
Installing a Plug-In K-Swap Conversion Harness in a 1999-2000 Honda Civic (EK)
- Keep the battery disconnected until the whole harness is installed; shorting ECU or fuse-box circuits can damage them.
- If your 1999-2000 Civic came with a D16Y5 engine (most HX models), Hybrid Racing says you need its 1996-1998 conversion harness instead of the 1999-2000 one.
- The 1999-2000 harness is not interchangeable with the 1996-1998 version; buy the one for your model year.
- If you drill the floor for the O2 lead, deburr the hole, use a grommet and check for brake and fuel lines underneath first.
Introduction
A conversion harness sits between a 1999-2000 Civic's dash wiring, an OEM K-series engine harness and a K-series ECU so the gauge cluster, fuel pump, check-engine light and diagnostic port keep working after a K-swap. Hybrid Racing's EK harness is plug-in on the chassis side, but a handful of wires still have to be joined to the factory ECU connector and to sensors in the engine bay. The harness is year-specific: Hybrid Racing says it works with USDM and JDM 2002-2004 K-series engine harnesses and ECUs (K20A, K20A2, K20A3) and does not work with 2005-2006 or K24 engine harnesses or ECUs. You also need a separate charge harness or the car will not crank and charge properly. This guide follows the vendor's wire map; if your harness is a different brand, use its own pin chart. Adapted from a community writeup by Hybrid Racing on guides.hybrid-racing.com (https://guides.hybrid-racing.com/Guide/99-00+Civic+EK+K-Series+Swap+Conversion+Wiring+Harness+V+4.0+Installation+Manual/57).
Procedure
18 steps-
Step 1: Disconnect the battery and clear the firewall grommet
Disconnect the battery and remove it and its tray, moving the fuse box aside if it is in the way. Behind them is the firewall grommet, held by two 10 mm bolts, where the old engine harness entered the cabin. Leave the battery disconnected until every step is finished.
-
Step 2: Swap the grommet onto the K-series harness
Remove the grommet from the K-series engine harness and from your old D or B-series harness. The old chassis grommet is the one that fits the EK firewall, so fit it to the K-series harness.
-
Step 3: Feed the engine harness through the firewall
Push the K-series engine harness ECU connectors through the firewall opening, seat the grommet and wrap it to the harness with electrical tape. Refit the fuse box and battery tray (but not the battery cables).
-
Step 4: Remove the factory ECU
Inside the car, pull back the passenger-side carpet and kick panel and remove the stock ECU. Lay out the K-series engine harness ends, the K-series ECU, the factory ECU connectors and the conversion harness.
-
Step 5: Find factory connector A
Locate the factory 'A' ECU plug under the passenger side of the dash: a grey 32-pin connector next to a green connector.
-
Step 6: Join the six E-plug wires to connector A
Six loose wires come off the conversion harness at its white E-plug. Join each to the matching wire of factory connector A (solder and heat-shrink or a quality crimp): E1 green/yellow to A16 green/yellow (fuel pump); E15 green/red to A30 green/red (ELD); E23 blue/yellow to A21 light blue or blue/yellow (data link connector); E26 blue to A19 blue (tachometer); E29 brown to A10 brown (SCS service connector); E31 green/orange to A18 green/orange (check-engine light). With a Type R ECU, Hybrid Racing says to leave E1 unconnected and ground A16 instead.
-
Step 7: Connect the charge-light wire
Tap the conversion harness wire labelled for the charging light onto B10 (white/blue) on the K-series ECU connector B with a T-tap, without cutting the factory wire. This drives the battery warning light.
-
Step 8: Plug the harnesses together on the passenger side
Plug the blue C302 connector of the conversion harness into the grey C101 connector of the K-series engine harness, and the green C131 connector of the conversion harness into the green C131 connector on the chassis harness.
-
Step 9: Connect the ECU
Plug the K-series engine harness into the K-series ECU, then plug the conversion harness's white E-plug into the ECU. Secure the DLC, the oxygen-sensor relay and the ECU itself.
-
Step 10: Route the C101 branch to the driver side
Remove the driver-side lower dash panels. Route the conversion harness's grey C101 branch across under the dash and tie it up with zip ties away from the pedals and steering column.
-
Step 11: Connect the driver-side engine bay plug
Find the grey 10-pin connector in the engine bay on the driver side, push it through to the cabin and connect it to the conversion harness. Connect the C101 connector, cut the zip tie on the loose bundle and tidy the connectors with zip ties.
-
Step 12: Pass the three loose wires into the engine bay
Feed the three remaining loose wires through the driver-side firewall grommet into the engine bay.
-
Step 13: Wire the radiator fan switch (optional with K-Pro)
The green/white 'fan switch' wire connects to one terminal of a radiator fan switch connector; the other terminal goes to chassis ground. Cut the fan switch connector from the old engine harness with at least 1 in of wire to work with. If a Hondata K-Pro will control the fan by temperature, you can skip this.
-
Step 14: Wire the dash temperature gauge sender
Connect the yellow/green 'coolant temp' wire to the coolant temperature gauge sender connector, cut from the old engine harness with at least 1 in of lead. If you run a Rywire K-series engine harness instead of an OEM one, Hybrid Racing says this wire goes to pin 6 of the Rywire harness's H2O connector.
-
Step 15: Route the primary air/fuel sensor lead
Run the primary (front) air/fuel sensor connector under the car through an existing floor hole, or drill and grommet a small hole in the top of the tunnel under the radio, and plug it into the sensor in the front of the downpipe. The engine runs poorly with a check-engine light unless the correct sensor is connected (or the car is tuned for open loop or an aftermarket wideband).
-
Step 16: Use a compatible primary sensor
Hybrid Racing lists only two OEM-style primary sensors as compatible: part number 36531-PRB-A01 (Denso replacement 13680), which its guide labels as a 2002-2004 'RSX Type R' sensor (there was no US RSX Type R, so buy by part number), and the 2001-2006 JDM Integra Type R sensor. Not compatible: the 2005-2006 RSX Type-S, the 2002-2006 base RSX, the 2003-2005 EP3 Civic Si (and UK Civic Type R), the 2006+ Civic Si and all K24 primary sensors. European Civic Type R K20A engines use a narrowband sensor that this harness does not support.
-
Step 17: Secondary O2 sensor (often skipped)
The rear (secondary) O2 sensor is usually not needed. With a K-Pro it can be disabled in software; otherwise cut its connector from the OEM harness with 2-3 in of lead and wire it in. Compatible secondary sensors listed by Hybrid Racing are 2002-2004 RSX Type-S and base 5-speed, Integra Type R/Type S and EP3 Civic Si; 2005-2006 RSX Type-S and 2006+ Civic Si sensors are not.
-
Step 18: Install the charge harness and reconnect the battery
Install the K-series charge harness (starter and alternator feeds), check every connector is latched and nothing rests on sharp metal, then reconnect the battery. Set up the ECU software (immobilizer, sensors) before the first start.
- Charge harnesses are not all the same; use one from the same chassis as the engine harness and engine.
- Label every factory wire before you cut or tap anything so you can undo mistakes.
Related procedures
All guides →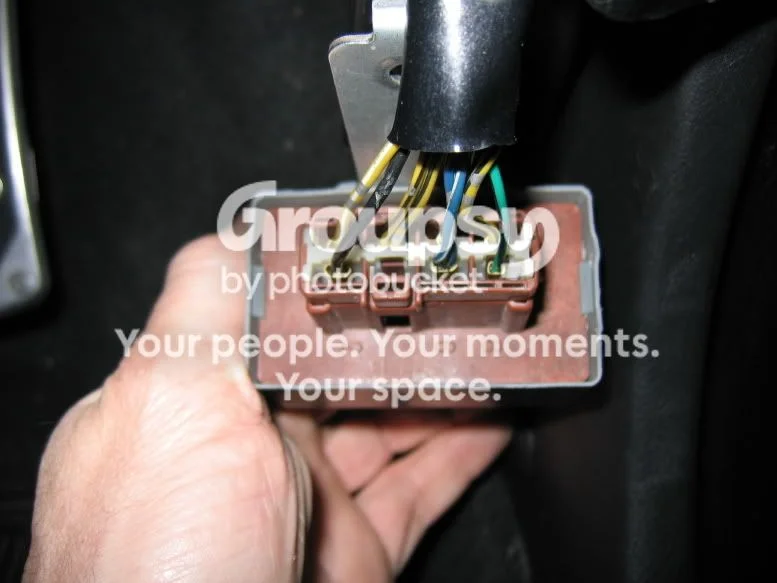
Tap right for next · left for back · Keys: ← → step · Space / PgUp / PgDn scroll · Esc exit