Honda Fit (GE8) JDM 11-Pin Folding, Heated Door Mirror Retrofit
Introduction
This guide covers retrofitting a full-feature JDM door mirror onto a second-generation USDM Honda Fit (GE8, 2009-2013). The top JDM mirror combines a folding motor, an integrated LED turn-signal repeater, a heated glass element, and the receiver for Japan's keyless-entry system, and it uses an 11-pin connector; lower-spec castings exist with 7 pins (fold plus signal) or 9 pins (adding either heat or keyless). Because US cars never offered these features, none of it is plug-and-play: the mirror must be bench-tested, its wiring reverse-mapped, and a custom harness built to tie the fold motor into an illuminated CR-V switch, the heater into the rear-defroster circuit, and the adjust and signal wires into the door harness. The Japanese keyless receiver cannot be made to work without dealer programming and a matching key, so it is left dormant. Follow the wire-color and pin references exactly, because a miswire can drive the fold motor the wrong way or backfeed the heater. Adapted from a community writeup by BMW ALPINA on FitFreak (https://www.fitfreak.net/forums/2nd-gen-ge8-specific-fit-exterior-modifications-jdm-styling-sub-forum/77807-diy-11-pin-door-mirror-folding-heated-smart-key.html), including corrections from the follow-up discussion.
Reference
Tools Required
- 9V battery for bench testing
- Multimeter
- Soldering iron and solder
- Heat-shrink tubing and heat gun
- Wire crimp/terminal tool
- 18 AWG hookup wire
- Molex connectors
- Add-a-circuit fuse tap
- Assorted mini blade fuses
- Trim/panel removal tools
- Coat hanger or fish wire for door boot routing
Parts Required
-
JDM 11-pin folding/heated/keyless door mirror pair, right 76208-TF0-J31 and left 76258-TF0-J31 (or lower-spec 7-pin J11 / 9-pin J21 variants)
-
CR-V illuminated mirror switch
-
Pigtail 04320-SAA-A00 (x2, for the folding function)
-
18 AWG wire, Molex connectors, heat-shrink, solder
-
Add-a-circuit fuse tap and mini fuses (heater feed)
-
Matching cover paint (e.g. Taffeta White) for the mirror covers
-
Optional: alarm-linked auto-fold harness
-
Optional: Honda Insight auto-tilt (reverse) module
Safety Warnings
- ⚠ Disconnect the battery before tapping into any fuse-box circuit.
- ⚠ The Japanese keyless receiver in the mirror needs dealer HDS programming and a matching key; treat it as inoperative and leave the Orange and Grey wires disconnected.
- ⚠ Fuse the heater feed correctly even though the two heater leads are bi-polar, since the circuit still carries real current.
- ⚠ Do not force the door trim; work slowly to avoid snapping retaining clips.
Step-by-Step Instructions
1 Identify and source the correct mirror
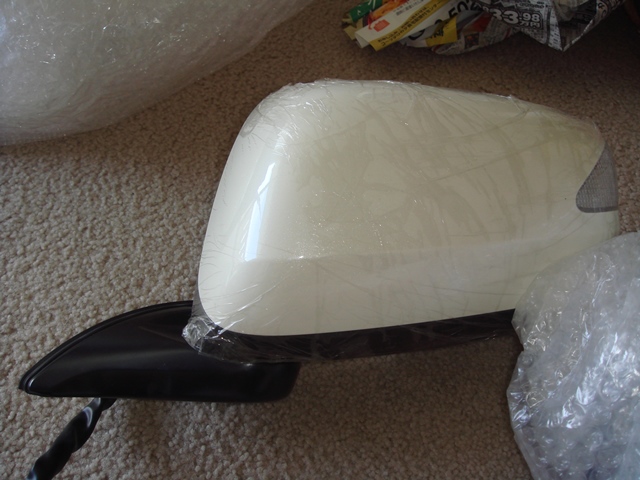
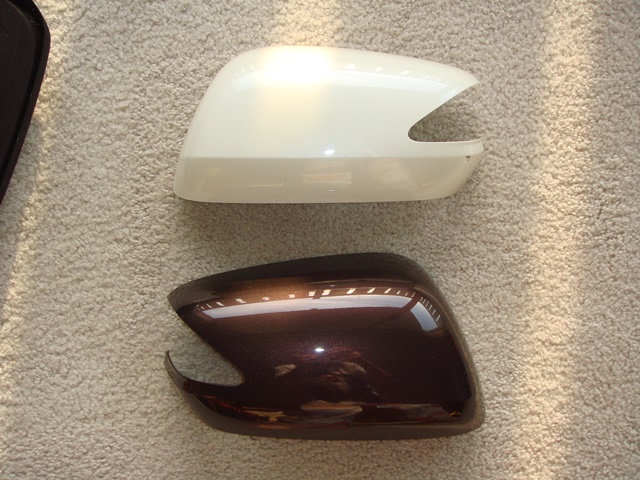
Decide which feature set you want, then match it to the Honda part number before buying, because used listings frequently carry the wrong number. The right-side castings are 76208-TF0-J11 (fold, signal, no heat, 7-pin), 76208-TF0-J21 (adds heat, 9-pin), 76208-TF0-J41 (fold, signal, keyless, no heat, 9-pin), and 76208-TF0-J31 (fold, signal, heat, keyless, 11-pin). The matching left-side castings are 76258-TF0-J11, 76258-TF0-J21, 76258-TF0-J41, and 76258-TF0-J31. Confirm any listing with a photo that clearly shows the pin count, not just a quoted number. Plan to repaint the covers to your body color, since a color-matched used pair is hard to find.
2 Bench-test every function first
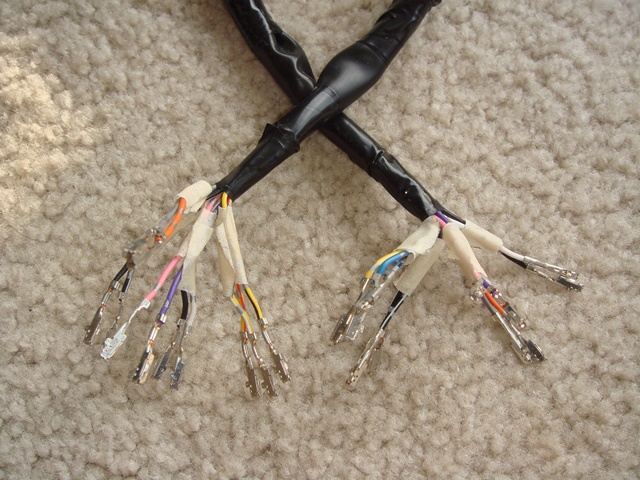
Before committing to a harness, power each circuit on the bench with a 9V battery and confirm the glass-adjust motor, the fold motor, the heater, and the LED signal all respond. A used mirror can look clean yet hide a failed motor, so verify movement in every direction and check that the heater terminals warm the glass. Open the cover and frame, clean out any dirt, and inspect the two heating-element terminals bonded to the back of the glass.
3 Build the mirror-side wire map
Record every wire and its function so the harness work is unambiguous later. On this 11-pin JDM mirror the circuits are: glass adjust, left mirror = Yellow/White, Yellow/Red, Yellow/Black; glass adjust, right mirror = Yellow/White, Blue/Green, Blue/Black; fold motor = White (Pin 8) positive and Black (Pin 3) ground; LED signal = Pink positive, Purple negative; heater = two Black/White leads that are bi-polar (either lead can take the feed); keyless receiver = Orange and Grey, which stay disconnected. These are factory JDM colors, so the table holds for any 11-pin car pull.
4 Match the mirror to the car's door harness
Splice the three glass-adjust wires to the matching factory door-harness colors. On the left door the correspondence is Yellow/White to Green, Yellow/Red to Orange, and Yellow/Black to Pink. On the right door it is Yellow/White to Green, Blue to Light Green, and Blue/Black to Blue. The USDM door socket has six cavities with only three in use, so you can reuse the spare cavities; alternatively, replace the socket connector entirely with a Molex to gain enough pins for all nine active wires.
5 Wire the fold motor to the fold switch
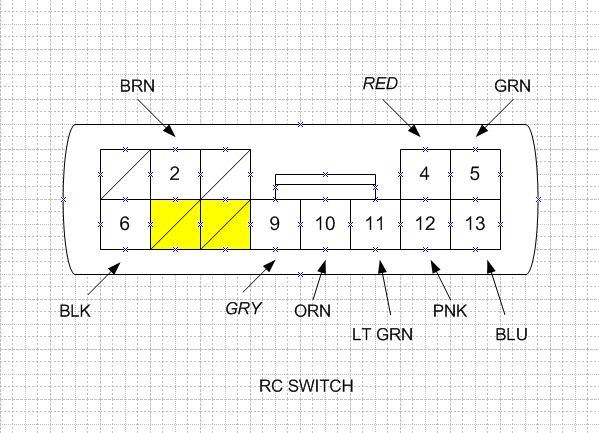
Connect the fold motor so pressing the switch folds the mirror inward rather than driving it the wrong direction. Run the mirror's White lead to Pin 7 of the RC (fold) switch and the Black lead to Pin 8. Pressing the switch then sends positive to White and ground to Black, and releasing reverses the polarity to unfold. Use the switch's own pin diagram to confirm orientation before soldering.
6 Prepare the illuminated CR-V switch
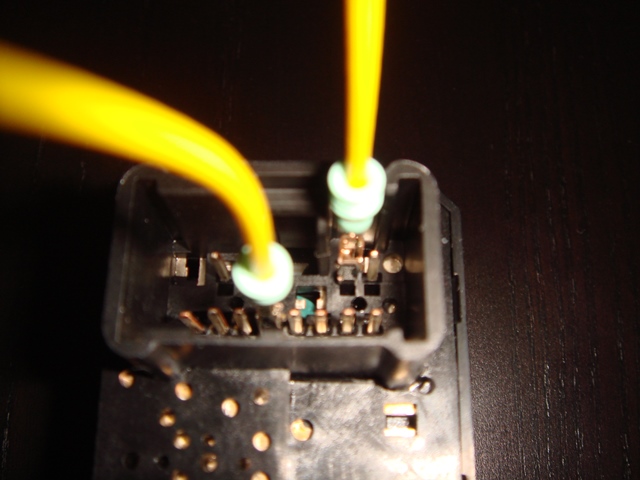
Substitute the CR-V mirror switch for its backlit face. On a USDM car this is effectively a direct swap: fit it in place of the stock switch and it lights with the parking/headlights, with no extra pins for the light. This corrects the original plan, which assumed four added pigtails; on US cars only the two folding-function pigtails are actually required. If you are instead wiring a JDM GE8 switch, which is not illuminated, add two 04320-SAA-A00 pigtails and feed a switched-light positive to Pin #10 and ground to Pin #2 (Pin 4 and Pin 9 on the alternate pin diagram). Confirm the illumination source, since the fold harness may not carry a light feed.
7 Fabricate the custom harness
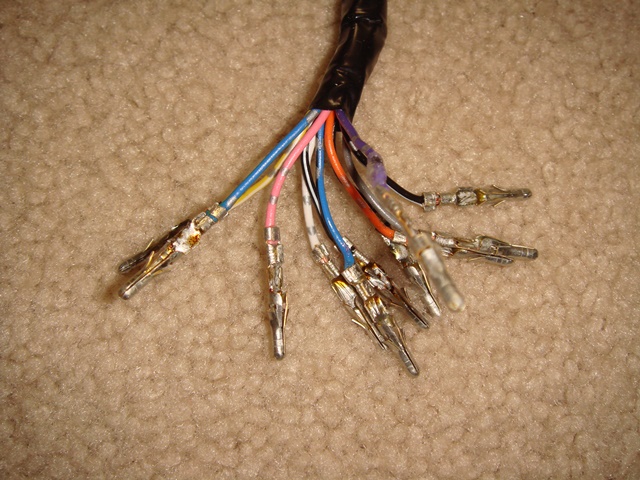
Build the runs off the bench. Make one six-wire run for the left mirror (heater x2, signal x2, fold x2) cut to roughly 2 m, since the left mirror sits near the fuse box, and one six-wire run for the right mirror cut to about 4 m. Make a third lead off the switch pigtails carrying the folding wires, to be joined to the mirror runs. Use 18 AWG wire and terminate the mirror ends into Molex connectors that replace both the JDM and the USDM connectors. Solder every joint rather than relying on crimps alone, then seal each with heat-shrink. Test each Molex connection before installing.
8 Tie the heater to the defroster circuit
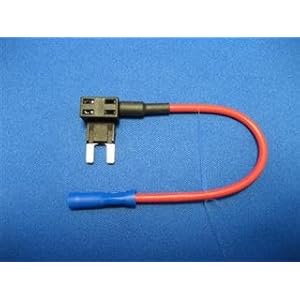
Wire the heated glass so it energizes with the rear-window defroster instead of running constantly. Take a switched feed from the fuse box using an add-a-circuit fuse tap and an appropriately rated mini blade fuse, so the mirror heat follows the rear defroster. The two Black/White heater leads are bi-polar, so either can take the feed. Disconnect the battery before working in the fuse box.
9 Route the harness and reassemble
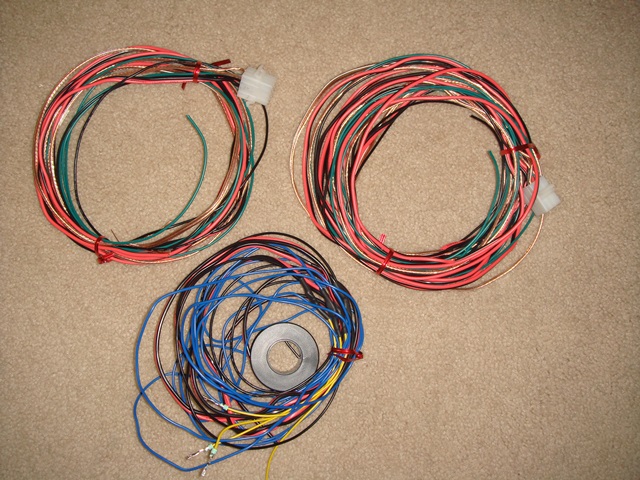
Feed the finished harness through the rubber boot between the door and the body, using a coat hanger or fish wire as a pull. Seat the mirror, connect the Molex, tuck and secure the wiring inside the door, and reinstall the door trim carefully to avoid breaking clips. Reconnect the battery and verify fold, glass adjust, signal, and heat on the car.
10 Optional auto-fold and auto-tilt modules
Add convenience modules if desired. An alarm-linked auto-fold harness (roughly under $100) folds the mirrors when you lock the car and unfolds them when you switch to accessory. Honda's Insight tilt-down module drops a mirror in reverse, but it tilts only one side, and because it was designed for a RHD car you must swap the relevant adjust pins to move the tilt to the USDM passenger (right) side. Wiring both sides in parallel is possible but visually distracting, so choose the passenger side only.
Pro Tips
- 💡 On Yahoo Auctions, verify a mirror by part number and by a photo showing the actual pin count, because listings sometimes state the wrong number.
- 💡 Used 11-pin mirrors can be cheaper than lower-spec ones; watch for a color-matched pair or plan to repaint the covers.
- 💡 Solder and heat-shrink every join rather than trusting crimps alone, for a durable long-term connection.
- 💡 Replace both the JDM and USDM connectors with a single Molex, since the USDM door socket has only six cavities but nine wires are active.
- 💡 A failed fold motor is cheap to remedy: a replacement used JDM mirror runs about $100 shipped.
- 💡 For JDM references and diagrams, translate Japanese, Portuguese, and Thai forum threads with a browser translator.
Was this guide helpful?

