
Budget Full-Color-Change Respray Using Marine Topside Paint (Roll or Spray)
- Wear a respirator when spraying any paint, and work with good ventilation - spray fumes are toxic and flammable. Spraying automotive paint at home is illegal in some jurisdictions; check local regulations.
- Do not mix different brands of spray paint on the same panel - incompatible paints react and wrinkle.
- Do not sand through to bare metal without priming, or the panel will rust under the new paint.
- Do not let body filler get wet before painting - absorbed moisture can cause the paint to flake or crack.
Introduction
This is the well-known 'budget paint job' refined with single-stage marine topside paint instead of hardware-store enamel, which produces a much glossier, close-to-OEM finish. Marine topside paint is UV-stable and durable (it is formulated to survive on boats), costs around $30 per gallon versus $150-300 for automotive single-stage, and can be applied either with a 4-inch roller straight from the can or through a cheap HVLP gun thinned about 10% with mineral spirits. The documented project was a full color change (blue to gloss white) on a 14-year-old Civic - exterior, interior, engine bay, jambs and brackets - completed by a first-timer over about three months of weekends for roughly $450, most of which was wasted spray cans; done with the spray gun from the start, the total would have been well under $150. Rolling and spraying give the same end result, but rolling roughly doubles or triples the labor because of wetsanding between coats. This suits any Honda (or any car) needing a full respray on a tight budget. Adapted from a community writeup by fventura03 on Honda-Tech (https://honda-tech.com/forums/paint-body-84/my-%2450-more-like-%24452-63-paint-job-writeup-thread-tons-pictures-1857355/), including corrections from the follow-up discussion.
Procedure
9 steps-
Step 1: Sand down the existing paint
Sand the entire car with 100-grit paper (up to 600 grit if the existing paint is in good shape), working in an X pattern - the cross-hatch reveals low spots and dents that will need filler. Wetsanding is strongly preferred over dry sanding: it is much faster and uses far less paper. Cut through the clearcoat; you generally do not need to go all the way to primer. Avoid sanding through to bare metal - any spots that do go to metal must be primed to prevent rust.
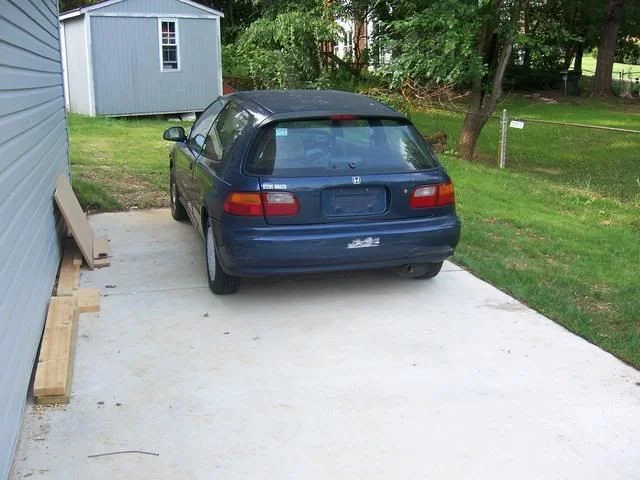
FIG. 2.1 -
Step 2: Repair dents and imperfections
Fill any dents or imperfections with body filler - USC Icing works very well. Do not wetsand the filler itself: filler can absorb moisture, which can later cause the paint to flake or crack. Shape and finish the filler dry, then feather it into the surrounding paint.
-
Step 3: Strip or mask trim and clean the panels
Remove trim, weatherstripping, lights and badges where possible; mask anything that stays with painter's tape (green tape works best). Do not rush the masking - paint on unmasked rubber and trim is very hard to remove later. For the most thorough result the documented project removed windows, window trims, doors, body panels and even the steering rack to paint the interior, engine bay and jambs. Immediately before painting, wipe every panel down with denatured alcohol or mineral spirits to remove dust and skin oils. No primer is needed over sound existing paint - this paint adheres very well to it - but prime any new plastic parts such as replacement bumpers.
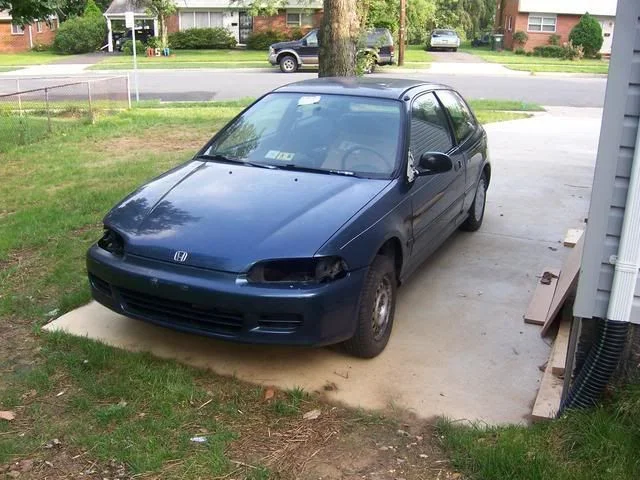
FIG. 2.3 -
Step 4: Roll on the paint (roller method)
Using a 4 in roller, apply the topside paint straight from the can, unthinned. Roll each panel in one diagonal direction (/////), then go back over it a couple of minutes later in the opposite diagonal (\\\\) WITHOUT loading more paint on the roller - adding paint on the second pass risks runs. The paint is self-leveling and will flow out to a clean layer. Use a brush for the door jambs. Each layer is very thin; expect multiple coats for coverage.
-
Step 5: Let each coat dry and wetsand between coats as needed
Allow 12-24 hours between coats depending on the weather (about 12 hours to fully dry in the documented conditions). If bugs or large dust particles land in the paint, wetsand between coats with 600-800 grit, always in an X pattern - but note wetsanding removes most of the thin layer you just applied, so if you are working somewhere clean you can skip between-coat sanding and save enormous time. Build 3-5 coats, then wetsand with 1000 grit; if coverage is still thin, apply a couple more coats. Fix any runs with about 320 grit before applying more paint. Let the sandpaper do the work - do not press hard.
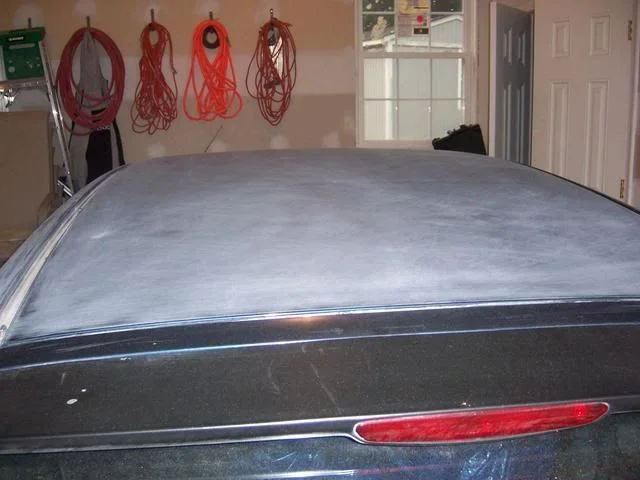
FIG. 2.5 -
Step 6: Or spray the paint (HVLP method)
For faster, more even coverage, spray instead: mix the marine paint with about 10% mineral spirits and shoot it through an HVLP gun (a $35 eBay gun on a 2-gallon compressor was sufficient). One spray session gave full, even coverage of the whole car in the documented project, versus repeated rolling sessions - if starting from scratch, buy the gun first. Do not spray rattle cans over other brands of paint: mixing incompatible spray paints made the finish wrinkle ('one paint ate the other') and wasted about $200 in the original attempt. Wear a respirator whenever spraying.
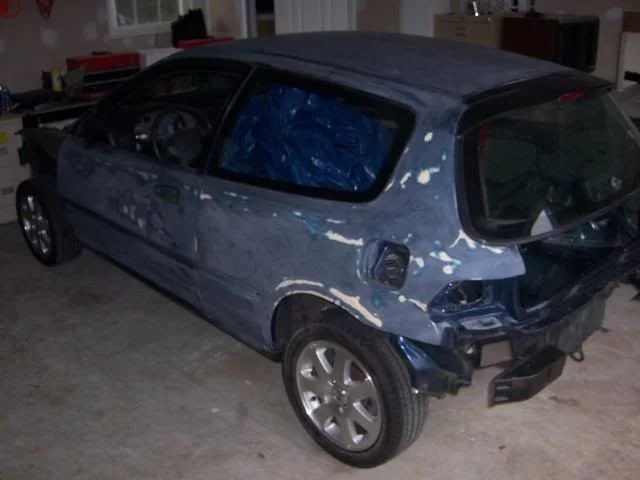
FIG. 2.6 -
Step 7: Let the final coat cure
After the final coat, let the paint sit for about a week before final wetsanding and polishing so it fully hardens. The last coat is the one where you take care of orange peel, so make it your cleanest, most even application.
-
Step 8: Final wetsand
Wetsand the cured paint progressively with 1000, 1200, 1500 and then 2000 grit, in an X pattern, until the surface is uniformly smooth and the orange peel is leveled.
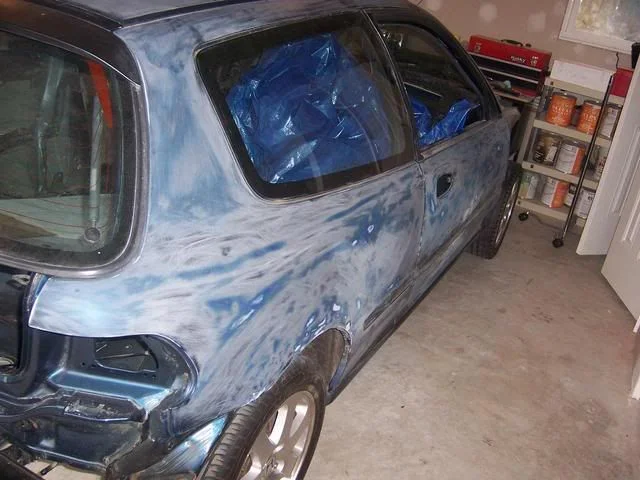
FIG. 2.8 -
Step 9: Buff and wax
Using an inexpensive buffer (about $20), apply rubbing compound first (3M marine rubbing compound was used), then follow with a cleaner/polishing wax (Meguiar's). This can be done by hand but takes far longer. The result should have a deep gloss with barely any orange peel, comparable to an OEM single-stage finish.
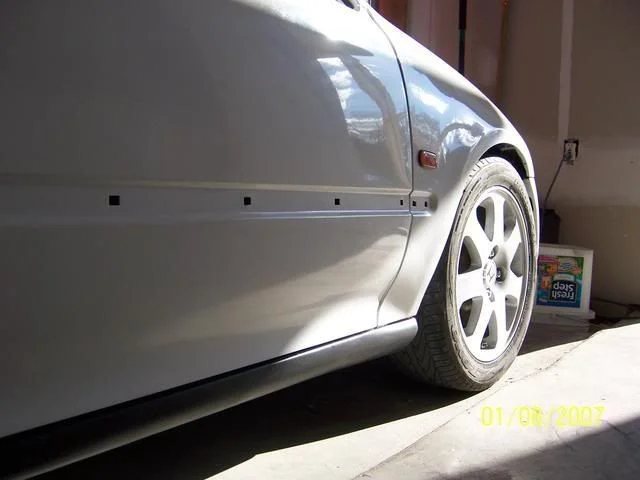
FIG. 2.9
- Buy the HVLP gun from the start - the documented project would have cost well under $150 total ($35 gun plus about $115 in paint and sandpaper) and finished months sooner.
- Sprayed, 2 quarts of topside paint covers a whole exterior; allow 3 quarts if also doing the engine bay, interior and jambs. Rolled with between-coat sanding, the same car consumed about 2 gallons.
- A clearcoat over the single-stage paint is optional - buffing and waxing alone brings up the shine.
- West Marine Sea Gloss Pro is a cheaper rebadge of Interlux Brightside; yachtpaint.com lists the available colors. A two-part (mixed) version exists that gives a harder film and nicer shine at higher cost.
- Marine topside paint is UV-protected and formulated for harsh conditions; users on the Mopar forums report it holding up well on daily drivers.
- A rotary sander speeds up coarse sanding (grits coarser than ~360), but watch for loose grit causing coil-shaped scratches that must then be hand wetsanded out.
Related procedures
All guides →
Tap right for next · left for back · Keys: ← → step · Space / PgUp / PgDn scroll · Esc exit