
Wiring an OBD2 B-Series Engine into an OBD1 Civic (EG): Harness, Distributor and ECU Options
- Disconnect the battery before unplugging or splicing ECU wiring.
- Running an ECU or calibration that does not match the engine can cause detonation; get the car tuned if you change ECUs.
- Swaps that remove emissions equipment may not be road-legal where you live.
Introduction
Dropping a 1996-2001 (OBD2) B-series such as a B18C1 or B16A2 into a 1992-1995 Civic (OBD1) raises three questions: which engine harness, how to plug in the OBD2 distributor and injectors, and which ECU. Owners on the Civic-EG forum describe two harness routes. One keeps the car's OBD1 engine harness and adds plug-in adapters for the distributor and injectors. The other uses a USDM OBD2 Integra engine harness, which plugs into an OBD1 Civic at the strut-tower connectors and needs no distributor, injector or alternator changes. ECU choice then decides what extra wiring (knock sensor, IAB, VTEC, CKF, secondary O2) is needed and whether the car can pass emissions inspection. Adapted from a community writeup by EconoBox and suspendedHatch on forum.civic-eg.com (https://www.forum.civic-eg.com/viewtopic.php?p=352499).
Procedure
11 steps-
Step 1: Identify what you have
Note the engine code, whether its distributor has an 8-pin or 10-pin OBD2 plug, what engine harness is in the car now, and which ECU you have. A JDM right-hand-drive engine harness is not usable in a left-hand-drive car.
-
Step 2: Pick a harness route
Route A: a USDM OBD2 Integra engine harness (1996-2001), which is two-piece with plugs at the strut towers like an OBD1 harness. An OBD2 Civic harness will not work because it is one piece with a single driver-side plug and a green plug near the ECU. Route B: keep an OBD1 Civic engine harness and add adapters.
-
Step 3: Route A: fit the OBD2 Integra harness
Lay the Integra harness on the engine and plug the distributor, injectors, alternator and sensors in directly; no adapters are needed. Connect it to the Civic's chassis harness at the strut-tower connectors. One connector on the Integra harness has no partner; zip-tie it out of the way.
-
Step 4: Route B: add the distributor jumper
Plug an OBD1-vehicle to OBD2-distributor jumper between the OBD1 harness's distributor connector and the OBD2 distributor. Buy the version that matches your distributor's 8-pin or 10-pin plug.
-
Step 5: Route B: injectors and alternator
OBD1 harness injector plugs do not fit OBD2 injectors. Use plug-in injector adapters or splice OBD2 injector connectors onto the harness. One forum member suggests a simpler option: keep the OBD1 B-series injectors and alternator, which plug straight into the OBD1 harness. He notes LS and GSR injectors are the same 240cc size. Check the injector size for your engine before reusing the old ones.
-
Step 6: Route B: add VTEC wiring if needed
If the OBD1 harness came from a non-VTEC engine, add a VTEC sub-harness so the VTEC solenoid and pressure switch reach the ECU.
-
Step 7: Choose the ECU
Options the forum members list: a USDM OBD1 manual P72 (add ECU pins and wires for knock, IAB and VTEC); an OBD1 automatic P72 converted to manual; a chipped P28 or P06 flashed with a B18C1 tune and modified for IAB control (P28 already has VTEC); a USDM OBD2 manual P72 with an OBD1-to-OBD2 ECU conversion harness; or a JDM OBD2 P72 with a conversion harness.
-
Step 8: Plan the extra wiring for your ECU
With a stock OBD1 P72, add the knock sensor wire or the check-engine light will come on. With a USDM OBD2 P72 on a conversion harness, the CKF signal has to be bypassed, knock wiring added, and a secondary O2 bung welded in behind the catalytic converter. Get exact pinouts from your ECU or harness supplier rather than guessing.
-
Step 9: Consider emissions inspection
One forum member notes the USDM OBD1 P72 and USDM OBD2 P72 routes should be able to pass California BAR inspection, with the OBD2 P72 route the most legitimate, while the JDM OBD2 P72 route probably will not. Check your local rules before choosing.
-
Step 10: Install the ECU
Disconnect the battery, remove the passenger kick panel and the existing ECU, plug in any ECU jumper harness, then connect and mount the new ECU so no connector hangs by its wires.
-
Step 11: Secure and check everything
Tie up any unused connectors away from the exhaust and pulleys, check every plug is latched, reconnect the battery and turn the key to ON. Watch for a check-engine light before cranking and read any stored codes if it stays on.
- If you already have an OBD1 non-VTEC ECU such as a P06, chipping services can add VTEC control, which can be cheaper than finding a USDM OBD1 manual P72.
- Jumper and adapter harnesses avoid cutting the OEM harness, so the car can be returned to stock.
Related procedures
All guides →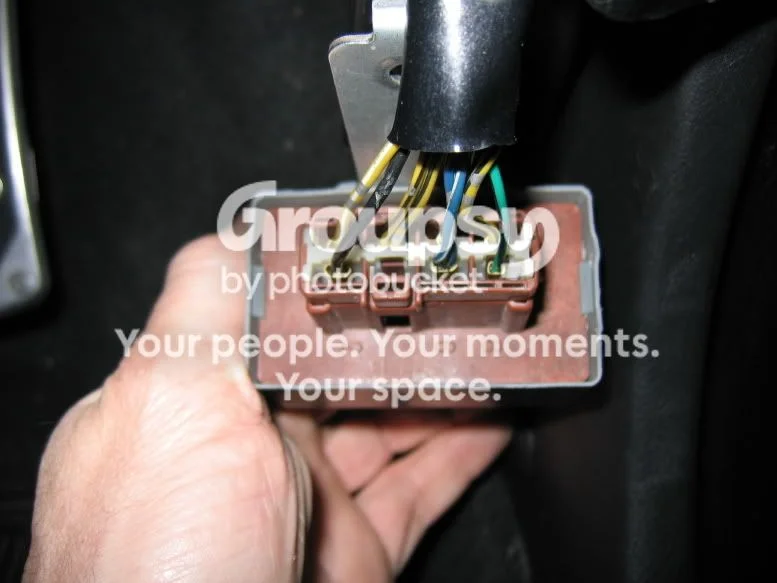
Tap right for next · left for back · Keys: ← → step · Space / PgUp / PgDn scroll · Esc exit