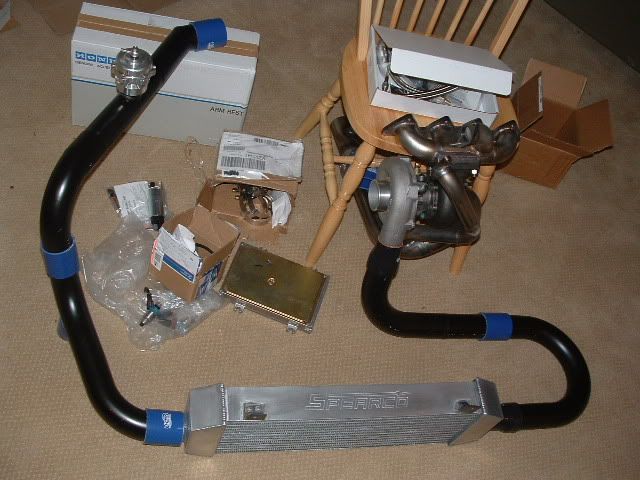
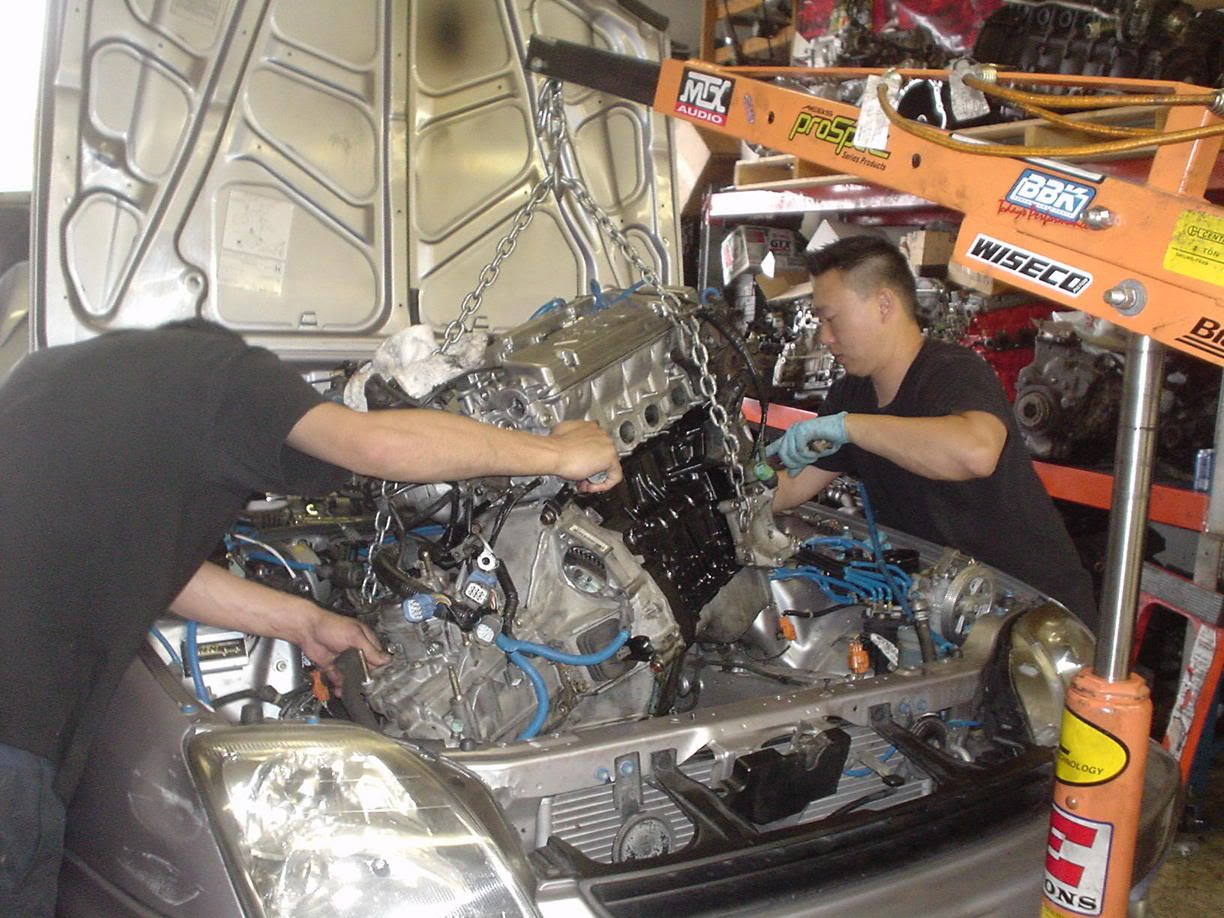
RevHard Turbo Kit Installation on the Honda Civic Si (EP3)
Introduction
This guide covers installing the RevHard bolt-on turbocharger kit on the 2002-2005 Honda Civic Si (EP3) with the K20 engine. It walks through the complete conversion: prepping the engine bay, tapping the oil pan for the turbo return, mounting the turbo manifold and turbocharger, routing the intercooler and charge piping, plumbing the oil feed and return, setting up the wastegate and blow-off valve, wiring in standalone engine management, and priming the oil system before the first start. The kit's supplied instructions are famously sparse, and because the hardware mixes SAE fasteners with the car's metric hardware, plan to switch between both tool sets constantly. This is an advanced forced-induction project that involves welding, custom oil plumbing, and standalone tuning, so budget several days and get a proper tune before ever driving under boost. Adapted from a community writeup by jeenyusss on Club RSX (https://www.clubrsx.com/threads/diy-revhard-turbo-kit-install.703626/), including corrections from the follow-up discussion.
Reference
Tools Required
- Metric socket and wrench set (8mm, 10mm, 12mm, 14mm)
- SAE socket and wrench set (kit hardware is SAE)
- 14mm flex socket (for the turbo oil return fitting)
- Allen/hex key set
- Welder or access to a welding shop (oil pan bung, return fitting)
- Drill and bits (intercooler mounting)
- Gasket scraper (for removing Honda-bond)
- Scissors or cutting tool (bumper and mud-guard trimming)
- Floor jack and jack stands
- Torque wrench and ratchet set
- Laptop for Hondata K-Pro tuning
Parts Required
-
RevHard turbo kit (turbocharger, turbo manifold, wastegate, blow-off valve, intercooler, charge piping, downpipe, air filter)
-
JB Weld (oil pan bung sealing)
-
Honda-bond Ultra Flange II liquid silicone sealant (oil pan)
-
Teflon (PTFE) tape
-
Heat/exhaust wrap (kit sheet; Thermo-Tec or Full-Race gold-foil recommended)
-
Siemens 630cc fuel injectors
-
Hondata K-Pro engine management
-
Multi-outlet oil takeoff adapter (e.g. TunerToys dual/triple outlet)
-
Silicone vacuum hose
-
Upgraded turbo oil return line (optional, e.g. fast-turbo.com)
-
Test pipe (optional, in place of the stock catalytic converter)
Safety Warnings
- ⚠ Always support the car on jack stands, never a jack alone, while working under the front end.
- ⚠ Prime the oil system before the first start and after every oil change, or the turbo bearings can fail from a dry startup.
- ⚠ Do not drive under boost until the car has been professionally tuned.
- ⚠ Heat-wrap all lines near the turbo and downpipe; unprotected lines will melt from the heat.
- ⚠ Do not apply Teflon tape to the compression feed fitting at the turbo; use Teflon only on the block-side fittings.
Step-by-Step Instructions
1 Strip the engine bay and front end for access
Begin by removing everything the kit will occupy or block. Take off the valve cover, the factory intake, and the stock exhaust manifold (header). Raise the front of the car and support it on jack stands, remove both front wheels, and take off the front bumper to expose the intercooler location. Keep both metric and SAE sockets within reach throughout the job: the car's own fasteners are metric while much of the kit hardware is SAE.
2 Tap the oil pan for the turbo oil return
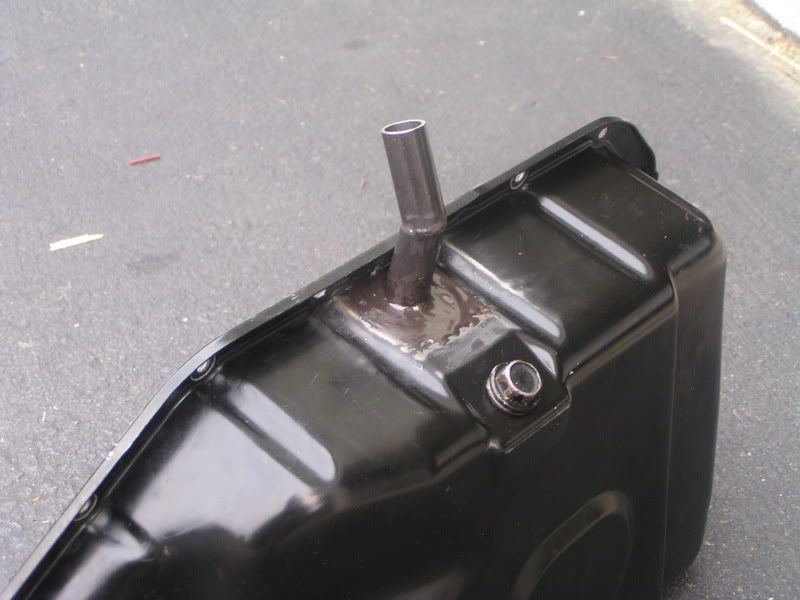
Drop the oil pan so a return bung can be added. The EP3 pan seals with Honda-bond (Ultra Flange II) liquid silicone rather than a paper gasket, so scrape the old sealant off completely and lay down fresh sealant when the pan goes back on. Have an elbow fitting welded into the pan as high up as practical, then coat the finished weld with JB Weld to seal off any pinholes.
3 Pre-assemble the oil return fitting onto the turbo
Thread the oil return fitting into the turbocharger on the bench before the turbo ever goes on the car. Reaching that fitting from underneath once the turbo is mounted is extremely awkward and generally calls for a 14mm flex socket. This is also the moment to decide on the return plumbing: many builders replace the kit's tube-and-clamp arrangement with a dedicated return line (for example from fast-turbo.com), which is less prone to the leaks that the supplied setup can develop.
4 Mount the turbo manifold and turbocharger
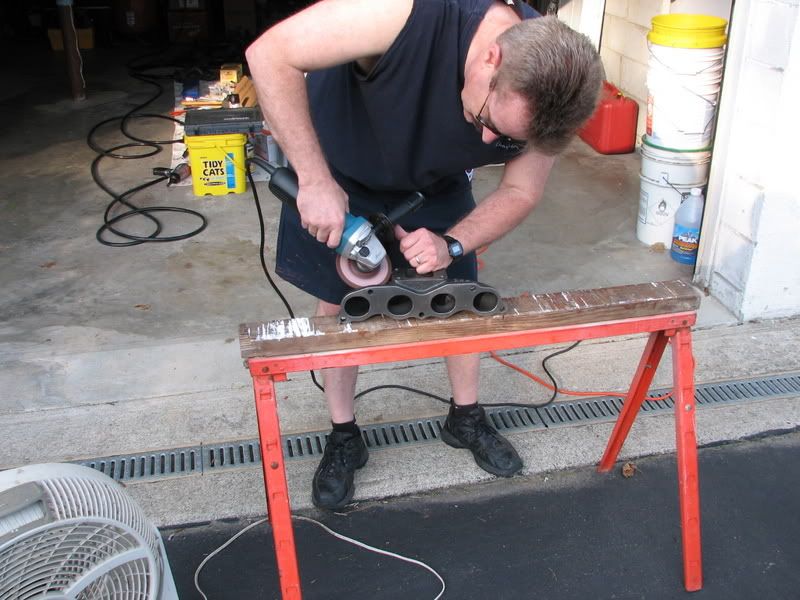
With the header and valve cover already off, lower the turbo manifold in from the top and bolt it to the cylinder head. Mount the turbocharger, wastegate, and dump tube to the manifold. If any manifold bolts will not pass cleanly through their holes, open the holes up with a grinder until the bolts seat properly.
5 Fit the intercooler and route the charge piping
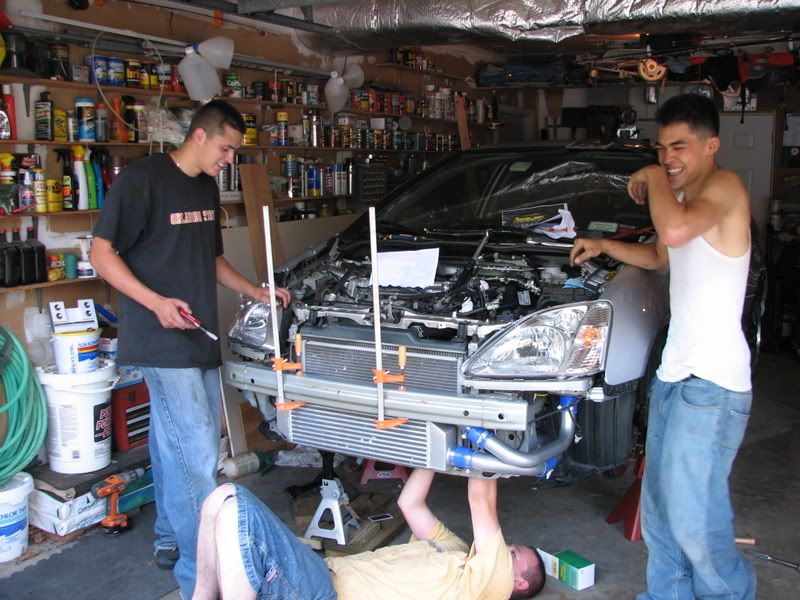
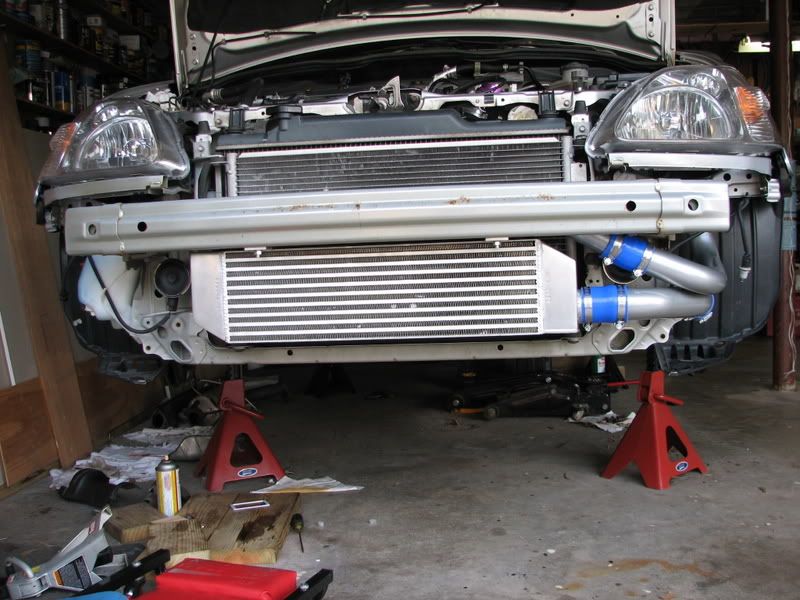
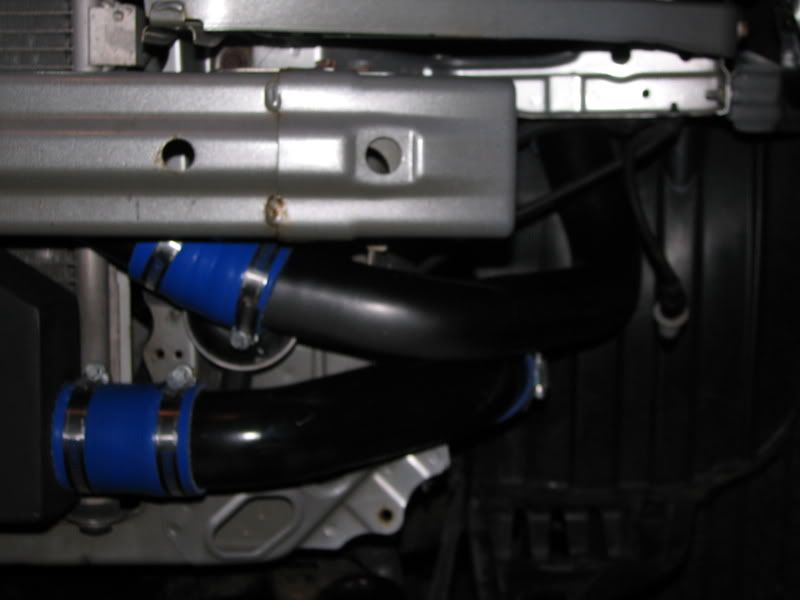
Set the intercooler in the bumper opening and clamp it in position, then work out the charge-pipe routing linking the turbo, intercooler, and throttle body. Because the kit gives almost no guidance on pipe placement, expect to spend time trial-fitting sections before anything lines up. Mark and drill the intercooler mounting points once the piping is settled. To refit the front bumper over the intercooler, shave the back face of the bumper and trim the driver-side mud guard with scissors so both clear the piping.
6 Install the blow-off valve
Bolt the blow-off valve to the charge pipe near the intake manifold using its gasket and two bolts. Tee the valve's signal line into a manifold vacuum source, and run that line to the upper port on the valve.
7 Connect the oil return line to the pan
Attach the two-bolt elbow return fitting to the underside of the turbo and run the return hose down to the welded bung on the oil pan. If the hose ends up crowding the turbo manifold, have the fitting re-welded to change its exit angle for better clearance.
8 Plumb the wastegate vacuum signal
Confirm the wastegate is bolted to the base of the turbo manifold with the dump tube fastened alongside it (its fasteners take an Allen key). Run a length of silicone vacuum hose from the nipple on the turbo to the side port of the wastegate, and leave the remaining port open to atmosphere as the vent. Because the wastegate sits upside down in this application, the open vent port ends up at the bottom once installed.
9 Set up the oil feed at the block
Take the oil feed from the passenger-side block port where the factory oil-pressure sending unit threads in. Install a multi-outlet takeoff adapter (such as the TunerToys dual/triple outlet, http://tunertoys.zoovy.com/product/OTODK/Oil_Take_Off__Dual_Outlet.html) so that single port can serve the stock sensor, an aftermarket oil-pressure gauge sender, and the turbo feed line together; running the gauge sender on its own braided steel line keeps it from cracking off under hard driving. Seal every block-side fitting with Teflon tape, but leave the compression feed fitting at the top of the turbo dry, as it must not be Teflon'd. Route the feed line up to the top of the turbo.
10 Install the charge pipe and air filter
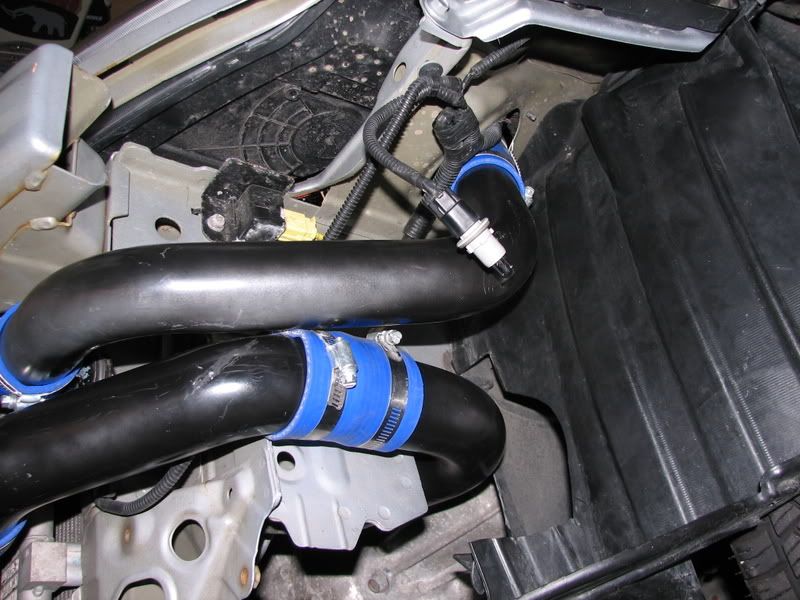
Fit the charge pipe onto the turbo compressor outlet and attach the air filter to the intake side of the turbo.
11 Bolt up and wrap the downpipe
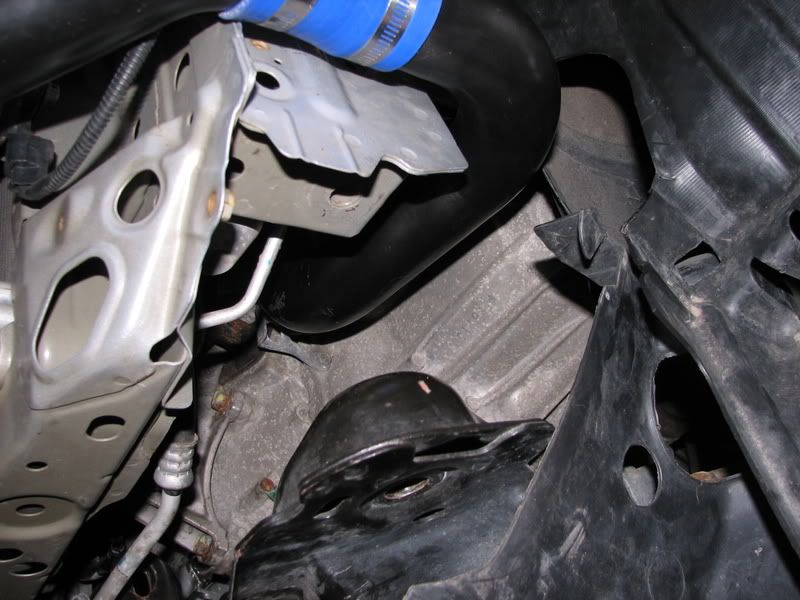
Fasten the five-bolt downpipe to the side of the turbo and wrap it in the supplied exhaust wrap to hold heat in. The downpipe mates directly to the EP3's factory catalytic converter, though many builders run a test pipe in its place instead.
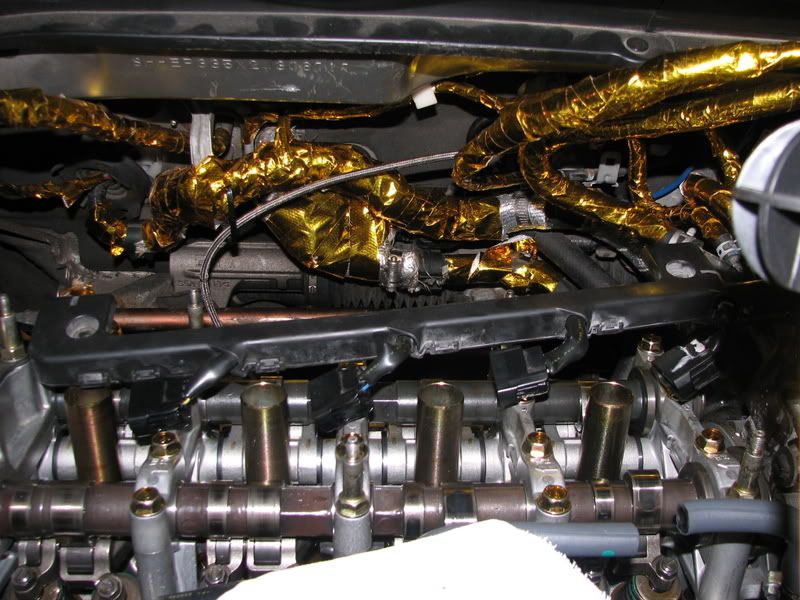
12 Heat-wrap the surrounding lines
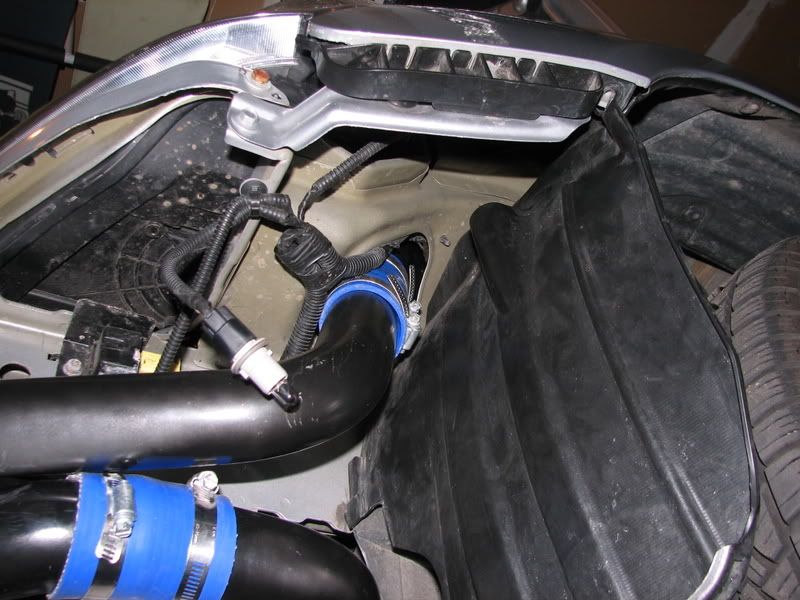
Protect every line and component routed near the turbo and downpipe with heat wrap, because the radiated heat will otherwise melt them. The kit supplies a sheet of wrap; stepping up to Thermo-Tec or Full-Race gold-foil wrap provides better protection where the budget allows.
13 Configure engine management with K-Pro
Connect the Hondata K-Pro and load a starting calibration. This build ran Siemens 630cc injectors, so load the RevHard Motoron base map and update the injector size under the parameters menu to match. Get the car professionally tuned before running any meaningful boost.
14 Prime the turbo before first start
Before the very first startup, and again after every oil change, prime the oil system. Pull the 15A ECU fuse from the underhood fuse box, then crank the engine for about 30 seconds so oil circulates fully through the turbo before it can fire. This step keeps the turbo bearings from spinning up dry.
Pro Tips
- 💡 Install the oil return fitting on the turbo while it is off the car; doing it from underneath afterward is far harder and needs a 14mm flex socket.
- 💡 Run the oil-pressure gauge sender on its own braided steel line so it does not snap off under acceleration.
- 💡 An upgraded return line (e.g. fast-turbo.com) resists the leaks that the kit's tube-and-clamp return can develop.
- 💡 A test pipe in place of the factory cat is a common choice on this setup.
- 💡 Supporting mods that pair well with this kit include a Walbro fuel pump, a 4-bar MAP sensor, a Hondata boost solenoid, and a 3-inch turbo-back exhaust.
Was this guide helpful?