Honda H22 Complete Engine Build for Forced Induction (Turbo/Supercharger)
Introduction
This guide covers a complete, boost-ready rebuild of the Honda H22 engine, the approach needed to reliably turbocharge (or supercharge) a Prelude rather than simply bolting a kit onto a stock long-block. It explains why the factory FRM cylinder liners must be replaced with cast-iron sleeves before forged pistons can be used, how to choose internals and compression for the boost level you intend to run, which supporting parts (bearings, seals, belts, pumps, clutch) should be renewed while the engine is apart, and how to manage and tune the finished combination. It applies to H22-powered Preludes and the closely related H23, and the same logic guides H-series builds swapped into other chassis. This is an expert-level, high-cost project that depends on quality machine work and professional tuning, so plan the full budget before ordering any parts. Adapted from a community writeup by Keahistight on PreludePower (https://www.preludepower.com/threads/step-by-step-to-correctly-build-and-boost.236053/), including corrections from the follow-up discussion.
Reference
Tools Required
- Engine hoist/crane and engine stand
- Full metric socket and wrench set
- Calibrated torque wrench
- Piston ring compressor
- Plastigauge for bearing clearance checks
- Crank pulley/harmonic balancer tools
- Access to a machine shop (boring, honing, decking, sleeve pressing, hot-tank)
- Laptop with tuning software and dyno access for calibration
Parts Required
-
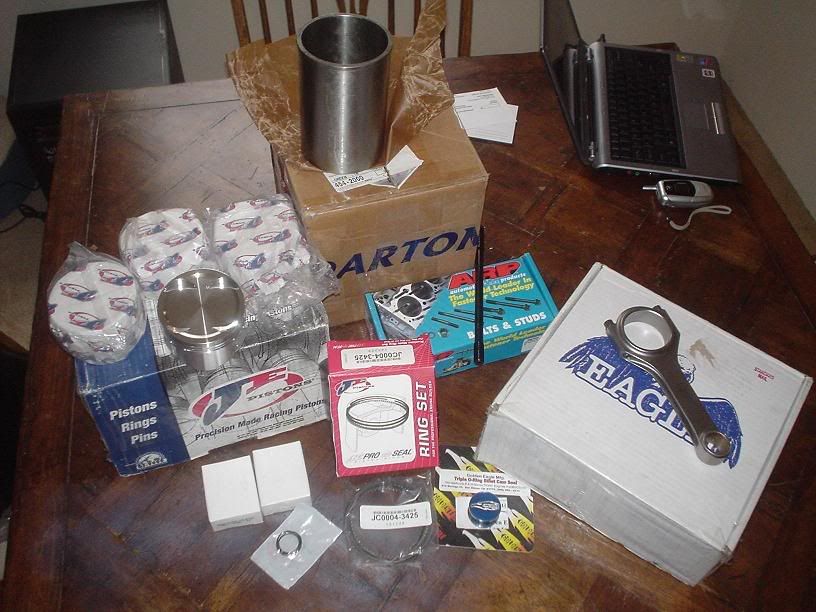
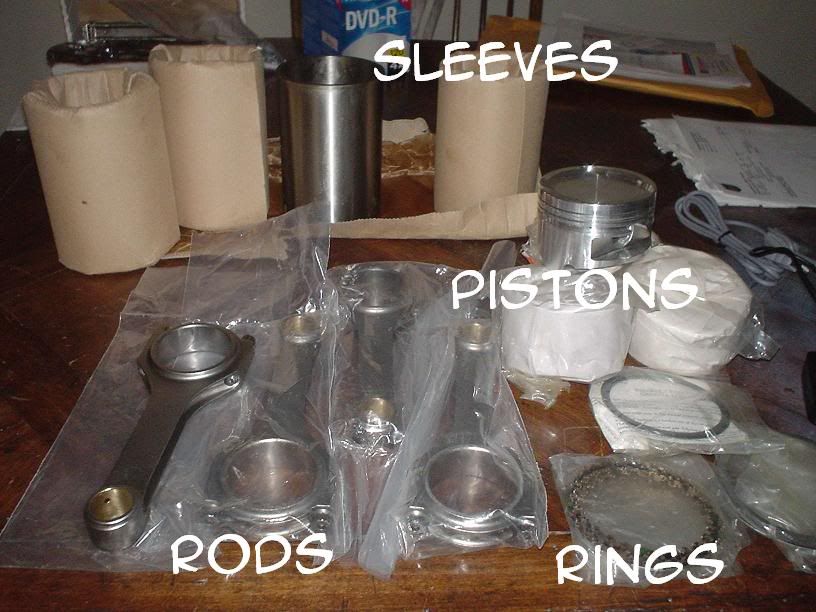
Cast-iron cylinder sleeve set (e.g. Darton or Golden Eagle)
-
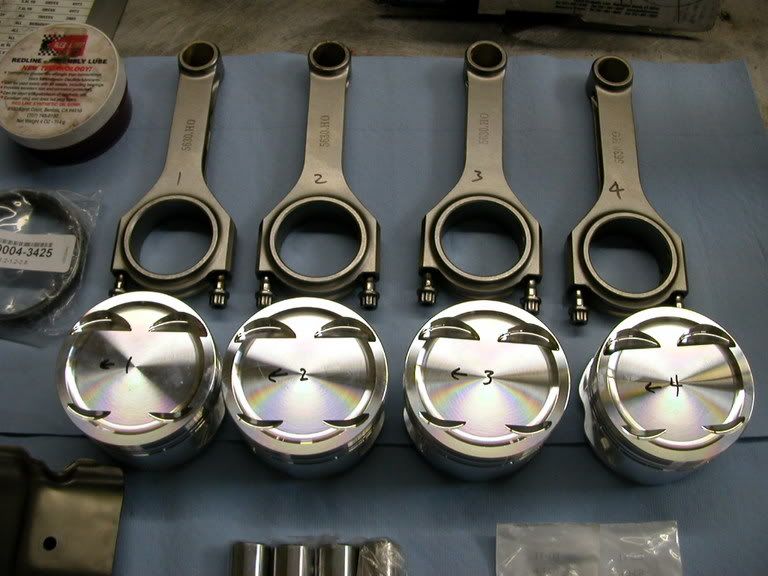
Forged piston set with rings, wrist pins, and locks (e.g. CP, JE, Arias, Wiseco, Endyn)
-
Forged H-beam connecting rods (e.g. Golden Eagle)
-
OEM main and rod bearing set (color-coded, ~$200)
-
OEM head gasket kit and full seal set (rear main and front crank seals)
-
Timing belt, timing belt tensioner, and hydraulic auto-tensioner
-
Crank/accessory, A/C, and power-steering belts
-
Water pump and oil pump
-
Clutch kit
-
Valve springs and retainers (valve job hardware)
-
Standalone engine-management system (Hondata or AEM PEMS) with wiring harness
-
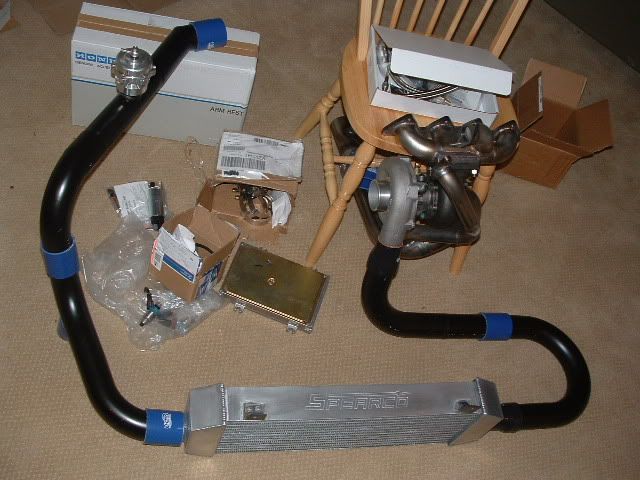
Turbo kit (or supercharger) with wastegate
-
Turbo timer
-
Boost controller (e.g. APEXi, ~$400) with solenoid and harness
-
Blow-off valve (e.g. HKS SSQV)
-
Boost gauge, plus exhaust-gas-temperature and oil-pressure gauges
Safety Warnings
- ⚠ Never run forged pistons against stock FRM sleeves. The harder piston flakes the liner, and a loose metal flake can wipe a bearing and destroy the engine.
- ⚠ Tuning is safety-critical: even a fully built engine can be blown on low boost without proper tuning.
- ⚠ Support the vehicle securely on jack stands and observe fuel-system safety when removing and reinstalling the engine.
Step-by-Step Instructions
1 Plan the budget and gather every part before disassembly
Forced induction on the H22 is a full engine rebuild, not a bolt-on, so budget the entire job before ordering anything: machine work, sleeving, forged internals, a complete set of OEM bearings/seals/belts/pumps, a clutch, standalone management, dyno tuning, and the turbo hardware. Assemble every component and confirm nothing is missing before teardown begins, because a stalled build ties up both the car and the shop. Interview several engine builders, choose one you trust, and favor a shop that guarantees its work. Expect the vehicle to be off the road for at least two weeks and arrange alternate transport.
2 Re-sleeve the block with cast-iron liners
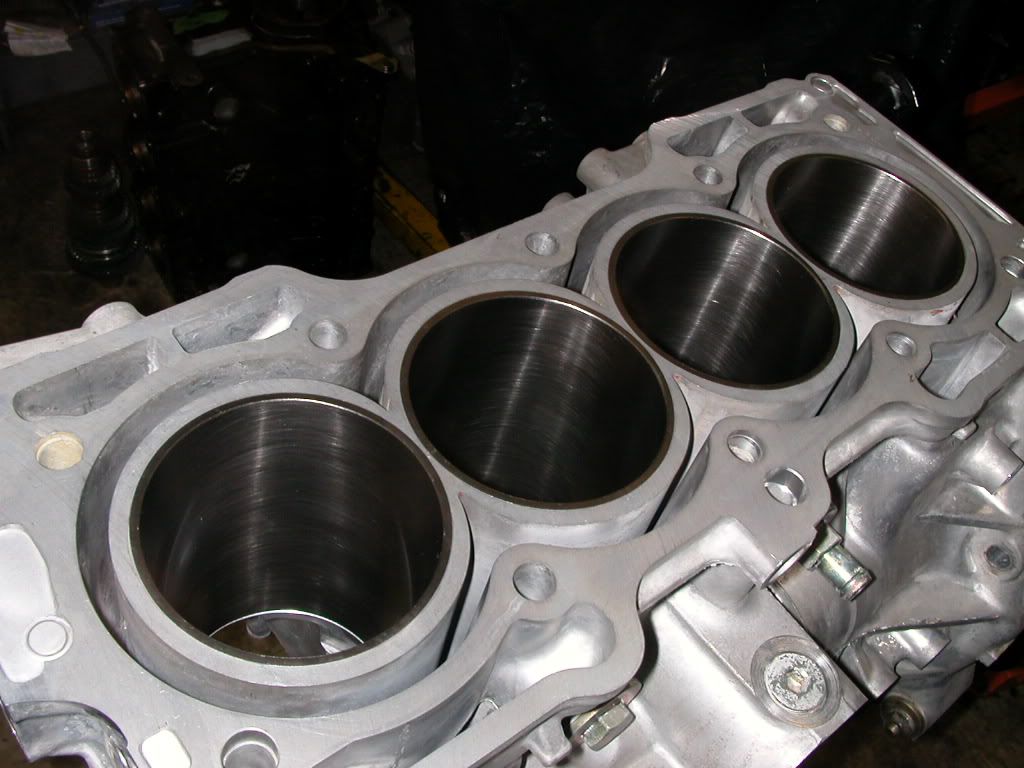
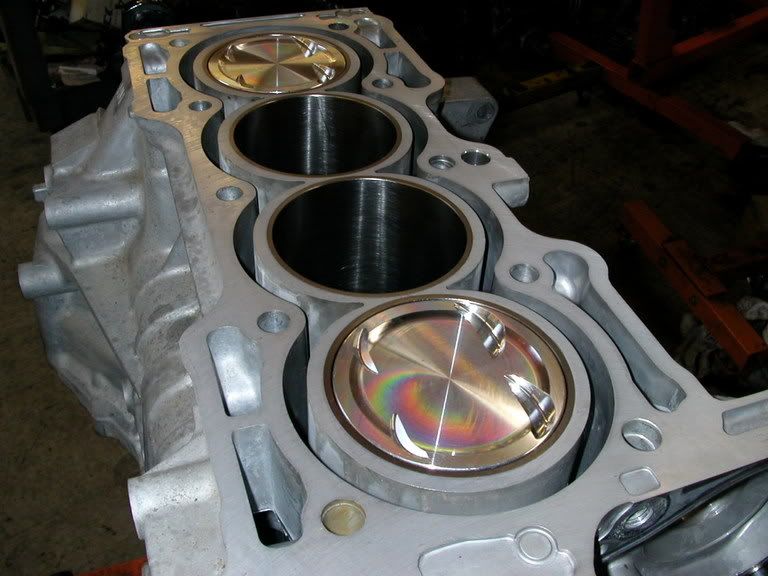
The stock H22 block uses FRM (fiber-reinforced metal) cylinder liners. Forged pistons, which are required for boost because of their higher tensile strength, cannot run against FRM: the harder piston flakes the liner surface and a loose flake can wipe a bearing. The block must therefore be re-sleeved with cast-iron liners. Machine work covers a full teardown, boring out the original liner material, a hot-tank cleaning, cutting a retaining lip at the top of each bore, and pressing the new sleeve in while the block is heated so it seats without sinking. The block is then decked flat, the new bores are honed to the chosen piston size, and the block is hot-tanked once more to remove every trace of debris. Deck choice matters: an open-deck build cools well and is generally rated near 24 psi, whereas a closed-deck conversion (four liners tied together and capped) withstands far more (40+ psi) at some cost to cooling. Golden Eagle offers a closed-deck conversion; Darton supplies two products, its Full MID conversion as well as a separate cast-iron liner kit, and Darton liners include a lip that resists sinking. For reference, boosted Preludes have made around 300 wheel horsepower on only 12 psi.
3 Select forged pistons, rings, and a boost-appropriate compression ratio
Forged pistons are mandatory; buy them as a package with rings, wrist pins, and retaining locks. Reputable makers include CP, JE, Arias, Wiseco, and Endyn. Choose bore and compression ratio around the stock rod length and head-gasket thickness; an 89 mm bore is a common selection. Stock compression is 10:1. On pump gas, reduce the compression ratio so you can run more boost safely and avoid detonation, knock, and lean conditions; the trade-off is less torque and more turbo lag. Higher compression makes high boost harder to tune and less forgiving. Match ring end-gap tolerances carefully so the engine does not burn oil. The ringlands are the known weak point, so genuinely forged pistons, not merely upgraded rods, are what protect against boost failure.
4 Install forged connecting rods
Replace the connecting rods with forged units. The rod ties the piston to the crankshaft and must survive reversing the piston's full inertia along with the combustion load at each end of every stroke. Golden Eagle H-beam rods are the common, well-regarded choice for the H22.
5 Renew all bearings, seals, gaskets, belts, and pumps
With the engine apart, replace every consumable so no original weak point remains. Fit a new set of OEM main and rod bearings; they are color-coded and supplied in halves, so read the block's markings to order the correct grades (a full set runs about $200). Install a complete OEM gasket set including the head gasket kit (~$200) and the rear main and front crank seals (~$80). Renew the timing belt, its tensioner, and the hydraulic auto-tensioner (~$140), plus the crank/accessory, A/C, and power-steering belts (~$80). Replacing the water pump and oil pump together (~$300) while access is easy avoids hidden failures later. Fit a new clutch at the same time. Use OEM Honda parts throughout.
6 Recondition the cylinder head
At minimum, hot-tank the head, perform a valve job, and resurface the mating face. Beyond that, upgrades are optional: many builders retain the stock valves and camshafts, which flow well and are reportedly capable of supporting well over 500 wheel horsepower, and simply refresh the valve springs and retainers. A professional port and polish is worthwhile if the budget allows (about $800 including the machine work). Specialist head porting is available from a small number of shops if you want to chase more airflow.
7 Assemble the engine, then remove and reinstall
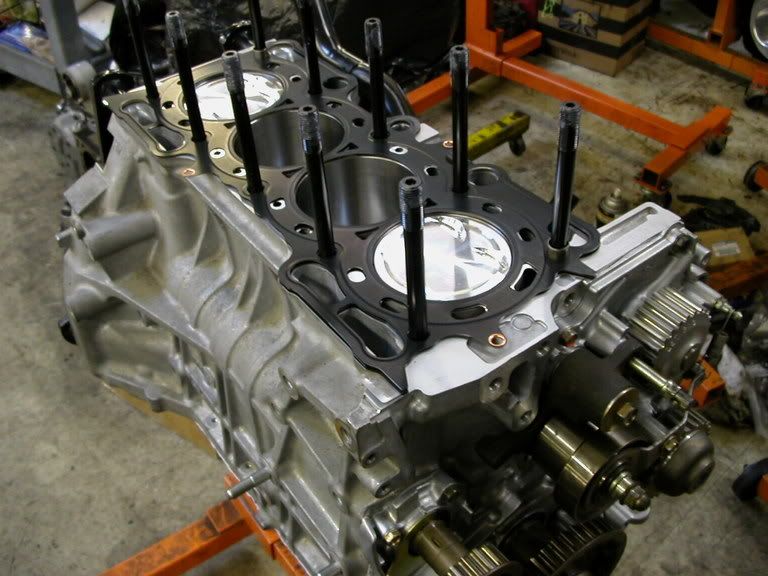
Hand the parts to your chosen builder for final assembly, or assemble carefully yourself, verifying every component is present and correct before you start. A remove-and-replace typically runs roughly $600-1,000 and the build itself $400-600. Plan the schedule realistically: about one day to pull the engine, one day to tear it down, roughly a week and a half for machine work, one day to assemble, one day to reinstall, and one day for initial start-up.
8 Install a standalone engine-management system
A built, boosted engine is far outside what the factory ECU or a piggyback can control, so fit a standalone system. Hondata is cheaper and easier to use; the AEM PEMS is more expensive and harder to learn but offers the most complete control, integrating features such as a boost controller and RPM-resolved boost mapping. Budget for supporting hardware including a wiring harness and data-logging provisions. Whichever system you choose, back up every map before making changes so a single mistake never costs you the entire tune.
9 Fit turbo support hardware
Beyond the turbo kit itself, install the components that keep it alive and controllable. A turbo timer keeps the engine idling briefly after shutdown so oil continues to cool the hot turbo and prevent bearing damage. A boost controller lets you raise boost above the wastegate spring's preset; the standalone APEXi unit (~$400) is well regarded, though the AEM EMS integrates this function and needs only a boost-control solenoid and harness. A blow-off valve vents compressor pressure when the throttle closes, protecting the engine and intake manifold and helping the turbo hold spool between shifts; the HKS SSQV is a proven choice. Fit gauges: a boost gauge is essential, with exhaust-gas-temperature and oil-pressure gauges as valuable second additions.
10 Tune, verify, then enable closed-loop
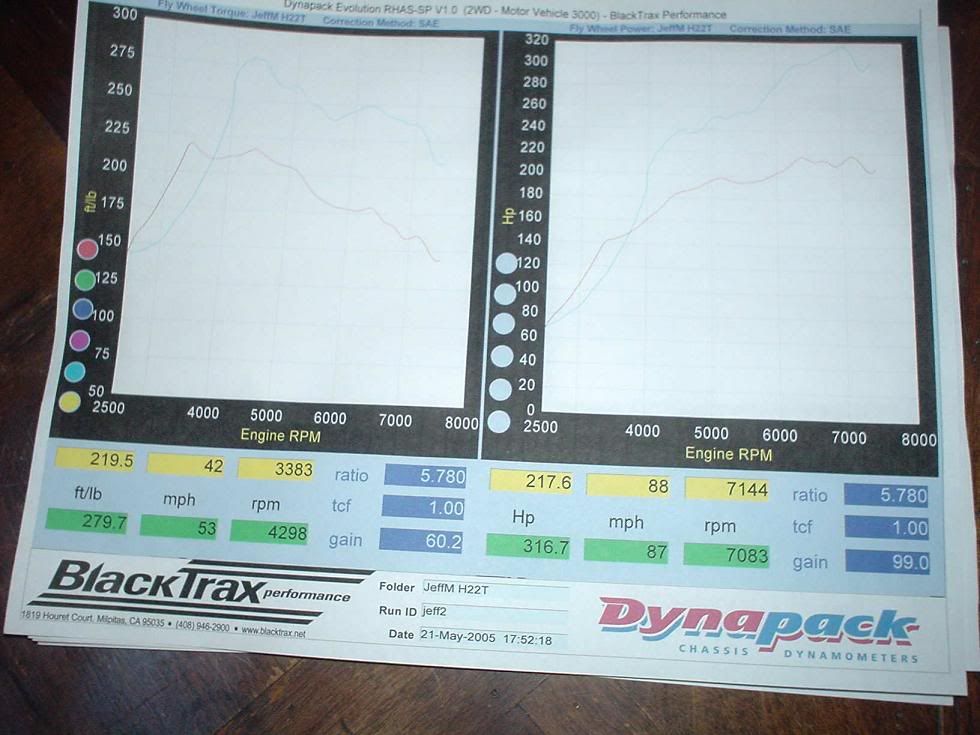
Tuning is the single most important stage, because even a fully built motor can be destroyed at low boost by a bad tune. Use a competent, system-certified tuner and budget $300-1,000 for the work. During tuning, disable O2 feedback so the ECU does not fight the calibration; once the car is finished and in daily use, re-enable it so the system can trim air/fuel, timing, and ignition within a set percentage for weather and altitude changes without altering the base map. On AEM you can also limit boost by gear and RPM, for example capping first gear near 7 psi and raising it as gearing and revs climb, to launch cleanly without wheelspin.
Pro Tips
- 💡 The stock H22 head and cams flow well and are reportedly good for over 500 wheel horsepower, so head upgrades beyond a valve job, springs, and retainers are optional. Web custom cams and specialist porting (such as PortFlow) exist if you want more airflow.
- 💡 The sleeves, not the deck type, determine forged-piston compatibility. Mahle is the only forged piston sometimes run against stock FRM liners, but failures are common; with iron sleeves this concern disappears.
- 💡 The exact block press temperature is uncertain: the original writeup listed 323 degrees F, while the author later recalled roughly 270 degrees F. Confirm the correct figure with your machinist before pressing sleeves.
- 💡 Interview machine shops and confirm they can heat the block correctly and cut the top lip properly when running lipped sleeves.
- 💡 For any standalone system, always disable O2 feedback while tuning and re-enable it for daily driving.
Was this guide helpful?