Honda Civic Interior LED Accent Lighting Install (Dual-Zone Switched)
Introduction
This guide covers adding switchable LED accent lighting to the interior of an eighth-generation Honda Civic (2006-2011), using a pair of six-LED pods for the front footwells and a pair of three-LED strips for the rear seating area. Each zone gets its own dashboard switch, so the front and rear lights can run independently or together, and the whole system draws from the center console's 12V accessory circuit. The work involves pulling the center console, tapping the cigarette-lighter feed, routing concealed wiring, and mounting the lights so the emitters stay hidden while they wash the floor with light. It is a rewarding weekend electrical project that gives the cabin a clean, custom glow with no visible hardware. Read through every step before starting, because the console has to come out and the battery must be disconnected first. Adapted from a community writeup by 2008fijibluesi on Honda-Tech (https://honda-tech.com/forums/lighting-107/diy-led-interior-lighting-pt1-2211648/), including corrections from the follow-up discussion.
Reference
Tools Required
- Wire cutters and strippers
- Crimping tool for 18 ga terminals
- Mini-torch or lighter (for heat shrink)
- Drill and bit set (including 1/2")
- T10 Torx key
- Phillips screwdriver
- Flathead screwdriver
- Nut driver with 5/16" socket
- 14mm wrench
- 10mm wrench
- Small container or tray for fasteners
Parts Required
-
Two LED pods (6 LEDs each)
-
Two LED strips (3 LEDs each)
-
Two two-way (SPDT) switches
-
18 ga wire in black, red, and yellow
-
Six female 18 ga insulated wire terminals
-
Heat shrink tubing or electrical tape
-
3M hook-and-loop (velcro) strips
-
Zip ties
Safety Warnings
- ⚠ Disconnect the battery before cutting into any wiring; this also erases the stereo code, so have the code on hand before you start.
- ⚠ Keep the car in gear and on flat ground whenever the parking brake is released to move the console.
- ⚠ Insulate every splice with heat shrink, solder, or tape so a bare connection cannot short against the chassis and blow a fuse.
Step-by-Step Instructions
1 Disconnect the battery and set up a workspace
Note your stereo's anti-theft code before you begin, since disconnecting power will lock the radio. Clear a clean, flat bench where the console can be worked on comfortably. Open the hood and disconnect a battery terminal with a 10mm wrench so the wiring is dead before you cut into anything. Confirm the transmission is in gear and the car is on level ground, as you will briefly release the parking brake later to maneuver the console past the shifter.
2 Remove the shifter knob and console trim
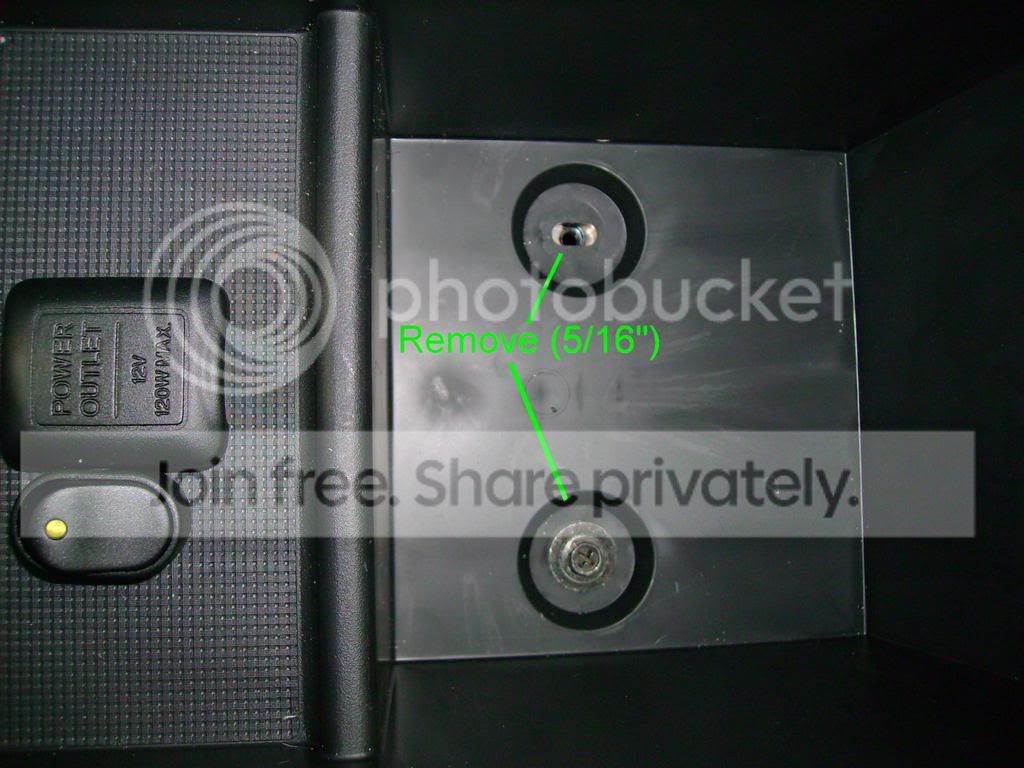
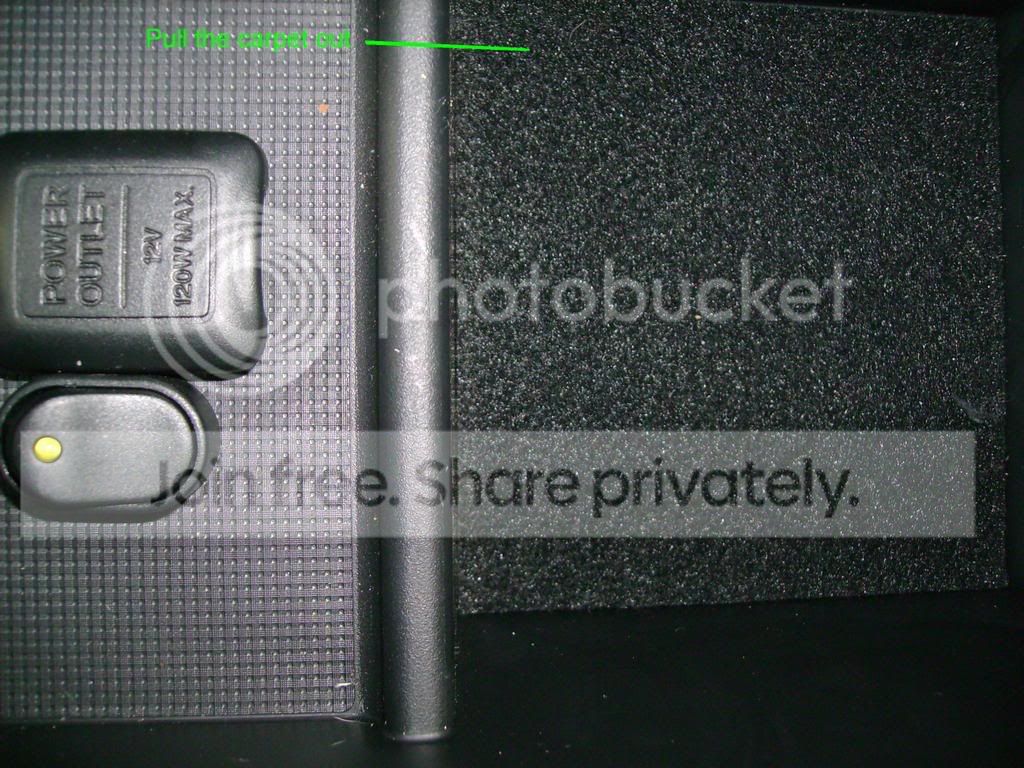
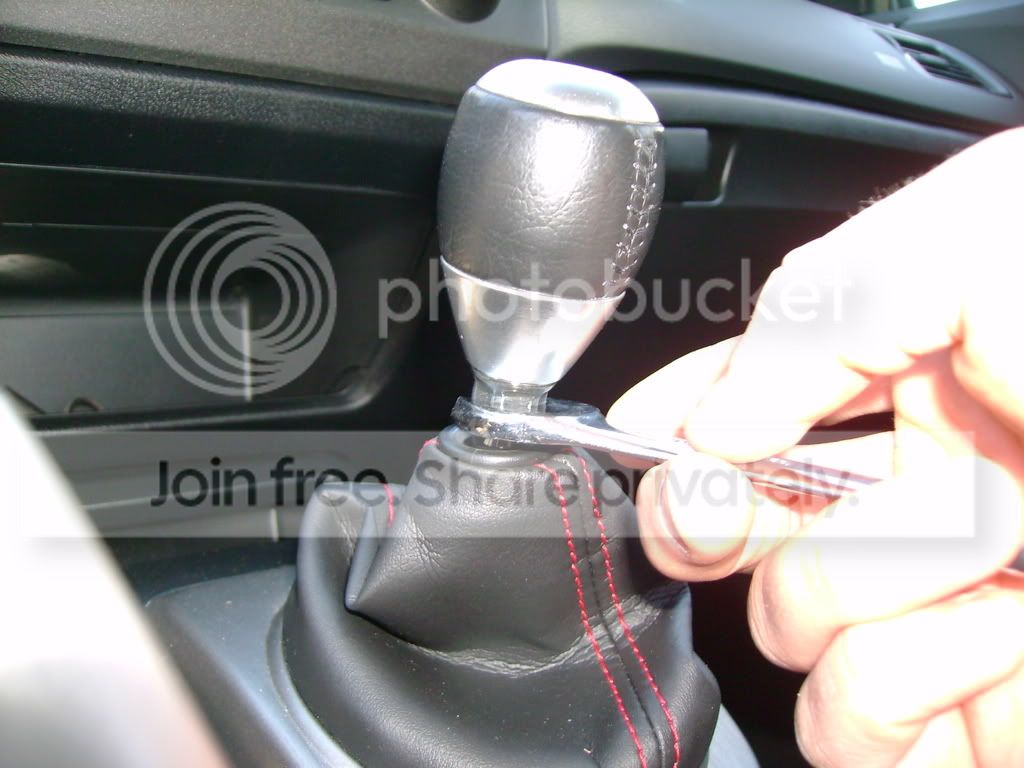
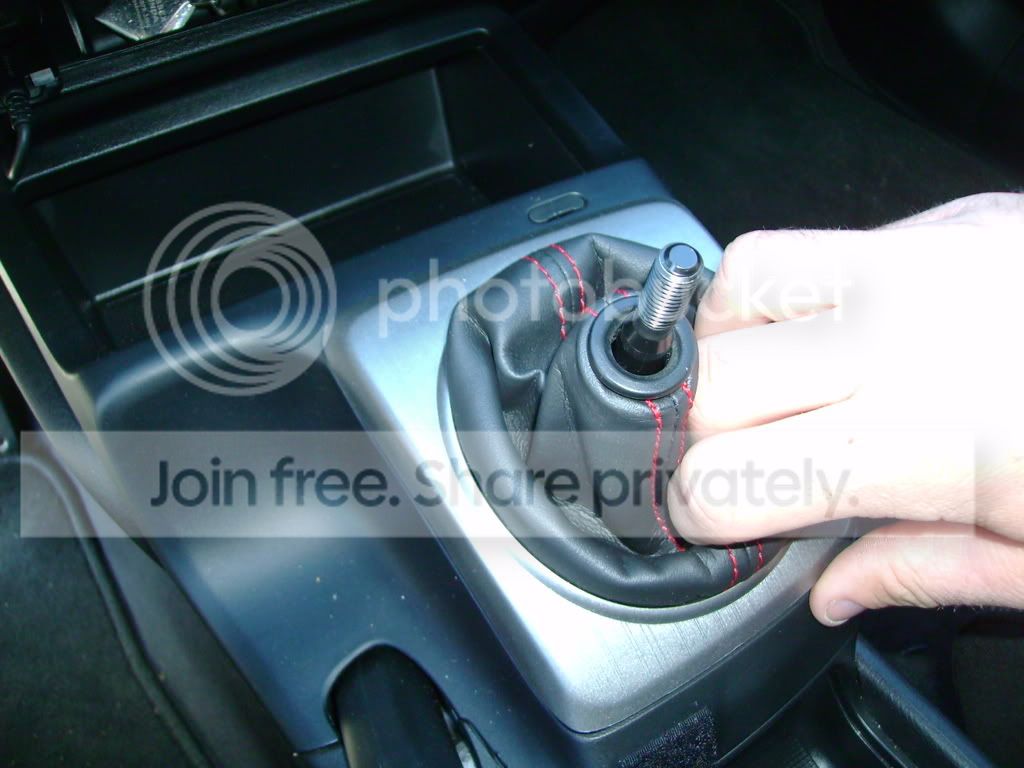
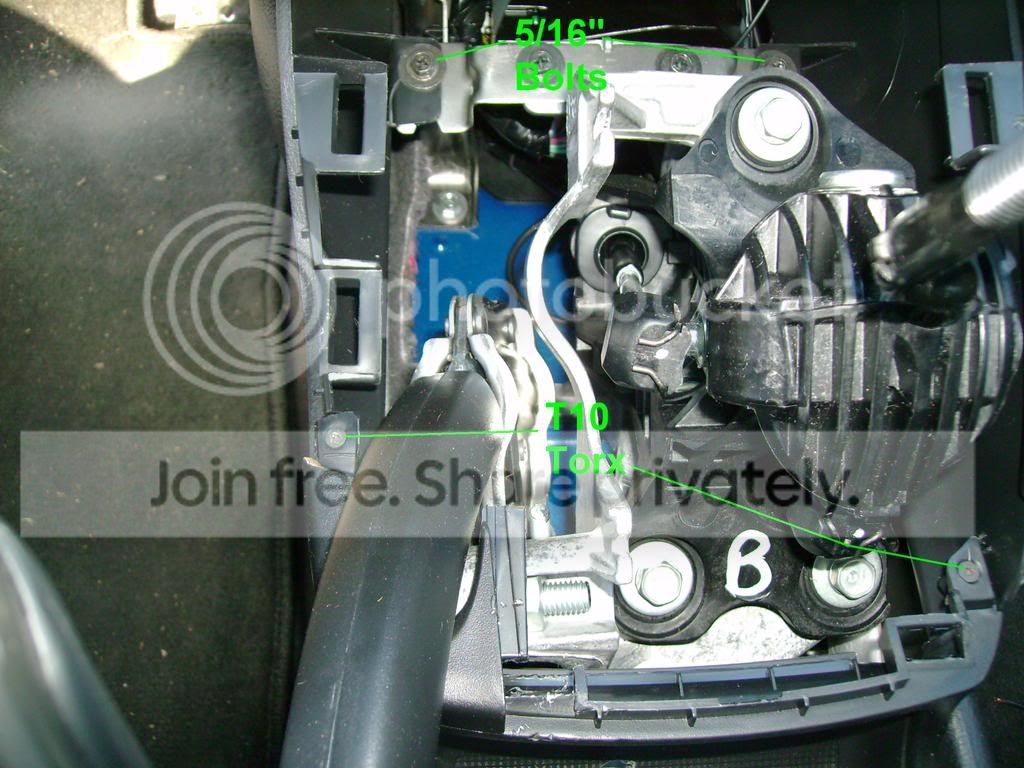
For a manual car, loosen the shift-knob retaining nut with a 14mm wrench, turning it clockwise, then spin off the knob and nut and set them aside. Reach into the shift boot and lift straight up to unclip the brushed-aluminum trim surrounding it; if it resists, ease a flathead under an edge and pry gently to avoid deforming the plastic. Lift the freed panel up and toward the rear to release its remaining tabs. Inside the console bin, pull out the rubber mat and remove the two 5/16" bolts beneath it with the nut driver.
3 Extract the center console
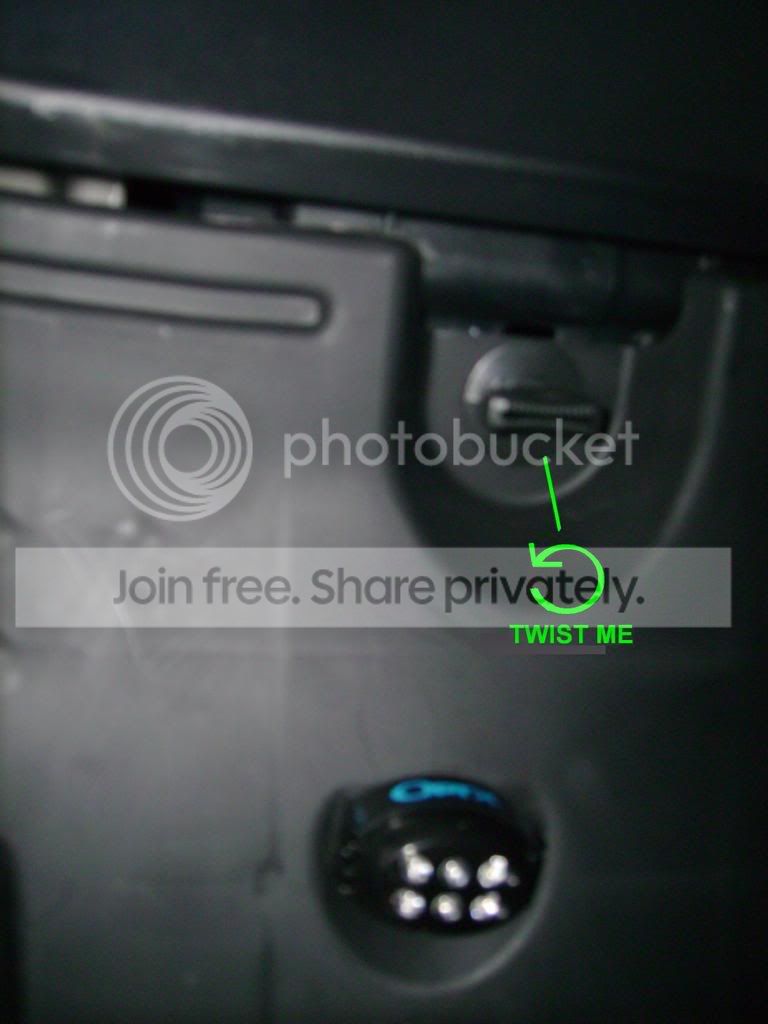
Once the boot trim is off, another pair of 5/16" bolts sits alongside a set of two T10 Torx screws; the Torx only need to come out if you are also routing an aux cable. Remove the trim clip near the pedals by popping its center pin with a flathead and pulling the body out, then take off the panel above the pedals by turning its fastener and pulling down and out. On the passenger side, release the cover under the glovebox and pop its clip. Slide the console rearward while lifting, raise it several inches, and unplug the cigarette-lighter connector. Move the seats and, if needed, release the parking brake momentarily to clear the shifter, then lift the console out and carry it to the bench.
4 Mount the two switches in the console
Pick a switch location near the 12V outlet, keeping it far enough to the left that the outlet cover still opens and closes without interference. Check both the top and underside of that spot for plastic ribs or wiring that the drill could hit. Drill the mounting hole from the top face so burrs land on the hidden side; a 1/2" bit suited the switches used here, but confirm the size on the switch packaging. Test-fit the switch and step up one bit size at a time until it seats snugly and fully.
5 Tap the 12V feed and wire the switches
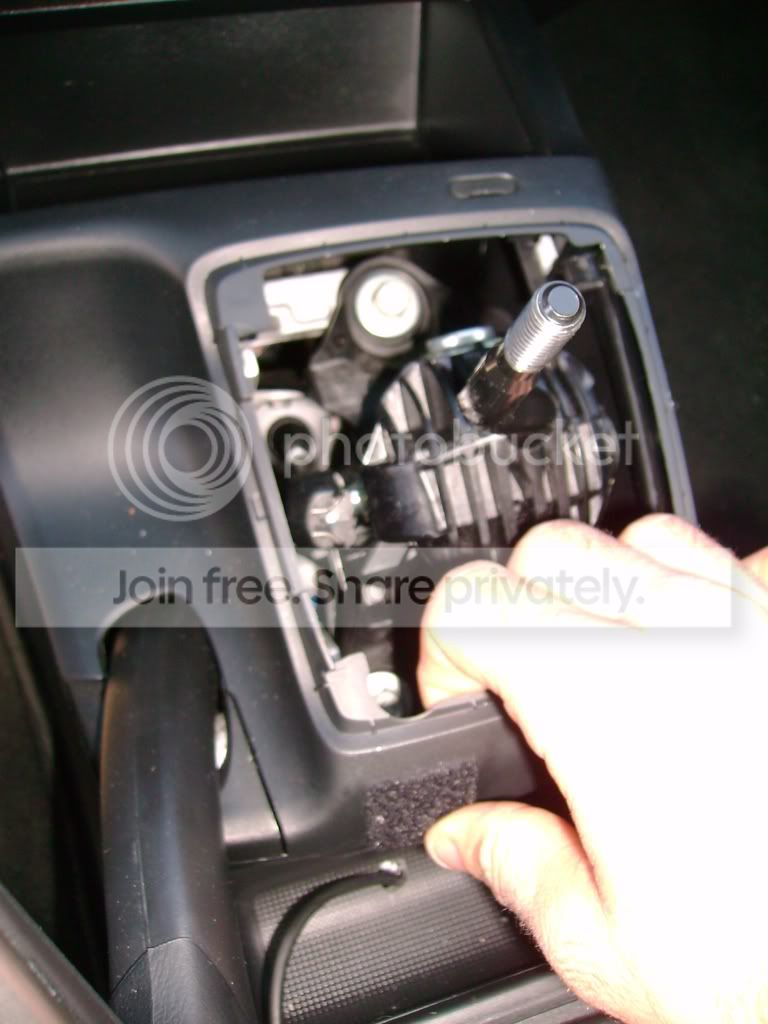
Peel back the tape and loom on the cigarette-lighter harness, then cut and strip to expose the accessory feed. Wire each SPDT switch to its ground, load, and power posts per the diagram on the switch box, using red 18 ga for power and load and black 18 ga for ground. Crimp female terminals onto the leads. Run one switch's LED output forward toward the dash and the other's toward the rear, leaving generous slack at each end so the runs reach the pods and strips. Zip-tie the harness tidily out of the way.
6 Install the rear LED strips under the seats
Route the rear switch wiring under the carpet from the console opening toward the seat-slider brackets, bringing it back to the surface near each front seat. Mount each three-LED strip low against the carpet flap at the base of the seat so the emitter stays out of sight and lights the toe-kick rather than shining on ankles. Because the strips' factory adhesive will not grip curved trim, back each one with the stiff hook half of a velcro strip cut to length. Connect each strip's black lead to the switch ground and its black-with-white-stripe lead to the switch power; extend the runs as needed so the two sides meet in the middle, then insulate every joint.
7 Install the front LED pods behind the kick panels
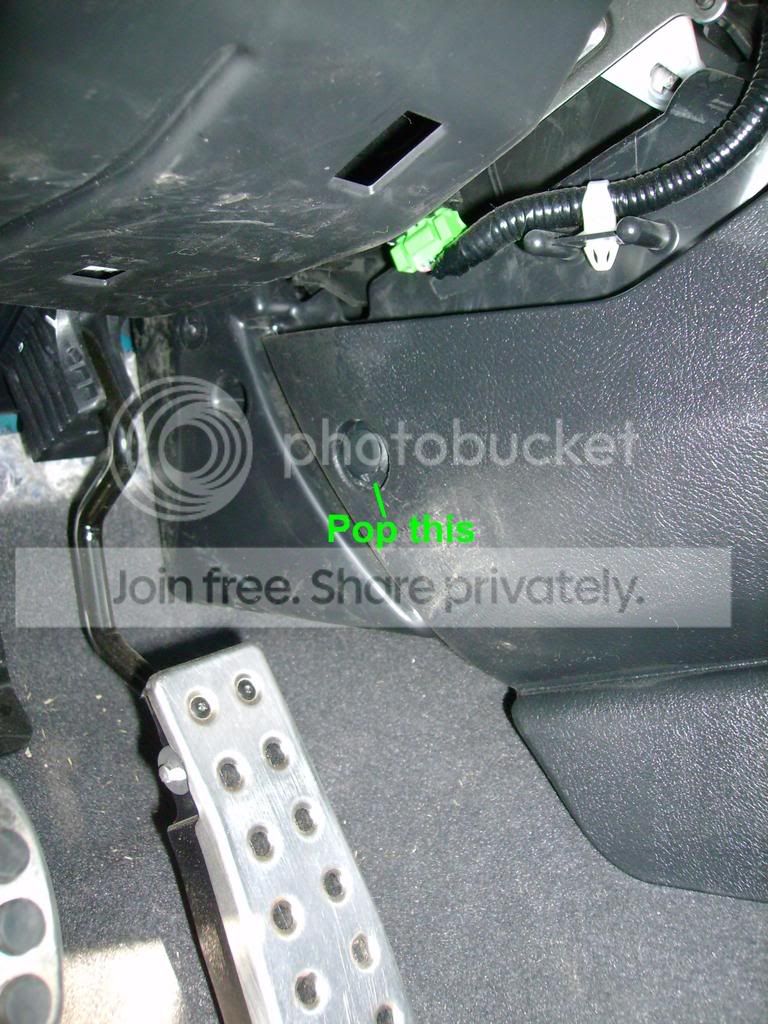
On the panel above the pedals, choose a spot behind the twist clip for the driver pod and drill a hole only large enough to pass the wires. Peel off the foam backing, run the leads toward the console, replace the foam over them, and refit the panel with the pod leads accessible. On the passenger side, center the pod so its beam fills the footwell, using an existing hole near the clip if one lines up. Route the front switch wires up into the dash, keeping them taut and zip-tied, then splice them to the pod leads and seal each connection with heat shrink.
8 Reconnect, test, and reassemble
Slide the console partway back in and reconnect the cigarette-lighter plug. Reconnect the battery terminal and turn the key to accessory. Flick both switches and confirm each zone lights, then verify the front and rear operate independently as well as together; if they only work in tandem, you have a crossed wire to trace. Once everything checks out, reinstall all trim in reverse order, tuck any loose wiring up out of the way, refit the shifter knob, and re-enter the radio code.
Pro Tips
- 💡 Drop every nut, bolt, and screw into one container as you go so nothing gets lost under the seats during reassembly.
- 💡 Where LED adhesive will not hold on rounded trim, back the strip with the stiff hook side of a velcro strip for a secure, removable mount.
- 💡 Mount the rear strips as low as possible on the seat-base carpet so the LEDs stay hidden and light the floor instead of reflecting off ankles.
- 💡 To make the lights come on with the doors, feed them from the dome/courtesy-light circuit using a fuse-tap jumper on that fuse instead of a manual switch.
- 💡 LED units are easy to swap later; if one fails, an equivalent aftermarket unit unplugs and replaces directly.
Was this guide helpful?

