
OEM Acura TL HID (D2R) Conversion for JDM H4H Headlamps
- HID ballasts and igniters produce very high voltage - disconnect the battery before wiring and never handle powered HID connections.
- High beam function is lost: the H4H is a dual-filament bulb and the single-arc HID cannot replicate it.
- The halogen reflector housing was never designed for HID: expect flare and no distinct cutoff line, and glare to oncoming traffic. Aim the lamps low and check the beam against a wall before road use.
- HID conversions in halogen housings are generally not street-legal; DOT approval numbers on OEM bulbs and ballasts do not make this installation road-legal.
Introduction
JDM one-piece headlamps for the EG Civic and DA Integra use the H4H bulb, a fitment that was produced only briefly, so practically no aftermarket HID kit exists for it and even replacement halogen H4H bulbs are hard to buy outside Japan. This conversion installs the factory OEM HID system from a 1999 Acura TL - Matsushita ballasts with D2R bulbs - into any JDM H4H headlamp. The D2R bulb is the best-fitting HID option for the H4H socket: its base width is almost identical, and the filament (arc) placement matches the H4H so the beam placement stays essentially stock, with the bulb sitting only about 1/8 inch further back because of the large HID plug. Being OEM, D2R/D2S bulbs are cheap, easy to source, and not brand-specific, and an unmodified factory kit is far more reliable than a rebased aftermarket kit. Be aware of the trade-offs discussed in the thread: the JDM housing has no glare shield, so there is no distinct cutoff line, the fluted lens produces flare, and the dual-filament high beam function is lost entirely. Adapted from a community writeup by DjGuamstyles on Honda-Tech (https://honda-tech.com/forums/lighting-107/how-acura-tl-hids-into-any-jdm-h4h-headlamp-2114909/), including corrections from the follow-up discussion.
Procedure
7 steps-
Step 1: Source the OEM HID kit and confirm bulb type
Obtain a complete factory HID kit from a 1999 Acura TL: both Matsushita ballasts/igniters and the D2R bulbs. Use D2R, not D2S - the D2R has a light-blocking stripe painted on the capsule for reflector housings, which the D2S lacks. OEM D2R and D2S bulbs are common at dealers and on eBay, so replacements are cheap and not brand-specific.
-
Step 2: Modify the D2R bulb bases
This is the most time-consuming part. Grind off the three tabs on the bulb base, then grind a small rounded slit at the 3 o'clock position as viewed from the back of the bulb. This slit aligns and seats the bulb in the H4H socket. Do not worry about the bulb falling through the housing - the large D2R/D2S plug on the back stops it from going in too far. For orientation, the small rod on the bulb aligns at the bottom.
-
Step 3: Slit the rubber bulb seals
Reuse the headlamp's rubber bulb seals rather than discarding them - cut a slit in each seal just large enough to push the D2R plug and wiring through. Ideally, devise a way to fully reseal the rubber around the wiring afterward, since the slit compromises the weather seal (the original author was not satisfied leaving it unsealed).
-
Step 4: Fabricate a bulb retention clip
The stock H4H wire retaining clip will not capture the modified bulb, so form a replica clip from stiff wire. The original was bent from a paperclip, but that proved weak - use something thicker. Bend the rear section into a V shape so it presses the bulb forward into the socket when clipped in. To swap clips, unscrew the original clip's anchor screw just far enough to wiggle the old clip out, then fit the fabricated clip the same way. It mounts and latches exactly like the original.
-
Step 5: Build a plug-and-play ballast harness
Do the wiring properly with solder and heat shrink tubing rather than crimps or twists. Solder a standard H4/sealed-beam harness pigtail (sold at any auto parts store) directly to the ballast input wires so the kit becomes plug-and-play. Fit male-to-male brass connectors to the pigtail so it mates with the car's factory headlight plug. A good soldered joint will never vibrate apart.
-
Step 6: Install the bulbs and connect the system
Fit each modified D2R bulb into its H4H socket with the alignment rod at the bottom, secure it with the fabricated retention clip, and pass the plug through the slit rubber seal. Connect the ballast harness to the car's factory plug, wrap the H4 pigtail connections in electrical tape to secure them, and zip-tie the two connector plugs face-to-face so they cannot shake loose (a practice recommended by HID kit maker McCulloch). Mount the ballasts securely in the engine bay - zip ties will do temporarily, but plan a proper permanent mounting.
-
Step 7: Aim the headlamps and manage glare
The JDM housing has no glare shield, so there is no distinct projector-style cutoff line. Aim the headlamps down - when the author previously ran an H4 HID kit in these housings, aiming them fully down helped tremendously. Verify against a wall and on the road that the beam stays on the pavement and does not light up signs, houses, or oncoming traffic. To further reduce upward stray light, the underside of the reflector bowl can be painted black or flat grey, since the upward glare comes mainly from the bottom of the housing.
- Because of the large HID plug, the bulb sits about 1/8 inch further back than the stock H4H bulb depending on brand - beam placement remains essentially the same.
- The D2R's base width is almost identical to the H4H, so it does not shake around in the socket - it fits the H4H housing better than any other HID bulb size (H7, 9004, and 9006 were all tried and fit poorly).
- An unmodified factory OEM kit is more reliable than a rebased aftermarket kit, which has been taken apart and converted and is often used stock.
- The glare shield from a US-spec headlamp only diffuses light rather than creating a cutoff; transplanting it is possible but produces an odd scattered beam pattern.
- If your car has US-spec projector or clear-lens housings rather than JDM H4H lamps, a proper OEM projector retrofit (for example Audi projectors) will give a far better beam than this reflector conversion.
Related procedures
All guides →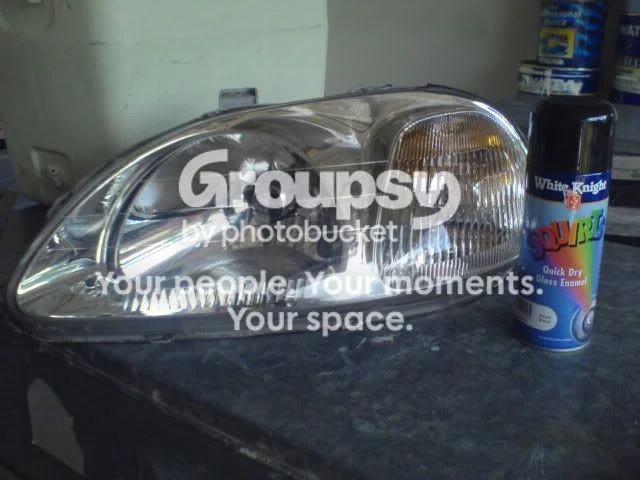
Tap right for next · left for back · Keys: ← → step · Space / PgUp / PgDn scroll · Esc exit