HID Headlight Conversion for the Honda Civic Type R (FN2)
Introduction
This guide covers retrofitting an HID (xenon) conversion kit into the halogen dipped-beam headlamps of the 8th-generation Honda Civic Type R (FN2), and it applies equally to the Type S and Type S GT, which share the same reflector-style housings. Because these lamps use a reflector rather than a projector, you must buy an H7R kit; a plain H7 kit will physically fit but scatters light badly and dazzles oncoming traffic. The result is a far brighter, whiter beam than the weak factory halogens. Budget roughly two hours and work one side at a time. Note the legal position before you start: in the UK, aftermarket HIDs fitted into reflector halogen lamps are not compliant with Construction and Use regulations, which call for headlamp washers and self-levelling, so weigh that up and declare the change to your insurer. Adapted from a community writeup by Loxy on Civinfo (https://www.civinfo.com/threads/how-to-fit-a-hid-kit-to-type-r.44629/), including corrections from the follow-up discussion.
Reference
Tools Required
- Flat-head screwdriver
- 25mm spade drill bit and a drill
- 10mm socket and ratchet
- Pliers (to bend the ballast bracket)
- Scrap block of wood to back the drilling
Parts Required
-
H7R HID conversion kit (slim ballasts are easier to mount; low-glare/anti-glare bulbs preferred, e.g. 55W 6000K)
-
Zip ties
-
1x M6 x 10mm bolt (to mount the offside ballast bracket)
-
Matching-temperature sidelight bulbs (optional, to suit the HID colour)
-
Spare headlamp rear covers if you want to keep the originals unmodified (Honda part 33126-SMG-E02)
Safety Warnings
- ⚠ Never touch the glass of the HID bulb; skin oil creates a hot spot that shortens its life.
- ⚠ Removing the battery earth strap disconnects the battery and clears stored settings such as the radio code; have the code and reset procedure ready.
- ⚠ Buy an H7R kit, not H7. An H7 kit fits the reflector housing but scatters light and will dazzle oncoming traffic.
- ⚠ A mis-oriented bulb produces a scattered beam with no clean cut-off and can dazzle other drivers; verify orientation before road use.
- ⚠ Legal/compliance: in the UK, retrofitting HIDs into halogen reflector headlamps does not meet Construction and Use requirements (no headlamp washers, no self-levelling). It may attract a fine or penalty points and can affect insurance; fit at your own risk.
Step-by-Step Instructions
1 Select the correct kit and handle the bulbs safely

Buy an H7R kit specifically, not an H7 kit. The FN2 headlight is a reflector design, so an H7 bulb intended for projector housings will throw an uncontrolled, glaring beam. Choose slim ballasts, which are much simpler to find a home for later, and prefer low-glare bulbs for a cleaner cut-off. Throughout the job, avoid contact with the glass envelope of each bulb; oil from your skin creates a hot spot that shortens bulb life. Verify the kit's rated hole size for the cable grommet, as it can differ between brands.
2 Free up working room across the slam panel

This is optional but makes the rest of the job far easier. Lift off the trim cover spanning the slam panel, which is held by eight push plugs. Release each plug by inserting the flat-head screwdriver fully into its slot and giving it a gentle twist; seating the blade all the way in reduces the chance of snapping the plug.
3 Optional: change the sidelights to match

If you want the sidelight colour to match the new HIDs, deal with them now while access is good. The sidelight cover sits at the rear of the lamp nearest the grille and releases with under a quarter turn. Behind it are two bulbs; the sidelight is the lower one and simply pulls straight out for replacement, leaving the main beam bulb above it undisturbed.
4 Start on the nearside: clear the cold-air feed

Do the passenger (nearside) headlamp first, because the battery and cold-air feed make it the awkward side, and the driver's side is then a quick repeat. Pop off the plastic cover along the top of the wing (two more push plugs) to reach the ducting. Work the upper section of the cold-air feed free by pulling firmly; there is no trick to it. The lower section is trapped by the battery, so slacken the battery: undo the earth strap and the tie-bar fixings with the 10mm socket and shift the battery toward the windscreen for clearance. Removing the earth strap effectively disconnects the battery, so have your radio code and any reset details to hand before you begin.
5 Open the rear of the headlamp

With the ducting out of the way, unscrew the round cap on the back of the headlight to expose the bulb. You will see the bulb held by a sprung retaining clip and the electrical connector plugged onto its blades.
6 Drill the rear covers for the HID leads

Each HID bulb has its ignition lead permanently attached, so the sealing lead must pass through the headlamp's rear cover. Drill a 25mm hole in each cover to suit the cable's rubber grommet, which keeps the cap watertight once fitted. Confirm the hole size against your own kit, as it can vary. Rest the cover on a block of scrap wood while drilling so the bit does not punch through and crack the cover; expect the bit to bite into the wood. If you would rather keep a set of unmodified covers for a future return to standard, the caps are available as Honda part 33126-SMG-E02.
7 Fit the HID bulb and orient it correctly

Feed the lead through the drilled cover and seat the grommet, keeping the bulb on the inside face of the cap. Because the lead is attached, you cannot just clip the bulb in as standard: unhook the spring clip from its pivot, pass it over the HID cabling with the bulb in position, then re-hook and spring it back into its locked seat. Orientation is critical to the beam pattern: the lip on the circular bulb holder goes to the top, which places the grey reflective strip on the bulb at the 12 o'clock position when viewed head-on. Get this wrong and the beam scatters and dazzles other drivers.
8 Wire in the bulb and ballast

Connect the bulb's spade terminals to the original headlamp connector. Follow your kit's own instruction for polarity; on the documented kit, black paired with brown and red with yellow. Screw the drilled cap back onto the headlamp, then join the bulb lead to the ballast. These plugs are keyed and waterproof, so they mate only one way; push them fully together until the locking clips snap home to keep water out.
9 Mount the ballast

Secure the ballast wherever it sits cleanly and stays dry. On the nearside you can reuse the earth-strap bolt and hole, bending the mounting bracket with pliers so it hooks over the lip of the slam panel. Alternatives that testers have used successfully include mounting further back near the bonnet hinges, or inside the front wings on drilled and bent metal brackets; whichever you choose, fix it firmly so it cannot rattle and keep it away from likely water ingress.
10 Reassemble the nearside, then repeat on the offside
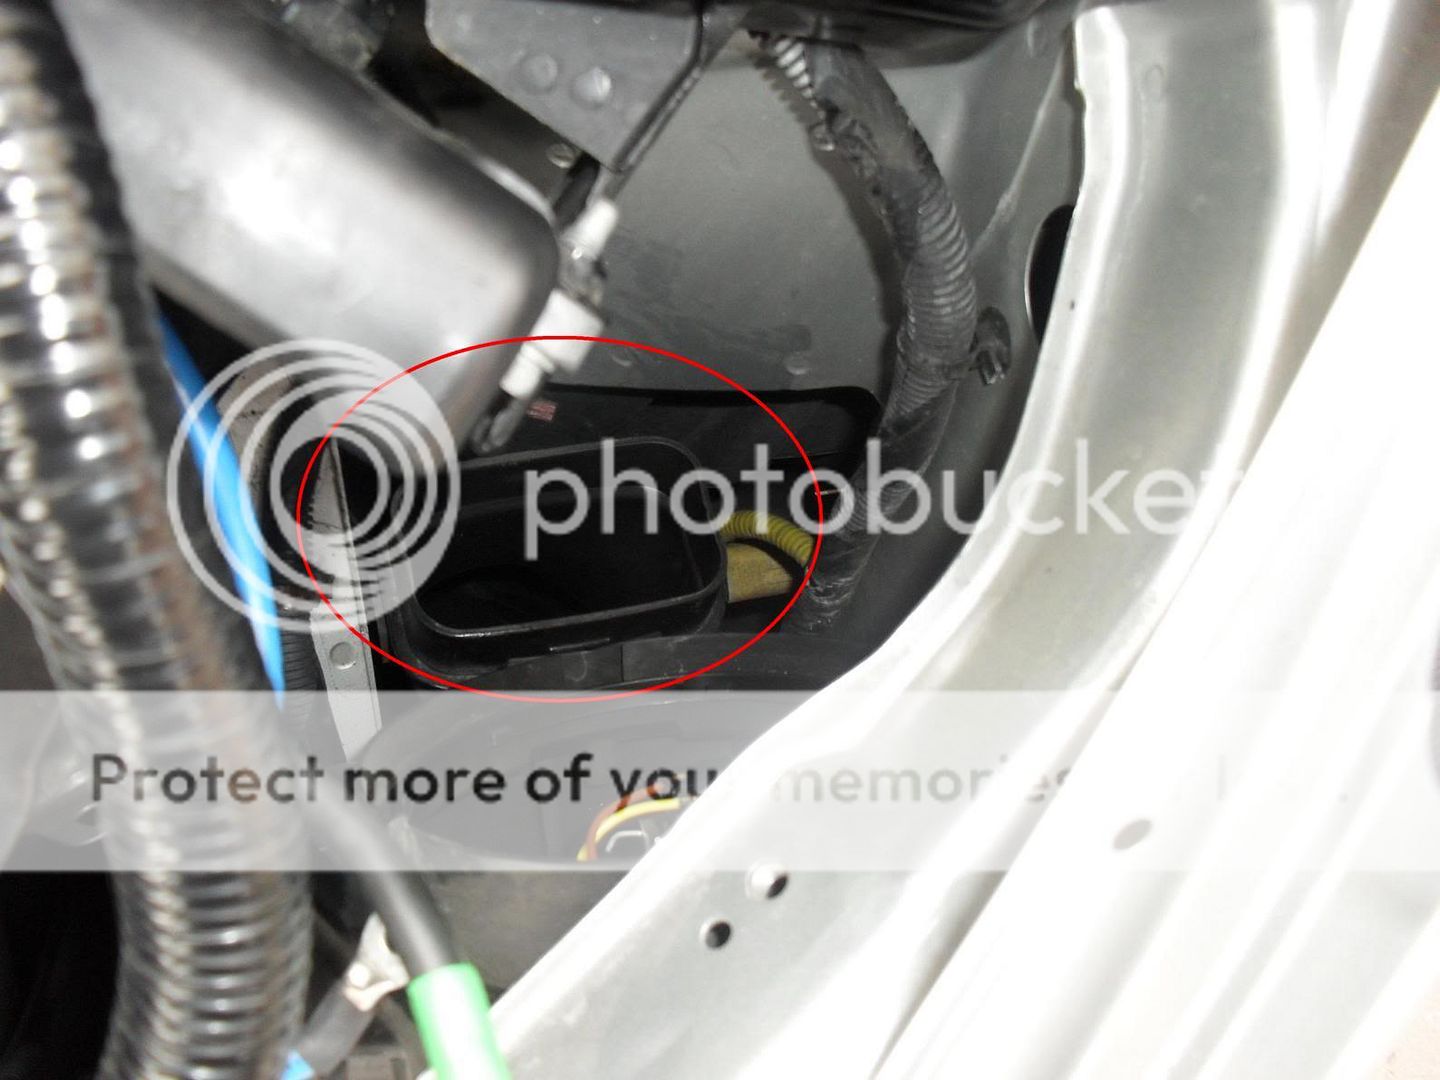
Refit the cold-air feed sections, taking care not to trap or chafe the new lead or the plastic wing trim. Reseating the lower triangular duct is the fiddliest part of the whole job; loosening the battery earlier gives the room to persevere until it clicks fully onto its fixed lower fitting. Refit the trim, reposition the battery and reinstate the tie-bars, earth strap and cable tie. The driver's (offside) lamp is the same procedure but much quicker, with no battery or ducting in the way; use the M6 x 10mm bolt in the matching threaded holes to mount that ballast. On this side, keep the leads clear of the drive belt and engine mount by zip-tying them out of the path of any moving parts.
11 Aim the beam and check the cut-off

Before driving at night, verify the aim against a wall or garage door. Look for a clean, level cut-off line rather than light thrown all over the surface. Confirm the reflective strip sits at 12 o'clock on both bulbs, and set the car's manual headlamp adjusters to at least 3 rather than 0. Fine alignment can be corrected with the car's manual adjustment if needed. An untidy, scattered pattern almost always means a bulb is mis-oriented rather than the aim being off.
Pro Tips
- 💡 Tackle the nearside (passenger) headlamp first; it is the harder side, and the offside is an easy repeat afterwards.
- 💡 Slim ballasts are far easier to position and mount than full-size units.
- 💡 Low-glare H7R bulbs give a much cleaner beam; a 55W 6000K H7R set for reflector lamps works well.
- 💡 Refitting the lower triangular cold-air duct is the most time-consuming step for most people, sometimes 20 minutes on its own; loosening the battery makes it manageable.
- 💡 If you drill your own headlamp covers, buy spares first so you can return to standard later (Honda part 33126-SMG-E02).
- 💡 Declare the modification to your insurer, as several owners in the thread did.
Was this guide helpful?

