DIY JDM-Style Shift Boot Trim Ring Using a Honda Valve Cover Washer
Introduction
This guide covers building a budget trim ring that gives the shift boot in an Acura RSX / Honda Integra (DC5) the flared, tailored look of a genuine JDM boot for only a few dollars. The trick is a common Honda valve cover sealing washer: once its center hole is opened up, the metal washer slides over the shifter and seats at the base of the knob, cleaning up the line of the rubber boot and holding it in a neater resting position. A factory or aftermarket JDM-style boot typically runs from around $50 used to $90 new, so this is a cosmetic upgrade for people who want the appearance without the cost. It changes only how the boot looks and sits, not how the shifter works. The write-up also incorporates the most reliable retention method surfaced in the discussion, because the original glue-only approach proved fragile in later reports. Adapted from a community writeup by danito321 on Club RSX (https://www.clubrsx.com/threads/diy-homemade-jdm-shift-boot.865197/), including corrections from the follow-up discussion.
Reference
Tools Required
- Drill
- Step drill bit
- Clamp
- Scrap wood board to back the washer while drilling
- Screwdriver or plastic trim tools for the shift knob and console panel
- Soldering iron (optional, as an alternative to adhesive)
Parts Required
-
Honda valve cover sealing washer (metal washer bonded to a rubber grommet), about $5 from a dealer parts counter
-
Super glue (cyanoacrylate) or epoxy (optional, backup bonding only)
Safety Warnings
- ⚠ Super glue used by itself has failed within minutes in this application and does not tolerate cabin heat well; rely on the mechanical clamp method or a heat-resistant adhesive such as epoxy.
- ⚠ Apply any adhesive carefully and in a ventilated space; stray super glue on the washer face or boot is visible and very difficult to clean off.
Step-by-Step Instructions
1 Remove the shift knob and console trim
Unthread the shift knob from the lever, then release the shifter surround trim panel from the center console to expose the factory rubber boot. Keep the knob and any fasteners together so nothing is lost during reassembly.
2 Detach the factory collar from the boot
Pull the chrome or plastic decorative ring off the top of the rubber boot. This uncovers the flat rubber shoulder near the top of the boot, which is the surface the washer will eventually sit against.
3 Clamp the valve cover washer for drilling
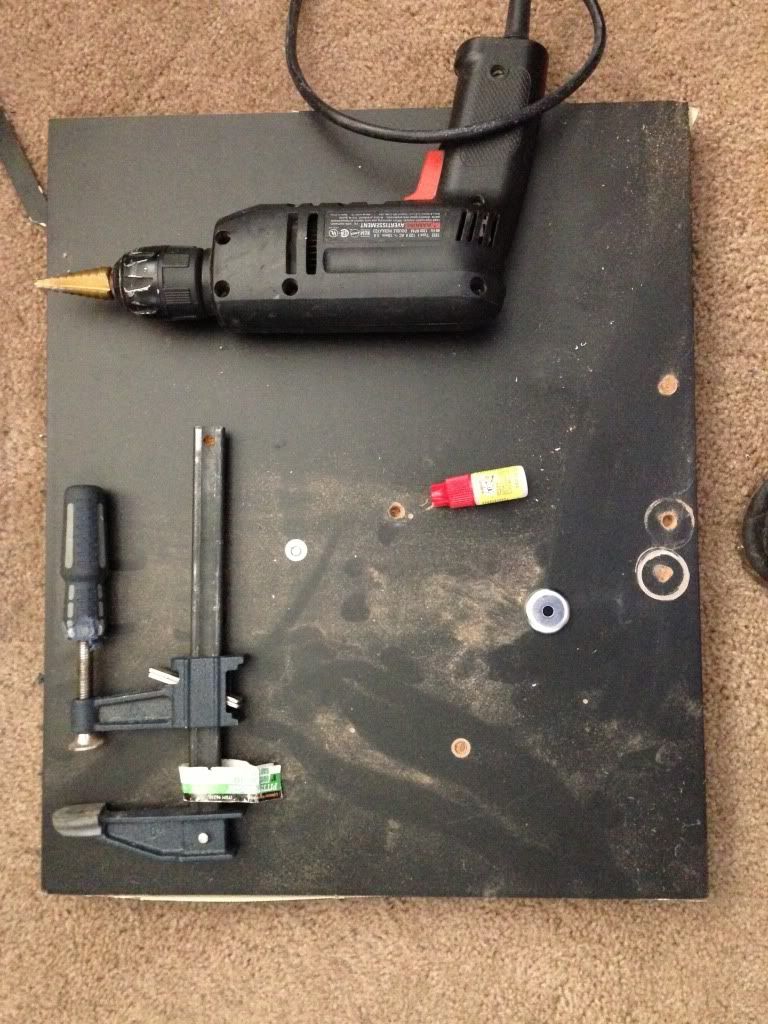
Lay the Honda valve cover washer on a scrap piece of wood with its finished face pointing up, and lock it down with a clamp. Keeping the good side up prevents the cut edge from tearing out and marring the surface that will be on show.
4 Open the center hole with a step drill bit
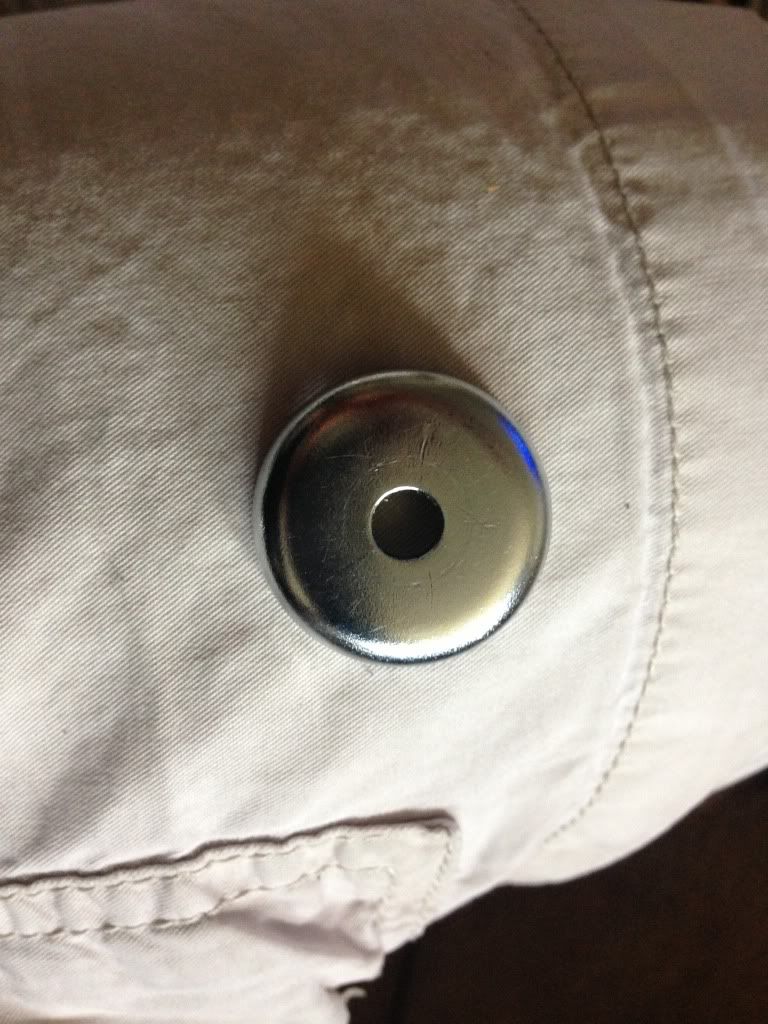
Working slowly, run a step drill bit into the washer's center to widen the bore. Enlarge it in small increments and repeatedly offer it up to the shifter shaft, stopping the moment it slips over cleanly. There is no fixed diameter; size the opening to your own shifter.
5 Test-fit the washer on the boot
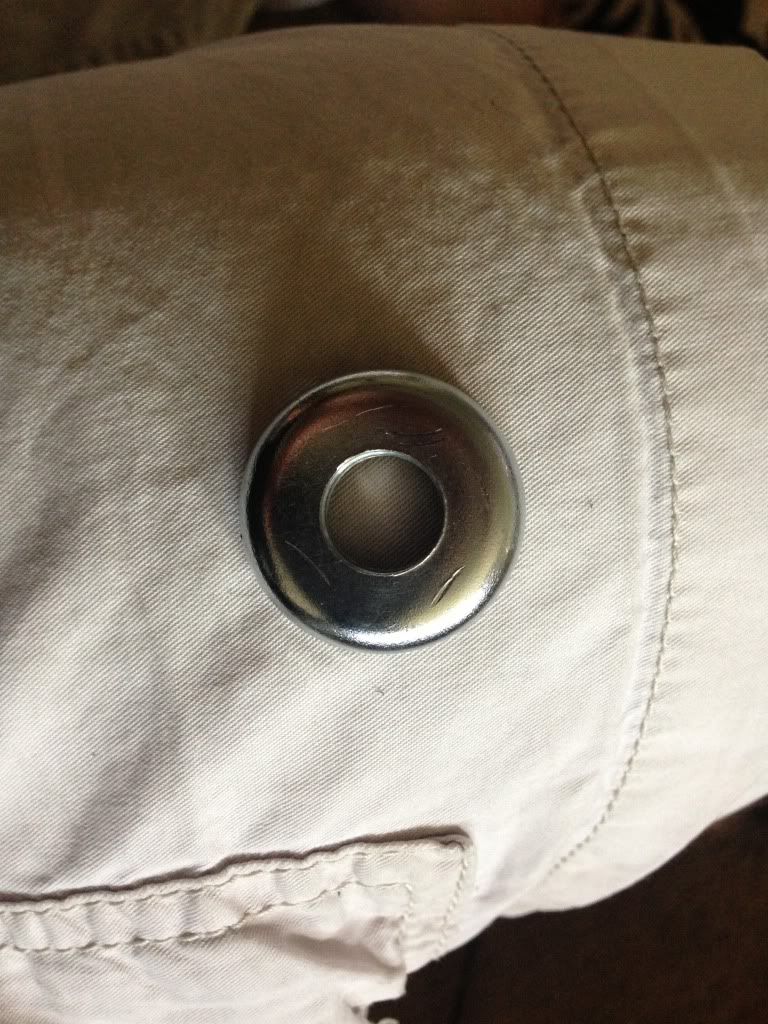
Slide the washer down over the shifter and seat it on the boot. It should come to rest right where the boot begins to flare outward, sitting flat and centered. Confirm the fit and alignment before committing to any adhesive, because a misplaced washer is very hard to remove later.
6 Secure the washer with the mechanical clamp method (recommended)
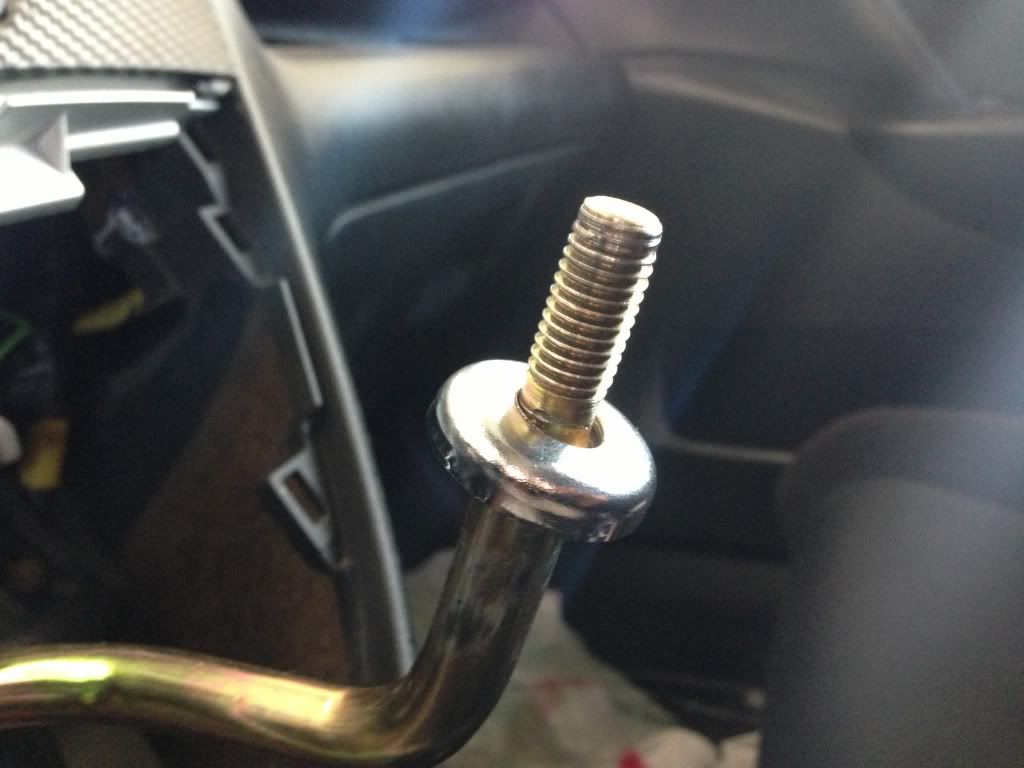
Cyanoacrylate on its own is unreliable here: follow-up reports had it release within minutes and it copes poorly with cabin heat. The durable method reported later in the thread uses the washer's own rubber grommet as a clamp. Seat the rubber grommet inside the top of the shift boot, then thread the shifter bolt and reinstall the knob so the knob's nut squeezes the grommet against the washer. That sandwiching force holds everything together even if any adhesive lets go. A thin bead of super glue can be added as backup, but do not depend on glue alone; for a glue-only build, epoxy or lightly welding the rubber with a soldering iron resists heat better than super glue.
7 Reassemble and check operation
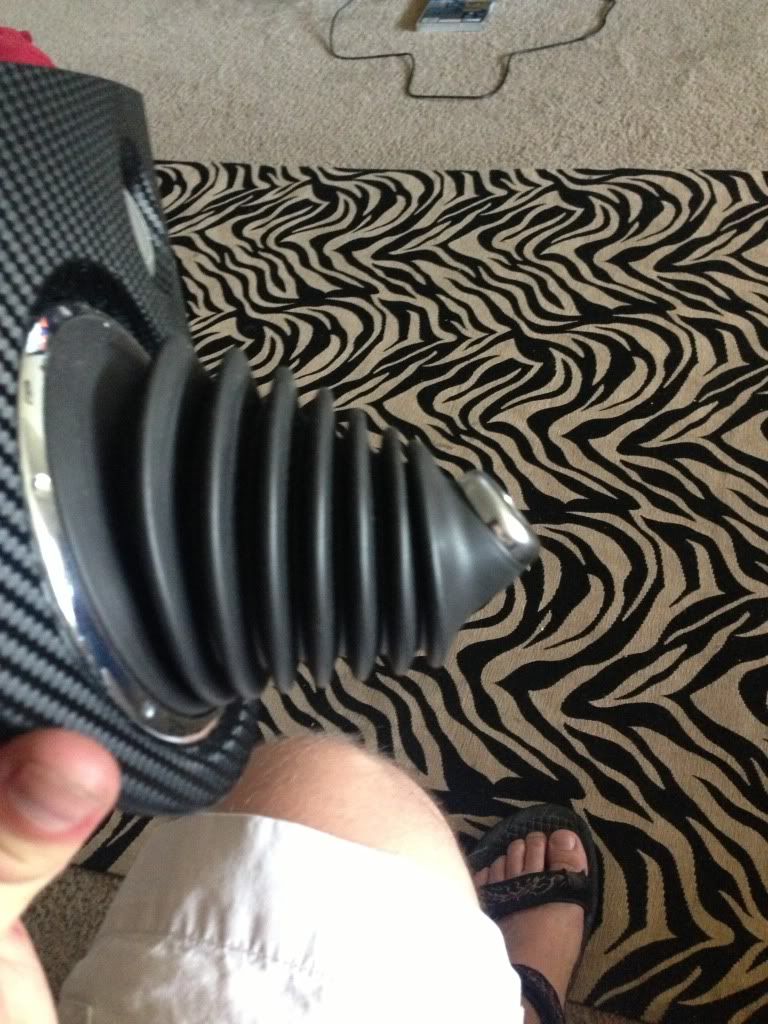
Refit the console trim panel, reinstall the shift knob to full tightness, and confirm the boot sits cleanly with the washer flush and centered. Run the shifter through every gate to be sure it still moves freely before driving.
Pro Tips
- 💡 A single valve cover washer is about $5 at a Honda parts counter, far cheaper than an OEM or JDM boot at roughly $50 used to $90 new.
- 💡 If you would rather not fabricate anything, a ready-made shift-boot adapter can be found on eBay for around $10.
- 💡 The mechanical clamp method, with the grommet trapped under the shift knob nut, is the most reliable retention and needs no adhesive to hold.
- 💡 This is a cosmetic change only; it alters the look and resting position of the boot, not its function.
Was this guide helpful?