Honda Fit (GE8) J's Racing Rear C-Pillar Bar Installation
Introduction
The J's Racing C-pillar bar is a bolt-on chassis brace for the 2nd-generation Honda Fit (GE8 / Jazz GE) that ties the two rear upper seatbelt anchor points together across the cabin, stiffening the rear structure to sharpen turn-in and reduce body flex without any cutting or drilling. It shares the anchor hardware with the factory seatbelts, so the belts continue to function after the install. This writeup covers the C-pillar bar specifically; the matching J's Racing rear strut bar mounts the same way as the popular Cusco rear strut bar and is referenced in the original thread. Note that the front J's Racing strut bar is made for right-hand-drive cars only and will not clear a left-hand-drive GE's steering components and fluid reservoirs, so left-hand-drive owners should look at the Cusco front bar instead. The whole job needs only basic hand tools and roughly an hour. Adapted from a community writeup by jdmsneakerhead on FitFreak (https://www.fitfreak.net/forums/2nd-generation-ge8-specific-suspension-brakes-sub-forum/54021-j-s-racing-rear-strut-bar-c-pillar-bar-diy-included.html), including corrections from the follow-up discussion.
Reference
Tools Required
- 14mm socket
- 16mm socket
- Ratchet and short extension
- 9mm Allen (hex) wrench
- Plastic trim removal tool (for the seatbelt anchor covers)
Parts Required
-
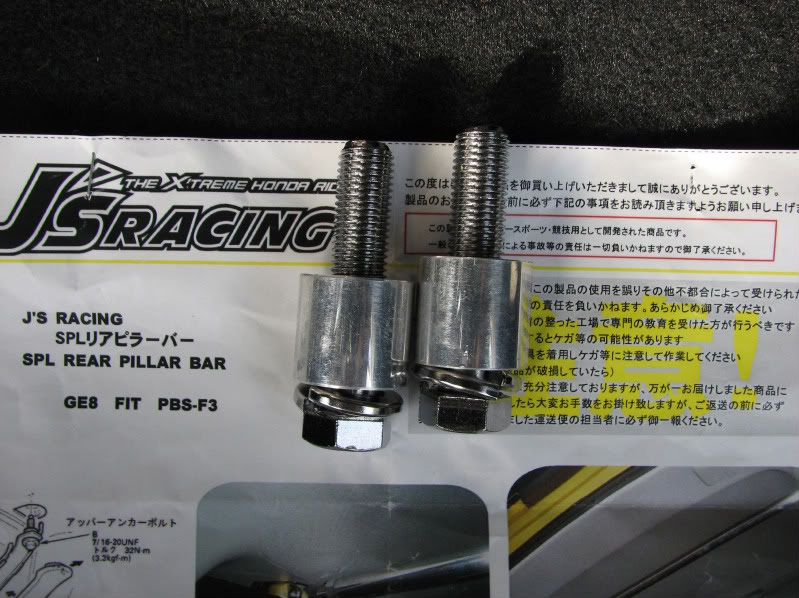
J's Racing rear C-pillar bar kit (includes the crossbar, two end brackets, and two 16mm mounting bolts)
-
Original rear seatbelt anchor washers (one black, one silver per side) reused from the vehicle
Safety Warnings
- ⚠ In many jurisdictions, fitting rear chassis bars can make it illegal to carry passengers in the rear seat, and a hard bar behind the occupants can increase injury risk in a collision. Confirm local regulations before carrying anyone in the back.
Step-by-Step Instructions
1 Expose the rear seatbelt upper anchors
Work one side at a time. On each rear C-pillar, pop off the plastic trim cover that hides the upper seatbelt anchor. Underneath sits the single 14mm bolt that fastens the belt's upper bracket to the body. Repeat on the opposite side so both anchor bolts are accessible.
2 Remove the seatbelt anchor bolt and save the washers
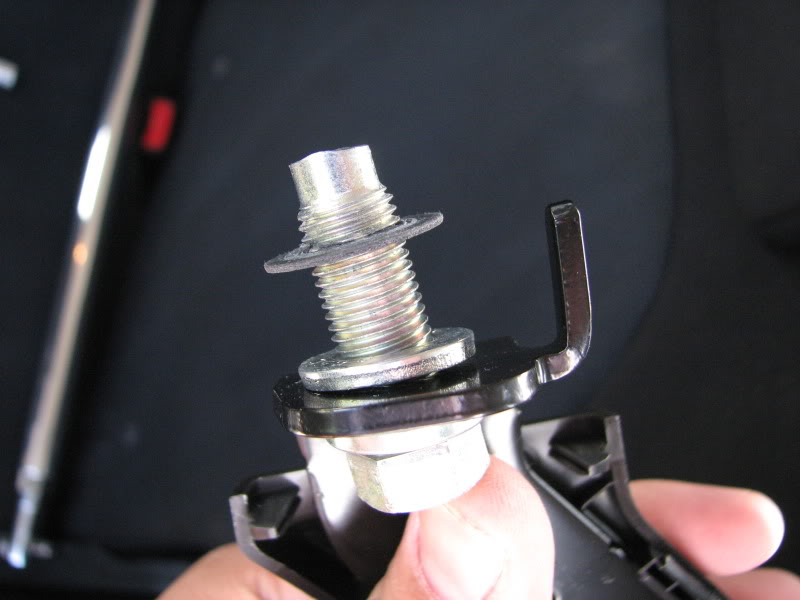
Using a 14mm socket, back out the anchor bolt and free the upper seatbelt bracket. Keep the two stacked washers that sit on top of that bracket, one black and one silver; they are reused with the new hardware, so set them aside in order rather than discarding them. Do the same on the second side.
3 Separate the end brackets from the crossbar
The kit arrives with its two end brackets fastened to the crossbar. Loosen those bracket-to-bar fasteners (9mm hex and 14mm) so each bracket can be mounted to the car independently and then swung into alignment once the bar goes in. Leaving them loose at this stage makes the final fit far easier.
4 Bolt the end brackets to the seatbelt anchors
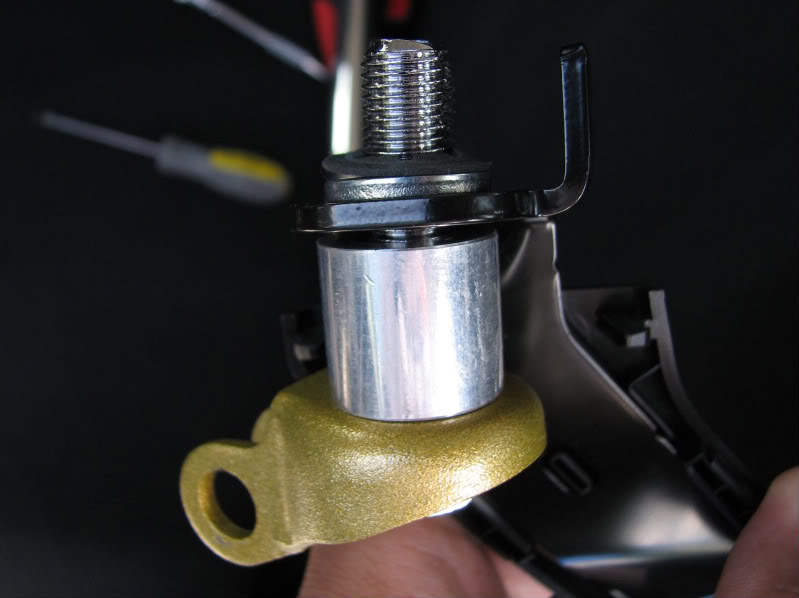
At each anchor, stack the vehicle's original seatbelt bracket together with a C-pillar bar end bracket, then drive in the supplied 16mm bolt. Reinstall the black and silver washers in their original order on top so the seatbelt retains its factory clamping arrangement. Run the 16mm bolts in snug but not fully torqued for now, leaving room to align the bar.
5 Fit the crossbar between the brackets
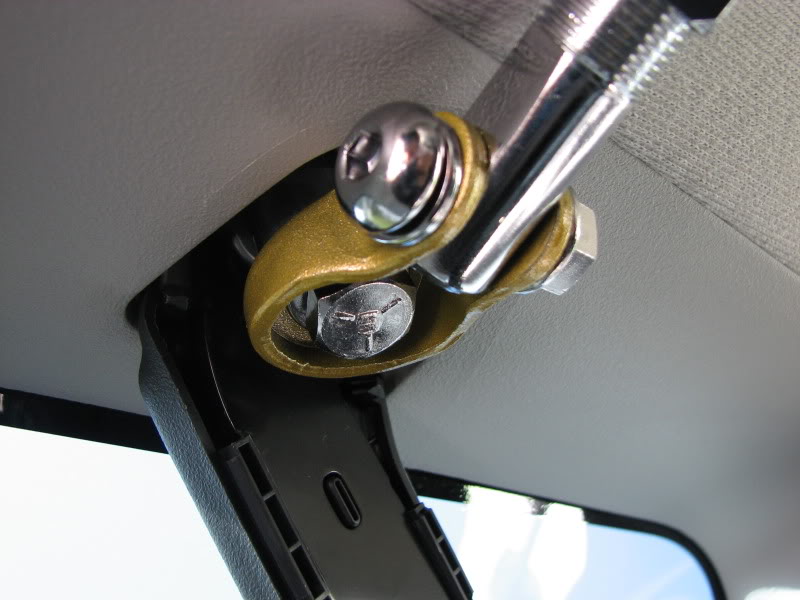
With both end brackets loosely mounted, lift the crossbar into place across the rear cabin and start its fasteners into both brackets. Adjust the angle of each bracket until the bar seats squarely without being forced, so no bracket is preloaded against the anchor point.
6 Torque everything and check the belts
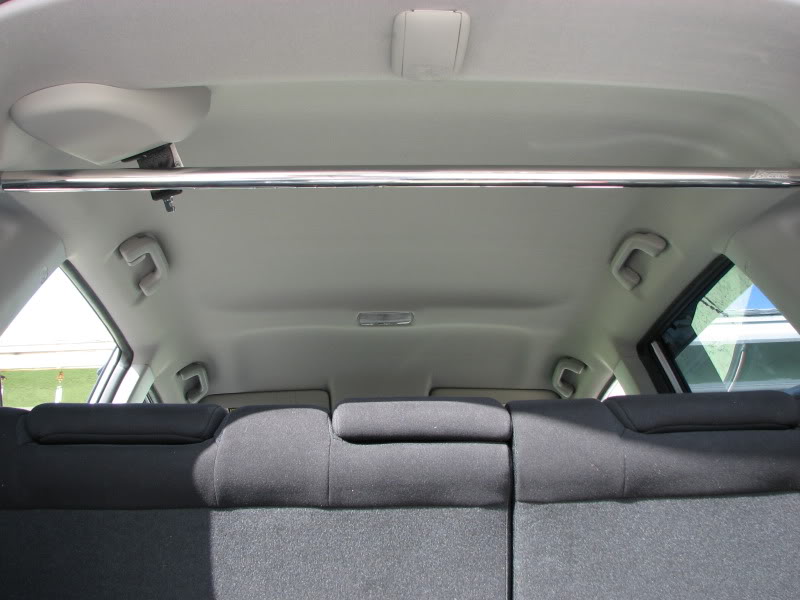
Working around the assembly, tighten all fasteners: the 16mm bolts at the seatbelt anchors, and the 9mm hex plus 14mm bolts that clamp the crossbar to its end brackets. After everything is tight, pull each rear seatbelt out and let it retract, and latch it once, to confirm the belts still work normally around the new bar.
Pro Tips
- 💡 The rear seatbelts remain fully functional and latch normally with the C-pillar bar fitted.
- 💡 Once the bar is installed the rear seats can no longer be reclined to their farthest-back setting.
- 💡 The matching rear strut bar installs the same way as the Cusco rear strut bar; a dedicated Cusco writeup is referenced in the source thread.
- 💡 For left-hand-drive GE cars, J's Racing does not offer a fitting front strut bar; the Cusco front strut bar is the LHD-compatible alternative.
Was this guide helpful?

