
Honda Civic (1992-2000) Front Wheel Bearing Replacement
- Never work under a car supported only by a jack - use jack stands.
- Never use a torque wrench to loosen the axle nut or lug nuts; most torque wrenches are tighten-only and loosening damages them.
- On the rotor retaining screws, reach for an impact driver rather than an impact wrench - the wrench strips them.
- Always fit new cotter pins to the castle nuts; never reuse the old ones.
- When pressing the hub in, the two-piece inner race must be supported from behind or it will be pushed out of the bearing.
Introduction
This guide covers replacing a front wheel bearing on 1992-2000 Honda Civics (EG and EK chassis; the same layout applies to closely related models such as the Del Sol and Acura 1.6 EL). A worn front bearing announces itself as a droning or growling noise that changes with speed and cornering load. The bearing is pressed into the steering knuckle with the hub pressed through it, so the knuckle must come off the car and the old bearing and hub must be pressed out and the new parts pressed in - either with a hydraulic press (many shops will do the pressing for $30-50 if you bring them the bare knuckle) or manually with hammers and a threaded-rod puller setup as described below. Adapted from a community writeup by black magic on Honda-Tech (https://honda-tech.com/forums/suspension-brakes-54/diy-92-00-civic-wheel-bearing-replacement-2833700/), including corrections from the follow-up discussion.
Procedure
14 steps-
Step 1: Crack the 32mm axle nut loose
With the car still on the ground, remove the centre cap from the wheel to expose the 32mm axle nut and crack it loose. It is extremely tight - use a long breaker bar or an impact wrench (or both). If you cannot get at it with the wheel on, do it after the car is raised with a helper standing on the brakes. Never use a torque wrench to loosen it.
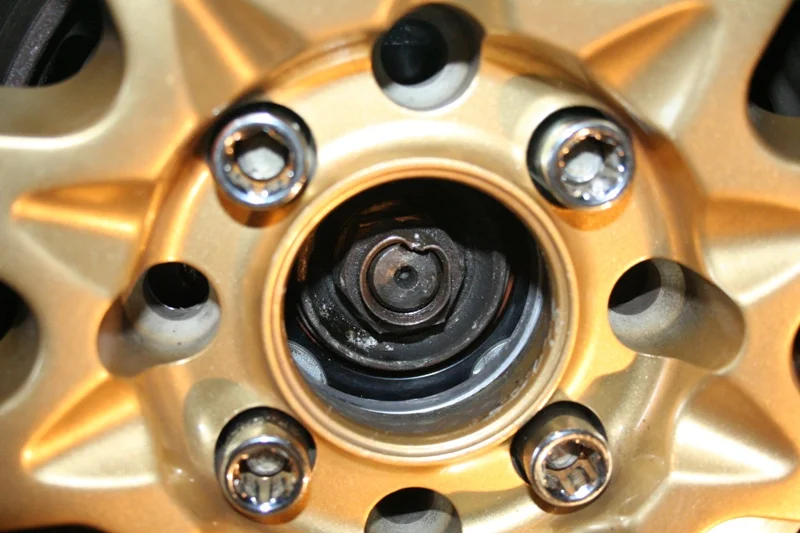
FIG. 2.1 -
Step 2: Raise the car and remove the wheel
Jack up the front of the car, support it securely on jack stands, and remove the wheel. Finish removing the 32mm axle nut if you have not already.
-
Step 3: Remove the brake caliper and rotor
Undo the two 17mm bolts mounting the caliper to the knuckle and remove the caliper. Then remove the two Phillips screws retaining the brake rotor and take the rotor off. Use an impact driver on these screws - not an impact wrench - as they are usually seized and strip easily; badly seized screws may need to be drilled out.
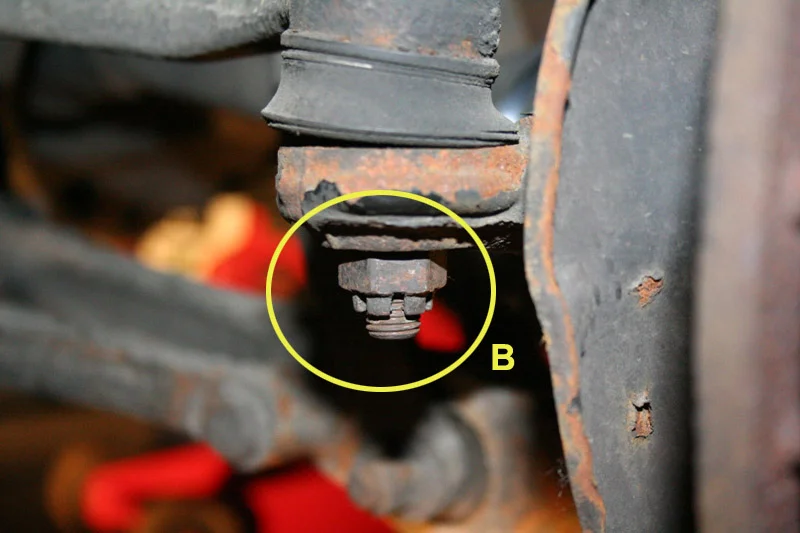
FIG. 2.3 -
Step 4: Free the knuckle: castle nuts, cotter pins and ABS sensor
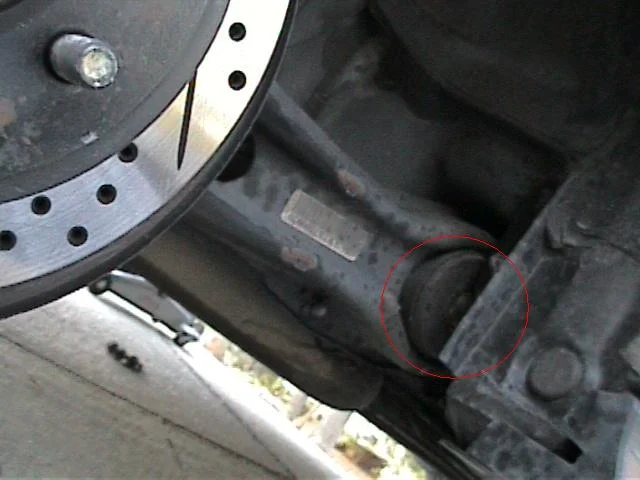
Three castle nuts hold the knuckle to the car (labeled A, B and C in the original diagram - the lower ball joint, upper ball joint and tie rod end). Remove the cotter pin from each, then remove the nuts. If the car has ABS, also remove the wheel speed sensor from the knuckle - four 10mm bolts.
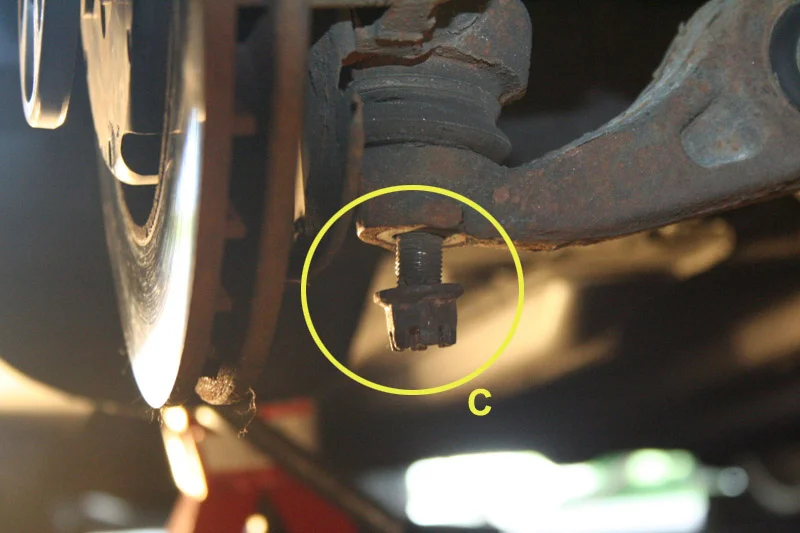
FIG. 2.4 -
Step 5: Remove the knuckle from the car
Carefully work the knuckle off its three joints - the lower ball joint's castle nut may need some persuasion with a pry bar. The axle ought to slide straight out of the hub; if it does not, tap it lightly with a hammer. With the knuckle on the bench, turn it over and the wheel bearing is visible from the back.
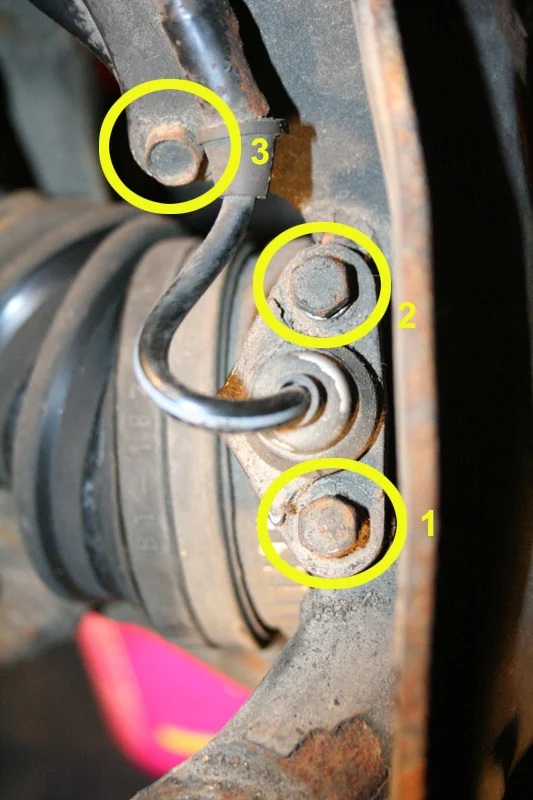
FIG. 2.5 -
Step 6: Drive the hub out of the bearing
Support the knuckle and drive the hub out using a suitably sized socket (about 1-3/8" outer diameter) and a 3 lb hammer - or press it out if you have access to a hydraulic press. Part of the bearing's inner race will usually come out stuck on the hub shaft; that is normal.
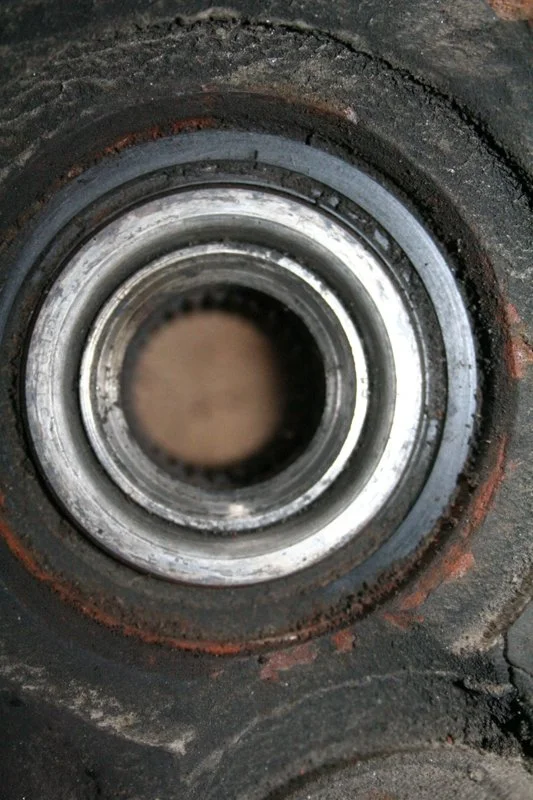
FIG. 2.6 -
Step 7: Remove the old inner race from the hub
Without a bearing puller or press, the stuck inner race is removed by grinding: buzz material off the race with an angle grinder until it starts to discolor (black/blue/purple) as you approach the hub shaft. The race section nearer the wheel studs is thicker. A gap separates the hub face from the bearing race - understand where that separation is before grinding. A small nick in the hub shaft is fine, but do not gouge it. Get close, break the race through with a chisel, then walk it off the shaft with channel locks, turning back and forth. Dress any nicks on the shaft with a file or emery cloth so the new bearing cannot hang up on an imperfection.
-
Step 8: Remove the snap ring and drive out the old bearing
An internal snap ring sits at the front of the bearing bore; remove it by popping it out of its rusted seat with a hammer and screwdriver, then pulling it free with needle-nose pliers (or a snap ring tool). Spray the bearing with penetrating oil on both sides, then drive it out of the knuckle: rest a 6 lb hammer (or a roughly 2-1/4" OD socket) on the bearing and strike it with the 3 lb hammer until it comes free.
-
Step 9: Clean and lubricate the bore and hub
Wipe out the knuckle bore (spindle) and the hub shaft. Apply anti-seize (or at minimum oil) to the hub shaft and to the inside of the bore where the bearing seats - it makes the pressing easier and the next replacement far less of a fight.
-
Step 10: Press in the new bearing
Note the new bearing's construction: the outer race is one piece but the inner race is in two pieces, which matters when the hub goes in. Start the bearing square in the bore - it enters about 1/4" to 3/8" by hand, which aligns it. Using 7/8" threaded rod: put a 3" diameter plate on the back of the knuckle resting on the bore edge, and a 2-3/4" diameter washer on the front face of the bearing, centred so it cannot catch the bore edge. Run the nut down with a 1/2" impact wrench (holding the far side with a wrench) and draw the bearing in until the socket stops turning, meaning it is fully seated. Reinstall the snap ring.
-
Step 11: Press in the hub
Rearrange the threaded-rod setup: a 2" diameter piece on the back side of the bearing to support the inner race (this stops the two-piece inner race being pushed out) and a 1-3/4" piece in the cup on the front of the hub. Line the hub up and draw it through until it stops. Do not try to pull the hub in with the axle - it does not work. The knuckle is now rebuilt.
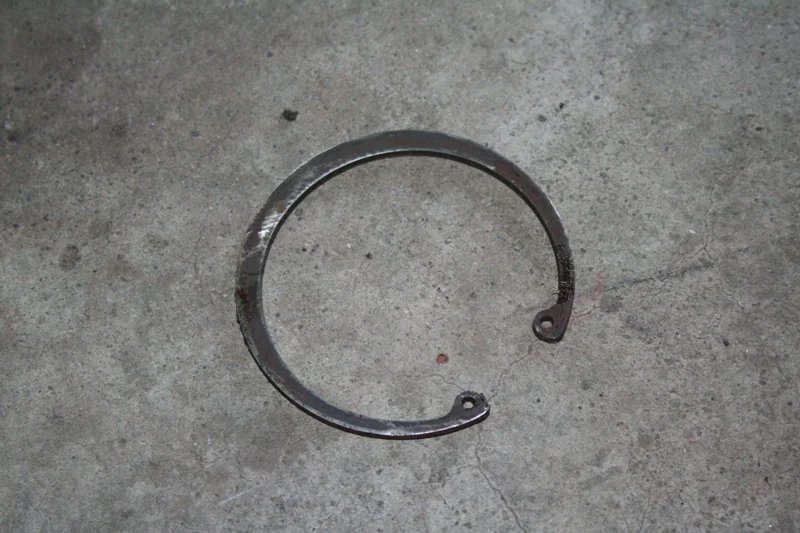
FIG. 2.11 -
Step 12: Reinstall the knuckle and torque the castle nuts
Refit the knuckle and ABS sensor in the reverse order of removal. Use NEW cotter pins in all three castle nuts. Torque the castle nuts to the specifications from the original diagram: nut A 29-35 ft-lb, nut B 33 ft-lb, nut C 36-43 ft-lb, then align each nut to the next cotter pin hole.
-
Step 13: Refit the rotor and caliper
Reinstall the brake rotor with its Phillips screws and mount the caliper. The author's aftermarket caliper mounting bolts specified 40 ft-lb; stock caliper mounting bolts are around 80 ft-lb - confirm the spec for your setup.
-
Step 14: Torque the axle nut, stake it, and test drive
Tighten the 32mm axle nut fully - either with the car back on the ground, or while raised with a helper applying the brakes. Stake the nut's collar into the axle groove using a hammer and a blunt drift so it cannot back off. Refit the wheel, lower the car, and take a test drive to confirm the noise is gone.
- Most shops will press the old bearing out and the new one in for around $30-50 if you bring them the bare knuckle - a worthwhile shortcut, since this is not a job to half-do.
- Buy an OEM Honda bearing. The original author was replacing a failed aftermarket bearing only about 1.5 years old.
- A used complete spindle/knuckle from a wrecker (about $40 with hub and bearing) can be a faster fix than pressing bearings.
- If the bearing has been noisy for a while it has often damaged the hub too - consider replacing hub and bearing together. Careless grinder work removing the old race can slice the hub shaft, ruining it for reuse.
- FWD on-car bearing kits (slide-hammer type) exist and can avoid pressing altogether, though results in rust-belt conditions were mixed.
- Aftermarket bearing sizes and specs can usually be found on RockAuto listings or by searching the bearing part number.
Related procedures
All guides →
Tap right for next · left for back · Keys: ← → step · Space / PgUp / PgDn scroll · Esc exit