Honda Civic Ambient Footwell Lighting Install with Door-Triggered Dimming
Introduction
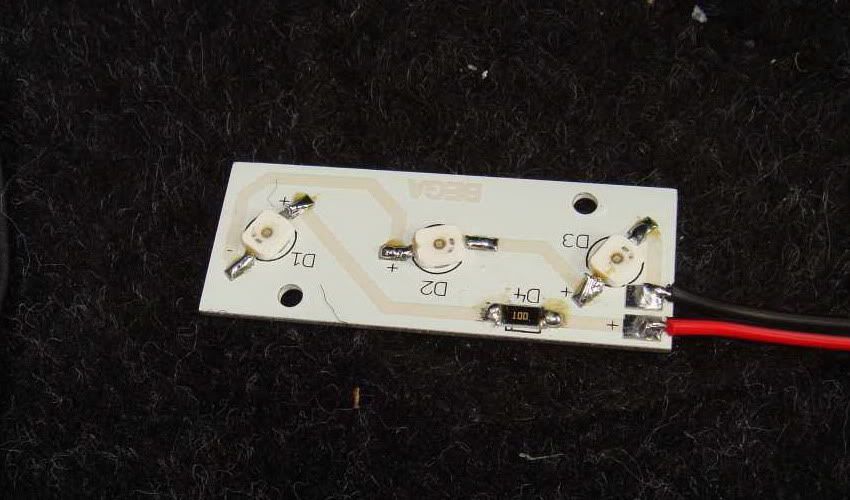
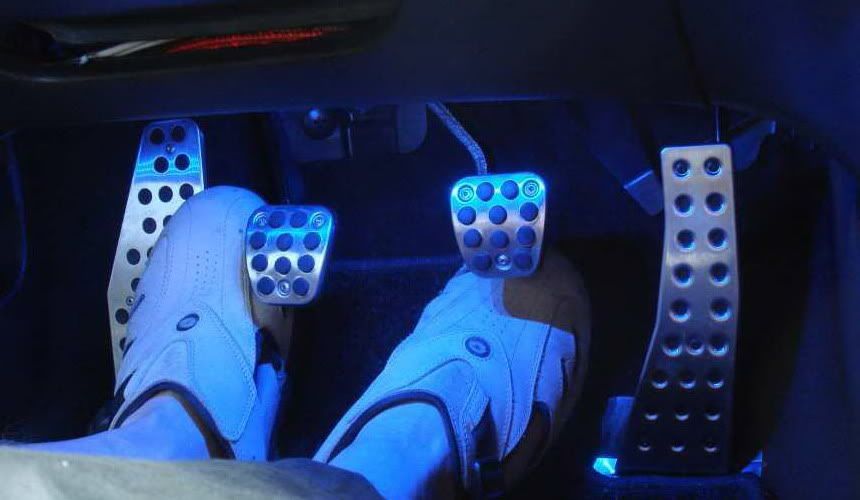
This guide adds soft ambient footwell lighting to a Honda Civic and wires it into the interior dome light circuit so the LEDs behave exactly like the factory courtesy lamps: they come up when a door opens and fade out afterward, and they remain fully compatible with the car's automatic dimming. Because the feed is taken from the dome lamp rather than a constant supply, the footwell lights are only active when the interior lights are, which keeps the install simple and avoids a separate door-trigger wire. The chosen light source is a pair of superflux LED boards, each carrying three LEDs on a thin metal plate; they draw very little current, run cool, sit flat under the dash, and stay bright enough to read as ambient light even in daylight. Plan on roughly an hour. This work involves prying interior trim, drilling a small pass-through, routing wire behind the dash and door seal, and a little soldering, which is why it rates as a moderate job rather than a beginner one. Adapted from a community writeup by ante00 on Civinfo (https://www.civinfo.com/threads/ambient-lighting-easy-install.7174/), including corrections from the follow-up discussion.
Reference
Tools Required
- Small flat-blade screwdriver (trim removal and lens prying)
- Electric drill with a small bit
- Soldering iron and solder
- Crimp tool for insulated connecting terminals
Parts Required
-
2 x superflux LED boards (three LEDs each on a slim metal backing plate, ~12 EUR each)
-
Small-gauge automotive wire
-
A few small self-tapping screws
-
2 x insulated connecting/crimp terminals
Safety Warnings
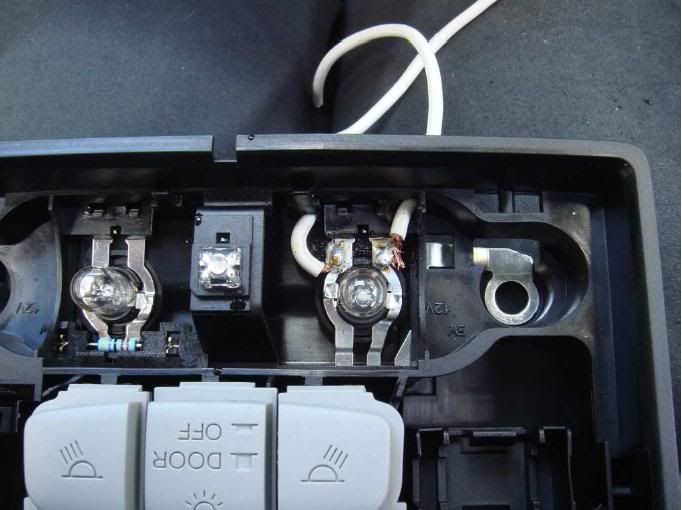
- ⚠ Confirm polarity before connecting; take the positive from the center contact of the dome lamp and avoid shorting the feed against the metal housing.
- ⚠ Drill the pass-through holes carefully and deburr them so the wire insulation is not chafed by a sharp edge over time.
Step-by-Step Instructions
1 Choose the interior dome light as the switched power source
Decide to feed the new lights from the interior dome lamp rather than a permanent supply. Tapping this circuit means the footwell LEDs inherit the factory behavior for free: they brighten when a door is opened, fade with the standard dimming, and switch off with the rest of the interior lighting. This keeps the wiring minimal because no additional door-open trigger wire is required.
2 Open the dome lamp and tap the positive contact
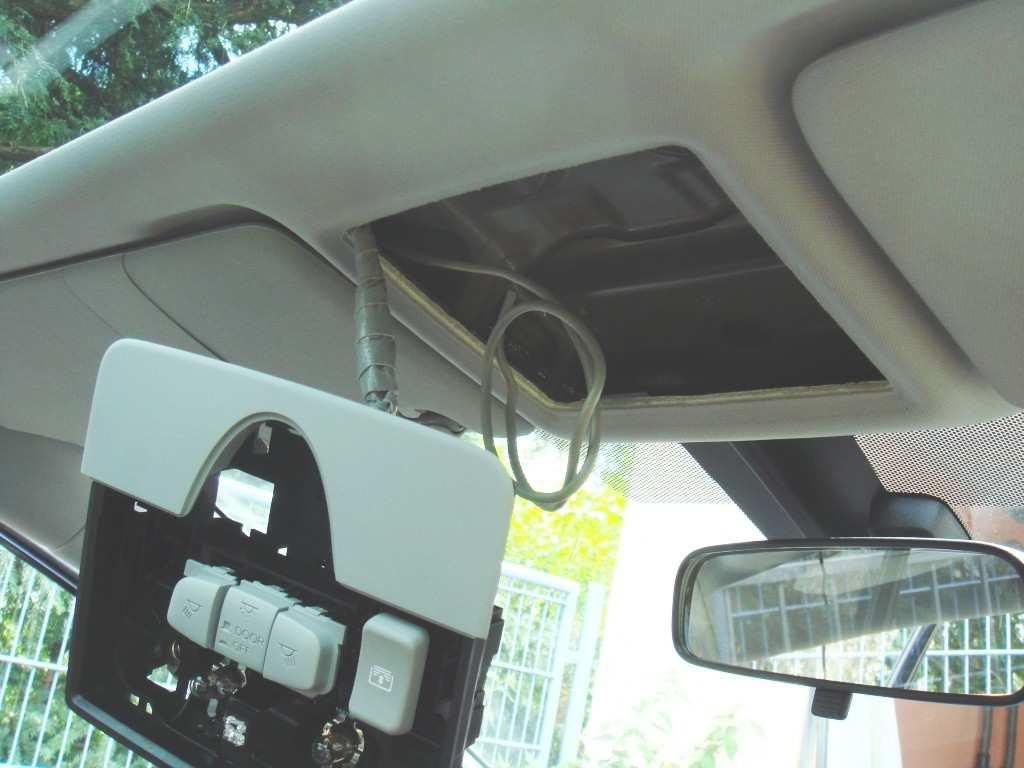
Pry the dome lamp lens away with a small flat screwdriver; on many cars a fingernail is enough to release it. The assembly is held by just two screws and unplugs from its wiring. Drill two small, clean pass-through holes for the new feed wires. Take the positive lead from the center contact and the negative from the housing ground, confirming polarity before you connect anything.
3 Route the wire down and under the door weatherstrip

Peel back the rubber weatherstrip along the driver's side door opening. Lay the new wire underneath it and run it down the pillar and forward toward the dash. The seal lifts off by hand and presses back into place without damage, so the wire is completely concealed along its whole run.
4 Mount the driver-side LED board under the dash
Remove the small side trim cap on the end of the dashboard with a screwdriver to gain access underneath. Fit the first LED board low under the dash aimed at the footwell, fixing it with a small screw; alternatively glue it or simply rest it in place if you want it easy to remove later. Pass the feed wire up into the dash cavity to meet the tapped supply.
5 Extend the circuit to the passenger footwell
Solder a length of wire to the second LED board and route it behind the center console across to the driver's side, where it ties into the same feed; the supplied wire is long enough to reach. Secure the passenger board under that side of the dash, aimed down into the footwell to match the driver's side.
6 Join the second side with crimp terminals
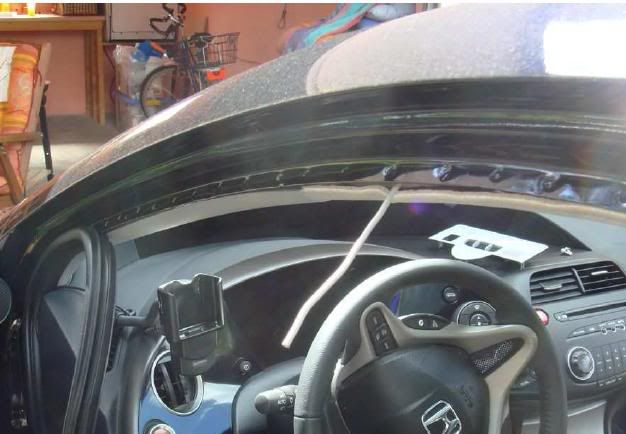
Rather than soldering the final connections on the second board, join them with insulated crimp/connecting terminals. This makes the joint reversible and lets you tap in additional LEDs in parallel later without desoldering. Reassemble the dome lamp, trim caps, and door seal, then test by opening a door to confirm the lights rise and dim with the interior lamp.
Pro Tips
- 💡 Because the feed comes from the dome lamp, the footwell lights only operate when the interior lights do, which is exactly the door-linked behavior most people want without a separate trigger wire.
- 💡 A cheaper alternative to spot-style LEDs is a blue cold-cathode neon tube powered from the glovebox; it gives a wide, even wash rather than points of light. Dim it by masking part of the tube with black electrical tape until the brightness suits you.
- 💡 Leave the crimp-terminal side accessible so you can add more LED boards in parallel later without cutting into soldered joints.
Was this guide helpful?

