K20A2 Swap into a 1996-2000 Honda Civic (EK): Mounts, Manual Conversion, Cooling and Axles
Introduction
This guide covers a complete K20A2 K-series engine swap into a 1996-2000 Honda Civic (EK), using HaSport EKK1 mounts and drawing donor parts from an Acura RSX Type-S. It walks through the full scope of the job: converting an automatic EK to a manual pedal and clutch hydraulic setup, bolting in the EKK1 mount plates to factory holes, fitting a Karcepts shifter kit so RSX cables and the shifter box sit like OEM, relocating the radiator and A/C condenser brackets, lowering the engine in, sorting the correct axle combination, and plumbing the fuel and clutch lines. It applies to EK Civics; EG chassis owners should note the mounting hardware and drilling differ. Because the EKK1 mounts pull the engine forward, cooling-fan clearance and axle length both require specific solutions detailed below. Attempt this only with fabrication access (drilling, cutting, and ideally welding) and confirm all electrical and emissions compliance for your region before driving. Adapted from a community writeup by boost_me on K20A.org (https://www.k20a.org/threads/k20a2-ek-swap-parts-list-pictures-manual-conversion-and-writeup-in-progress.7176/), including corrections from the follow-up discussion.
Reference
Tools Required
- Metric sockets 8-19mm (deep, standard, and impact)
- Breaker bar
- Impact gun and air ratchet
- Torque wrench (lb-ft)
- Screwdrivers, pry bars, needle-nose and standard pliers
- Sledgehammer and rubber mallet
- Cold chisels
- Drill with metal-cutting bits (1/4", 9/32", 11/32")
- Rotary tool (Dremel) with metal cutting wheels
- Reciprocating saw
- Bench/stone grinder
- Fluid drain pans
- Engine hoist or lift
- Welder (optional, for reattaching relocated brackets)
- CV boot clamp crimping tool (or dealer service)
Parts Required
-
HaSport EKK1 96-00 motor mount kit
-
K-series header for 88-00 Civic
-
Plug-and-play K-to-EK conversion harness
-
Type R (PRC) or equivalent K-series ECU
-
Karcepts shifter mounting kit
-
RSX Type-S shifter assembly and shift knob
-
Manual pedal set: clutch pedal, clutch pedal bracket, and manual brake pedal
-
New clutch master cylinder (wear item; buy new)
-
Clutch fluid reservoir
-
Steel-braided clutch line (no. 4 / 4AN) with 10mm x 1.0-to-4AN adapters
-
K20 fuel rail and fuel pressure regulator with AN fittings and gauge
-
Radiator hose adapter with fan switch and temp sender port
-
OEM power steering pulley with belt, thermo unit, and coolant temperature switch
-
Exhaust manifold gasket, studs, stud nuts, and flange bolts
-
Axle set: RSX Type-S inners and shafts, 92+ Prelude shaft (passenger), B-series outer CV joints
-
Slim electric radiator fan
-
Coolant, clutch fluid, and CV boot/grease kits
Safety Warnings
- ⚠ Do not tighten the rear transmission mount bolt until the gap is shimmed with the correct spacer or washers, or the mount plate will bend and be ruined.
- ⚠ A too-short passenger axle can let the inner CV roller bearings pop out under load, cornering, or suspension travel; use the correct 92+ Prelude shaft.
- ⚠ When knocking CV joints off the spline, strike the joint body and never the ball bearings, and protect the shaft end so it does not mushroom.
- ⚠ Support the radiator core with a fabricated cushion after fan relocation to avoid metal-on-metal mounting and eventual fatigue.
- ⚠ Seal the shifter plate underside thoroughly with silicone to keep engine and exhaust heat out of the cabin.
Step-by-Step Instructions
1 Prepare the engine bay
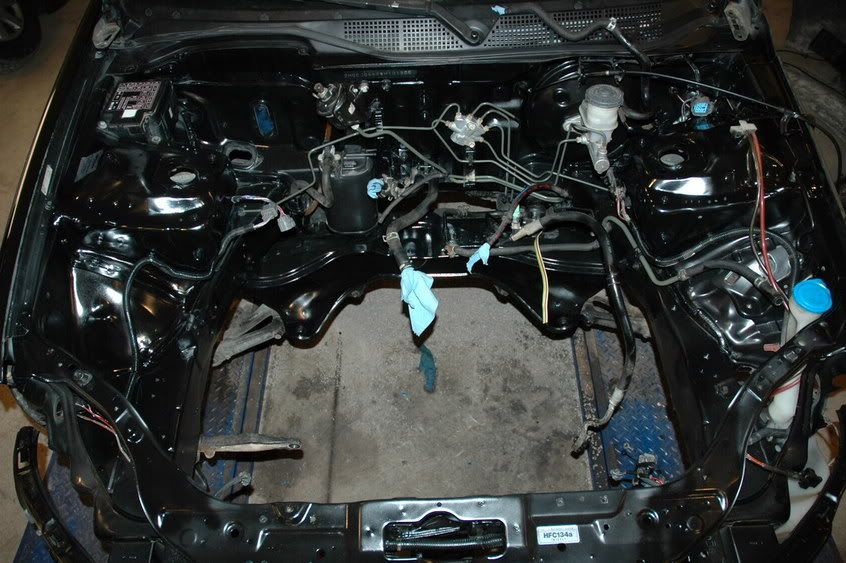
With the original engine and transmission removed, clean the engine bay thoroughly. Degrease the metal, scuff the existing paint with steel wool, and lay down a fresh coat of gloss primer if you want a presentable finished bay. This is cosmetic and optional, but it is far easier to do now than after the K-series is installed. Use the waiting time for parts to move on to the interior conversion work.
2 Swap the automatic brake pedal for the manual pedal
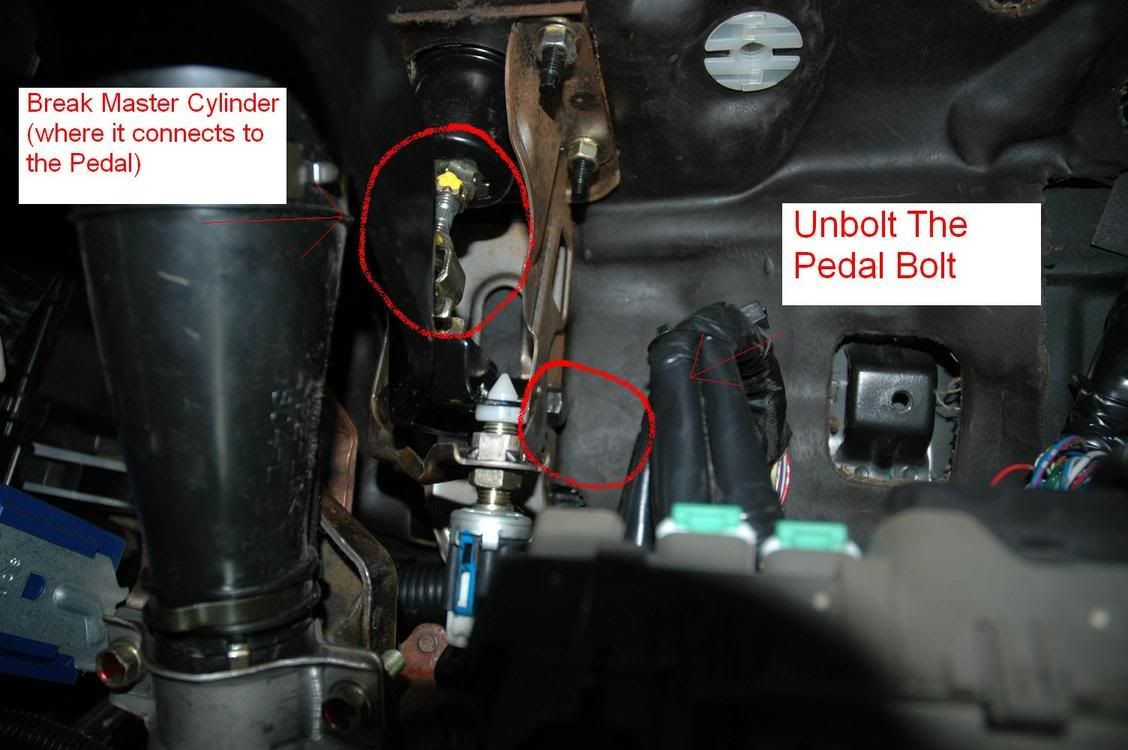
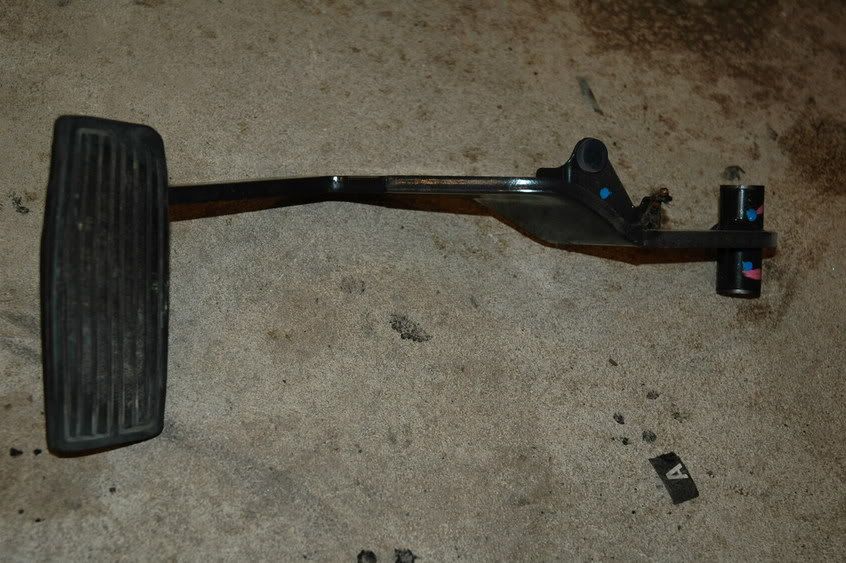
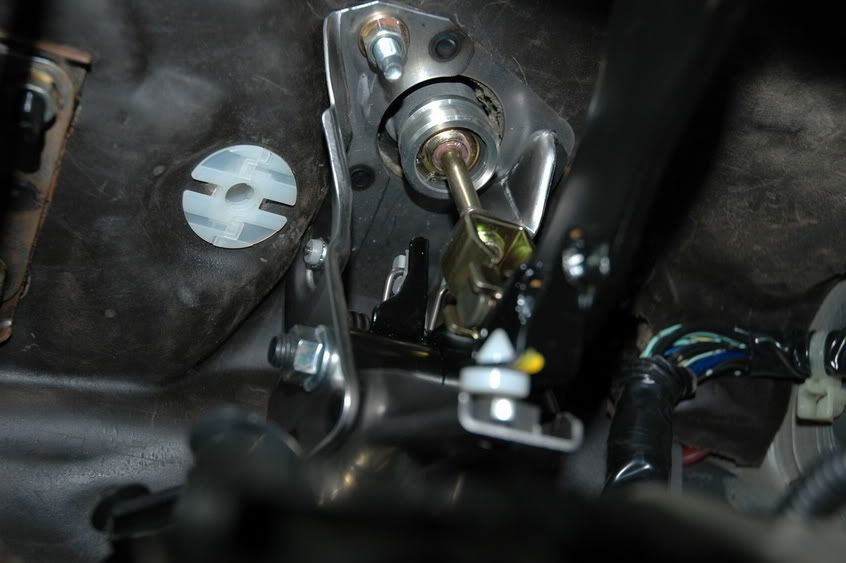
Start the auto-to-manual conversion inside the cabin. Disconnect the brake master cylinder pushrod from the pedal (leave the master cylinder on the firewall), unhook the pedal return spring, and remove the single pivot bolt to drop the automatic brake pedal out. Fit the manual brake pedal in its place: bolt the pivot first, refit the return spring (the most awkward part), then reconnect the master cylinder pushrod with its clevis bolt and cotter pin. The manual pedal is worth buying because the automatic brake pedal sits too wide and can foul your foot when working the clutch.
3 Assemble and install the clutch pedal and master cylinder
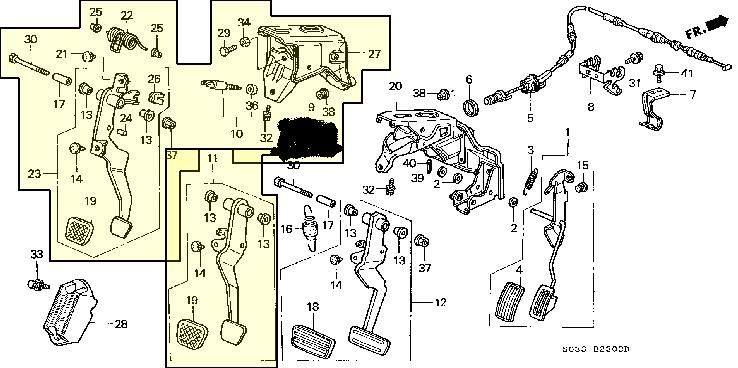
Build the clutch pedal, return spring, and all plastic bushings and stops into the pedal bracket on the bench before installing, which is far easier than doing it in the car. Pass the clutch master cylinder through the firewall from the engine bay; a second person holding it from outside helps considerably. Line the pedal bracket up to the master cylinder studs and start the two retaining nuts, then start the upper flange bolt into its hole, leaving all fasteners loose until everything is aligned. Snug the master cylinder nuts first, then tighten the top bolt. Finally attach the master cylinder pushrod to the clutch pedal's rear tang using its bolt and cotter pin, mirroring the brake pedal connection.
4 Fit the clutch reservoir and plan the master-to-slave line

Mount the clutch fluid reservoir on the engine-bay side; this is the simplest part of the hydraulic install. The full clutch line from master to slave cylinder is run later, once the engine is in. Both cylinder ports measure 1/8", so plan an adapter setup rather than a stock line: this build used a 10mm x 1.0 adapter into a 4AN fitting feeding a no. 4 steel-braided line. An alternative is to take the stock fittings to a hydraulic hose shop and have them build an adapter for a 3AN braided line.
5 Bolt the EKK1 motor mount plates to the chassis
Install the HaSport EKK1 mount plates onto the factory mount locations. On the EK chassis these bolt straight to the original mount holes with no drilling (EG chassis may require drilling). Reuse OEM bolts for the driver-side plate (two on top, one underneath) and the passenger-side plate. When removing the factory mounts, do not pull off the threaded stud plate that points straight up. Torque to HaSport's figures: passenger-side plate 43 lb-ft, driver-side plate 33 lb-ft. HaSport does not list a figure for the rear transmission plate; this build used 43 lb-ft. Critically, do not tighten the rear transmission mount bolt until any gap is shimmed: use the supplied spacer, or fill the gap with washers (three were used here) so the plate does not bend and get ruined. Follow the HaSport PDF instructions closely.
6 Install the Karcepts shifter mounting kit
Fit the Karcepts shifter plate kit so the RSX cable shifter box mounts like OEM without drilling a hole in the firewall for the cables. You will need a rotary tool, a drill, a 9/32" bit, and, if converting from an automatic, an 11/32" bit, all rated for metal. Follow the Karcepts instructions and apply the supplied silicone liberally on the underside, sealing around the bolts, cable pass-throughs, and any gaps to block engine heat. Attach the shifter-cable bracket to an existing OEM hole. Paired with the EKK1 mounts and the K-series header, this kit gives good exhaust clearance and needs no custom exhaust bends. Do not reinstall the interior trim around the shifter until the engine is in and the car is confirmed to shift correctly.
7 Relocate the radiator and A/C condenser brackets

The OEM radiator and A/C brackets must trade sides for the K-series cooling package. Free each bracket by drilling out its spot welds and prying it off, then sand the jagged edges for safety and fit. Reposition the first radiator bracket roughly where the A/C bracket was, mark the holes, center-punch them, and drill through with a 1/4" metal bit so the exit point shows where to access the nut on the far side. Space the second radiator bracket about 15.5 inches from the first. Welding the brackets back on is the cleaner method; if you cannot weld, bolt them through, using a hole saw rather than cutting a window to reach the nut for a tidier result. Mount the A/C brackets even if you are not running A/C now: place the first about half an inch from the center radiator bracket, hold the condenser in position to get it as close to the radiator as possible, and mark and drill the same way. Keep a small cup of oil to dip the bit into while drilling; it cuts better and prolongs the bit.
8 Lower the engine and transmission into the bay

Install the mount brackets onto the chassis-side plates before hanging the assembly, rather than bolting the mounts to the engine first; that sequence makes dropping the drivetrain in easier. Lower the K20A2 and transmission onto the EKK1 plates, then connect the heater core hoses and torque the mount bolts to the specifications above. Work slowly and follow the HaSport instructions; take extra time to guide the mounts together cleanly.
9 Relocate the cooling fan for EKK1 clearance
Because the EKK1 mounts sit the engine closer to the front, the factory radiator and A/C fans will not fit. Use a slim electric fan mounted on the front (grille) side of the cores rather than the engine-bay side. When you remove the factory fan you also lose the mounting brackets and rubber cushions that isolate the core, so fabricate support on the bottom of the core (dense foam plus large zip ties, for example) to avoid metal-on-metal contact, then verify it holds securely.
10 Build the axles with the correct EKK1 combination

The EKK1 swap needs specific mixed axles. For the driver side, pair an RSX Type-S inner and its shaft with a B-series outer CV joint. For the passenger side, combine an RSX Type-S inner with a 92+ Prelude shaft (a VTEC unit is recommended) and, again, a B-series outer CV joint. Do not leave the passenger side with only the RSX shaft; it comes out too short and the inner joint roller bearings can pop out of the socket under throttle, cornering, or suspension travel. To swap the outer CV joints, cut off the boot clamps (bend them with a chisel and snip with wire cutters), slide the boots back, and wipe the joints clean. Rest the axle on a block of wood and knock the outer joint off the spline with a sledgehammer, striking the body of the joint and never the ball bearings. Fit the outer joints onto the correct shafts, ideally with fresh NAPA/AutoZone boot kits (boot, two clamps, grease); align the splines and tap gently until the joint locks, protecting the end with a wood block so it does not mushroom. Reference compressed lengths inside the hub: passenger 22.5", driver 24".
11 Plumb the fuel system and pressure regulator

Fit the K20 fuel rail and the fuel pressure regulator with a mechanical gauge. This build used a SARD regulator (noted as limited for versatility) and a B&M fuel pressure gauge. Side fittings ran: 1/8" NPT to 6AN male, then 6AN female to 6AN male carrying a 1/8" gauge port, then 6AN female to a 6AN swivel. The bottom fittings ran 1/8" NPT to 4AN male, then a 4AN swivel to a barb fitting. Mount the intake and any AEM management first so you can locate a clear spot for the regulator. Set base fuel pressure and verify no leaks before starting.
12 Connect the ECU, harness, and throttle cable
Run the plug-and-play conversion harness and a K-series ECU (a Type R PRC unit was used here) to bring the engine online. If the RSX throttle cable sits slightly loose, carefully bend the throttle bracket back with large vise grips until pressing the pedal fully opens the throttle body; check that it returns and does not bind. After the engine runs, expect to chase startup issues such as a check-engine light and unstable idle tied to oxygen-sensor and air/fuel setup, and read stored codes to diagnose. Confirm the car shifts properly before reinstalling the shifter trim.
Pro Tips
- 💡 For a clean silicone edge around the shifter box, mask both sides of the gap with tape, apply the silicone between the tape lines, then peel the tape for a sharp edge.
- 💡 The Karcepts shifter kit instructions and the HaSport mount PDF are both detailed; keep them on hand throughout.
- 💡 Mount the A/C condenser brackets now even if you are not running A/C, so the option remains later without redrilling.
- 💡 A 92+ VTEC Prelude passenger shaft is the confirmed fix for passenger axle length on EKK1 mounts.
- 💡 Dip the drill bit in oil frequently when drilling the bracket holes to cut cleaner and extend bit life.
Was this guide helpful?
