Honda Fit (GD3) Clutch Delay Valve Delete via Braided -3 AN Line
Introduction
The clutch delay valve (CDV) is a small inline restrictor Honda plumbs into the hydraulic clutch line of the first-generation Fit (GD3) to slow how quickly the clutch re-engages. It smooths driveline shock for the sake of longevity but blunts pedal feel and leaves the catch point vague, which is most noticeable when trying to drive smoothly at low speed. This guide removes the CDV on a manual '08 Fit Sport by replacing the factory soft line and valve with a single stainless-steel braided -3 AN hose that runs from the clutch master cylinder down to where the transmission-mounted hard line begins. The payoff is a firmer, more communicative pedal and a clearer engagement point. Note that it does not cure a cold-engagement shudder; the discussion traces that fault to the pressure plate and clutch friction material rather than the valve, so a delete will help you modulate around the shudder but not eliminate it. The same approach suits other manual GD-chassis Fits. One fitment detail stays contested in the thread: the master-cylinder adapter that several builders ordered is a 12mm bubble flare, but the factory hard-line seat is an inverted flare, so confirm the flare type before ordering. Adapted from a community writeup by Willard on FitFreak (https://www.fitfreak.net/forums/fit-diy-repair-maintenance/69651-diy-gd3-clutch-hard-line-remove-line-cdv.html), including corrections from the follow-up discussion.
Reference
Tools Required
- 10mm flare nut wrench
- 12mm flare nut wrench
- Socket and ratchet set for the battery tray and delay-valve bracket bolts
- Basic hand tools to remove the air cleaner and battery
- Clutch bleeding kit or a helper to pump the pedal
- Shop towels or rags to catch fluid
Parts Required
-
Aeroquip Teflon -3 AN stainless braided hose, straight end for the transmission bracket and 90-degree end for the master cylinder (FBPA0039-18 for 18", FBPA0039-20 for 20"; the 24" FBPA0039-24 works but is longer than needed)
-
Russell R41411 adapter: female 10mm x 1.0 to male -3 AN, steel (Japanese-style inverted flare, joins the transmission hard line; may arrive as a pair)
-
Goodridge 305-03M121 adapter: 12mm x 1.0 to -3 AN for the master cylinder (verify flare type - see notes)
-
Fresh clutch/brake fluid for bleeding
Safety Warnings
- ⚠ Clutch and brake fluid strips paint on contact; keep rags under the fittings and rinse any spills immediately.
- ⚠ The 10mm hard-line nut rounds off easily even with a flare nut wrench, so seat the wrench fully before applying force.
- ⚠ Bleed the system completely before driving; trapped air can leave the clutch unable to disengage.
Step-by-Step Instructions
1 Clear access to the clutch hydraulics
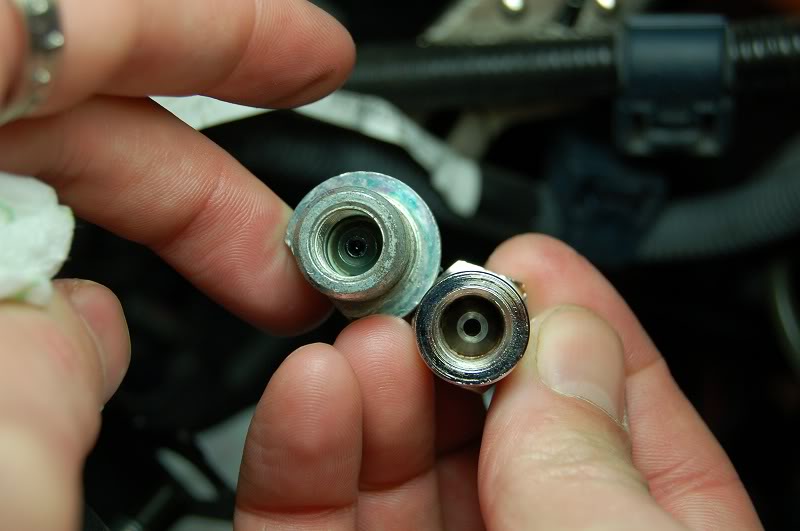
Open the hood and remove the air cleaner assembly. Disconnect and lift out the battery, then unbolt the battery tray (three bolts) to expose the clutch line, the delay valve, and its mounting bracket on the frame rail. The extra working room makes every later step far easier.
2 Identify the valve and the line routing
Trace the hydraulic path from the clutch master cylinder at the firewall down to the hard line that terminates at a bracket on top of the transmission. The delay valve sits inline in that run, held by a small bracket bolted to the frame rail. The plan is to delete both the valve and the flexible section and replace them with one continuous braided hose.
3 Catch the fluid and open the fittings
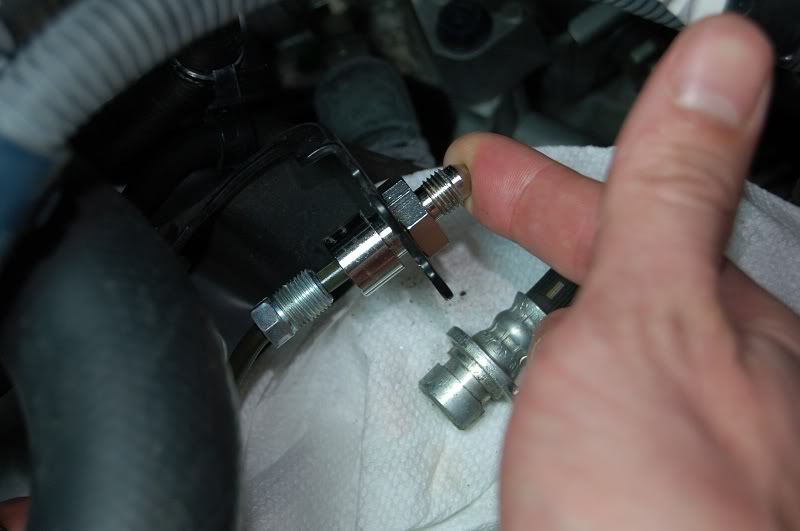
Lay towels beneath the connections to catch spillage, which attacks paint on contact. Use a 10mm flare nut wrench on the hard-line nut and a 12mm flare nut wrench at the master-cylinder end, then break each fitting loose slowly. The 10mm nut on the hard line is soft and rounds off readily, so seat the wrench fully and work it gently.
4 Remove the delay valve
Unbolt the valve's bracket from the frame rail (two bolts) and withdraw the CDV together with the original flexible line. Keep the hard-line and master-cylinder seats clean and free of debris.
5 Assemble the braided line and adapters
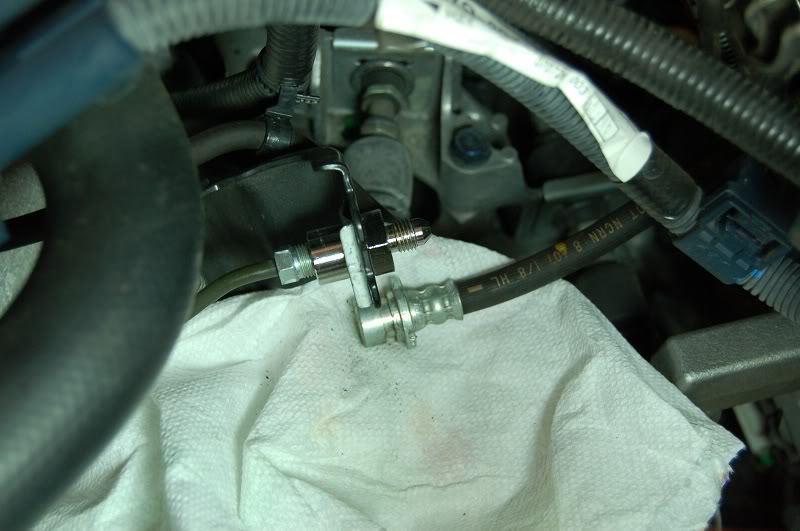
Fit the Russell R41411 adapter (female 10mm x 1.0 to male -3 AN, steel) to the transmission-side hard line; it is cut for the Japanese-style inverted flare there. At the master cylinder use the 12mm x 1.0 to -3 AN adapter, the Goodridge 305-03M121. Attach the stainless -3 AN hose with its straight end at the transmission bracket and its 90-degree end at the master cylinder. Choose an 18-inch or 20-inch hose (FBPA0039-18 or FBPA0039-20); the 24-inch length seals fine but leaves slack. Before committing, confirm the master-cylinder flare: the seat is an inverted flare while the common Goodridge part is a bubble flare.
6 Fit and tighten the new line
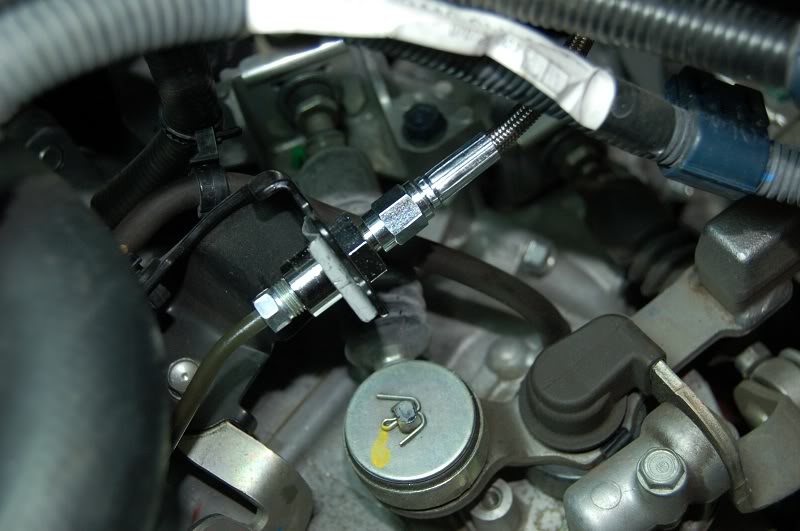
Route the hose clear of moving and hot components and thread both adapters home. Snug every joint. Seat the hose into the factory metal lock tab on the OEM bracket; it may feel tight but holds correctly. Check that neither fitting is strained or kinked.
7 Bleed the clutch
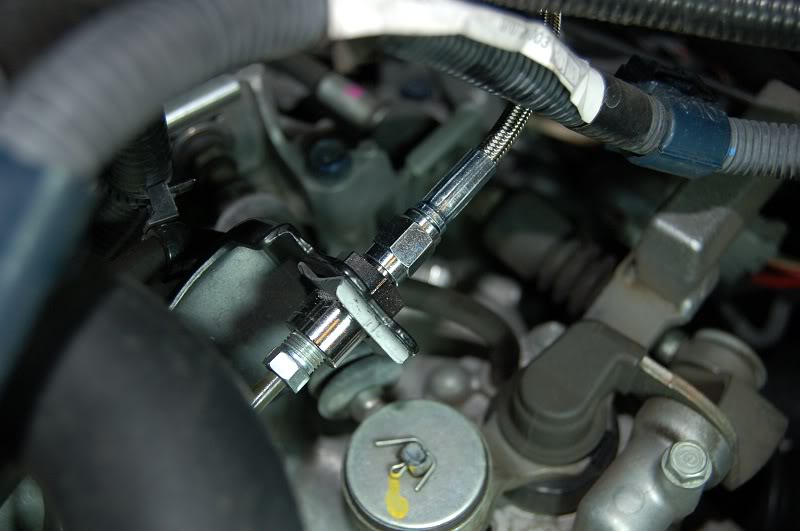
Refill and bleed the clutch hydraulic system to purge all air. Holding the new hose upright helps trapped bubbles rise and escape; once the line is full of fluid, secure it in its bracket. A firm pedal with a clean catch point confirms the bleed is complete.
8 Test and adjust
Start the engine and work the clutch through all gears at low speed to confirm smooth, leak-free operation, then recheck the fittings for weeping after the first drive. For a further gain, adjust the clutch pedal down to remove the wasted travel below the engagement point.
Pro Tips
- 💡 Order the 18-inch or 20-inch hose rather than the 24-inch; the longer line seals fine but leaves excess slack in the engine bay.
- 💡 The master-cylinder adapter is the one unresolved detail: the factory seat is an inverted flare, while the widely ordered Goodridge 305-03M121 is a bubble flare. It has sealed leak-free for some builders as a male-to-male joint, but confirm the flare before ordering.
- 💡 Removing the CDV sharpens engagement feel but will not eliminate a cold-start clutch shudder; that comes from the pressure plate and friction material, not the valve.
- 💡 Adjusting the clutch pedal down to trim excess free play (about 1/2 in. is the general rule) further tightens shifts, and stiffening the front transmission mount helps as well.
- 💡 The Russell R41411 may ship as a pair, so you may only need one of the two.
Was this guide helpful?
