Adding an Inline Magnetic Transmission Filter to the Acura RDX
Introduction
An inline magnetic transmission filter adds serviceable, external filtration to the first-generation Acura RDX (2007-2012), whose five-speed automatic carries only an internal filter and magnet that cannot be reached without splitting the transmission case. By splicing an aftermarket MagneFine filter into the transmission cooler line, you capture the steel, copper, aluminium and clutch particles that ordinary wear sheds, debris that would otherwise keep circulating and foul the solenoids, valves and fluid passages behind most automatic failures. A magnetic drain plug only holds particles that settle in the pan and saturates quickly, and any single drain exchanges just part of the total fluid, so this add-on is meant to work alongside frequent drain-and-fill services to stretch transmission life well past the factory maintenance schedule. The same method transfers to other Honda and Acura models that route fluid through an external cooler line, such as the fourth-generation TL. Adapted from a community writeup by dcmodels on AcuraZine (https://acurazine.com/forums/1g-rdx-diy-faq-161/diy-%96-add-transmission-replaceable-inline-magnetic-filter-803129/), including corrections from the follow-up discussion.
Reference
Tools Required
- Trolley jack and jack stands
- Wheel chocks
- Phillips screwdriver
- Flat screwdriver or trim tool for the push-pin body clips
- 10mm socket or wrench
- Hose cutter or sharp knife
- Large slip-joint or channel-lock pliers (to open the filter for inspection)
- Drain pan
- Low-pressure water hose for cleaning the body clips
Parts Required
-
MagneFine inline magnetic transmission filter (about 5 in long x 2.5 in diameter, with integral bypass valve)
-
Transmission-rated rubber hose, about 3 feet total
-
Hose clamps
-
Zip ties (cable ties)
-
Honda ATF-Z1 or DW-1 automatic transmission fluid for the drain-and-fill
-
Dielectric (silicone) grease
-
Replacement push-pin body clips as needed (about $3 each)
Safety Warnings
- ⚠ Installing the filter backwards can cause internal transmission damage; confirm the cooler-line flow direction and align the filter's arrow before fitting.
- ⚠ Support the car on jack stands, never on the jack alone; a falling vehicle can be fatal.
- ⚠ Inspect every new filter before use, as some MagneFine units ship with a bypass valve glued shut or a leaking top seal; the bypass should open with about 2 pounds of force, not 20.
- ⚠ When flushing dirt out of the body clips, keep water off the radiator-fan electrical connectors.
Step-by-Step Instructions
1 Raise and support the vehicle
Park on level ground, chock the rear wheels, then lift the front of the car and lower it onto jack stands before going underneath; never trust the jack alone. The cooler line and filter mounting point sit low behind the radiator, so front clearance is what you need. The passenger front wheel can stay bolted on: with the car on stands the tyre drops far enough to reach the two clips hidden inside that wheel well.
2 Remove the front splash shield
Take off the lower plastic under-panel that ties the front bumper cover to the sub-frame, since it covers the entire cooler-line area. It is held by 13 push-pin clips (8 of the short type and 5 of the long type) plus two Phillips sheet-metal screws at the outer corners that thread into speed clips on the bumper cover; two more push-pins sit inside the passenger wheel well. The long clips are used wherever three panel layers stack instead of two, so note each position for reassembly. Dirt packs into the open top end of each clip and stops the centre button from popping up: flush it out with a low-pressure hose aimed from the engine bay downward, and lever the button up at one of the moulded lines on its head rather than on the metal insert, which snaps the clip.
3 Locate the transmission cooler line
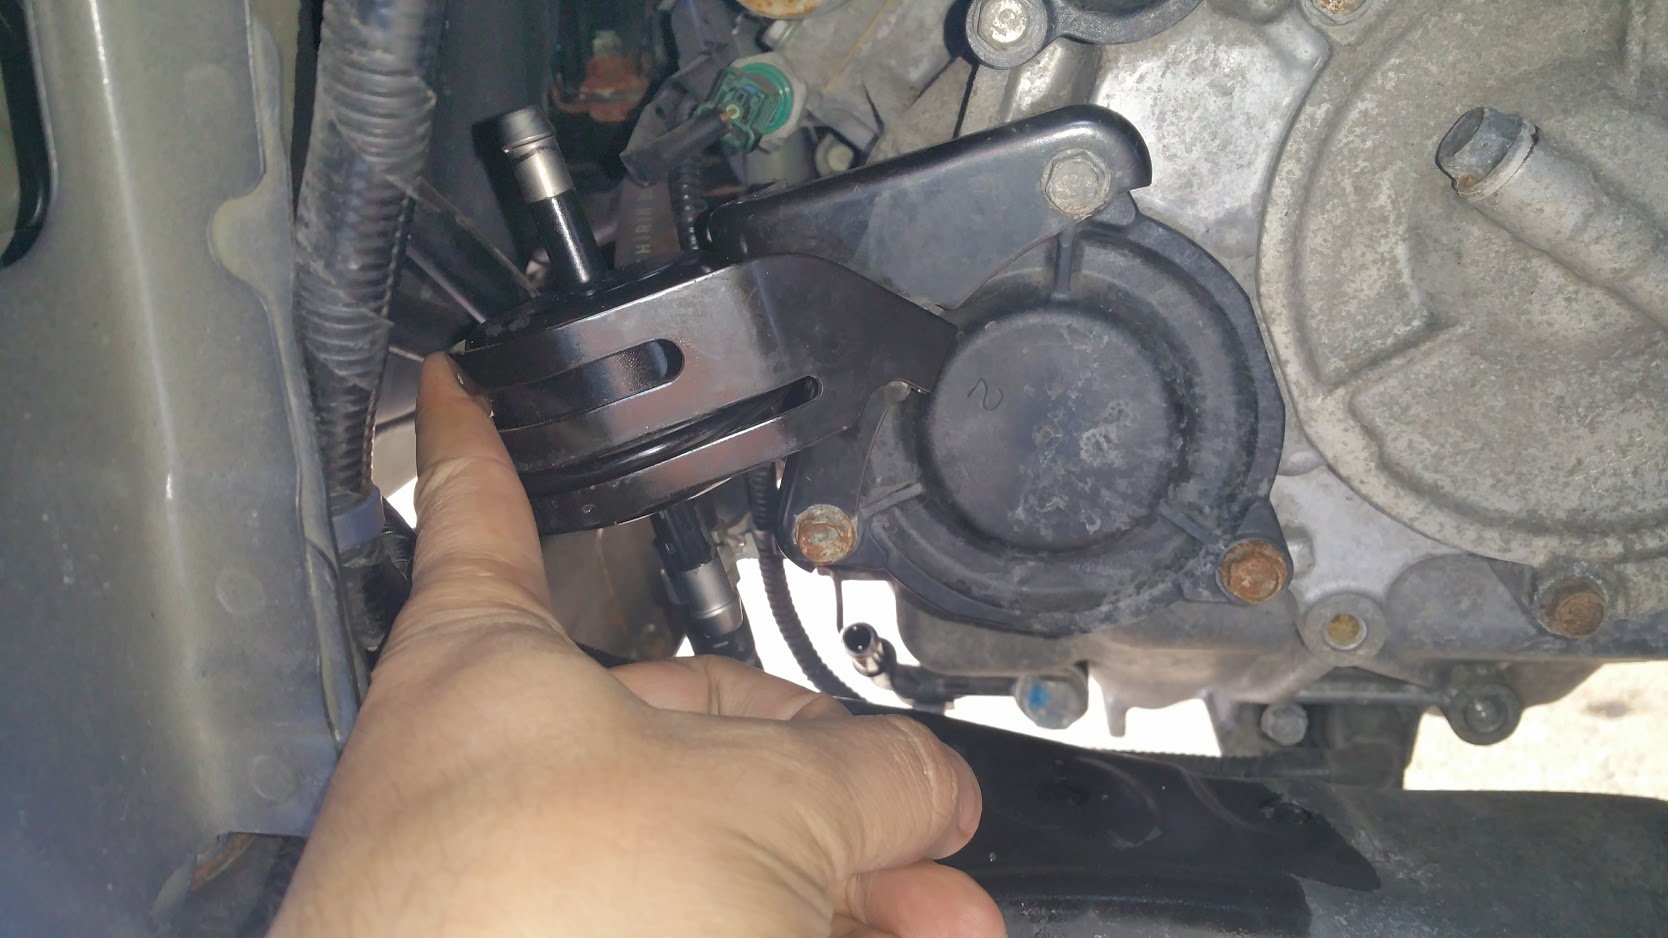
Trace the cooler circuit along the bottom front of the car. Fluid leaves the auxiliary cooler on the driver side, just ahead of the A/C condenser, and runs to the lower passenger side of the radiator, which holds an internal transmission cooler. The run is two rubber hoses joined in the middle by a short steel tube carried on a bracket that fastens to the upper sub-frame. In the OEM parts diagram these are the two hoses (parts 7 and 8) and the centre tube and bracket (part 3).
4 Determine the correct flow direction
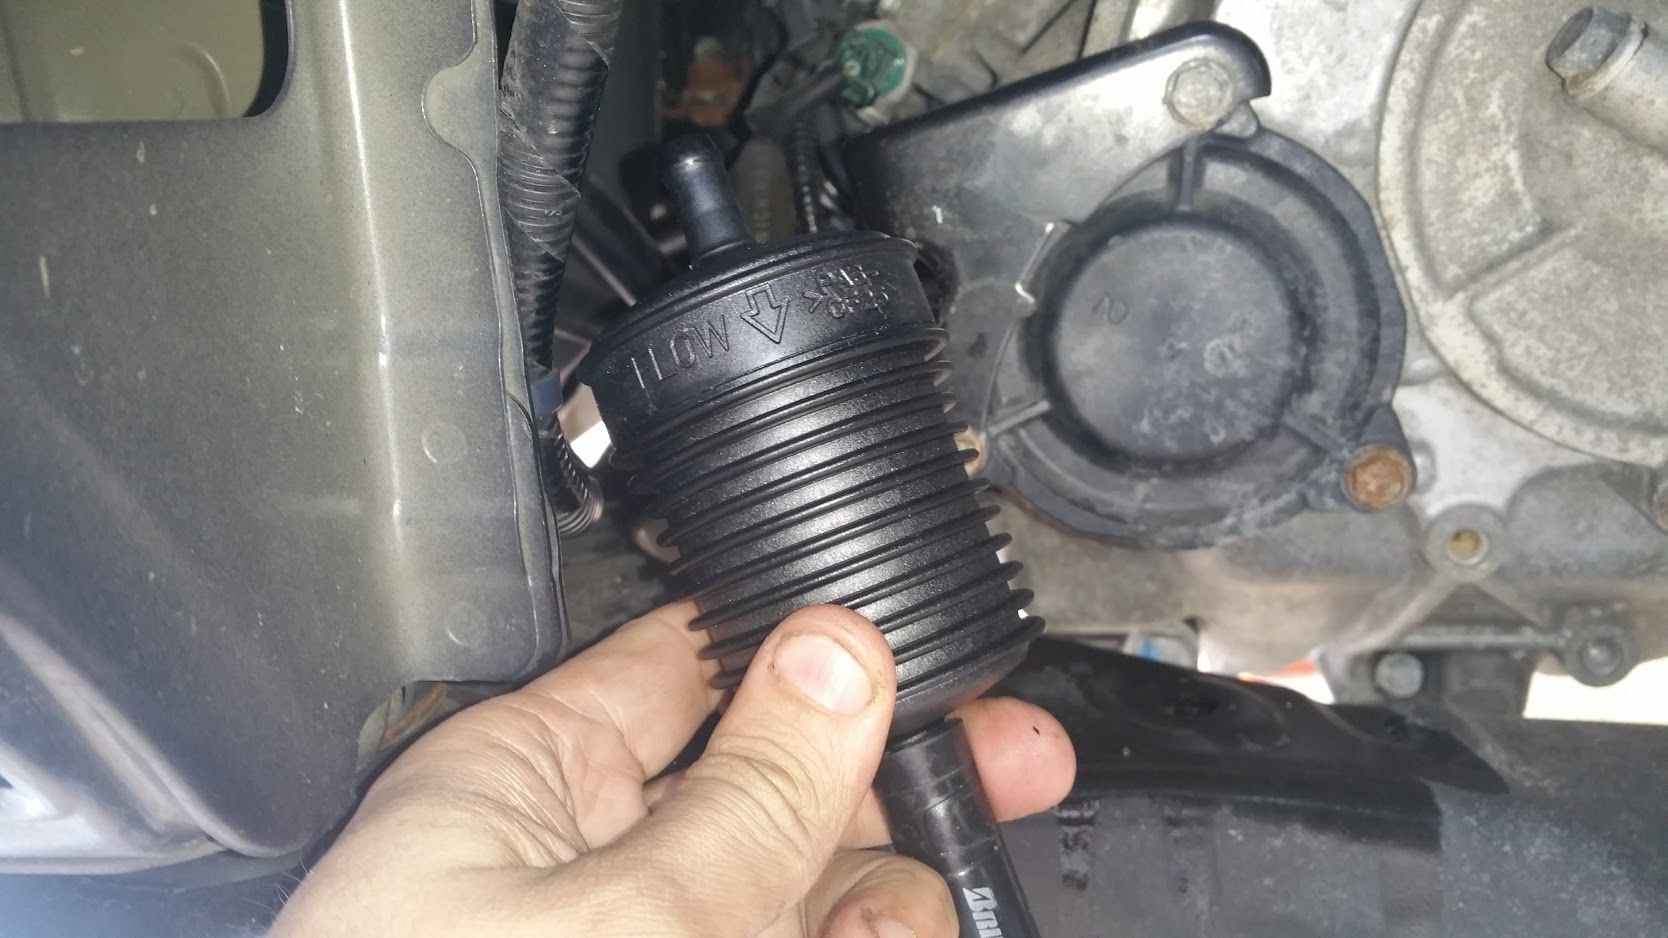
Establish which way fluid travels before disturbing the hoses, because a filter fitted backwards can damage the transmission internally. On this circuit the flow runs from the auxiliary-cooler hose toward the radiator hose, that is from part 7 to part 8. Confirm it against the arrow printed on the filter body and any supplied instructions; the arrow must point with the flow. One reader fitting a MagneFine on a fourth-generation TL guessed the direction, got it wrong, and only caught the mistake after pulling the filter and briefly starting the engine, so trace the line from the cooler outlet rather than assuming.
5 Inspect the new filter before fitting
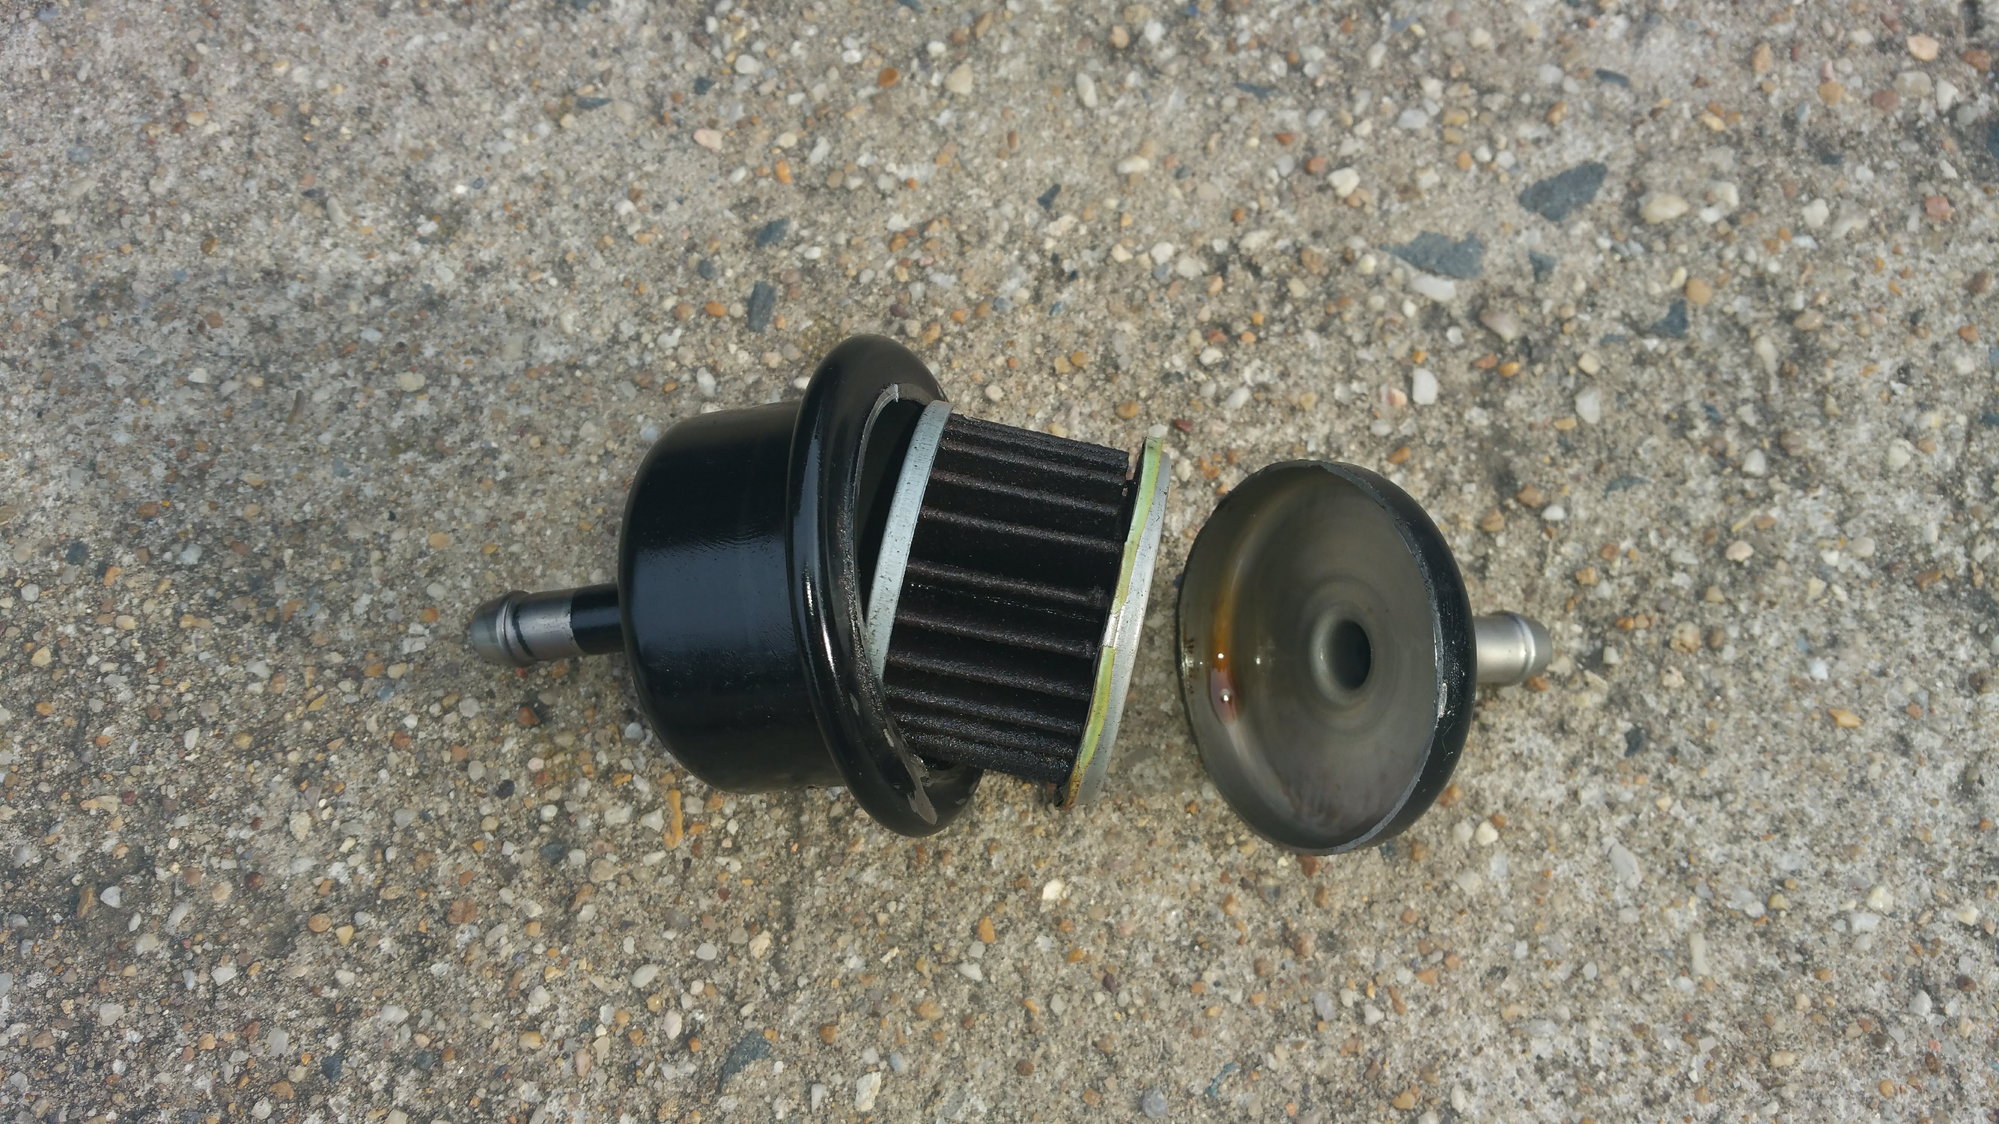
Do not assume a fresh filter is sound. Of five MagneFine units one owner bought, two were defective out of the box: one had a bypass valve glued shut by excess cartridge adhesive, the other leaked at the screw-on top seal. The top unscrews (sealed by an O-ring) with large slip-joint pliers so you can check the internals, and the built-in bypass valve should crack open under roughly 2 pounds of force, not the 20 pounds a stuck valve took. Reassemble carefully, or discard any filter that shows a fault, since a filter costs about $25 against a wrecked transmission. The unit measures about 5 inches long by 2.5 inches in diameter.
6 Remove the OEM rubber hoses
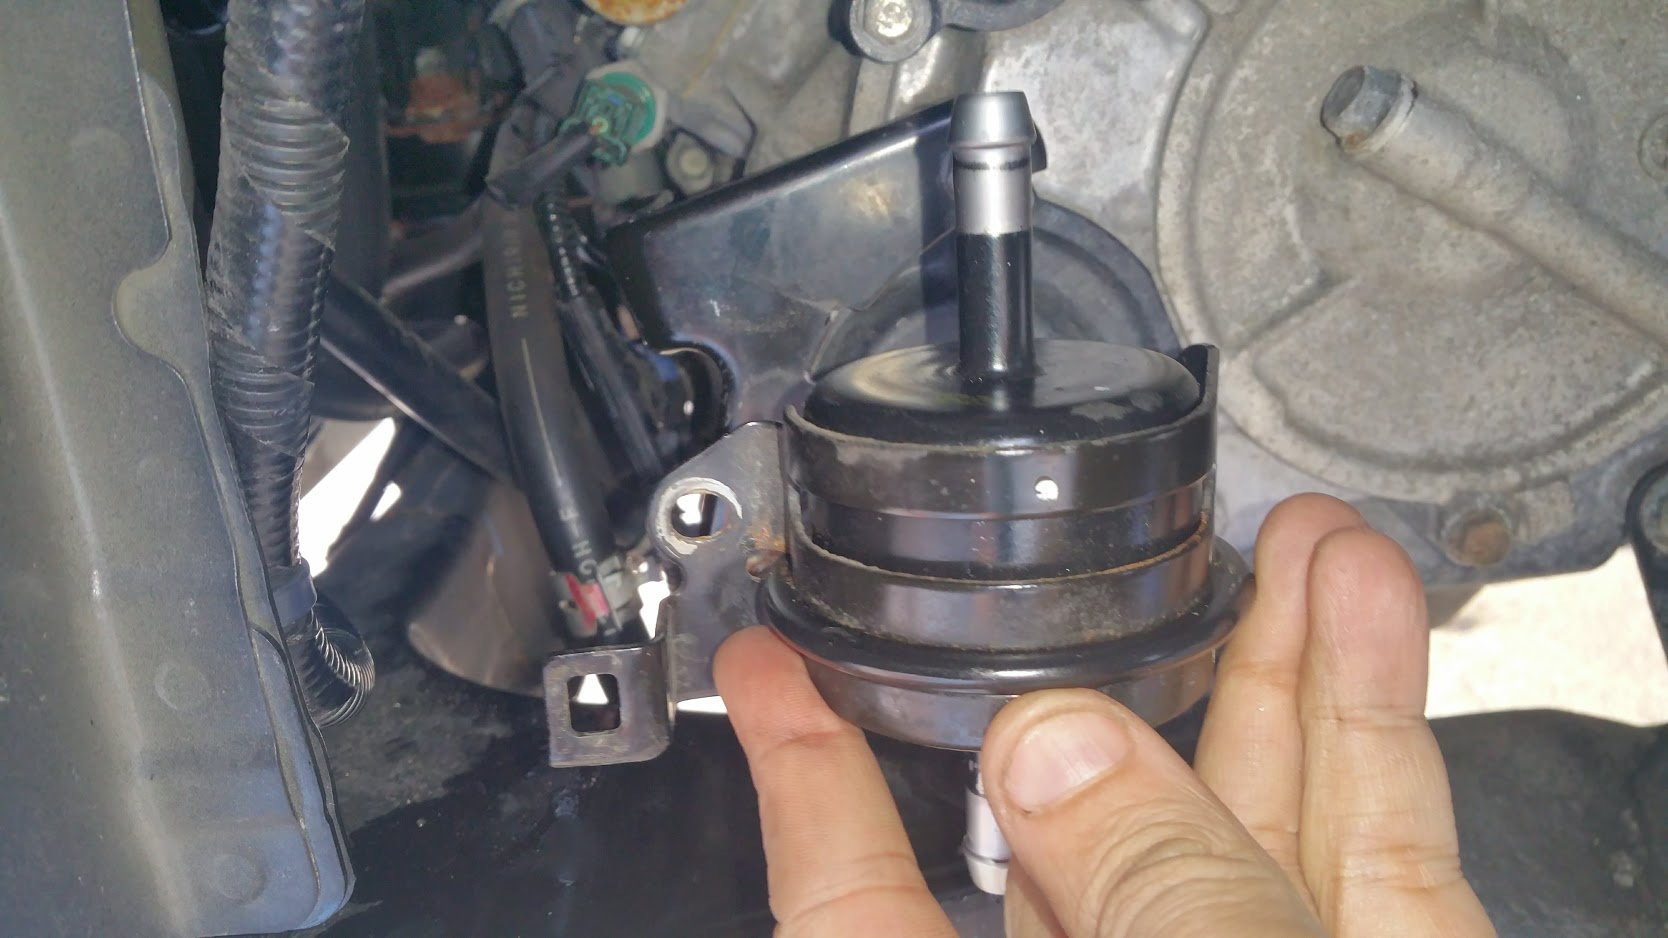
With the flow direction confirmed, pull the two rubber hoses out of the cooler run and catch the fluid that drains from the open line. Leave the central steel tube and its sub-frame bracket (part 3) bolted in place, as it becomes the filter mount. On the second-generation setup the bracket is held by a single 10mm bolt behind the filter, with a wire also routed to it from the far side.
7 Cut the replacement hose and splice in the filter
Rejoin the circuit with transmission-rated hose; about 3 feet in total is enough. Cut it to bridge each side of the filter, connect the filter inline between the two hose sections with its arrow aligned to the flow you established, and clamp every joint. Double-check the orientation one last time before tightening, since this is the point where a backwards filter would go unnoticed.
8 Secure the filter to the bracket
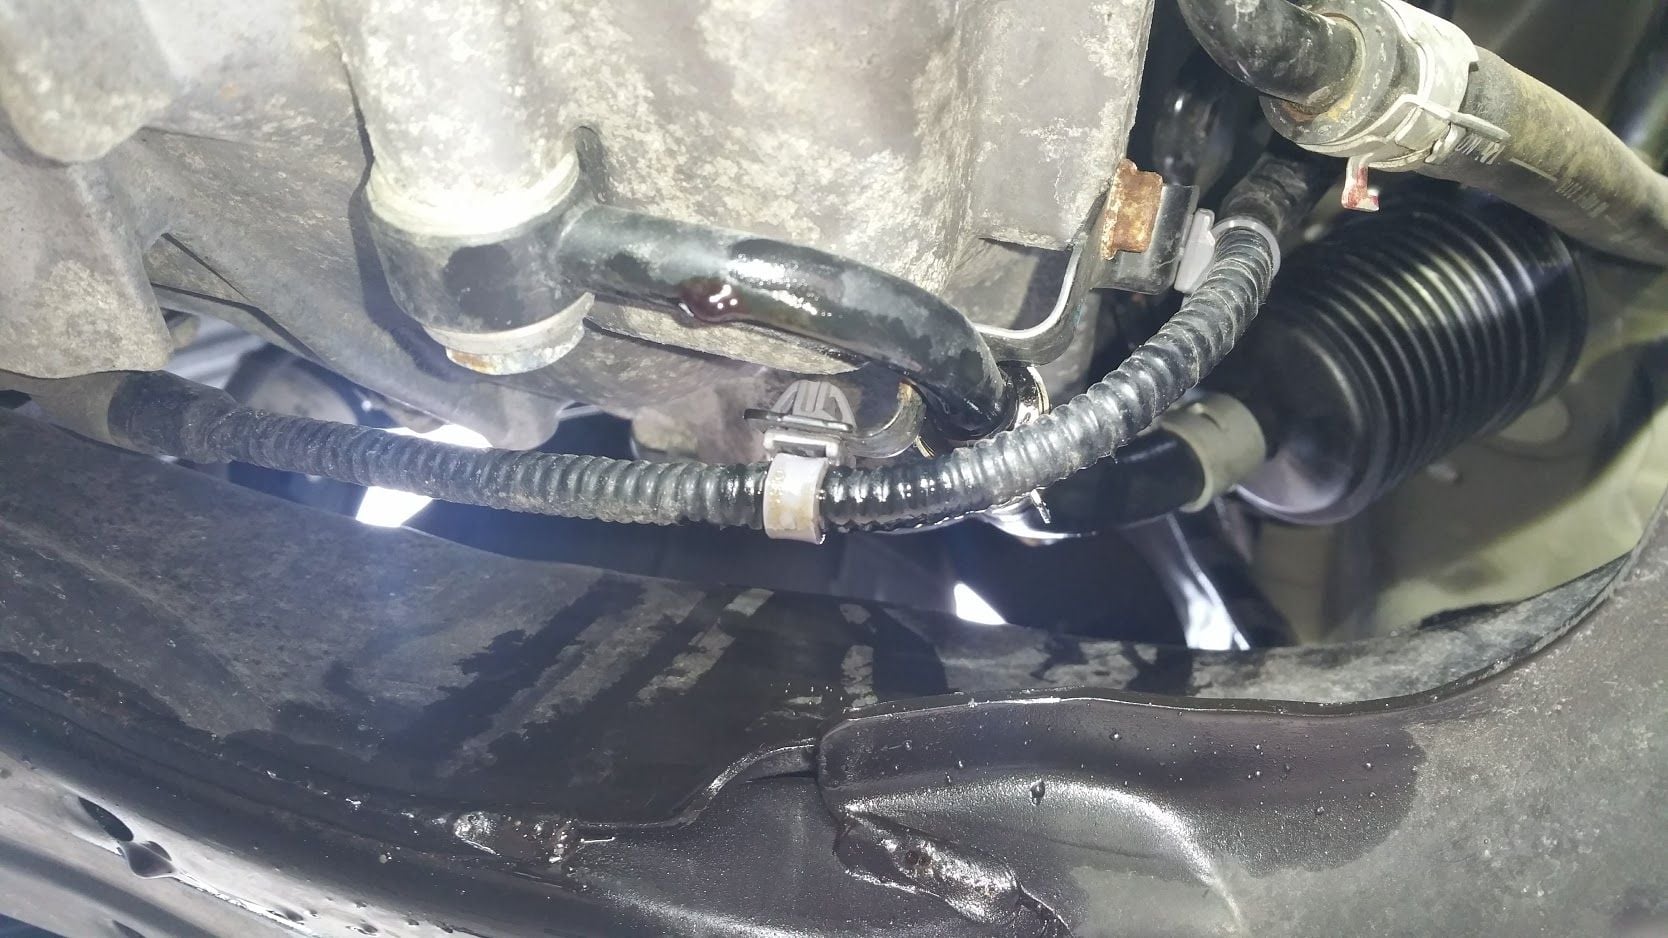
Fix the filter to the front face of the retained OEM steel-line bracket (part 3). Zip ties do the job, but because the bracket is flat and the filter round, the body can shift a little over bumps; wrapping the filter in a strip of rubber or vinyl cushions it and improves the grip.
9 Reinstall the splash shield
Refit the under-panel, returning each push-pin to the spot it came from and the two Phillips screws to the corners. Before reinserting the reusable clips, soak them in soapy water, rinse and shake them off, and dab a little dielectric (silicone) grease onto the metal insert to keep it from rusting and to ease the next removal. New clips cost about $3 each if any break.
10 Refill the ATF and check for leaks
Top the transmission back up with the specified Honda fluid (ATF-Z1, or DW-1 on later fills) and inspect every connection for weeping. A single drain-and-fill only exchanges roughly 3.5 to 4 quarts of the transmission's roughly 8.2 quarts, so schedule repeat services to keep diluting the old, contaminated fluid. Driving about 500 miles and then doing another drain-and-fill lets the new filter scrub out the remaining old ATF.
Pro Tips
- 💡 The un-replaceable internal RDX filter is P/N 25450-P4V-013 and costs under $15, but reaching it means disassembling the transmission, which is the whole reason for adding an external filter.
- 💡 After a little practice the splash shield comes off in about 10 minutes.
- 💡 Only a small fraction of the pump's output is routed through the cooler circuit, so the drain-plug magnet will catch fewer particles after the filter is added but will not come up completely clean.
- 💡 The MagneFine media is rated at 25 microns, and its magnet grabs the fine ferrous 'mud' that a bare drain plug leaves behind; that dark paste is metal, not harmless crud.
- 💡 Doing a drain-and-fill about 500 miles after installation lets the filter clean up the older fluid already in the system.
Was this guide helpful?