
Honda Manual Transmission Removal and Input Shaft Bearing Replacement
- Never work under a car supported only by a jack - use axle stands, properly placed, before going underneath.
- Never pull a driveshaft out by the shaft itself; you will pull the CV joint apart. Pry the inboard joint out of the case instead.
- Once the clutch slave cylinder is unbolted, do not press the clutch pedal, and take care not to bend the clutch hard line.
- Support the engine under the sump (on wood) before removing any transmission bolts or mounts.
- Never let the transmission hang on the input shaft splines during removal or refitting - it can damage the splines, input shaft and clutch.
- Disconnect the negative battery terminal before starting - you will be unbolting the starter motor's live connections.
Introduction
This procedure removes the manual transmission from a Honda Civic (D-series shown; the B-series gearbox is essentially the same) and replaces the input shaft bearing (ISB), the usual culprit behind gearbox whine that changes with clutch engagement. The first half - getting the gearbox out - is identical to what you would do for a clutch, flywheel, release bearing or rear main seal job, so it doubles as a clutch replacement guide. Everything is done on jack stands with hand tools; the only genuinely fiddly parts are popping the lower ball joints, the shift linkage spring pin, and the countershaft snap ring inside the case. While the box is apart, inspect and replace any other worn bearings and all the oil seals so you never have to do this twice. Adapted from a community writeup by wynode on OzHonda (https://ozhonda.com/forum/showthread.php?12789-DIY-Tranny-removal-and-Input-Shaft-Bearing-change), including corrections from the follow-up discussion.
Procedure
15 steps-
Step 1: Raise the car and drain the gearbox oil
Jack up the front of the car and support it securely on axle stands. Remove both front wheels and disconnect the negative battery terminal. Through the driver-side wheel arch, undo the gearbox oil drain bolt and drain all the fluid.
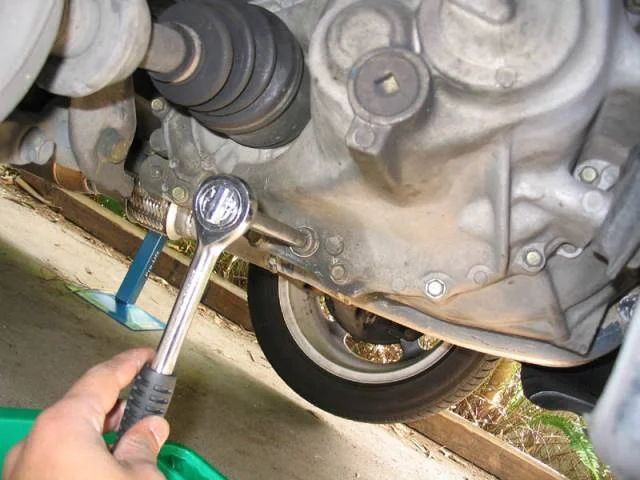
FIG. 2.1 -
Step 2: Pop the lower ball joints
The original write-up removes the 32mm hub nut first (lift its staked tab with a flat screwdriver, then crack the nut with an impact gun or breaker bar), but the follow-up discussion agreed you can skip the hub nut entirely and simply pop the ball joints and pull the complete driveshafts out of the box. To pop a lower ball joint without hammering the control arm: place the jack under the lower control arm and raise the hub assembly, remove the cotter pin from the castle nut, undo the castle nut but leave it on by a few turns, then wedge the end of a breaker bar securely between the lower control arm and the ball joint holder. Lower the jack and the loaded suspension will crack the joint; if it doesn't, give the hub a firm downward push with your foot.
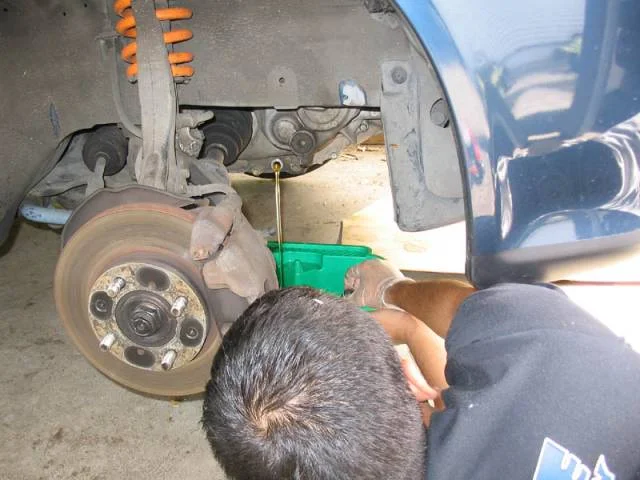
FIG. 2.2 -
Step 3: Separate the driveshafts from the transmission
If you removed the hub nut, push the axle tip back through the centre of the hub (drive it with a socket extension and hammer if tight) and let the shaft hang free. On the driver side, never pull on the shaft itself or you will pop the CV joints apart - wedge a screwdriver into the gap separating the inboard joint from the transmission casing and pry the joint out of the case, supporting the shaft as it comes free. On the passenger side, undo the three bolts near the oil filter that retain the intermediate shaft, then slide the passenger driveshaft and intermediate shaft out together as one piece.
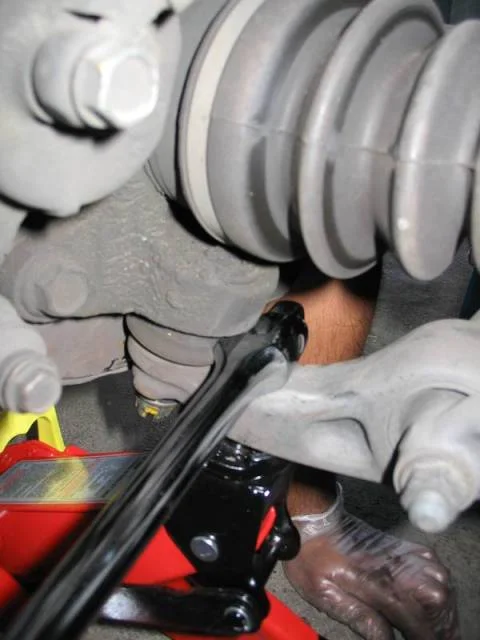
FIG. 2.3 -
Step 4: Remove the underside brackets and flywheel cover
While under the car, remove the two bolts connecting the rear torsion mount to the transmission, plus the additional bolt connecting the engine to the transmission near it. Remove the 3-4 bolts holding the flywheel cover in place. Note from the replies: with a stock exhaust manifold, the 2-into-1 exit pipe must be removed (5 bolts plus 2 spring-loaded bolts) to access the flywheel cover.
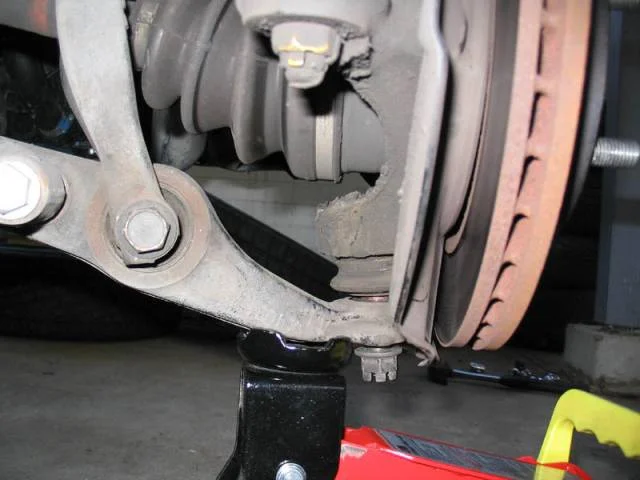
FIG. 2.4 -
Step 5: Disconnect the shift linkages
There are two rods: the gear-change linkage and the stabiliser. The stabiliser comes off by simply undoing its bolt. The gear-change rod is retained by a spring pin that needs serious pounding with a pin punch to drive out - a much easier alternative used by the author (and confirmed by others) is to unbolt the linkage at the base of the gear lever inside the car instead and lower the transmission with the linkage still attached. Do not try to undo the split pins on the rod itself.
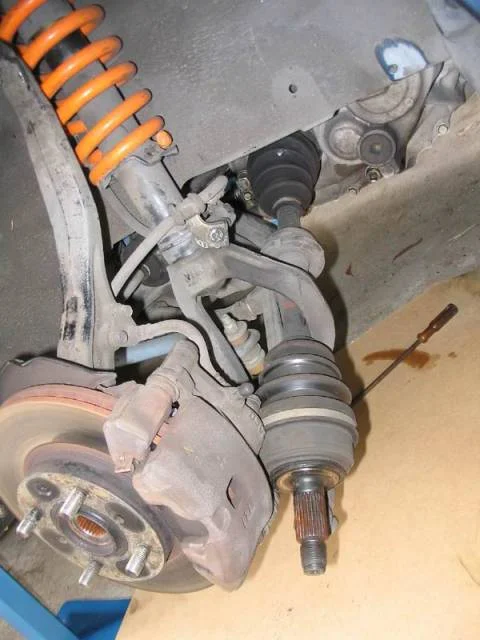
FIG. 2.5 -
Step 6: Unplug the electrical connectors on top of the box
Remove the airbox and intake arm for access, then unplug: the vehicle speed sensor (VSS), the backup (reverse) light switch, the O2 sensor connector, and the two connectors on the back of the starter motor. The sensors themselves can stay in place - only the connectors need to come off at this stage.
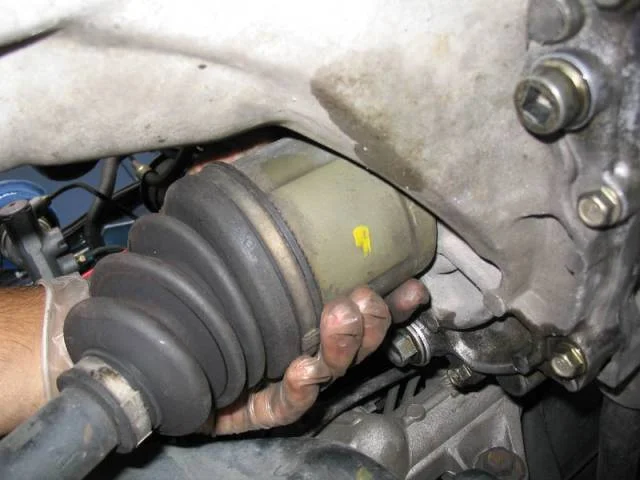
FIG. 2.6 -
Step 7: Remove the starter motor and clutch slave cylinder
Undo the two bolts on either side of the starter motor and slide it out. Remove the dust cover over the slave cylinder piston and release fork, undo the two bolts securing the slave cylinder hard line, then the two bolts holding the slave cylinder, and tie the cylinder out of the way (wire to the radiator fan bracket works). Take care that the clutch hard line never gets bent, and do not press the clutch pedal from this point on.
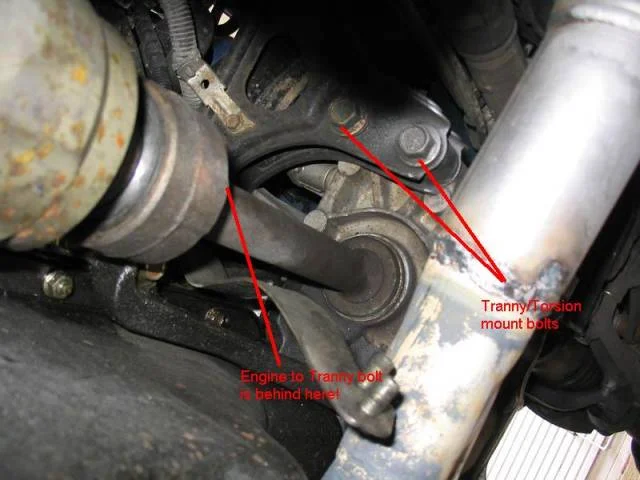
FIG. 2.7 -
Step 8: Support the engine and unbolt the transmission
Place a piece of wood on a jack and take the engine's weight beneath the sump (the wood is there to protect the sump); raise it until the engine and transmission lift slightly so you know the jack is taking the weight. Remove the five bolts holding the transmission to the engine - note one hides under where the slave cylinder sat.
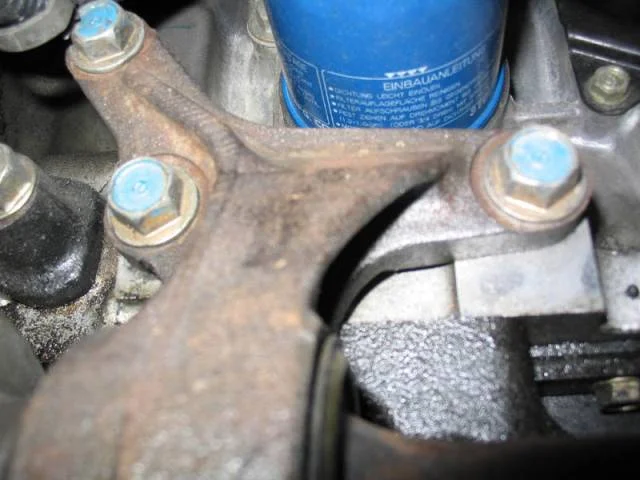
FIG. 2.8 -
Step 9: Remove the transmission mounts
Position a second jack with wood under the transmission. First remove the earth cable running from the body to the transmission, then the three bolts holding the top mount to the transmission, then the three bolts holding the front mount to the transmission. To remove the front mount completely, undo the two bolts into the body behind the splash guard.
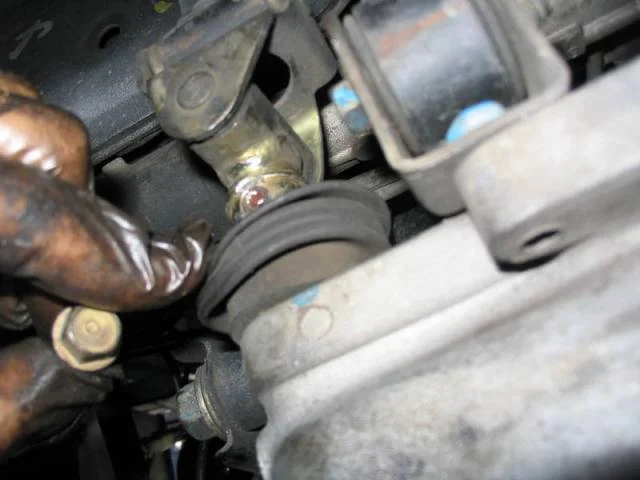
FIG. 2.9 -
Step 10: Separate and lower the transmission
With the box supported on the jack, lean over the driver-side quarter panel and shake the transmission side to side to break it free from the engine. If it is stubborn, tap with a hammer against the release-fork opening, then against the opposite end near the diff casing, alternating until it lets go. Keep it fully supported as it slides off - resting the box's weight on the input shaft splines can damage the splines, the input shaft and the clutch. Once the box is out, wrap tape around the input shaft splines so they stay protected.
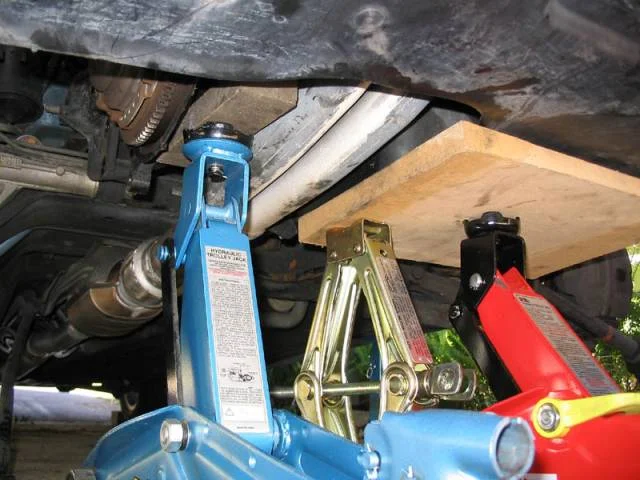
FIG. 2.10 -
Step 11: Open the transmission housing
Sit the transmission input-shaft-down on two blocks of wood so the shaft is protected. Undo the 32mm sealing bolt with a 3/8" drive, unscrew and remove the backup light switch, then, working in a criss-cross pattern, loosen the housing bolts and take them out. Use a wedge or hammer to break the transmission housing free from the clutch housing - it will not lift off yet. Spread open the snap ring that sits on the countershaft bearing using snap ring pliers (or ordinary pliers) while yanking and shimmying the case upward to work the ring out of its groove and off the bearing. This is the trickiest, most time-consuming part of the whole job. Once the snap ring releases, the housing lifts off (the mainshaft bearing also sits in it, hence the wiggling).
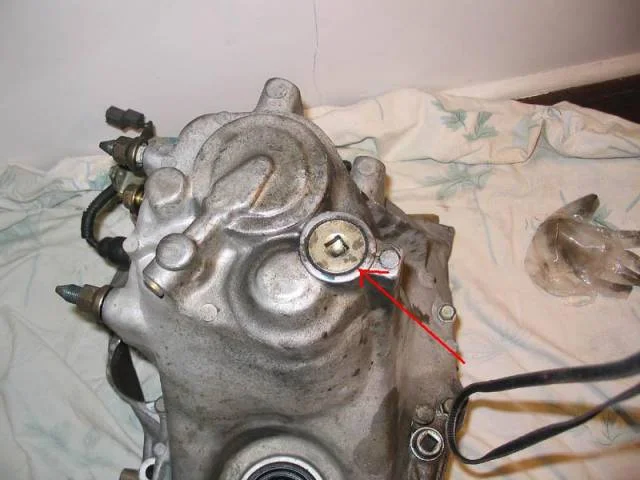
FIG. 2.11 -
Step 12: Remove the gearsets, shift forks and differential
Unbolt the reverse shift holder (two bolts), pull the reverse idler shaft straight upward, then remove the reverse idler gear. Undo the interlock guide bolt on the clutch-housing side (hex key required), then the bolt (with its washer) attaching shift arm B on top of the interlock. Now grip the mainshaft and countershaft assemblies by the gears (not by the synchro hub or collar) and pull the shafts and shift fork assemblies straight up and out together - some wiggling may be required. Lift the differential straight out of the clutch housing.
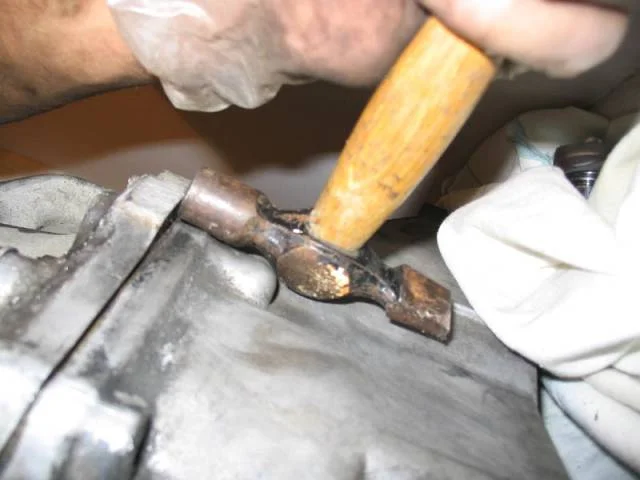
FIG. 2.12 -
Step 13: Drive out the input shaft bearing and oil seal
Working from the clutch-housing side, drive the input shaft bearing out with a long extension fitted with a 5/8" socket - anything of a suitable diameter that lets you drive the bearing through will do. If it resists, warm the case around the bearing with a hair dryer. Lever the rubber oil seal out from under it with a flat-blade screwdriver.
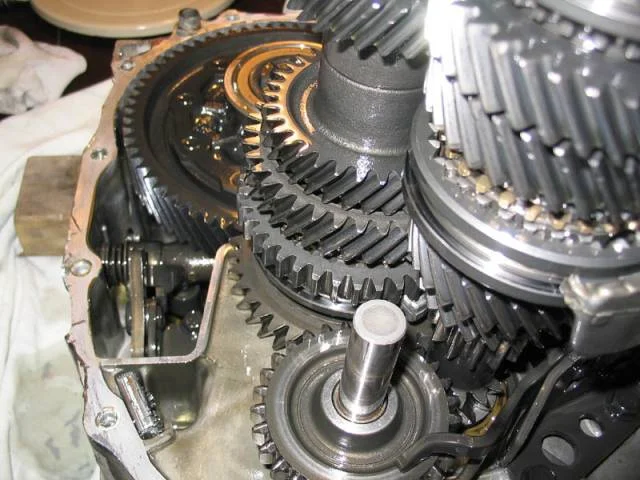
FIG. 2.13 -
Step 14: Fit the new seal and bearing
Lubricate the new oil seal with a little oil and seat it, then fit the new input shaft bearing and tap it home with even force all around. Putting the new bearing in the freezer for about 10 minutes shrinks it slightly and makes it drive in much more easily. While you are in there, check the countershaft needle bearing is fully seated in its bore and tap it back in if it has walked out.
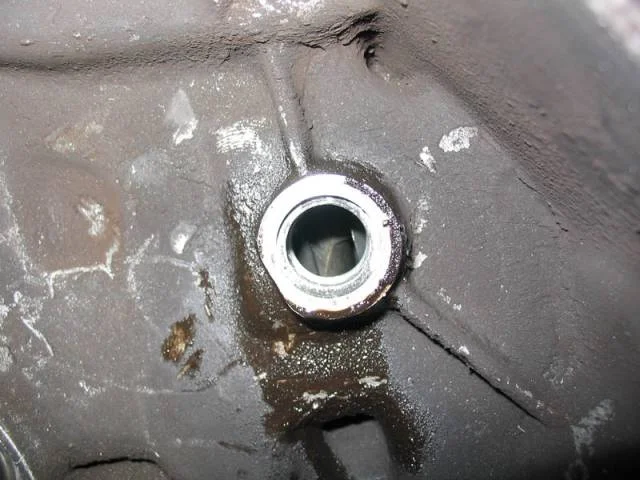
FIG. 2.14 -
Step 15: Reassemble and refill
Rebuild in reverse order: refit the differential, gearsets and shift forks, refit shift arm B and the interlock guide bolt, reverse idler and shift holder, then seal the housing joint with Hondabond, refit the housing bolts (criss-cross), the 32mm sealing bolt and the backup light switch. If gear selection needs aligning, take out the 28mm plug bolt together with the 1st/2nd select spring, which lets the interlock be turned. Refit the transmission to the engine (there is no sealant between the gearbox casing and the engine block), then reverse the removal steps: mounts, earth strap, slave cylinder, starter, connectors, linkages, flywheel cover, torsion mount, driveshafts (fresh CV grease where needed), ball joints with castle nuts and new cotter pins, and torque everything to spec. Refill with 2.5-3L of Honda MTF before driving.
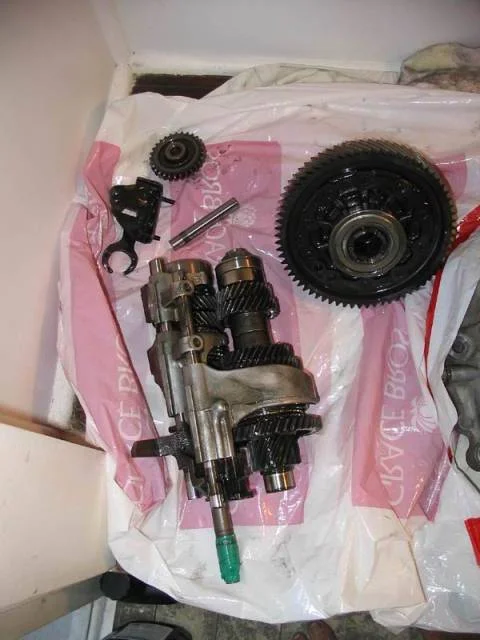
FIG. 2.15
- Skip the 32mm hub nut entirely: popping both lower ball joints and drawing the driveshafts out of the box is faster and avoids the toughest fastener on the car. If you do remove the hub nut, penetrating oil, a helper standing on the brakes and a breaker bar had it off in about 5 minutes.
- Replace all the oil seals while the box is apart, not just the bearings - one contributor replaced every bearing but reused the seals and ended up with a mainshaft leak that meant doing the entire job again.
- Check every bearing while you are in there; a manual box holds 20-30 of them and Honda parts can price them from your VIN. You do not want to open this box twice.
- The clutch release (thrust) bearing can only be changed with the gearbox out - if yours is noisy, do it now. Flywheel machining, clutch replacement and the rear main seal are also easy with the box out.
- Use genuine Honda MTF for the refill.
- A genuine input shaft bearing is cheap (quoted around AUD $37), so buy OEM.
Related procedures
All guides →
Tap right for next · left for back · Keys: ← → step · Space / PgUp / PgDn scroll · Esc exit