Acura RDX Automatic Transmission Fluid Flush by Triple Drain-and-Fill
Introduction
This guide covers refreshing the automatic transmission fluid in the first-generation Acura RDX (2.3L K23A1 i-VTEC) using three successive drain-and-fill cycles rather than a single change. A conventional drain empties only the transmission sump; the torque converter retains most of the roughly 7.8 L total, so one change swaps out under half the fluid. Repeating the drain and fill three times, with a short drive between each to blend the fluid, progressively dilutes the old fluid and approaches a full flush without a pressurized flushing machine, which Honda advises against. The payoff is smoother, more responsive shifting from clean fluid; a sensible interval is around every 30,000 miles. Honda originally specified ATF-Z1 and later superseded it with the synthetic DW-1; the two are compatible and may be mixed, and DW-1 is now the current fluid. Both front-wheel-drive and all-wheel-drive RDX models are covered, with a note where the procedure differs. Adapted from a community writeup by 737 Jock on AcuraZine (https://acurazine.com/forums/1g-rdx-diy-faq-161/diy-transmission-fluid-flush-3x-drain-fill-794451/), including corrections from the follow-up discussion.
Reference
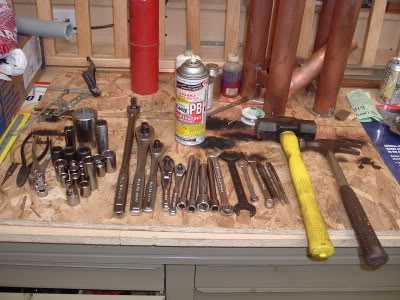
Tools Required
- 3/8-inch drive ratchet with short extension
- 10 mm wrench (for the negative battery cable)
- Small torque wrench
- Drain pan, minimum 4 litre capacity
- Clear measuring container for the drained fluid
- Measuring funnel with on/off valve, fitted with a 9 mm OD nylon hose (or a long funnel/tube that seats in the dipstick tube)
- Fluid extractor (for final level trimming)
- Eye and face protection, gloves, protective clothing
- Rags and newspaper
Parts Required
-
Honda ATF-Z1 or the later DW-1 automatic transmission fluid, one 12-quart case
-
Transmission drain plug sealing washer, part # 90471-PX4-000
-
Transmission fill plug sealing washer, part # 90441-PK4-000 (only if filling through the fill port instead of the dipstick tube)
Safety Warnings
- ⚠ Never go under the vehicle unless it is securely supported; the RDX weighs about 3950 pounds.
- ⚠ Automatic transmission fluid is hazardous and will damage paint; wear eye, face, hand, and body protection.
- ⚠ Do not confuse the transmission drain (3/8-inch square drive) with the engine oil drain (17 mm hex); draining the wrong one can destroy both the transmission and the engine.
- ⚠ Avoid pressurized aftermarket flush machines; Honda service bulletins advise against them and any resulting damage is not covered by warranty.
- ⚠ On front-wheel-drive models, do not cycle the gears with the vehicle raised on stands; this triggers VSA faults. Lower it and drive between fills.
Step-by-Step Instructions
1 Prepare the vehicle and protective gear
Work only when the transmission is cool or barely warm, with the vehicle on level concrete. Automatic transmission fluid is toxic and strips paint, so wear gloves, eye and face protection, and old clothing, and lay down newspaper and rags to catch spills. Disconnect the negative battery cable with a 10 mm wrench as a routine safety measure before working underneath. If you raise the vehicle, support it on rated stands and confirm it cannot move; the RDX weighs roughly 3950 pounds. Throughout, treat left as the driver side and right as the passenger side relative to the vehicle, not to where you are standing.
2 Identify the correct drain plug
Beneath the engine the transmission drain and the engine oil drain sit close together and face one another, and confusing them is a classic, costly error that has left cars with a drained transmission and a badly overfilled engine. The engine oil plug accepts a 17 mm hex key and is marked. The transmission drain plug instead takes a 3/8-inch square drive. Verify you have the transmission plug before loosening anything. Viewed from directly above the bolt head, turn it counterclockwise to loosen; it is frequently torqued down very tight.
3 Drain and inspect the old fluid
Slide the drain pan under the plug and remove the bolt using the 3/8-inch drive and a short extension. Let the fluid empty into a container you can measure, since the level is hard to judge and you must return exactly the volume that came out. Honda's figure for a single drain is 3.3 L (3.5 qts). The drain bolt carries a magnet that captures metal particles; a light film of fine sludge is normal. Wipe the magnet clean and check the fluid: cherry red is healthy, while a brown cast or a burnt smell indicates heavy contamination. Comparing a drip on a white paper towel against fresh fluid makes the difference easy to see.
4 Reinstall the plug with the original washer
For the first two cycles, refit the plug using its original sealing washer and keep the new washer aside for the final fill. Clean the threads, thread the bolt back in, and snug it only lightly; there is no reason to fully torque a temporary washer you will remove again shortly.
5 Refill through the dipstick tube
The fill port sits atop the transmission below the brake fluid reservoir, about 35 cm (14 in) down and hard to reach without pulling the airbox. Rather than remove the airbox for each of three fills, add fluid through the dipstick tube. Pull and wipe the dipstick, then insert a small hose about 25 mm into the tube; a 9 mm OD nylon line on a valved measuring funnel seats snugly and does not leak. Hang the funnel from the hood latch with wire so it cannot tip, then open the valve and let in exactly the measured amount of fresh fluid. A little over three quarts flows in over roughly fifteen minutes. Reinsert the dipstick when finished. (If you prefer the fill port, remove the airbox and use fill plug washer part # 90441-PK4-000.)
6 Circulate the fluid and repeat the cycle
Reconnect the battery, tidy the work area, and drive gently for about five minutes, moving through all five forward gears and reverse so old and new fluid mix, but do not let the transmission get hot. On front-wheel-drive models, do not try to run through the gears with the wheels off the ground: the stability system reads spinning fronts against locked rears as a slide and throws VSA and other nuisance codes, so drive it on the road between cycles instead. Then repeat the drain, temporary-washer refit, and measured refill a second time.
7 Perform the third fill with the new washer
On the third and final drain, fit the fresh sealing washer (part # 90471-PX4-000) to the drain plug and tighten to 49 N-m (36 ft-lb) so the washer crushes slightly. Refill with the measured volume as before. Wipe the plug and the surrounding casing dry so that any later seepage is obvious during the leak check.
8 Set and verify the fluid level
Confirm the level with Honda's hot-check method. On level ground with the air conditioning off, warm the engine until the cooling fans cycle on a single time, then switch it off; do not allow a second fan cycle. Read the dipstick within a 60-to-90-second window after shutdown. The fluid should fall between the upper and lower marks, ideally resting at the lower edge of the upper hole. Trim as needed by adding small amounts or drawing fluid out with an extractor. This setting reads the same when the transmission is fully cold, so either condition can be used to confirm it.
9 Leak check and dispose of the old fluid
Take a final short drive, then park and inspect the cleaned drain area for any weeping. Collect the used fluid for recycling: transmission fluid and gear oil can be combined with used engine oil at a recycling centre or an independent shop that burns waste oil, but keep brake fluid and coolant separate. Plan to repeat the full three-cycle service about every 30,000 miles.
Pro Tips
- 💡 Only a little under half the total fluid drains each cycle because the torque converter retains the rest; that is why three passes are used instead of one.
- 💡 Filling through the dipstick tube avoids removing and reinstalling the airbox three times.
- 💡 Judge fluid condition by placing a drip beside fresh fluid on a white paper towel: fresh fluid spreads quickly and evenly and is cherry red; slower spread and a brown tint mean contamination.
- 💡 ATF-Z1 and DW-1 are compatible and may be mixed, which lets you transition gradually if you still have Z1 on hand.
- 💡 Reading the dipstick in the 60-to-90-second post-shutdown window gives the same level as a fully cold check, so you can verify either hot or cold.
Was this guide helpful?