Honda Fit Billet Grille Overlay Installation with Zip Ties (A/C Condenser Rock Protection)
Introduction
A mesh or bar-style grille overlay mounted over the factory front grille shields the A/C condenser and radiator from stones and road debris, a common failure point that is expensive to repair once the condenser is punctured. This method fastens a one-piece billet overlay to the existing plastic grille using hidden zip ties, so no cutting, drilling, or permanent modification of the car is needed, and the overlay can be removed later if desired. It was worked out on a second-generation Honda Fit (GE8) but transfers to the first-generation GD Fit and to most bar-type overlays, whether polished aluminum, stainless steel, or a black-anodized or Plasti-Dipped finish. Adapted from a community writeup by Triskelion on FitFreak (https://www.fitfreak.net/forums/2nd-gen-ge8-specific-fit-exterior-modifications-jdm-styling-sub-forum/72906-diy-grille-overlays-protect-c-condenser.html).
Reference
Tools Required
- Fine precision (jeweler's) screwdriver for lifting clip center pins
- 1/4 inch flat-blade screwdriver
- Masking tape
- Sharp diagonal wire cutters (for later removal)
Parts Required
-
Bar-type billet grille overlay sized for the Fit (polished aluminum or stainless steel)
-
Six heavy-duty black nylon zip ties rated about 75 pounds breaking strength (14 inch preferred, 11 inch acceptable)
-
Plasti-Dip spray coating (optional, only if blacking out a silver overlay)
Safety Warnings
- ⚠ Do not substitute cheap, unrated bulk zip ties; a tie that fails at speed can release the grille onto the road. Use ties with a known breaking strength (about 75 pounds each).
- ⚠ Keep the differently sized mushroom clips organized so each returns to its matching hole; forcing a wrong-size clip can damage the radiator cover or its mounting.
Step-by-Step Instructions
1 Identify the load-bearing anchor ribs
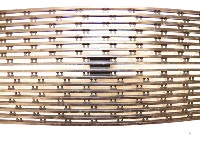
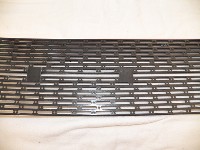
Only the vertical ribs of the stock plastic grille are strong enough to hold the overlay under wind load, so plan to tie off exclusively to those. Locate each vertical rib across the grille opening before beginning; these become your fastening points, while the thinner horizontal elements are ignored.
2 Transfer the rib positions to reference marks
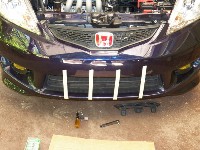
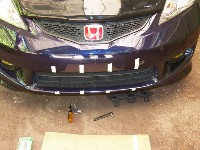
Apply short strips of masking tape over each vertical rib, then run the tape onto the top edge of the bumper and onto the plastic lip below the grille. Peel the tape away from the grille face itself, leaving only the marks on the bumper and lower lip. These reference marks show where the ribs sit once the overlay hides them from view.
3 Seat and temporarily secure the overlay
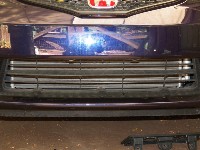
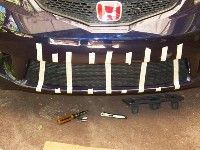
Set the billet overlay into the grille opening and hold it in place with loops of masking tape so it cannot fall out while you work behind the front end. Position it so the horizontal bars sit level and the overlay is centered in the opening.
4 Remove the radiator support cover for rear access
Detach the plastic cover that spans the radiator support and hood-latch area by releasing its push-type mushroom clips. Pry each clip's center pin upward with a fine precision screwdriver, then lever the outer collar free with a 1/4 inch flat-blade screwdriver. The clips come in more than one size, so keep them sorted and return each to the hole it came from; they survive many reuses without losing grip.
5 Select properly rated zip ties
Use heavy-duty black nylon ties with a breaking strength near 75 pounds each. The 14 inch length is easiest to manipulate behind the grille; 11 inch ties also work. Avoid unrated bulk discount ties of unknown strength, which can snap and let the overlay depart at highway speed.
6 Thread the first tie around a spacer
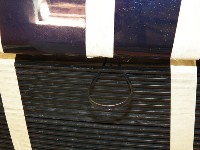
Reaching in behind the grille, push the pointed end of a tie forward through both the stock grille and the overlay, feeding it up between the top pair of horizontal bars. From the front, loop the tail back around to the rear, then draw it sideways until it snags on one of the small vertical spacers that join the bars. The ties are just the right width to pass between adjacent bars.
7 Place and tension all six ties together
Feed each tie's tip into its own ratchet head and take up the slack, but leave it slightly loose for now. Repeat at both upper corners, at each side, and at the lower center, for six ties in total. With every tie started, cinch them all down as far as they will go; the overlay seats tight against the factory grille, leaving nothing open along the top edge, the bottom edge, or either side.
8 Confirm the fit and reinstall the cover
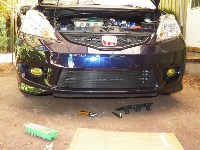
Fully tightened, the black ties vanish between the bars and the overlay sits flush and rattle-free in any weather. Refit the radiator support cover, pressing each mushroom clip back into its original hole. The install is permanent in service yet fully reversible: to remove the overlay, cut the ties from behind with sharp diagonal cutters.
Pro Tips
- 💡 Leave every tie loose until all six are threaded, then tighten them as a set; this lets the overlay self-center and pull in evenly for a gap-free fit.
- 💡 Once fully tightened, the black ties are effectively invisible between the bars, so there is no need to trim them flush for appearance.
- 💡 The mushroom clips tolerate a dozen or more removals, so there is no need to buy replacements as long as you keep them organized by size.
- 💡 A silver or bare overlay can be blacked out by scuffing it with sandpaper and coating it with Plasti-Dip spray if a black-anodized version is unavailable.
Was this guide helpful?


