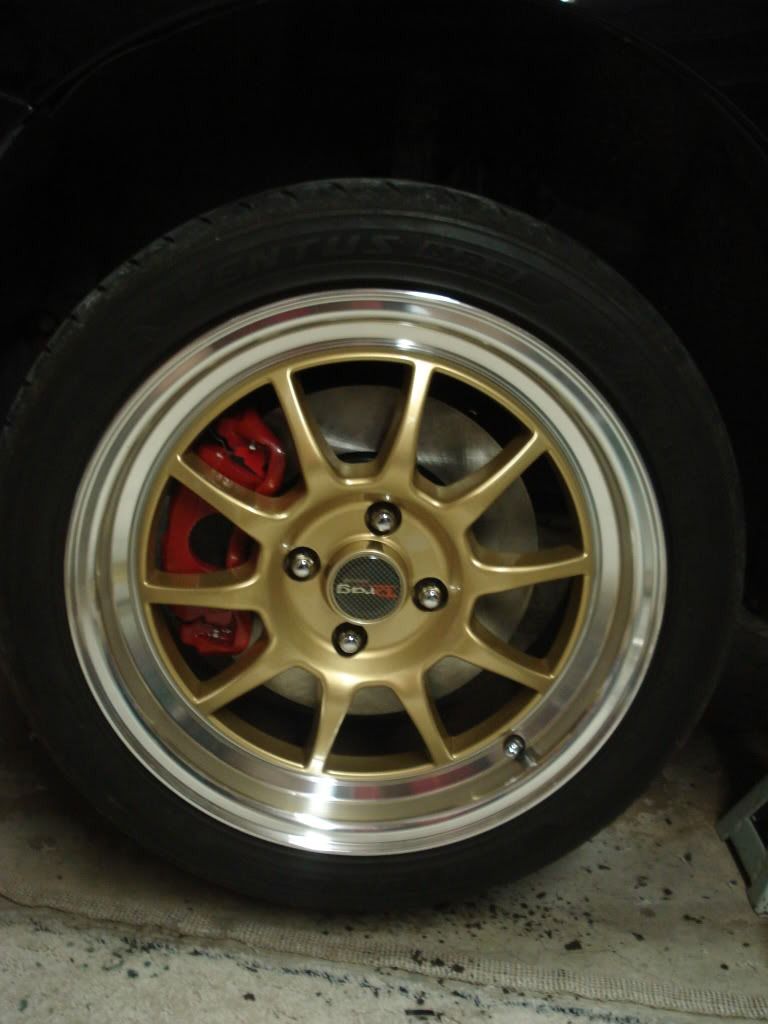
Honda Civic (FN3) Rear Brake Disc and Pad Replacement - EBC GD Grooved Discs and Yellow Stuff Pads
Introduction
This guide covers renewing the rear brake discs and pads on the eighth-generation Honda Civic (FN3, 2.2 i-CTDi, Type S), upgrading from the factory setup to EBC GD grooved discs and EBC Yellow Stuff pads. It is a worthwhile job if the rear brakes feel vague or uneven, if the discs are worn to their lip (roughly 1mm of wear per side, 2mm combined, is the usual limit), or if you simply want stronger, cleaner-running rear brakes. In this case the original pads were only about 50% worn at 23000 miles yet the braking was erratic, one rear pad had seized in its carrier, and a rear piston was found full of air rather than fluid, so the system was also flushed and refilled with DOT 5.1 fluid. Expect a full day's work if you clean and prepare the parts properly. The part codes on the boxes are specific to the 2.2 FN3, so confirm the correct references for your variant before ordering. Adapted from a community writeup by Relic on Civinfo (https://www.civinfo.com/threads/fitting-my-rear-ebc-grooved-disks-and-yellow-stuff-pads.38259/), including corrections from the follow-up discussion.
Reference
Tools Required
- Trolley jack and axle stands
- Wheel brace or socket for the wheel bolts
- Socket and ratchet set and spanners
- Torque wrench
- Tight-fitting No.3 Phillips bit
- Impact driver (recommended for corroded disc screws)
- Centre punch
- Rubber mallet
- Laser-type caliper piston wind-back (rewind) tool
- One-way brake bleed pipe or bleed kit
- Nylon brush
- Flat file (to dress the pad shoulders)
- WD40 or penetrating oil
- Safety glasses and gloves
Parts Required
-
EBC GD grooved rear brake discs (directional/handed pair; part codes vary by model, those quoted are for the 2.2 FN3)
-
EBC Yellow Stuff rear brake pads
-
Copper grease (anti-seize)
-
Brake fluid - DOT 5.1
-
White spirit (to strip the disc anti-corrosion coating)
-
Replacement disc retaining screws (optional; can be omitted if the originals are drilled out)
Safety Warnings
- ⚠ Support the car on axle stands, never on the jack alone, and leave the removed wheel under the car as a backstop.
- ⚠ Never let the caliper hang from the flexible brake hose; support it so the hose is not stressed or damaged.
- ⚠ Rear caliper pistons must be wound in (rotated clockwise) while pushed, not forced straight back like fronts; forcing them can damage the handbrake mechanism.
- ⚠ Keep brake fluid off paintwork and clean up any spills immediately, as brake fluid attacks paint.
- ⚠ Match the wind-back tool adaptor to the piston bore; an oversized adaptor can wedge inside the caliper and be difficult to free.
Step-by-Step Instructions
1 Clean and identify the new discs
New EBC GD discs ship with a protective anti-corrosion film that must be removed before fitting, and the box carries a warning to that effect. Wipe it away with white spirit; the zinc-plated versions may arrive dry with no obvious coating, but clean them anyway. Critically, grooved discs are directional (handed): the spiral groove is meant to fling hot gas and brake dust outward as the wheel turns, so fitting a disc to the wrong side reverses that and drags debris inward. Confirm which disc belongs on which side before you install anything.
2 Dress the pad shoulders for a free fit

Inspect the side edges (shoulders) of each new pad, where they slide into the carrier. Manufacturing can leave burrs, paint, or fixing compound here, and any high spot stops the pad moving freely in the carrier channel, mimicking a seized caliper. File each shoulder only as far as needed to strip off the paint and leave bare, smooth metal, and no further. Pads that have to be hammered in because of excess shoulder material will neither clamp nor release properly. Note the small metal wear-indicator prong standing just proud of the friction material: it touches the disc and squeals once the pad is spent. It usually sits at the bottom of the inboard pad, though the symmetrical carrier means the orientation can differ on your car.
3 Raise the car and remove the rear wheel
Chock the wheels, slacken the wheel bolts, then jack the car and lower it onto axle stands. Never work under a car held up by the jack alone. Slide the removed wheel under the sill as a backstop in case a support fails. Before you strip anything down, spin the hub and listen to the existing pad-to-disc contact so you have a baseline noise to compare against once the new parts start bedding in.
4 Unbolt and support the caliper
Release the upper caliper guide bolt and lift the caliper off its carrier. Honda bonds the pads to the caliper and piston with a plastic film, so the caliper is often stuck to the old pads; twist and pull to break it free. Do not let the caliper hang from the flexible brake hose, as that stresses the hose. Rest it on the tyre or otherwise support it. The handbrake cable stays connected at the rear caliper, which limits how far the caliper can move and rules out cable-tying it up. While you are here, check the guide-pin rubber boots move in and out freely, since that float is what lets the caliper follow the disc as the pads wear.
5 Remove the carrier and old disc
Undo the two bolts holding the caliper carrier (pad carrier / caliper housing) to the hub and take it away complete with the pads. The disc itself is retained by two countersunk Phillips screws; use a tight-fitting No.3 Phillips bit so you do not round the heads. These screws are commonly corroded solid, so shock them loose first with a centre punch, or use an impact driver, before trying to turn them. A screw beyond saving can simply be drilled out; the disc is clamped by the wheel once bolted up and does not rely on these screws. The disc usually rusts onto the central hub spigot as well, so free it with a rubber mallet and persistence.
6 Clean the hub face and ABS reluctor

With the disc off, remove all corrosion and debris from the hub mounting face and the central spigot until the face is flat and clean. A disc seated on a rough or rusty face runs untrue and brings on vibration and braking faults. Close by, clean the magnetic ABS wheel-speed sensor and the toothed reluctor ring; iron filings clinging to the teeth and packed-in dirt disturb the magnetic signal the sensor reads. A nylon brush handles most of it. Clearing this can also cure VSA complaints on the rear axle.
7 Wind the caliper piston back
A rear piston cannot be pressed straight in like a front one because it carries the handbrake mechanism; it must be rotated clockwise while being pushed in. A wind-back tool (for example the Laser caliper rewind tool, around 29.99 GBP from Halfords) engages the two lugs on the piston face. Apply hand pressure and turn clockwise to retract it. The very first movement is often stiff. Match the tool adaptor to the piston bore, because an oversized adaptor can jam inside the caliper. Crack the bleed nipple open with a one-way pipe fitted (or lift the reservoir cap) so displaced fluid is expelled instead of being forced back up the system. Finally, set the grooves on the piston face to a plus (+) orientation, not an X, so the raised central boss on the pad back will seat in the piston groove.
8 Grease the hub and refit the disc
Smear a very light film of copper grease on the hub spigot and the inner (hub-side) face of the new disc to stop it corroding solid for next time. Keep it thin, as too much throws the disc out of true and causes vibration. Fit the correctly handed disc and secure it. Then pull the pad guide shims out of the carrier, clean the caked dirt from both faces, and clip them firmly back home so they mate properly. Lightly grease the guide channels that the pad shoulders run in.
9 Fit the pads
Apply a little copper grease to the pad shoulders and their sliding faces. The black rubber layer on the pad backs is an anti-squeal damper, so greasing the piston side is optional. Seat each pad in the cleaned guides with the wear indicator positioned as noted earlier, and confirm the pad's raised central cylinder drops into the correctly oriented (+) piston groove. Both ends of each pad should slide back and forth in the guides under light finger pressure, since the spring guide only clamps the shoulders gently. If a pad has to be forced, take it out and file the shoulders down further. Refit the caliper and torque the fasteners.
10 Check disc runout
Put a sighting mark on the carrier lined up with the edge of the disc and rotate the disc slowly; the gap should stay constant all the way round. Visible side-to-side wobble points to a problem: recheck that the grease on the inner face is only a light smear, look for rust spots or trapped debris between the disc and hub, and test the wheel hub for play that would indicate a worn wheel bearing. A dial-gauge disc runout set gives a precise measurement if you have one.
11 Bleed the brakes and check operation
With everything back together, bleed the caliper thoroughly; on this car a rear piston was found full of air rather than fluid, so do not skimp here. After bleeding, pump and release the pedal and confirm the disc spins without binding. Apply the handbrake and check the disc locks, then releases fully when the handbrake is dropped. Spin the disc and listen: with zero runout you should hear a steady light rub, and with a little runout the rub will rise and fall. A pattern of rub then silence then rub suggests the disc is running out and needs another look.
12 Bed in the new brakes
EBC pads carry a coloured bedding compound that gives a surprisingly sharp initial bite for the first few stops until it wears off. Bed the brakes in gently: around 150 miles of light braking and no emergency stops for the first 200 miles, checking at roughly 25 miles for even pad contact and the correct groove direction. Rear braking may feel weak at first and firms up as the pads bed and the zinc plating wears off the swept face of the disc. Drive with the windows down early on so you can listen for any rubbing or squeal.
Pro Tips
- 💡 Shock the disc retaining screws loose with a centre punch before unscrewing them; one member paid 44.50 GBP to a professional just to free seized screws.
- 💡 An impact driver makes removing heavily corroded disc screws far easier. On only lightly seized screws, a good tight No.3 Phillips bit turned by hand can be enough.
- 💡 Soak stubborn corroded screws with WD40 and give it time before forcing them, to avoid shearing off a head.
- 💡 A G-clamp will wind front pistons in, but rear pistons must be turned as they retract, so use the proper wind-back tool for the rears.
- 💡 As an alternative to opening the bleed nipple, some fitters just remove the reservoir cap and let the fluid rise as the piston is pushed back.
- 💡 The new EBC discs are zinc plated; that plating wears off the friction band as the pads bed in, which is normal.
Was this guide helpful?