Integra RS/GS/LS/GSR Front Big-Brake Upgrade Using Type R Calipers and Mini Cooper Rotors
Introduction
This guide covers a low-cost front big-brake conversion for the 1994-2001 Acura Integra in RS, GS, LS, and GSR trim, and it also applies to the earlier second-generation chassis because both share the same front caliper and hub. The build mates inexpensive five-lug reman calipers from the Type R / V6 Accord family with an off-the-shelf 280mm rotor from a 2007 base Mini Cooper (not the S), taking front rotor diameter from roughly 10.3 in to about 11 in while keeping factory piston size and therefore factory pedal effort. The larger disc adds heat capacity for repeated high-speed stops, autocross, and track sessions, where the smaller original rotors fade. Earlier versions of this swap used a Prelude rotor that had to be redrilled or machined; the Mini rotor is the key correction, because its center bore matches the Honda hub and it centers with no machining at all. The only fabrication is a small relief cut in the splash shield to clear the taller caliper. Adapted from a community writeup by LightningTeg on Team Integra (https://www.team-integra.net/threads/diy-the-no-bs-bolt-on-big-brakes-for-rs-gs-ls-gsr.209631/), including corrections from the follow-up discussion.
Reference
Tools Required
- Floor jack and two jack stands
- Lug wrench and socket/ratchet set
- Angle grinder or cutoff wheel (to relieve the splash shield)
- Line/flare wrench and box wrenches
- Torque wrench
- Brake bleeder hose and catch bottle
- Brake cleaner and shop rags
Parts Required
-
Two Type R / V6 Accord family front brake calipers (semi-loaded reman cores; same casting as 97-99 CL, 97-01 Integra, mid-90s Accord, 97-01 CR-V, 95-98 Odyssey, 93-01 Prelude, Isuzu Oasis)
-
Caliper mounting brackets supplied with the chosen five-lug calipers (23T for the Type R calipers)
-
Two 280mm front rotors for a 2007 base Mini Cooper (not the Cooper S), roughly 11 in / 22mm thick
-
04-08 Acura TSX front brake pads (part numbers PXD787H, ACT787, or GNAD787)
-
Stainless steel front brake lines
-
Fresh DOT brake fluid and new banjo sealing washers
Safety Warnings
- ⚠ Always support the car on jack stands before working under it or removing wheels.
- ⚠ Keep brake fluid off paint; it damages the finish quickly.
- ⚠ A caliper whose bleeder ends up pointing down will not fully purge air; orient it bleeder-up while bleeding.
- ⚠ Never let the fluid reservoir drain empty during bleeding or you will pull air in and have to start over.
- ⚠ When running wheel spacers, verify adequate stud thread engagement before driving.
Step-by-Step Instructions
1 Confirm parts and fitment figures before ordering
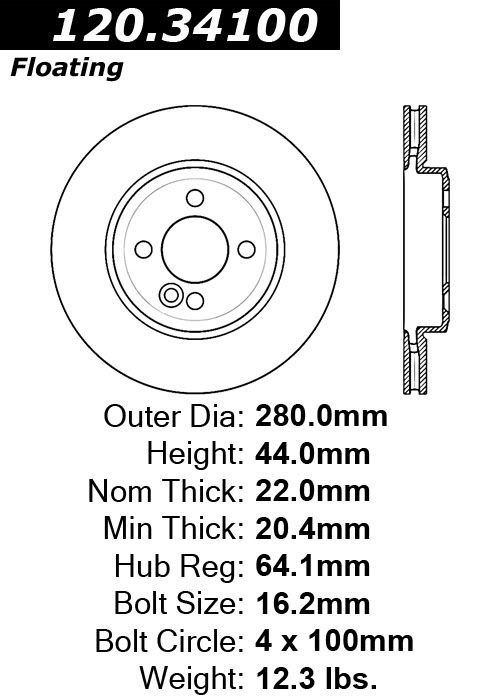
Source a pair of five-lug front calipers from the Type R / V6 Accord family; the same casting is used on the 97-99 CL, 97-01 Integra, mid-1990s Accord, 97-01 CR-V, 95-98 Odyssey, 93-01 Prelude, and Isuzu Oasis, and reman cores are inexpensive. Their piston bore matches the factory Integra caliper, so brake feel and effort stay stock. Order two 280mm front rotors for a 2007 base Mini Cooper (avoid the Cooper S); these run about 22mm thick against the 23mm Type R disc, and the Mini's center bore matches the Honda hub even though its bolt holes are 1-2mm oversize. For pads, use 04-08 Acura TSX units, which sit flush with no overhang past the rotor edge (part numbers PXD787H, ACT787, or GNAD787). Plan to fit stainless lines while the hydraulics are open.
2 Raise the car and strip the front corner
Break the lug nuts loose, jack up the front of the car, and set it on jack stands before pulling the wheels. Remove the original small four-lug caliper, unbolt its mounting bracket, and slide the factory rotor off the hub. Do not try to reuse the old bracket: a different caliper requires its own matching bracket, so plan to fit the brackets that come with the five-lug calipers you bought.
3 Relieve the splash shield for caliper clearance
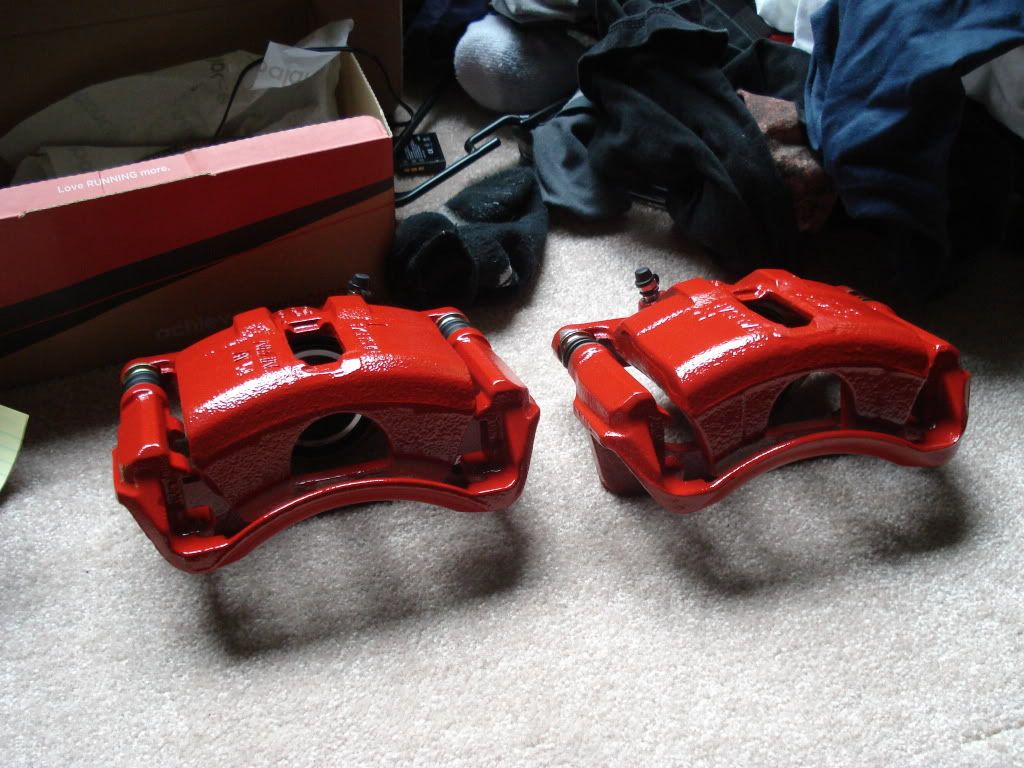
Offer the larger caliper up to the hub and you will see its body contacts the metal splash shield behind the rotor. Mark the two spots where it interferes and trim the shield back with an angle grinder. Two short cuts are enough to clear the caliper; recheck the fit once the cuts are made. Nothing needs to be removed from the bracket, and the pad still lands centered on the rotor with no machining.
4 Fit the Mini rotor and the caliper bracket
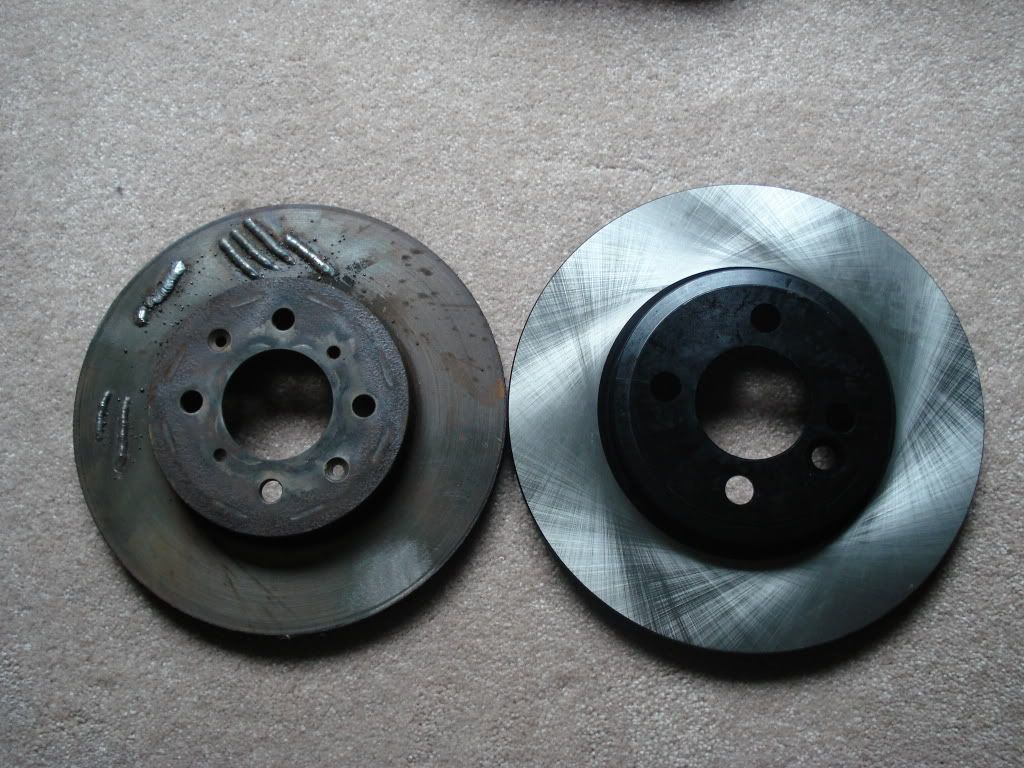
Slide a Mini Cooper rotor onto the hub and retain it. Bolt the five-lug caliper bracket to the steering knuckle. With Type R calipers this bracket is a 23T unit, spaced for a 23mm rotor, which suits the 22mm Mini disc so the piston is not overextended as the pads wear; do not substitute a 25T bracket, which spaces the caliper too far outboard. Builders adapting Legend or NSX two-piston calipers instead should keep the bracket that ships with those calipers rather than mixing rotor and bracket thicknesses.
5 Install the caliper and TSX pads
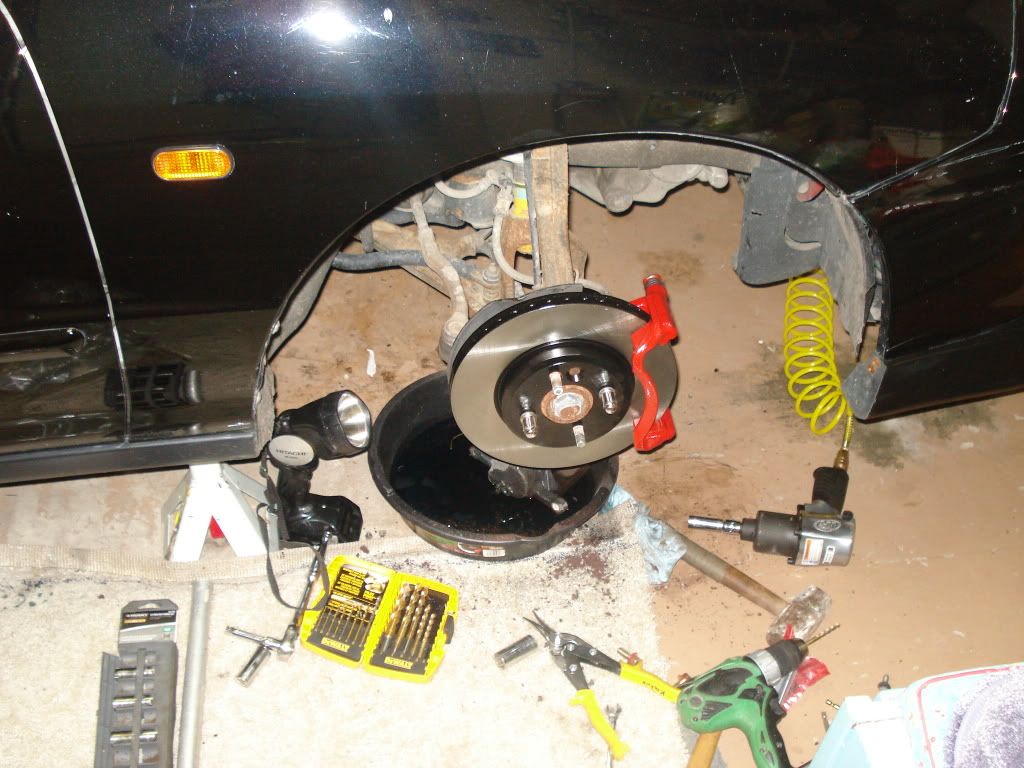
Seat the 04-08 TSX pads in the caliper, set the caliper over the rotor onto the bracket, and torque the mounting hardware. Confirm the pad face fully covers the friction ring with no edge hanging past the outer diameter of the rotor. If a different pad is substituted and a thin lip does overhang, it forms a wear line on the pad edge but has not been reported to hurt performance; the TSX pad avoids this entirely.
6 Connect the stainless brake line
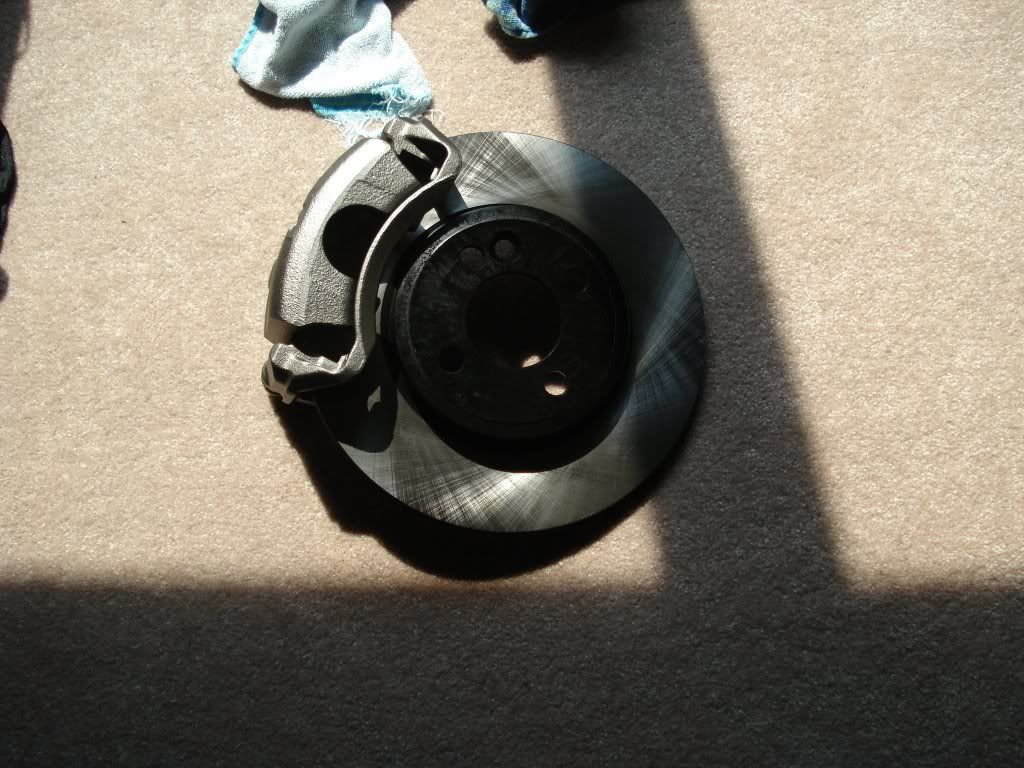
Attach the brake hose to the caliper with the correct banjo bolt and fresh sealing washers, then join the other end to the hard line. Fitting stainless lines now firms up the pedal and removes the flex of aged rubber hoses. Verify every fitting is tight before any fluid goes in, and keep brake fluid off painted surfaces.
7 Optional: convert the rear brakes as well
To enlarge the rear brakes too, fit RSX or EP3 rear calipers (or genuine ITR rear calipers, which cost more but keep the bleeder in the factory position) together with early 02-03 Civic Si (EP3) 4x100 rear rotors. Transfer the parking-brake arm from your original rear calipers to the new ones. RSX/EP3 calipers have to be mounted on the opposite side to bolt up, which leaves the bleeder pointing down, so they must be bled inverted. Rear Type R discs measure 10.25 in against 10.23 in for the Mini, so the rear gain is marginal and the fronts are the priority.
8 Bleed all four corners in the correct sequence

Top up the reservoir and bleed every corner, not just the fronts; bleeding the front calipers alone leaves a soft, low pedal. Follow the factory order: on 94-97 cars work right rear, left front, left rear, right front; on 98-01 cars work left front, right front, right rear, left rear. A gravity bleed is reliable here: crack one bleeder, keep the reservoir topped, and let fluid drain out under its own head before moving to the next corner. Any caliper installed with its bleeder facing down must be held bleeder-up while bleeding, or trapped air will never clear. Do not let the reservoir run empty during the process.
9 Check wheel clearance and bed in the pads
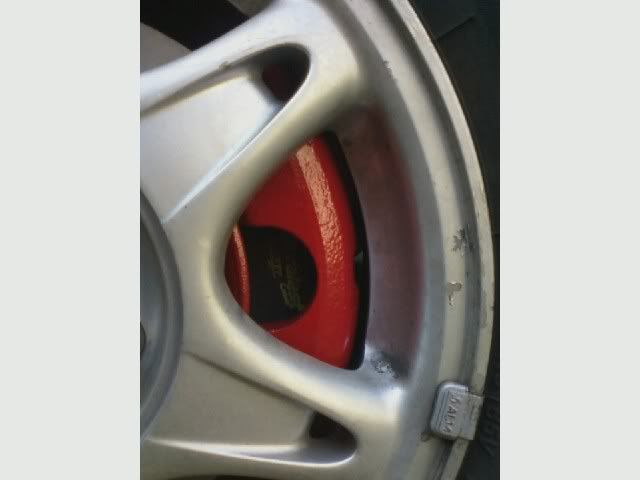
Refit the wheels and confirm caliper-to-rim clearance. The setup clears all 15x6 OEM Honda wheels, which share a +45 offset, and most correctly sized aftermarket wheels; a few tight designs such as some Rota RPF1s and certain 15x6.5 wheels need a thin spacer or a little caliper grinding to fit. If you add spacers, keep an eye on how much stud remains engaged. Pump the pedal until firm before rolling the car, then bed the new pads with a series of progressively harder stops from moderate speed.
Pro Tips
- 💡 The 04-08 TSX pad is the fuss-free pad choice because it fully covers the Mini rotor with no overhang.
- 💡 Stainless brake lines noticeably improve pedal firmness and are cheap to add while the system is already open.
- 💡 A soft pedal after the swap almost always means air is still in the system or only the fronts were bled; bleed all four and repeat if needed.
- 💡 A hissing sound near the intake on the first pedal stroke is the brake booster using up its vacuum reserve, not a fault.
- 💡 Type R (Accord-family) calipers keep the factory piston size, so most of the brake feel comes from the pad compound, not the caliper.
Was this guide helpful?