8th-Generation Honda Civic HID Low-Beam Conversion
Introduction
This guide covers converting the low beams of an 8th-generation Honda Civic (including the Civic Hybrid) from factory halogen to an aftermarket HID/Xenon kit. The low beams use a 9006 (HB-4) bulb and the high beams use a 9005, so a 9006 HID kit is a direct fit that needs no cutting or splicing. The result is a whiter, brighter beam that draws less power than stock: each ballast pulls roughly 35W against the 55W of the original halogen, and the bulbs actually run slightly cooler in the reflector housing. Color temperature options run from about 4300K (the factory halogen color) up toward 30000K; 6000K is a popular balance of white color and usable output, since anything much higher trades away brightness. The job is mostly mechanical access work through the wheel well plus a plug-and-play electrical connection, and it takes roughly two hours at a relaxed pace. Adapted from a community writeup by Orient Express on 8th Civic (https://www.8thcivic.com/threads/my-civics-hid-diy-installation.21376/), including corrections from the follow-up discussion.
Reference
Tools Required
- Floor jack and jack stands
- Lug wrench for removing the front wheel
- Tack puller or trim-clip removal tool for the wheel-well fasteners
- 10mm socket and ratchet (and small wrench)
- Small flat-blade jeweler's screwdriver
- Cotton swabs (Q-tips) for applying lubricant
- Hair dryer or heat gun (optional, to ease bulb seating)
Parts Required
-
9006 (HB-4) HID conversion kit: two Xenon bulbs plus matching ballasts/igniters and brackets
-
Silicone or dielectric lubricant
-
Adhesive felt pad (to cushion the ballast bracket)
-
10mm nut for the passenger-side ballast mount
-
Cable tie-wraps
Safety Warnings
- ⚠ Do not mount ballasts on or next to any yellow connector or Torx-mounted sensor; these are airbag crash sensors and interfering with them can compromise deployment.
- ⚠ Bright-orange cables and connectors carry hybrid high voltage (158V+). Keep all hardware away from them.
- ⚠ Never touch the bulb's glass envelope with bare fingers; skin oils shorten its life.
- ⚠ Bolt the ballast solidly to chassis metal for grounding and EMI control; do not secure it with zip-ties alone.
- ⚠ Never fit larger-than-stock fuses to a converted circuit, as this can allow wiring damage before the fuse opens.
- ⚠ Support the vehicle on jack stands before working under the fender; do not rely on a jack alone.
Step-by-Step Instructions
1 Confirm the bulb size and lay out the kit
Verify that your car uses a 9006 (HB-4) low-beam bulb before starting; the 8th-gen Civic uses 9006 for the low beams and 9005 for the high beams. A typical kit contains two Xenon bulbs on the standard 9006 base, two ballasts/igniters with mounting brackets, headlight wiring extension leads, and a separate battery-to-relay harness. Set the relay harness aside for now, as this platform does not require it. Have your chosen color temperature ready; 6000K is a common pick.
2 Access the headlight through the wheel well
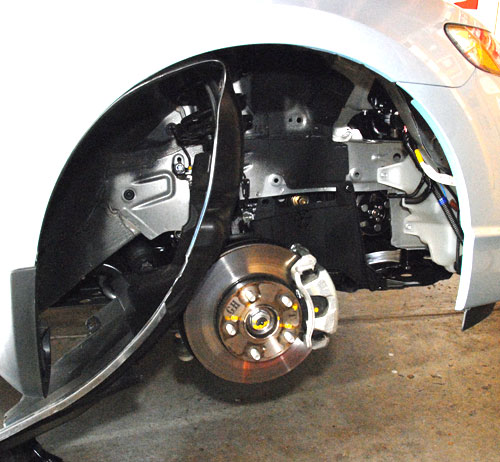
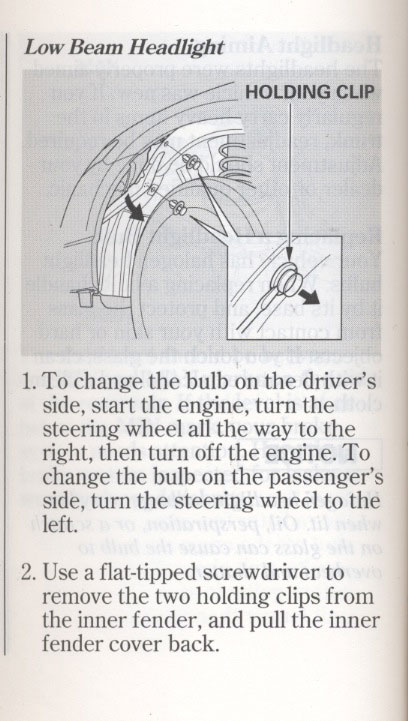
The low-beam bulb is reached from behind, through the front inner-fender liner rather than from the engine bay. Loosen the lug nuts, raise the front of the car, support it on jack stands, and pull the wheel to open up room. Release the roughly dozen push-type fasteners that hold the liner and fold it back. A tack puller slipped under each fastener head pops the clips out cleanly and greatly reduces the breakage that pry tools tend to cause. On the driver side you can gain clearance by removing the battery instead of the wheel; the passenger side is tight, so turning the steering fully or pulling that wheel is the practical route.
3 Remove the factory halogen bulb
Unplug the electrical connector from the back of the bulb first. Rotate the bulb holder counter-clockwise and withdraw the old halogen bulb. If the surrounding space is too tight to work the bulb free, the retaining bezel is held by three small screws that can be loosened or removed for extra clearance; keep track of them so none are dropped inside the housing.
4 Fit the HID bulb into the reflector
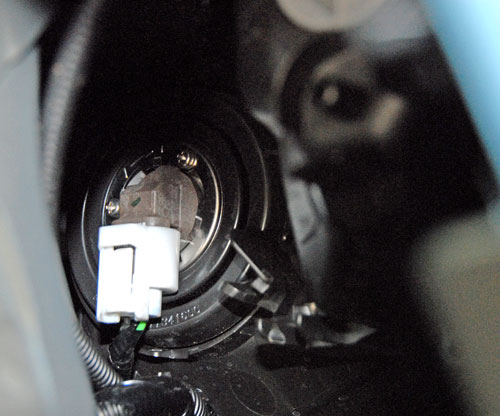
Handle the new Xenon bulb only by its base. Skin oils on the glass envelope shorten bulb life, so keep bare fingers off it. Installation reverses the removal, but the HID base is machined to a tight tolerance and can bind before it locks. Wipe a little silicone lubricant onto the base fingers and the O-ring using a cotton swab, and never spray lubricant straight at the glass. Press the bulb home firmly without forcing it; if it stalls in the last millimeter, brace a small flat jeweler's screwdriver against the base and nudge it until the retaining latch clicks. Gently warming the housing receptacle with a hair dryer expands it slightly and can also help the bulb seat.
5 Choose a safe ballast location
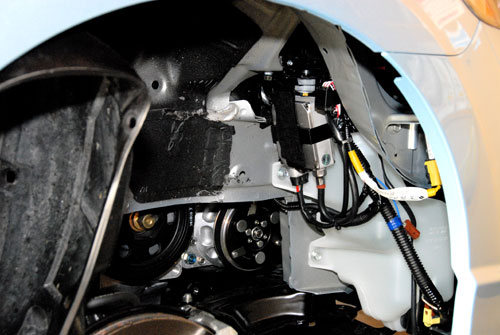
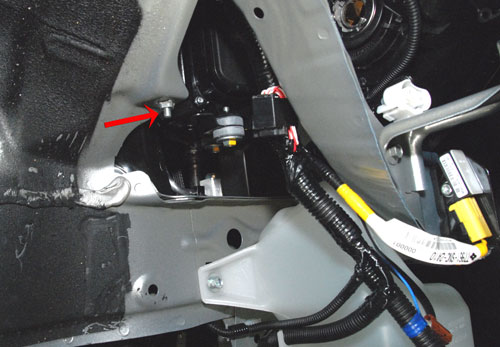
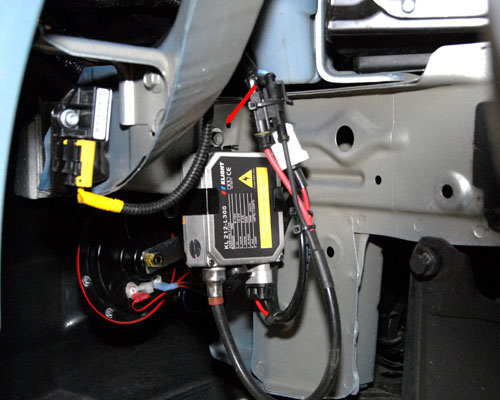
Before bolting anything down, identify what not to disturb. Two airbag crash sensors sit on the front bulkhead, roughly outboard of the ballast area, and are marked by Torx screws with a yellow cable and connector; mounting a ballast on or beside them can interfere with airbag deployment. Any bright-orange cable or connector belongs to a hybrid high-voltage system carrying 158V or more, and must likewise be left clear. Keep the ballast away from both.
6 Mount the ballasts securely
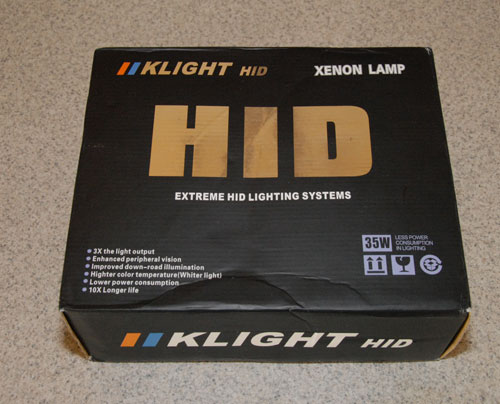
On the passenger side, an existing threaded stud in the wheel well accepts a 10mm nut to anchor the bracket. On the driver side, a nut welded to the forward cross-member/bulkhead gives an easy, solid attachment point in essentially the same position. Bolt each ballast down to bare chassis metal rather than tying it up; a firm metal-to-metal mount grounds the case and limits the electrical noise the ballast radiates, so avoid relying on zip-ties. Angle the tight passenger-side bracket forward slightly so it clears the liner on reassembly, and stick an adhesive felt pad on the back of the bracket where it may rub the liner. Orient both ballasts so their connectors point downward, keeping water out of the connector shell.
7 Make the plug-and-play connections
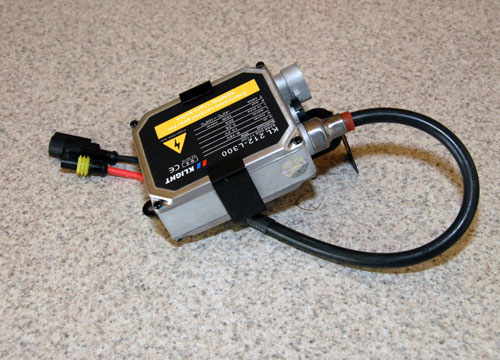
The wiring daisy-chains without any cutting: the car's original headlight plug feeds the extension lead, which feeds the ballast, and the ballast output plugs into the HID bulb lead. Dab a little silicone lubricant or dielectric/lithium grease into each connector shell to seal it and ease mating. If a coupling refuses to seat, the pins may be slightly off-center; wiggle them until they align, then push until both halves click, since an unclicked connector often means no light. Route the leads alongside the factory harness and secure them with tie-wraps.
8 Leave the relay harness out and keep stock fuses
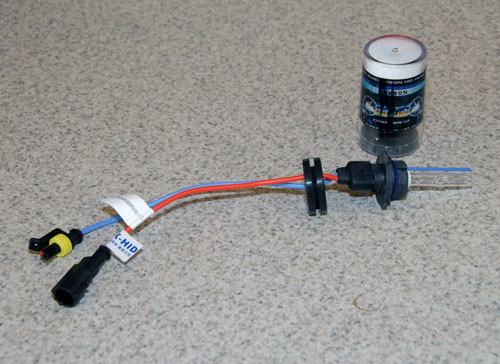
The 8th-gen Civic's factory lighting circuit already uses wiring of the same gauge as the supplied relay harness plus its own switching relay, and it adds per-lamp and main-relay fuses at the correct ratings. That makes the OEM wiring the safer choice, so the battery relay harness is unnecessary on this car. Do not substitute higher-amperage fuses after the conversion; an oversized fuse can let wiring damage occur before it ever blows.
9 Reassemble and test
Refit the fender liner and its fasteners, remount the wheel, torque the lug nuts, and lower the car. Switch on the low beams to confirm operation. A brief bright flash followed by a couple of seconds of dimmer light before the output stabilizes is normal HID warm-up behavior, not a fault. High beams continue to function as before, coming on alongside the still-lit low beams exactly as with the halogen setup.
Pro Tips
- 💡 6000K gives a clean white output with good on-road brightness; higher color temperatures look bluer but throw noticeably less usable light.
- 💡 If a bulb will not seat, combine tricks: silicone lube on the base and O-ring, a jeweler's screwdriver to push the final millimeter until it clicks, and a brief warm-up of the housing with a hair dryer.
- 💡 Loosening the three bezel/retaining screws frees up meaningful room for a stubborn bulb.
- 💡 The HID draw of about 35W versus the halogen's 55W means less current load, and testing showed the reflector running a few degrees cooler with the Xenon bulbs.
- 💡 The driver side can often be done by removing the battery instead of pulling that wheel.
Was this guide helpful?

