
Rear Lower Control Arm Polyurethane Bushing Replacement (1989-1995 Civic, CRX, Del Sol)
- This set does not fit the 1988 Civic/CRX with stamped-steel lower arms.
- Removing the spring hat from a strut without a proper compressor can cause serious injury.
- Never work under a car supported only by a jack.
- Polyurethane gives a firmer ride and more noise than rubber.
Introduction
The rear lower control arms on 1989-1995 Civics, 1989-1991 CRXs and Del Sols are cast iron, with rubber bushings at the inner (frame) and outer (knuckle) pivots. When those bushings wear, the rear alignment wanders and the back of the car feels loose. Energy Suspension's 16.3104 set replaces them with polyurethane. The arm has to come off the car and the old bushings, including their metal shells, are pressed out. Note that this set does not fit the 1988 Civic/CRX with stamped-steel lower arms, and leave the separate shock-mount bushing in the arm unless you are replacing it too. Adapted from the installation instructions by Energy Suspension on SEMA Data (https://sdda.semadata.org/Standard/Energy%20Suspension/17140.pdf).
Procedure
11 steps-
Step 1: Support the car
Lift the rear and support the car on jack stands on the body/frame, not the arms. Remove the rear wheels.
-
Step 2: Disconnect the arm
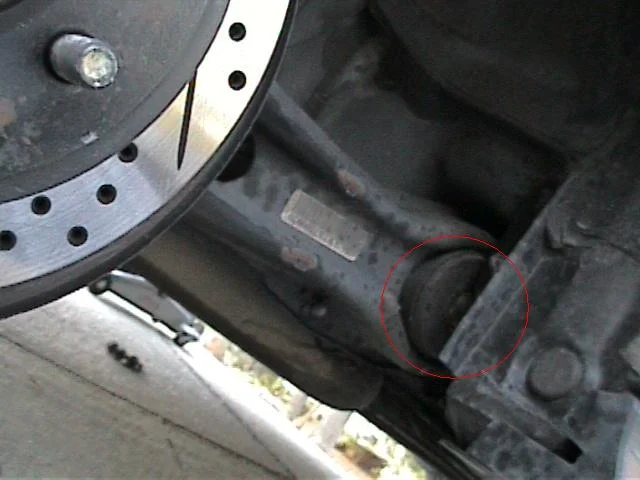
Disconnect the sway bar end link from the lower arm if your car has one. Remove the inner pivot bolt, loosen then remove the outer pivot bolt at the knuckle, and remove the lower shock/strut mount bolt. Take the lower control arm off the car.
-
Step 3: Identify what to remove
The arm has three bushings: inner pivot, outer pivot and the shock mount. This set replaces the inner and outer pivots only. Do not press out the shock-mount bushing unless you have the separate 16.8103 set.
-
Step 4: Press out the old bushings
On a hydraulic press, push out each pivot bushing complete with its outer metal shell, using a pushing cup about 0.050 in smaller than the bore. Energy Suspension lists the bore for set 16.3104 as about 31 mm (1.220 in); arms with the larger 35 mm (1.378 in) bore take set 16.3109 instead. The sheet does not say which cars have the larger bore, so measure yours before ordering.
-
Step 5: Clean the bores
Clean the inside of each bore back to bare metal and lightly smooth any sharp edges so they cannot cut the new bushing.
-
Step 6: Grease everything
Grease the bores and every surface of the polyurethane bushings that will touch metal. Dry poly bushings squeak.
-
Step 7: Install the bushings in order
Each pivot uses three bushing pieces: two flanged pieces that are the same and one plain piece. Install a flanged piece first, then the unflanged piece, then the remaining flanged piece.
-
Step 8: Fit the sleeves
Grease the supplied steel sleeves and push them through the bushings.
-
Step 9: Optional: shock-mount and strut-top bushings
If using 16.8103, press out the lower shock-mount bushing and shell (bore about 37mm / 1.457in), grease and press in the new one with its sleeve. Its upper strut bushings require removing the strut and taking off the spring hat, which must be done with a spring compressor following the factory manual.
-
Step 10: Refit the arm
Bolt the arm back to the car. Tighten all fasteners to the factory specifications, with the suspension at ride height (jack under the arm) for the pivot bolts.
-
Step 11: Align
Refit the wheels, lower the car and get a rear alignment.
- Do both sides at once.
- While the arms are out, check the trailing arm bushings and the rear upper arm bushings as well; you have already done most of the work to reach them.
Related procedures
All guides →
Tap right for next · left for back · Keys: ← → step · Space / PgUp / PgDn scroll · Esc exit