Honda Fit HID Projector Retrofit Using Infiniti FX35 Bi-Xenon Projectors
Introduction
This guide covers building projector HID headlights for the Honda Fit by transplanting Infiniti FX35 bi-xenon projectors into the factory reflector bowls, then hiding the projector behind an improvised shroud made from an inexpensive stainless steel pet bowl. The FX35 projector is chosen because it retains a high-beam function via its bi-xenon solenoid, produces a sharp cutoff, and is more affordable than many alternatives. The result is a clean, glare-controlled beam with an OEM-style appearance that suits the compact Fit headlight housing better than larger shrouds. The work applies to the first- and second-generation Fit (GD and GE), and the same approach adapts to other reflector housings. Expect permanent cutting of the reflector bowls, some light fabrication, and wiring of a bi-xenon harness, so it is best suited to builders comfortable with a dremel and basic 12V wiring. Adapted from a community writeup by smeister on FitFreak (https://www.fitfreak.net/forums/fit-interior-exterior-illumination/18061-diy-hid-retrofit-fx35-projectors.html), including corrections from the follow-up discussion.
Reference
Tools Required
- Dremel rotary tool with cutting disk and multi-purpose cutting bit
- Drill with 3" hole saw (for the shroud)
- 1500 grit sandpaper
- 10mm socket and ratchet
- Screwdriver set
- Soldering iron and basic wiring tools
- Heat gun or hair dryer (to open the sealed headlight)
- Safety glasses
Parts Required
-
Pair of Infiniti FX35 bi-xenon projectors
-
D2S HID bulbs and ballasts (OEM FX35 kit or aftermarket equivalent)
-
Bi-xenon wiring harness
-
Six 2" machine screws matching the projector's factory screw thread
-
Twelve 7mm nuts, twelve flat washers, and twelve lock or nylon washers
-
Smallest stainless steel non-tip pet bowl (about 5") per side, for the shroud
-
Semi-gloss black spray paint
-
Weatherstrip
-
JB Weld (optional, for bonding the shroud to the projector)
Safety Warnings
- ⚠ HID ballasts produce high-voltage output; disconnect power before handling the bulbs and connectors, and keep ballasts dry and clear of heat sources.
- ⚠ Cutting the reflector bowls is permanent; trial-fit and mark carefully before running the dremel, and wear safety glasses.
- ⚠ Aim the finished projectors low enough that the cutoff does not blind oncoming traffic; misaimed HIDs are dangerous and may be illegal.
- ⚠ Reseal the headlight fully after the retrofit, as trapped moisture will fog the lens and can damage the electronics.
Step-by-Step Instructions
1 Gather the projectors, HID components, and hardware
Source a pair of Infiniti FX35 bi-xenon projectors together with a matching D2S HID kit (bulbs and ballasts); an OEM FX35 set or an aftermarket kit both work, and complete retrofit packages are sold by vendors such as The Retrofit Source. Collect the mounting hardware: six 2" machine screws whose thread matches the projector's factory clamp screws, plus twelve each of 7mm nuts, flat washers, and lock or nylon washers. For each shroud, pick up the smallest stainless steel non-tip pet bowl (roughly 5" across) from a pet store. Also have semi-gloss black spray paint, 1500 grit sandpaper, weatherstrip, and a bi-xenon wiring harness ready before starting.
2 Open the headlight housing
Separate the lens from the housing so the internal reflector bowls are exposed. The Fit headlight is sealed with a heat-softened adhesive bead; warm the seam evenly with a heat gun until the adhesive releases, then unclip and lift the lens away. With the housing open, this is also the convenient moment to paint the interior of the housing or tint the amber signal and clear running-light covers, since every surface is accessible. Keep the clips and screws organized for reassembly.
3 Disassemble and trim the projector
Split each FX35 projector into its front and rear halves. The rear section carries the tabs that located the projector inside the original Infiniti headlight; those tabs are not needed here and must be cut away so the projector will seat down into the Fit's reflector bowl. Compare a stock projector against a trimmed one to confirm exactly which tabs and edges to remove. Then swap three of the screws that clamp the projector halves together for three of the 2" screws, which will later pass through the reflector bowl and serve as mounting studs.
4 Mark and cut the three mounting holes in the reflector bowl
Transfer the projector's three screw positions onto the rear face of the reflector bowl. The accurate method is to trace the projector outline and hole pattern onto the bowl; a faster but rougher method is to rest the projector (now fitted with its 2" screws) in the bowl and mark where the screws contact it. Cut the central opening for the projector body using a dremel with a cutting disk, and open the three screw holes using the dremel's multi-purpose cutting bit. The center hole may be made slightly undersized for a snug fit, but protect the three screw-hole locations, since losing them destroys the mount. Careful marking here leaves the projector nearly centered.
5 Prep and paint the reflector bowl
Lightly scuff the reflector surface with 1500 grit sandpaper and clean it thoroughly so the paint will adhere. Coat the bowl in the color of your choice; semi-gloss black is a common pick for a subtle, blacked-out look. Allow roughly 10 hours of cure time before handling. Painting the bowl also suppresses stray reflections around the projector. Anyone who prefers to leave the reflector chrome must instead seal the projector completely against light leaks to prevent unwanted reflections.
6 Mount the projector into the reflector bowl
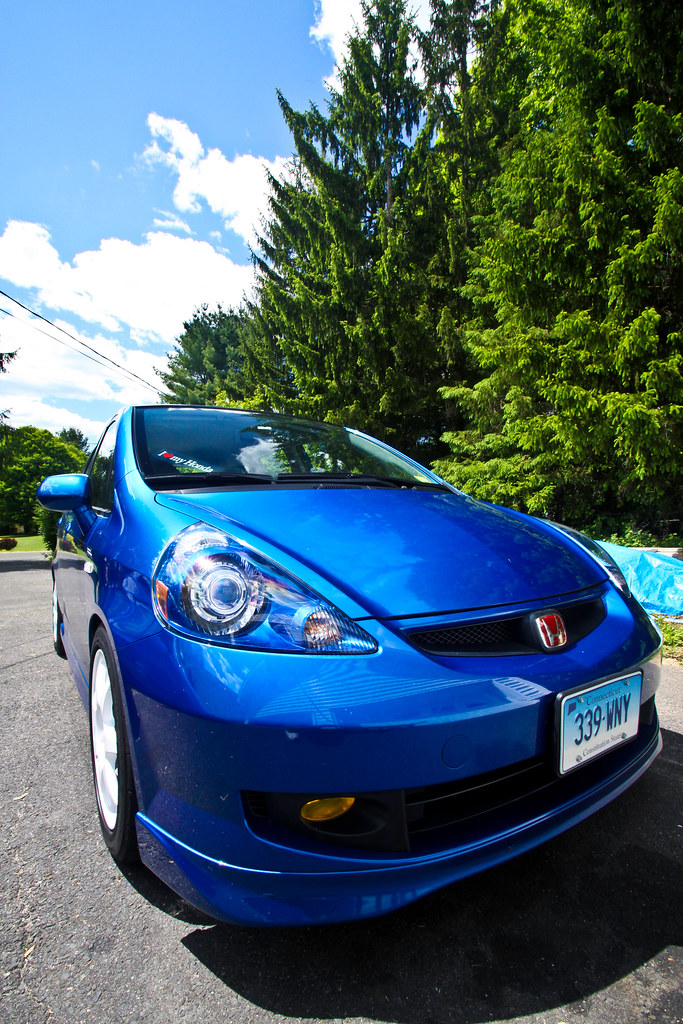
Pass each 2" screw through its hole fitted with a flat washer, then a lock or nylon washer, and thread a 7mm nut on from behind the bowl. Nylon washers give a tidier result than lock washers. To gain working room behind the bowl, back the headlight adjuster out with a 10mm socket; if access is still tight, release the round retaining clip by squeezing it and popping the bowl loose. Snug the three nuts evenly. The projector is seated correctly when its rear barrel appears centered in the opening at the back of the housing, though final centering comes during aiming.
7 Wire the bi-xenon harness and bulbs
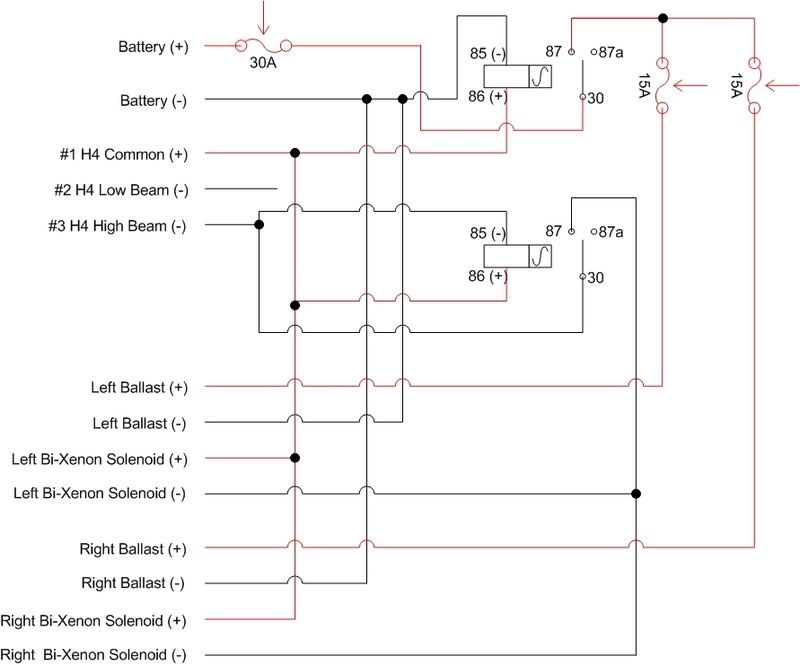
Install the D2S bulbs and their ballasts, then connect a bi-xenon harness so the projector's solenoid lifts the cutoff shield for high beam. A store-bought plug-and-play harness or a self-built one both work; a connector must be made up for the projector shield leads to drive the high beams. The single yellow lead exiting the rear of the projector is not required for this setup and can simply be cut off. Route and secure the wiring, keeping the ballasts away from heat and moisture.
8 Prepare the dog-bowl shroud
Drill a 3" opening in the base of the roughly 5" pet bowl so it clears the projector lens, then paint it to match the build; semi-gloss black is typical. The smallest bowl size drops inside the reflector bowl with no further trimming. Discard the bowl's rubber lip strip. This low-cost shroud stands in for purpose-made units such as Apollo or FX-R shrouds if you prefer a ready-made part.
9 Install the shroud
The shroud is decorative and goes in last, seated inside the housing over the projector to hide the lens edge and mounting hardware. One method presses the bowl up under a strip of weatherstrip run around the inside of the lens holder, which also conceals the cut edge; another bonds the shroud directly to the projector with JB Weld. The shroud does not need to seal against moisture, because the OEM lens handles sealing once the housing is closed.
10 Reassemble and align the cutoff
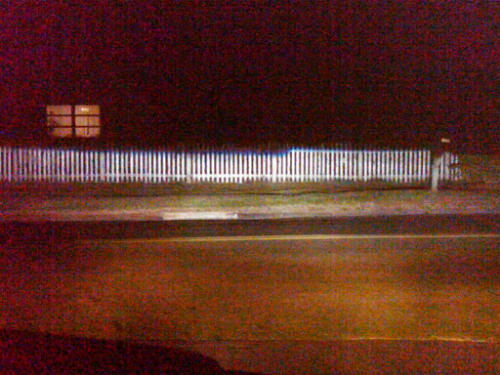
Reseal the lens to the housing (the reverse of opening it) and refit the headlight to the car. Park about 20 ft from a flat wall and level the beams, adjusting so the sharp horizontal cutoff line sits at the correct height; the lower 2" mounting screw has the greatest effect on aim. Set the beams low enough that the cutoff does not throw glare at oncoming drivers, then tighten the screws down firmly. A crisp cutoff with no upward glare confirms a successful retrofit.
Pro Tips
- 💡 The smallest Petzazz stainless steel non-tip pet bowl (about $4.99) is the popular shroud; The Retrofit Source also sells Apollo and FX-R shrouds and complete bi-xenon kits as ready-made alternatives.
- 💡 Nylon washers give a cleaner mount than lock washers, and JB Weld is a reliable way to bond the shroud to the projector.
- 💡 Bulb color is personal preference; builders in the thread ran everything from 4300K (closest to OEM white) to 5000K.
- 💡 The yellow wire at the back of the projector serves no purpose in this setup and can be removed.
- 💡 Leaving the reflector chrome instead of painting it gives a more OEM look but requires thorough light-sealing to avoid stray reflections.
- 💡 Optional halo/angel-eye rings can be added; the blinker ring generally only fits inside the reflector without extensive cutting.
Was this guide helpful?

