Acura RSX (K-Series) Fuel Injector Harness Tuck
Introduction
Once the plastic intake manifold cover is deleted on a K-series RSX, the factory fuel injector wiring is left sitting in plain view, draped across the top of the stock fuel rail where it clutters the engine bay. This guide covers a no-cost way to hide that wiring by unclipping it, stripping off its bulky plastic loom, and routing the individual injector leads down between the injectors so they sit out of sight. It is a purely cosmetic job that keeps the stock rail, so there is no need to buy an aftermarket rail just to clean up the look. The procedure applies to the K20 and K24 engines in the Acura RSX and shares its layout with related K-series intake setups. Adapted from a community writeup by Jamdc5 on Club RSX (https://www.clubrsx.com/threads/diy-fuel-injector-harness-tuck.811425/), including corrections from the follow-up discussion.
Reference
Tools Required
- #1 (small) flat-blade screwdriver
- 10mm socket or wrench
Parts Required
-
None (reuses existing hardware only)
Safety Warnings
- ⚠ You are working directly on the fuel rail. Keep sparks and open flame away and have the engine fully cool before starting.
- ⚠ Disconnect the negative battery terminal before unplugging the injector connectors to prevent shorts and stored fault codes.
Step-by-Step Instructions
1 Unplug the four injector connectors

With the engine cold, disconnect the negative battery terminal first to avoid shorts or stored fault codes. Then work along the fuel rail and release each of the four injector connectors. Depress the locking clip on the top of each plug and lift it straight off its injector. Setting all four loose at once frees the wiring bundle so it can be worked on as a unit.
2 Free the harness from the rail brackets

The wiring loom is anchored to the fuel rail by two small clip brackets, one sitting between injectors one and two and the other between injectors three and four. Squeeze the pair of plastic tabs on the loom cover at each bracket and lift the harness out of the clips. The bundle is now held only by the ground wire.
3 Remove the ground bolt
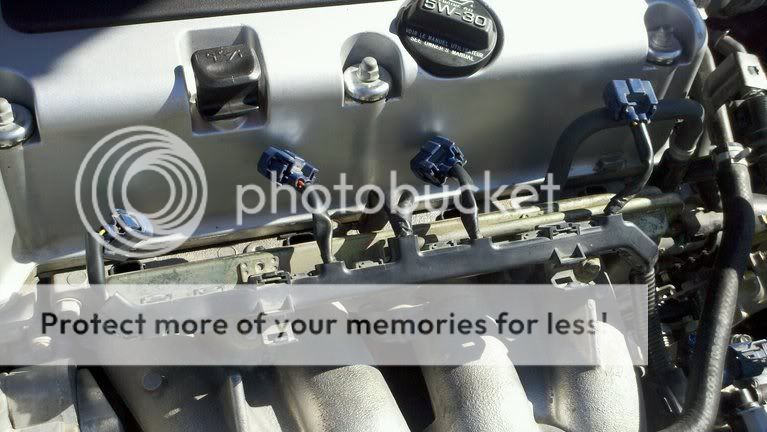
A single 10mm bolt near the middle of the fuel rail secures the harness ground eyelet to the manifold. Back this bolt out and store it somewhere safe, since it is reused at the end. With the ground released, the entire wiring assembly is now free to be repositioned.
4 Strip off the bulky wire loom

The oversized plastic loom is what makes the wiring look so heavy on top of the rail. It is held closed by roughly ten small tabs spaced around its edge. Work each tab open with a #1 flat-blade screwdriver, taking your time so none snap, then split the cover away and set it aside. You are left with the bare, far slimmer injector leads and the ground wire.
5 Route the leads down between the injectors

With the loom gone, feed the wiring out of sight. Pass the first two injector leads together with the ground wire down into the gap between the two center injectors. Drop the third lead through the space between the third and fourth injectors, and tuck the fourth lead around the outboard side of the fourth injector. The goal is to get every wire below the top line of the rail rather than lying across it.
6 Reconnect the injectors and refasten the ground

Push each of the four connectors back onto its injector until the clip latches. Reinstall the 10mm ground bolt you saved earlier to lock the ground eyelet back down. Reconnect the battery, then start the engine and confirm it idles cleanly with no misfire or check-engine light, verifying every injector plug seated fully.
Pro Tips
- 💡 The two rail clip brackets remain slightly visible after the tuck; most builders find the exposed clips far less noticeable than the full loom lying across the rail.
- 💡 If a separate cable runs across the top of the intake manifold, that is the cruise control cable, not part of the injector harness. It can be cleaned up by removing its retaining brackets and rerouting it along the firewall.
- 💡 If you prefer a dressier look instead of tucking, painting the stock rail or fitting an RRC/RBC-style manifold are alternatives, but note that going to an aftermarket intake manifold requires ECU tuning (e.g. KPro) to avoid running lean.
Was this guide helpful?
