Acura CL Clear Corner Lights: Blacked-Out Housing Conversion
Introduction
The clear corner marker lamps on the first-generation Acura CL leave the internal reflector bright chrome, which many owners want darkened for a cleaner, blacked-out front end. This guide covers the full process of splitting a sealed clear corner lamp, painting the inner reflector housing flat black, and resealing it so it stays weather-tight. It applies to the bonded clear corner assemblies used on the 1G CL and similar Acura corner lenses of that era. Note that these lenses are glued rather than silicone-sealed like a headlight, so the oven-warming trick used on headlights will not open them and will only deform the plastic. Because darkening the reflector reduces how much light the marker throws, treat this as a cosmetic modification and confirm the lamp still meets your local visibility requirements. Budget for a spare set of corners, since replacements are inexpensive if a lens cracks during opening. Adapted from a community writeup by acuratl_2nr on AcuraZine (https://acurazine.com/forums/1g-cl-diy-faq-74/diy-blackhousing-clear-corners-483145/), including corrections from the follow-up discussion.
Reference
Tools Required
- Utility knife with fresh blades
- Flat head screwdrivers
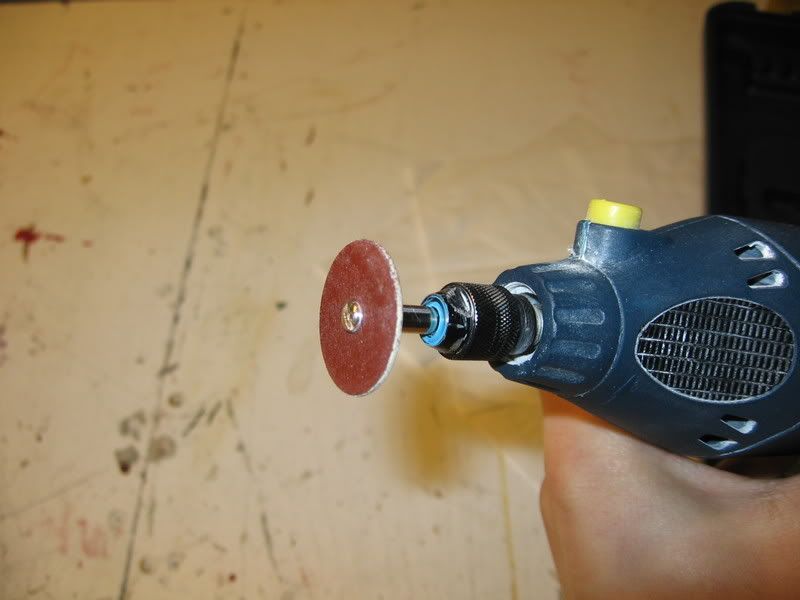
- Dremel or rotary tool with a small abrasive cutoff wheel (preferred)
- Heat gun (alternative opening method)
- Caulking gun
- Masking tape
- Safety glasses
- 800 grit sandpaper
Parts Required
-
Krylon Plastic Primer
-
Krylon Plastic Flat Black paint
-
Mono Clear bathroom sealant (or equivalent clear silicone sealant)
-
Meguiar's PlastX plastic cleaner (for final cleanup)
Safety Warnings
- ⚠ Do not try to open these lenses in an oven; they are glued, not silicone-sealed like headlights, and will melt.
- ⚠ Wear safety glasses when using a rotary tool, as it throws plastic fragments.
- ⚠ The trimming and cutting steps carry a real laceration risk; the original author was cut to the bone with a utility knife, so keep the blade angled away from your hand.
- ⚠ Spray primer and paint only in a well ventilated area or outdoors.
- ⚠ Verify the seal is complete before refitting, or condensation will collect inside the lamp.
Step-by-Step Instructions
1 Remove the corner lamps from the car
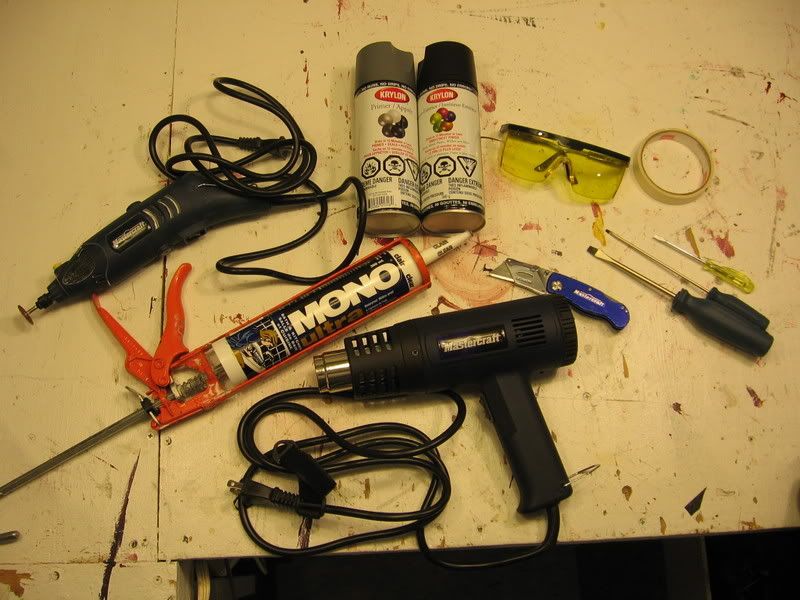
Take the clear corner assemblies off the vehicle before doing any cutting so you can work on a bench with full access. Working off the car also protects the paint and bumper from slips of the knife or rotary tool. Set up in a space where dust, plastic shavings, and paint overspray will not be a problem.
2 Open the assembly along the lens-to-housing seam
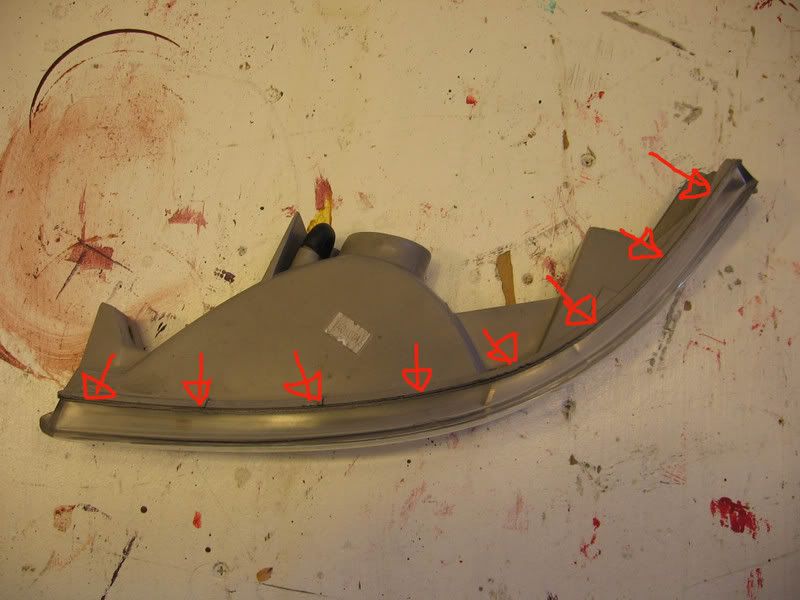
The lens is bonded to the housing around its full perimeter and must be separated by cutting that glue joint. A rotary tool fitted with a small abrasive cutoff wheel is the faster and more controllable choice; run it at a low speed and follow the seam patiently rather than forcing it, since going fast melts the plastic. Keep the cut slightly out from the lens edge so you do not crack the clear. A heat gun is the slower alternative: warm only a short section of the seam at a time, keeping the gun moving so the housing does not soften, then slice the softened glue with the utility knife. If you have neither tool, a utility knife alone can work but is tedious and much more likely to crack the lens.
3 Work carefully around the plastic elbow
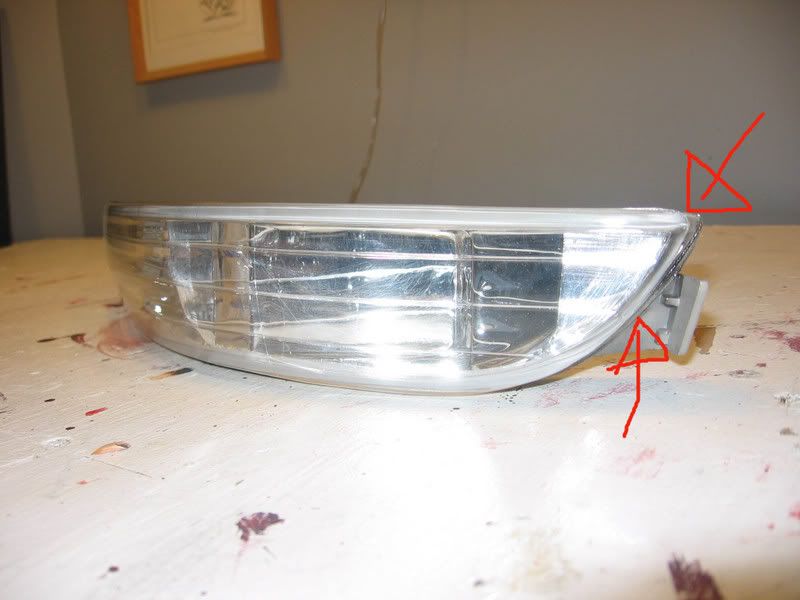
The tight corner where the small plastic elbow sits has little clearance for the blade or wheel. Approach it from the top and progress downward a little at a time so you do not sever the elbow itself. Rushing this area is the most common way to ruin the assembly.
4 Separate the lens without prying
Once the seam is fully cut, the lens should lift free with almost no resistance. If it still feels attached anywhere, do not yank on it; a stuck lens means the glue is uncut somewhere along the edge. Go back with the utility knife, find the remaining bonded spots inside the gap, and release them before lifting the lens away.
5 Trim leftover glue and plastic ridges
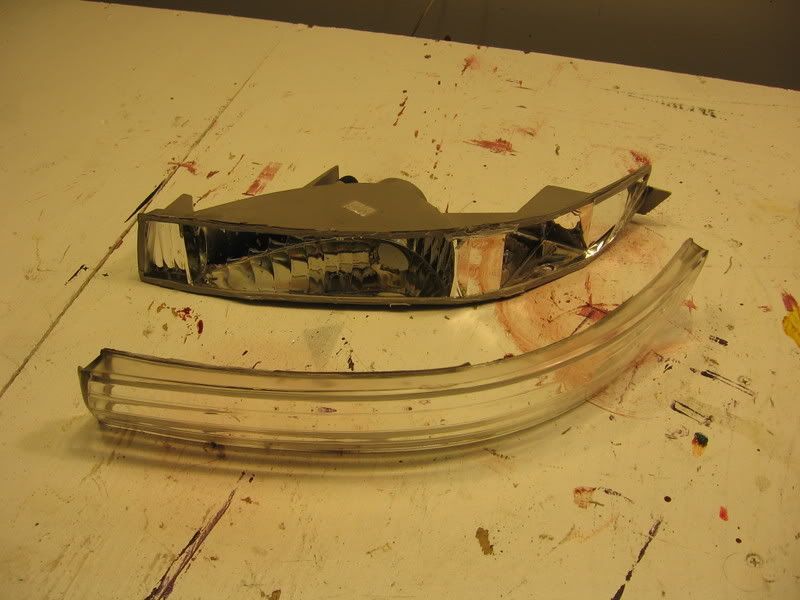
With the two halves apart, pare away the rough glue and plastic remnants left along the mating edges of both the lens and the housing. Also clear out any chips or shavings that dropped down inside the housing during cutting. Keep the blade angled away from you and mind your fingers, as this trimming step is where cuts most often happen.
6 Mask everything that stays unpainted
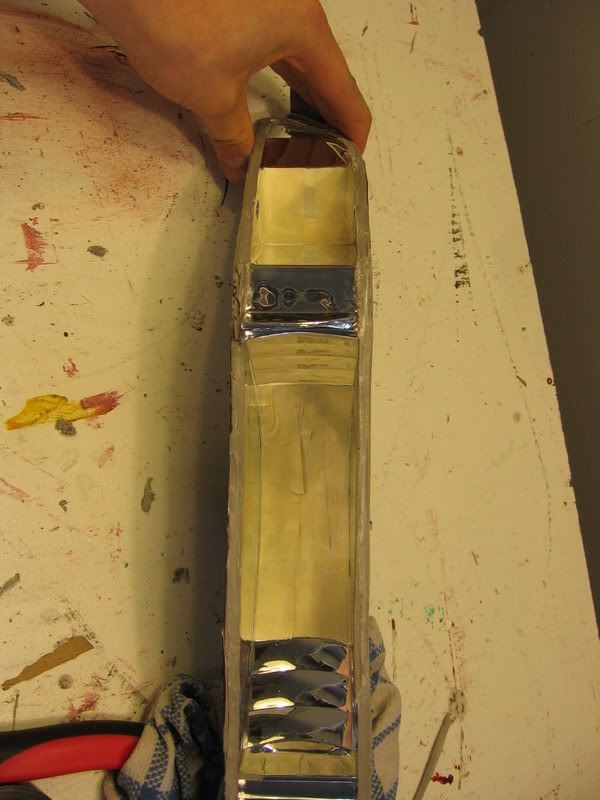
Cover the areas you want to keep their original finish with masking tape, leaving only the chrome reflector surfaces exposed. Take time to get clean tape edges here, because these lines define how sharp the finished blackout will look.
7 Scuff the chrome so paint can grip
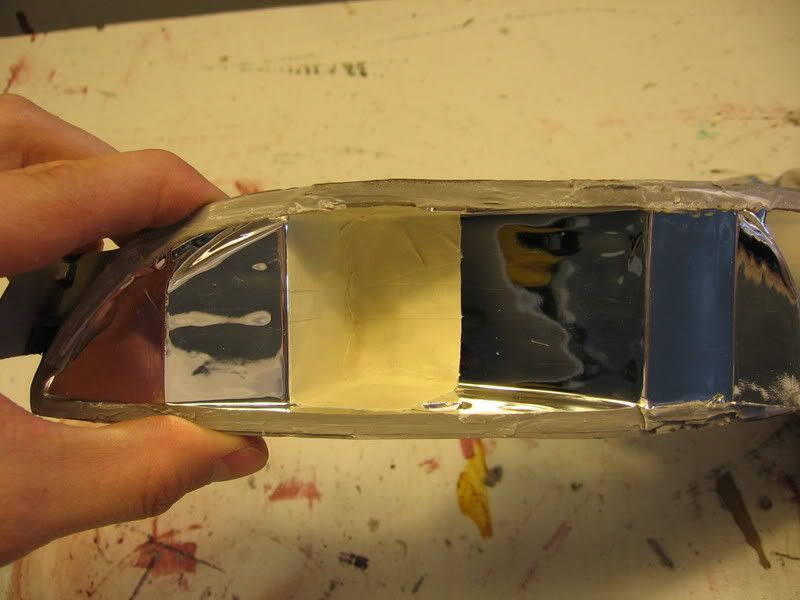
Rough up all the exposed chrome reflector areas with 800 grit sandpaper. The goal is a dull, keyed surface, not bare plastic, so there is no need to strip the chrome entirely. A smooth chrome surface will reject the paint, so do not skip this.
8 Clean off sanding residue
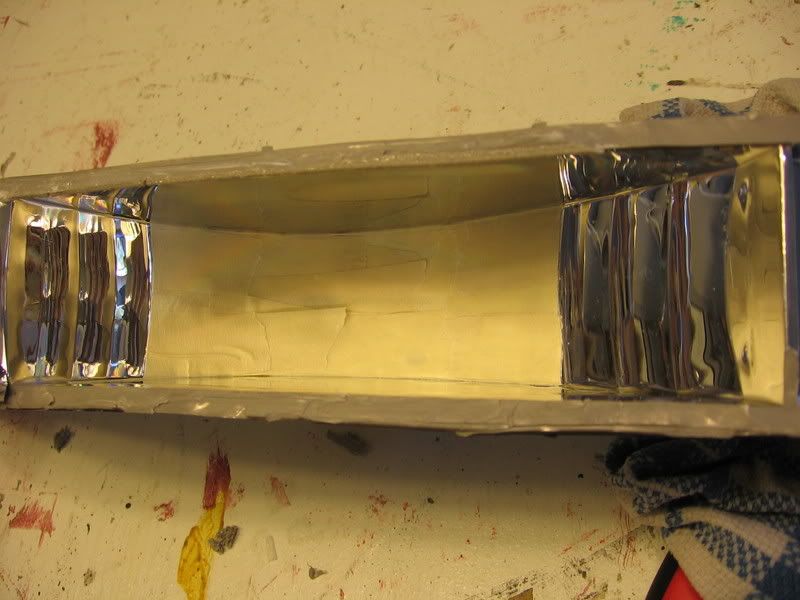
Wipe the sanded housing free of dust and any loose particles left behind by the abrasive. A clean, contaminant-free surface is essential for the primer to bond evenly and avoid fisheyes or flaking later.
9 Prime the housing
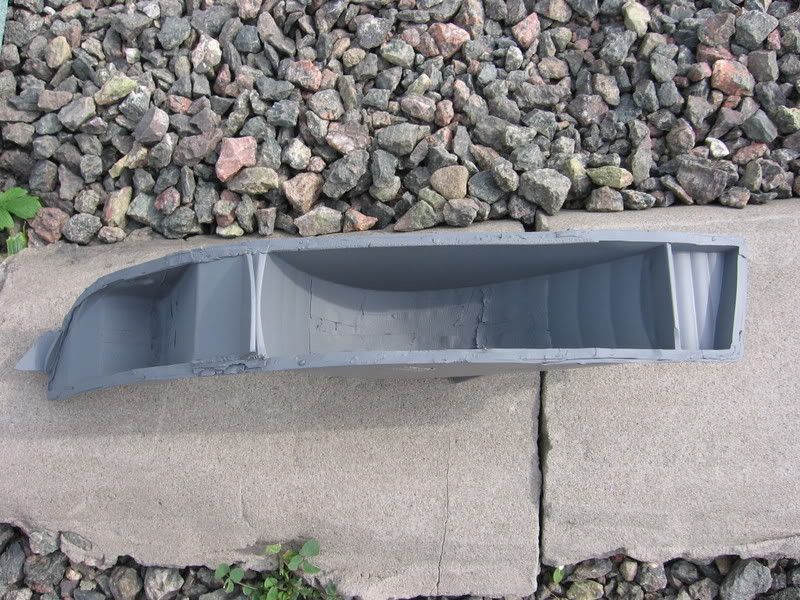
In a well ventilated area or outdoors, lay down Krylon Plastic Primer in light passes. Two thin coats give even coverage; heavy application will sag and run because of the steep angles inside the housing. Allow the primer to cure fully per the product's stated drying time before painting.
10 Apply the flat black paint
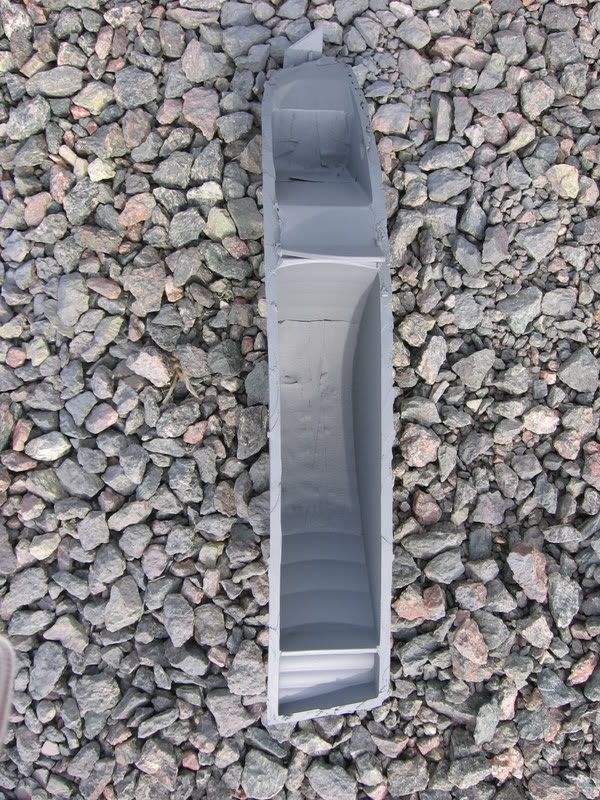
Once the primer has set, spray Krylon Plastic Flat Black in the same light-coat approach. Three thin coats build an even finish without runs; the sharp interior angles make heavy coats sag quickly. Let the paint harden thoroughly, ideally overnight, before touching it.
11 Unmask and prep for reassembly
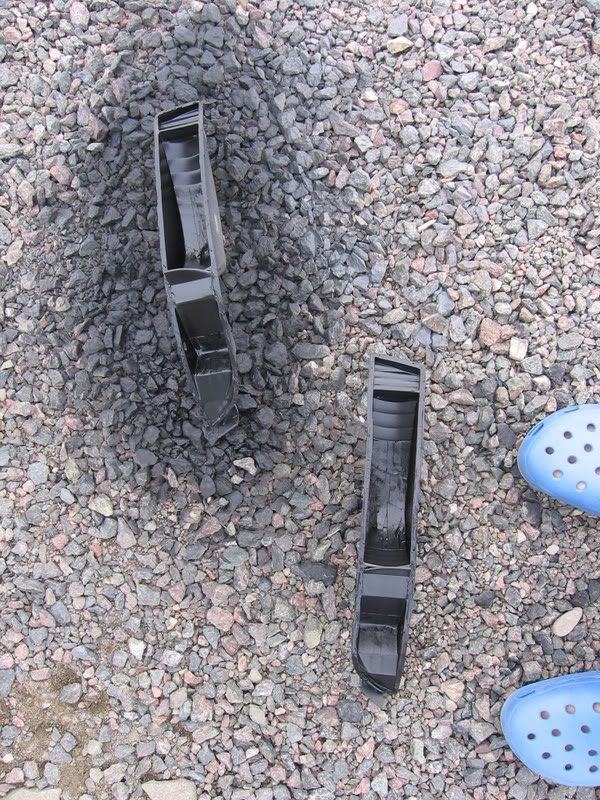
After the paint is fully dry, peel the masking tape away slowly so it does not lift any paint at the edges. Confirm the mating surfaces of both housing and lens are clean, and take the opportunity to wipe the inside of the lens clear of fingerprints and debris while it is still open.
12 Reassemble and reseal the lamp
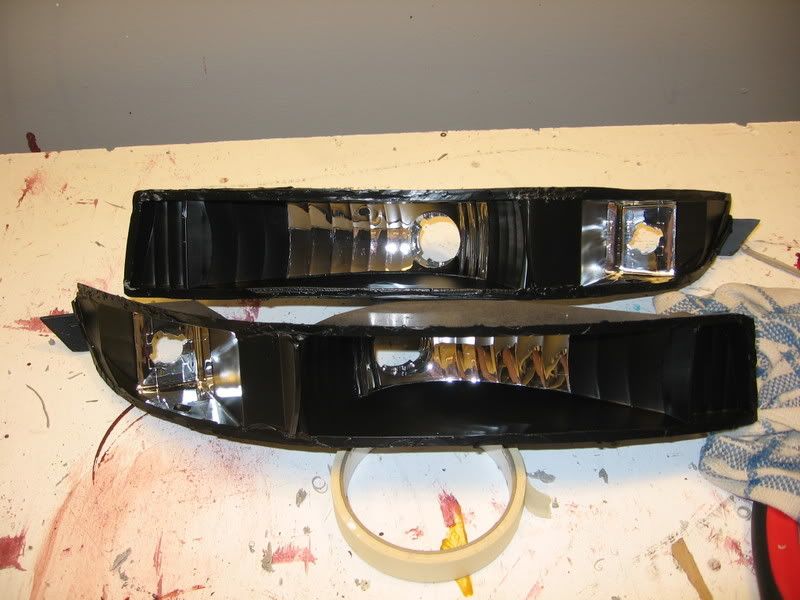
Fit the lens back onto the painted housing and hold the two together with masking tape; expect a small gap along the joint since the original bond is gone. Run Mono Clear bathroom sealant (or an equivalent clear silicone) along the seam with a caulking gun, keeping the tape line as your guide and using only enough to fill the gap so it does not weep inside. Smooth the bead with a wet fingertip. When the sealant has cured per its instructions, remove the tape, fill any gaps the tape left, and let it set. Inspect the full perimeter for missed spots, since an incomplete seal will let condensation form inside the lens. Finally, remove any sealant or glue smears from the outside of the lens with Meguiar's PlastX plastic cleaner.
Pro Tips
- 💡 A rotary tool at low speed is far less painful than a utility knife for opening the seam; some owners buy an inexpensive one just for the job.
- 💡 If a lens will not release, stop and recut the glue rather than pulling, which cracks the cheap clear plastic.
- 💡 Dip your finger in water before smoothing the sealant bead so it spreads cleanly and does not stick.
- 💡 Keep every primer and paint coat thin; the steep interior angles cause heavy coats to run almost immediately.
- 💡 Replacement clear corners are cheap, so having a spare set on hand removes the pressure if you damage one.
Was this guide helpful?

