Acura CL (1G) Black-Housing Headlight Conversion
Introduction
This guide covers converting the chrome-trimmed headlamps of a first-generation Acura CL to a blacked-out look by opening each sealed assembly, painting the internal chrome bezel flat black, and resealing the lens. The front bumper cover must come off to reach the lower headlamp fasteners, so that removal is part of the job. The result darkens the reflector trim for a more aggressive front end while keeping the factory lenses and any HID retrofit in place. The single biggest risk is trapped moisture, so most of the care goes into curing the paint away from the assembly and resealing the lens thoroughly. Plan for one evening of hands-on work spread around overnight drying time. Adapted from a community writeup by klepto on AcuraZine (https://acurazine.com/forums/1g-cl-diy-faq-74/black-housing-headlights-w-front-bumper-removal-470662/), including corrections from the follow-up discussion.
Reference
Tools Required
- 12mm socket
- Two socket extensions
- Ratchet or wrench
- Medium flathead screwdriver (plus a stubby and a long screwdriver)
- Heat gun or a household oven
- Oven mitt
- Sandpaper
- Masking tape
- Several clamps
- Soft cloth or towel
Parts Required
-
Primer (spray can)
-
Flat high-temperature spray paint
-
Clear silicone sealant (e.g. Permatex Clear RTV Silicone)
-
Aluminum foil (for the baking tray)
Safety Warnings
- ⚠ Trapped moisture is the biggest risk of this project; a poor or under-cured seal will fog the lamp and force you to pull the bumper and redo everything.
- ⚠ The oven-heated housing and its metal are hot; wear an oven mitt and work one lamp at a time.
- ⚠ Never bake the fully assembled headlamp to cure the paint, only the loose painted piece, or off-gassing will haze the inside of the lens.
- ⚠ There is no way to skip bumper removal; the lower headlamp bolts cannot be reached with the cover on.
- ⚠ Let painted parts dry fully before handling to avoid chipping the finish during reassembly.
Step-by-Step Instructions
1 Remove the front bumper cover

The lower headlamp fasteners cannot be reached with the bumper in place, so begin here. Pop out both corner turn-signal lenses. Take out the single screw on each side that holds the fender liner to the bumper near the bottom edge (on some cars it sits higher), plus the screw hidden inside the lower grille beside the inner edge of the turn-signal opening. Reaching through each turn-signal cavity, run a 12mm socket on two stacked extensions to remove the two 12mm bolts per side: a lower bolt and an upper one that is awkward to reach, so keep seating the socket until it catches. With every fastener out, lift the cover slightly and draw it forward off the car.
2 Unbolt and remove the headlamp assemblies
Each headlamp is held by five bolts (the original writeup counted six, but the corrected figure is five). Back them out and lift each assembly clear of the car. These bolts sit in the area the bumper covered, which is why the cover had to come off first.
3 Remove all bulbs
Pull every bulb from the assembly, including low beam, high beam, and any signal or marker bulbs; consult the factory service manual if you are unsure how each one releases. Hold halogen or HID capsules by the base only, since skin oil left on the glass shortens bulb life.
4 Heat the assembly to soften the factory sealant
Handle a single assembly at a time and never batch them. Preheat an oven to 200 degrees for roughly five minutes, lay foil on a tray, then bake a single assembly for 8-10 minutes; alternatively, play a heat gun evenly around the seam. Avoid opening the oven repeatedly to peek. Bare-metal areas may distort a little, and the small black vent tubes can be left alone, though keep them from dropping loose inside the oven.
5 Separate the lens from the housing
Lay a towel on your work surface to protect the lens face down. Wearing an oven mitt on your steadying hand because the metal is hot, work a medium flathead screwdriver into the seam at the bottom and ease the lens away from the housing gradually. If it resists, the butyl is not hot enough, so reheat rather than force it; forcing only bends the housing flange and ruins the later seal. Protect the grey plastic clips running along the edge.
6 Remove the chrome bezel
Undo the two screws on each side that retain the chrome trim piece you intend to paint, lift it out, and set the remaining components somewhere safe and clean where they will not get scratched.
7 Sand the chrome dull
Scuff the entire chrome surface until it is uniformly matte. A sanded surface gives the primer something to grip and keeps the finish from flaking, which is the failure that makes refitting the piece so frustrating later.
8 Mask and prime
Pop out the corner lens where applicable and mask carefully, fully covering the bulb opening at the rear so overspray cannot reach the corner reflector. Lay an even coat of primer over the sanded bezel.
9 Apply the paint
Using a flat high-temperature paint, build 2-3 light coats spaced about 15 minutes apart. The first coat will look thin and patchy, which is normal; the later coats fill in the color. Keep every coat light, because the steep contours let heavy paint run easily.
10 Let the paint dry
Leave the bezel to cure, ideally overnight. Rushing this stage invites chipping when you reassemble the trim or peel the masking, which would undo the work you just did.
11 Heat-cure the painted piece only
Bake just the painted bezel on its own (a heat gun, or about 8-10 minutes at 200 degrees), never the assembled lamp. High-temperature paints off-gas and shift sheen the first time they are heated; curing the loose piece now stops a foggy film or rainbow haze from forming inside the sealed lamp. Flat paint usually settles to a semi-gloss after this.
12 Reseal the lens to the housing
Scrape away as much of the old grey factory sealant as you can rather than pushing it back into the channel. Reheat the housing seam, lay a generous bead of fresh clear silicone (such as Permatex Clear RTV Silicone) into the groove, and press the lens home. Let whatever squeezes out cure untouched; do not wipe or smear it, and once dry it peels off cleanly. Never use Goo Gone on silicone, as it just smears the mess everywhere.
13 Clamp and cure the seal
Clamp the lamp shut tightly for at least four hours, and longer or overnight if you can manage it, so the seal sets fully. An incomplete cure is the main cause of fogging, so confirm the sealant is no longer wet before moving on.
14 Reinstall and monitor for fogging
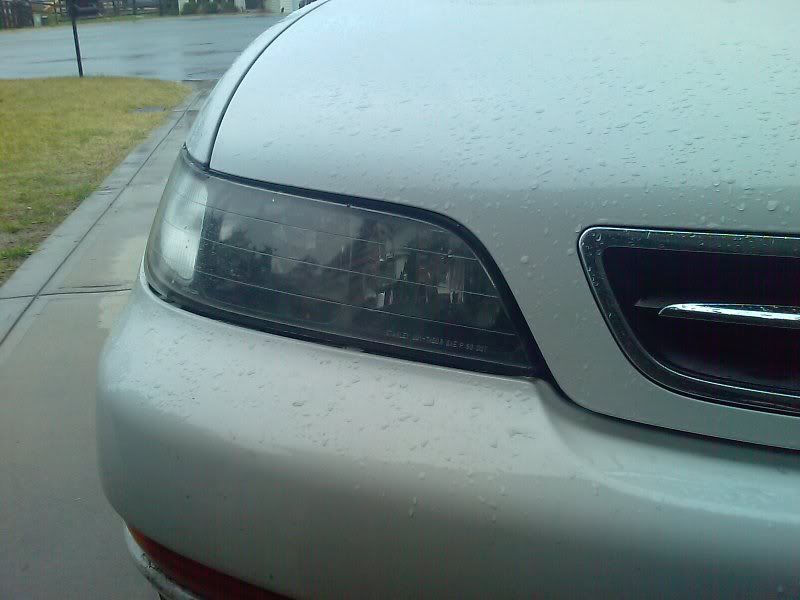
Refit the bulbs, mount the headlamps, and reinstall the bumper cover; aligning the cover is the fiddliest part of the whole job, so a second person speeds it up. Over the next several days, especially in damp or rainy weather, watch for internal condensation. Any fogging means the seal needs more silicone or more cure time.
Pro Tips
- 💡 Permatex Clear RTV Silicone in the small auto-parts squeeze tube works well; plain clear silicone from a hardware store is also fine.
- 💡 Use enough sealant that a little gushes out when you clamp the lamp; too little forced at least one person to redo the job.
- 💡 Choose a flat paint rather than gloss, since the heat cure turns it to a semi-gloss anyway.
- 💡 Have a helper on hand for the bumper reinstall, as realigning the cover is the hardest single part of the project.
- 💡 If a headlight does not work after reassembly, check the fuse in the engine-bay fuse box (upper passenger side) before assuming a dead bulb; touching the bulb glass during removal can also kill it.
Was this guide helpful?

