2001 Honda Accord Front Strut and Damper Replacement
Introduction
This procedure covers removing and rebuilding a front strut assembly on a 2001 Honda Accord EX (sixth-generation, 1998-2002), and applies equally whether you are replacing worn dampers or chasing a front-end rattle. A common cause of that rattle is the upper rubber mount bushings being installed upside down, which lets them shear against their washers, combined with collapsed bump stops. Because the coil spring must be compressed off the car to reach the damper, treat the bushings and bump stops as a package and renew them whenever the damper comes out. The single most awkward point, which the Haynes manual glosses over, is freeing the lower fork past the end of the damper; this guide gives the workaround. Adapted from a community writeup by keep_hope_alive on DriveAccord (https://www.driveaccord.net/threads/2001-accord-front-strut-swap-how-to.74969/), including corrections from the follow-up discussion.
Reference
Tools Required
- Floor jack
- Jack stands
- Air compressor with impact wrench (impact required for the lower fasteners)
- Metric impact sockets, 10mm through 19mm
- 3/8" drive metric socket and ratchet set
- Metric combination/box-end wrench set
- Crescent (adjustable) wrench
- Vice grips
- 5mm metric hex key
- Ball-peen hammer and rubber mallet
- Coil spring compressor (typically a $50 refundable rental from a parts store)
Parts Required
-
Front strut dampers (KYB or OEM equivalent)
-
Upper rubber mount bushings (diagram #6, approx. $2 each)
-
Bump stops (diagram #12, approx. $7 each)
Safety Warnings
- ⚠ A compressed coil spring stores dangerous energy. Grip as many coils as possible, keep body parts out of its line of travel, and release it slowly.
- ⚠ Always support the car on jack stands, never on the jack alone, and keep a jack under the hub assembly as it drops.
- ⚠ An impact wrench is effectively mandatory for the lower fork and link fasteners; hand tools alone are likely to strip or fail.
Step-by-Step Instructions
1 Raise and support the vehicle, remove the wheel
Loosen the wheel lug nuts, then lift the front of the car with a floor jack and set it securely on jack stands. Never rely on the jack alone. Remove the road wheel to expose the strut, hub, and lower fork.
2 Detach the brake line bracket
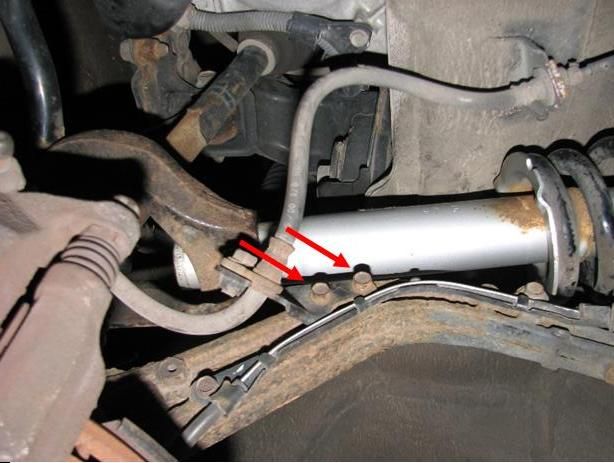
Remove the two 10mm bolts that clamp the brake hose/line bracket to the strut. Free the line so it is not stressed as the assembly is lowered later. There is no need to open the hydraulic system.
3 Remove the lower fork pinch bolt
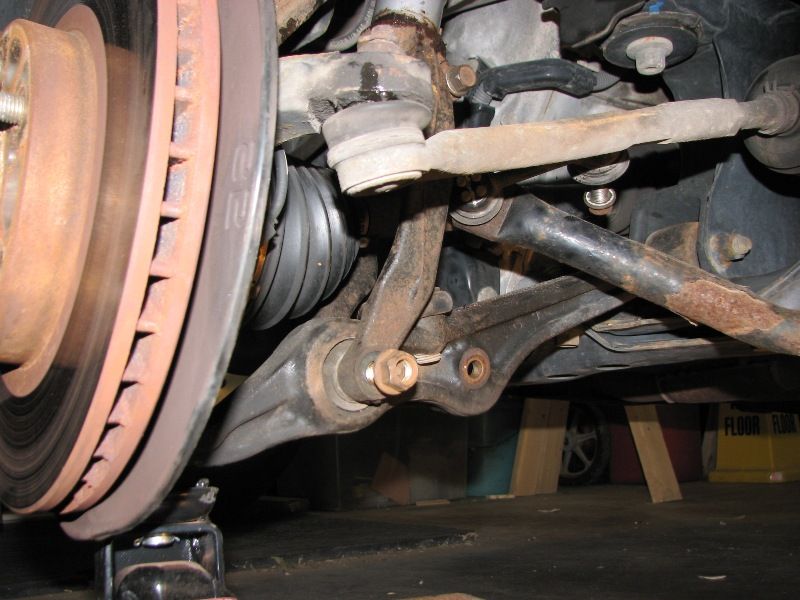
Back out the 17mm lower fork bolt (exploded diagram callouts 24 and 26). An impact wrench is effectively required here; these lower fasteners rarely yield to hand tools.
4 Free the upper fork bolt
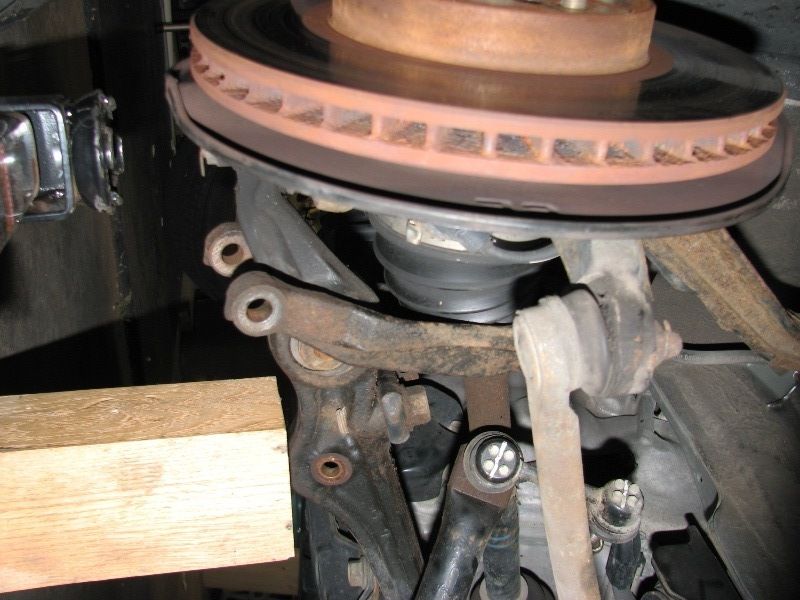
Remove the 14mm upper fork bolt (diagram callout 22). With it out, tap downward on the fork with a mallet to start separating it from the damper. It will not slide fully clear yet, because the lower link still holds the hub up.
5 Drop the hub by releasing the lower link or sway bar
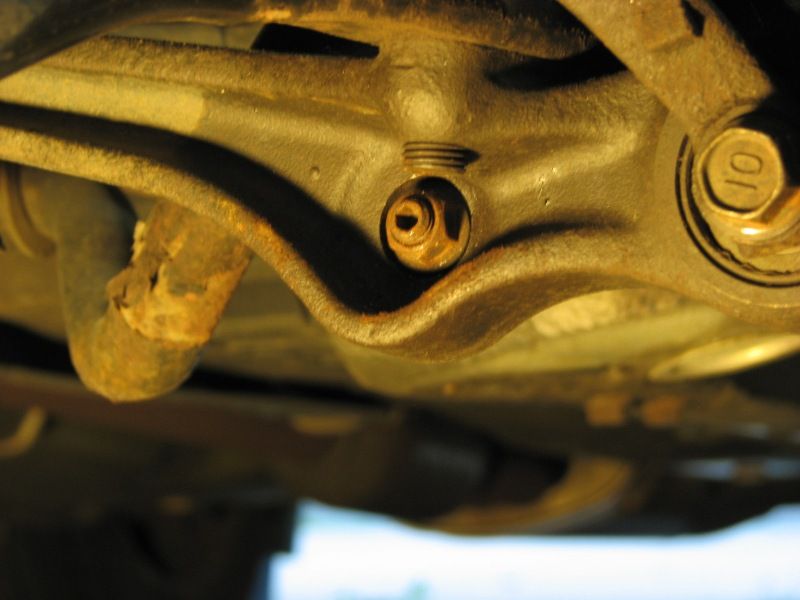
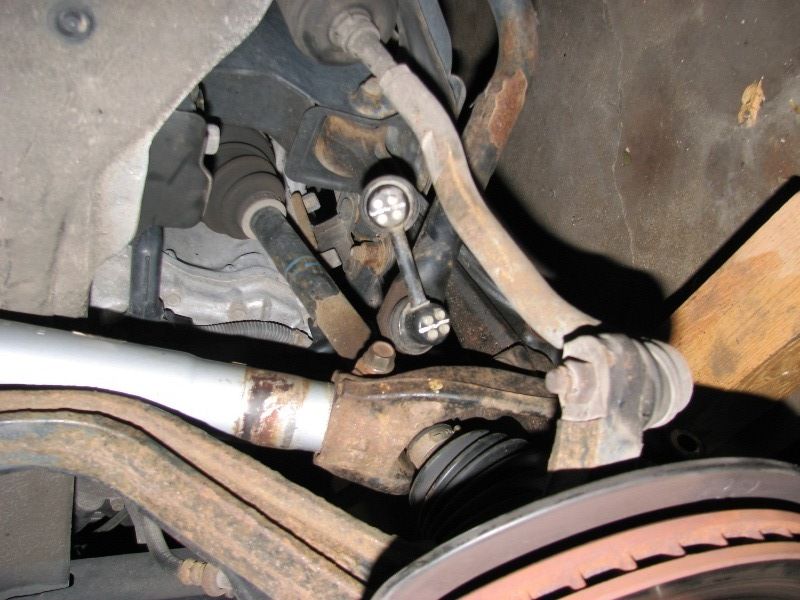
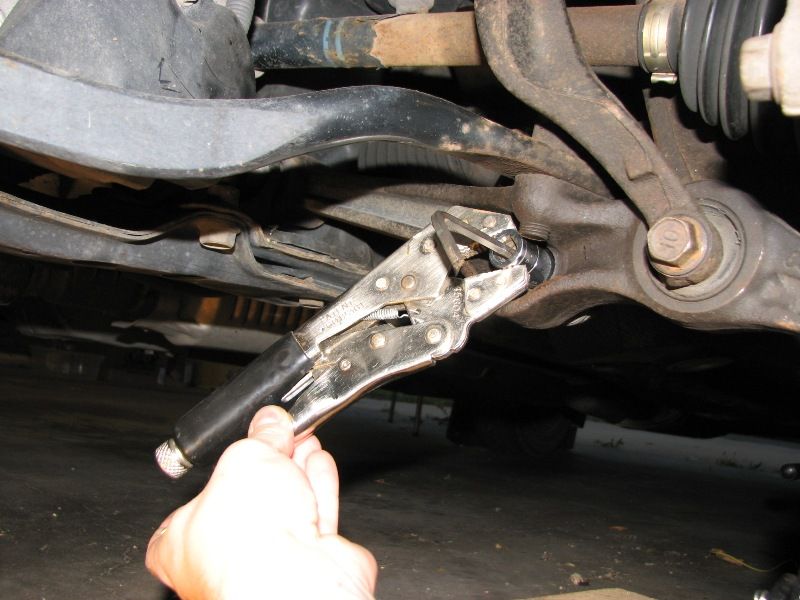
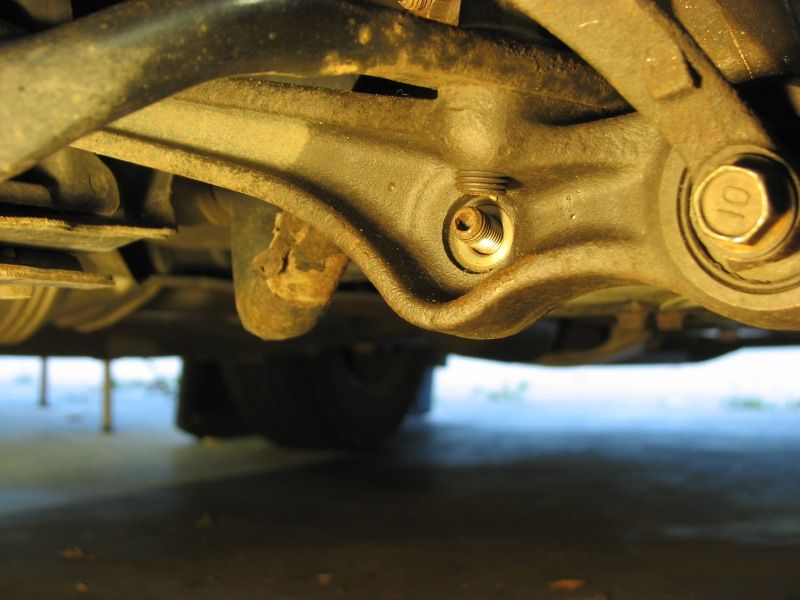
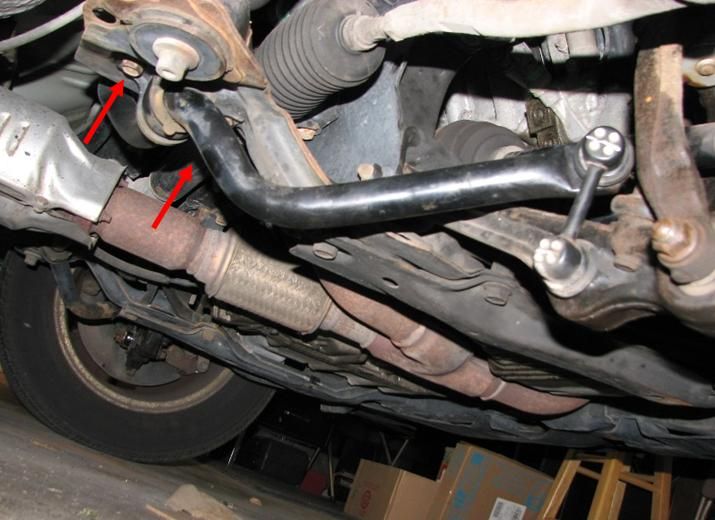
The hub must swing down far enough for the fork to clear the end of the damper. The easy method is to remove the two 14mm sway bar bolts, which lets the control arm drop. The harder method is to undo the lower link bolt (diagram callouts 4/5 and 21): its head takes a 5mm hex key while the shank is a 14mm bolt, and it spins freely. To beat the spin, clamp vice grips on a 14mm socket over the bolt, pass the hex key through the socket opening, and hold the hex still while loosening the bolt. Support the whole hub assembly on a jack as it comes down.
6 Unbolt the strut top and remove the assembly
In the engine bay, remove the five upper mount fasteners that hold the strut to the body: three 14mm and two 12mm. Maneuver the strut out of the wheel well, raising the hub as needed to gain clearance for the fork to pass the damper.
7 Compress the coil spring
Fit a spring compressor on the bench, capturing as many coils as possible for a safe, even grip. Before compressing, scribe a reference mark linking the spring seat (diagram #7) to the coil itself, which lets you index the seat correctly against the damper and fork during rebuild. Compress the spring until the upper mount is unloaded.
8 Release the top nut and separate the damper
Hold the damper shaft still by gripping its flat with a crescent wrench, then loosen the 14mm top nut with a box-end wrench. Lift off the upper mount, seat, and spring, and withdraw the old damper from the assembly.
9 Renew the damper, bushings, and bump stop
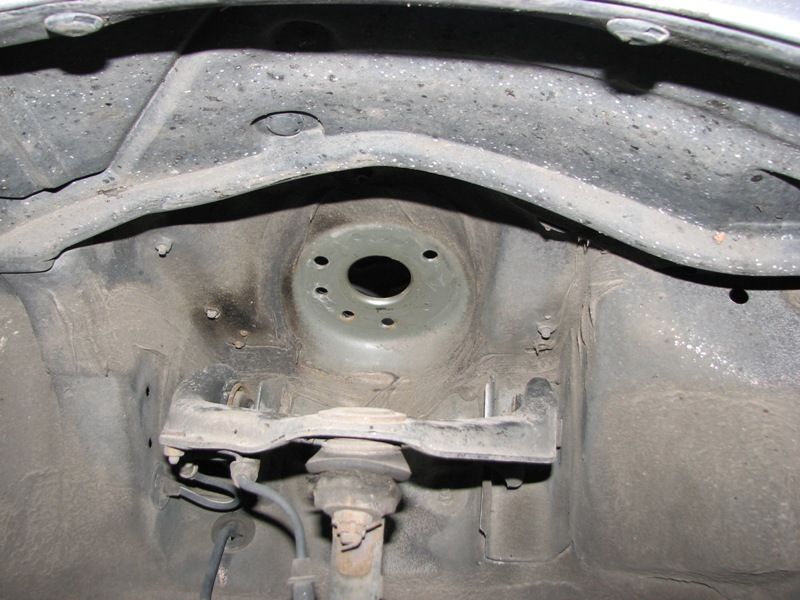
Install the new damper. Fit a fresh bump stop (diagram #12) and new upper rubber mount bushings (diagram #6). Orientation matters: seat each rubber with its larger end against the strut cap and the smaller end toward the washer. Installing them the other way, even if they seem to fit better, lets them shear and rattle.
10 Rebuild the strut and start the top nut
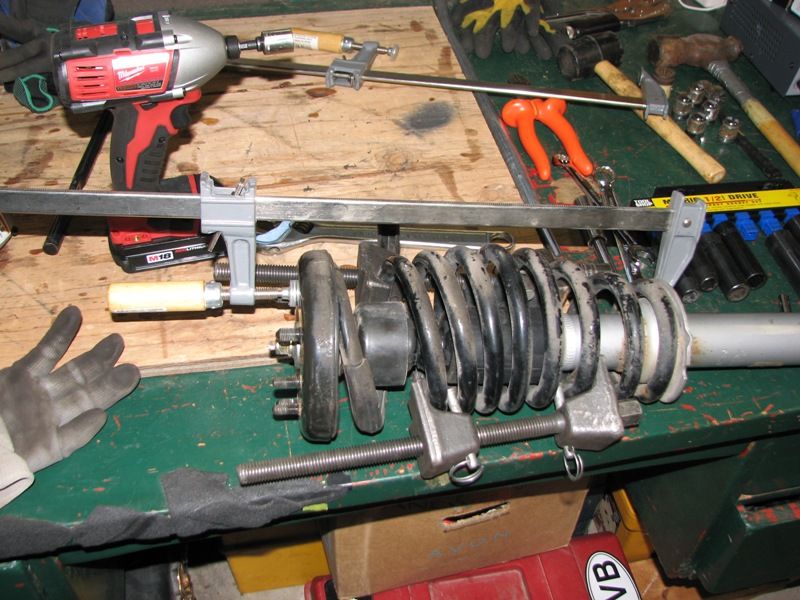
Set the spring back on with the seat aligned to your reference mark, refit the upper mount, and thread the top nut. If the cap will not compress enough to catch the threads, add a clamp to squeeze it down until the nut starts. Snug the top nut, then carefully release and remove the spring compressor.
11 Reinstall and torque the assembly
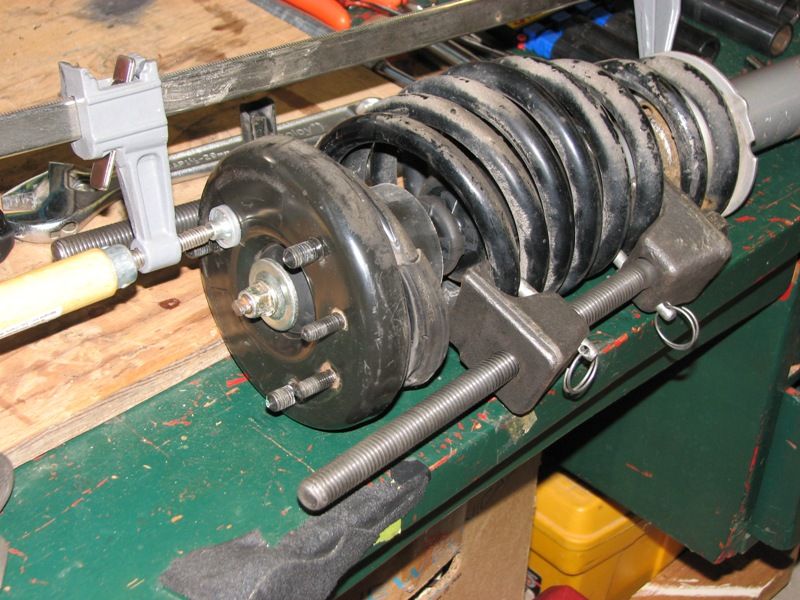
Refit the strut in reverse of removal: bolt the upper mount to the body, raise the hub to slip the fork onto the damper, and reconnect the lower link or sway bar, the fork bolts, and the brake line bracket. The lower fork bolt takes a 19mm impact to fully tighten. Reinstall the wheel, lower the car, and torque the lug nuts.
Pro Tips
- 💡 Removing the two 14mm sway bar bolts to drop the control arm is far quicker than fighting the free-spinning lower link bolt.
- 💡 Parts-store spring compressors are usually loaned for about $50 and fully refunded when returned.
- 💡 Mark the spring seat to the spring before compressing so the seat lines back up with the damper and fork.
- 💡 The rubber bushings and bump stop are cheap (around $2 and $7 each); replace both any time the damper is out rather than reusing tired parts.
- 💡 The Haynes manual skips the lower link step and gives poor guidance there, so plan for it in advance.
Was this guide helpful?

