Honda Fit (GE8) C-Pillar Brace Bar Installation
Introduction
A C-pillar brace is a lightweight bar that spans the interior behind the rear seats, bolting to the two upper seat belt anchor points where the belts mount to the body. Because it clamps to the reused factory anchor hardware, it installs without drilling, cutting, or new fasteners. This guide covers the bolt-on kit sold for the second-generation Honda Fit (GE8, roughly 2009-2013), which arrives as a threaded center bar with an adjustable rod end (end link) at each side. Owners fit it for a modest rear-body tie-together and for its appearance; note that reported handling gains are limited and debated, so treat it primarily as a light chassis accessory rather than a serious stiffening upgrade. The whole job reuses your existing anchor bolts and washers and can be finished in well under an hour with a small set of hand tools. Adapted from a community writeup by kurisux92 on FitFreak (https://www.fitfreak.net/forums/2nd-generation-ge8-specific-suspension-brakes-sub-forum/62948-diy-c-pillar-bar-advanced-speed-shop-type.html), including corrections from the follow-up discussion.
Reference
Tools Required
- Flat-head screwdriver (to release the trim covers)
- 14mm open-end wrench
- 14mm socket with an extension of roughly 5 inches
- 3/8-inch drive ratchet
- 24mm open-end wrench
Parts Required
-
C-pillar brace bar kit with two threaded end links (e.g. Advanced Speed Shop, ~$30)
-
Factory seat belt anchor bolts, lock washers, flat washers, and plastic retainer discs (all reused from the vehicle)
Safety Warnings
- ⚠ Keep your face and eyes clear when prying off the trim covers; a released cover can fly off with force.
- ⚠ Hand-start each anchor bolt and verify it is not cross-threaded before tightening.
- ⚠ The two mounting bolts also secure the upper seat belt anchors, which are safety-critical restraint mounts. Ensure each anchor is correctly seated on its tab and the bolt is fully tightened before driving.
Step-by-Step Instructions
1 Lay out the bar and confirm the hardware
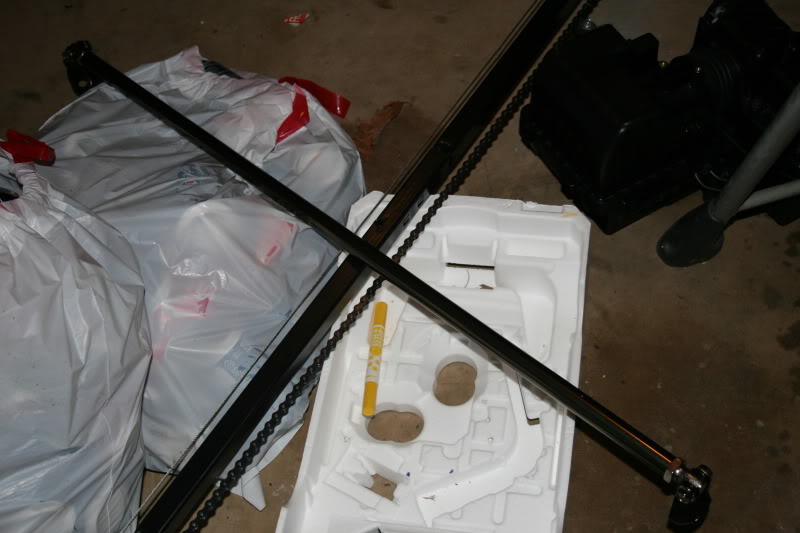
Unpack the brace and identify the center bar with a threaded rod end (end link) screwed into each end, plus a large adjuster nut riding on each threaded section. No new bolts are supplied; the kit clamps onto the seat belt anchor bolts already in the car, so no additional fasteners are needed. Set your two open-end wrenches, the socket and extension, and the ratchet within reach before starting.
2 Release the seat belt anchor trim covers
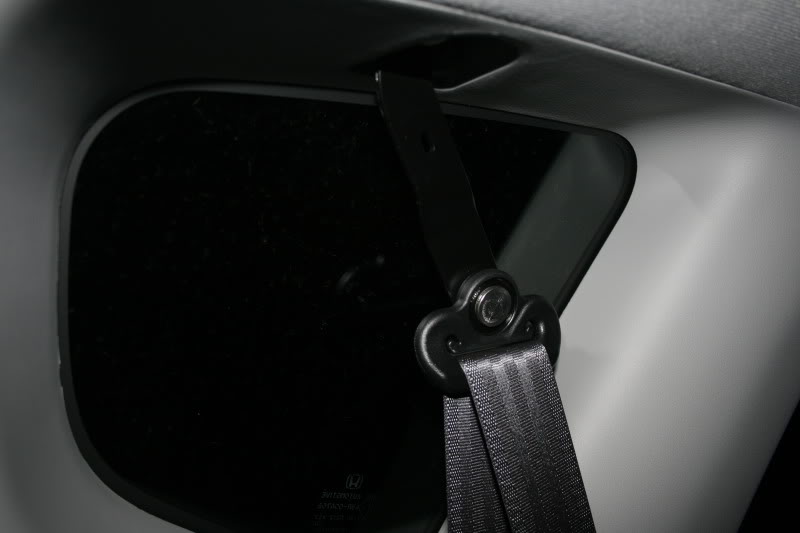
Each upper seat belt anchor is capped by a two-piece plastic cover. Work the tip of a flat-head screwdriver into the seam where the halves meet and twist gently until the cover snaps free. Keep your face clear while doing this: a released cover can spring off with some force. Repeat for both anchors so the mounting bolts are exposed.
3 Remove the first anchor bolt and save the loose hardware
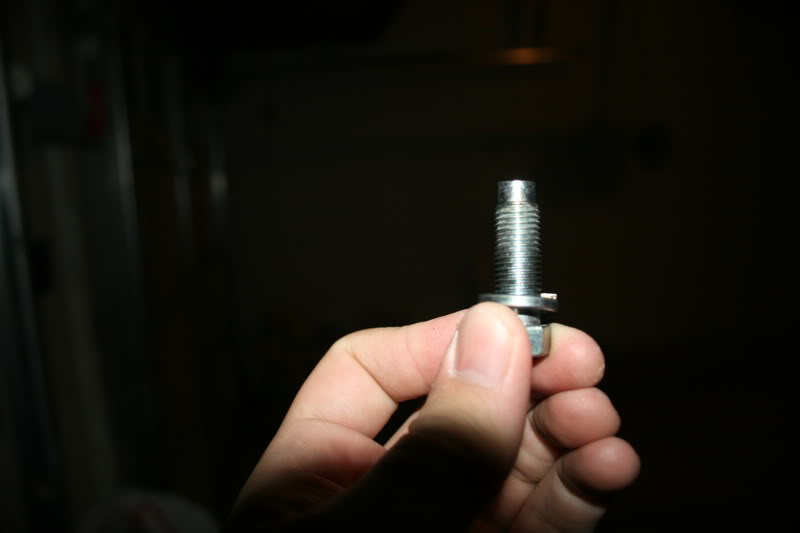
Pick one side to start. Using the 14mm socket, extension, and ratchet, back out the bolt that secures that seat belt anchor and lift it out. As it comes free, capture the flat washer and the small plastic disc that sits above it to hold the washer in place during assembly; note exactly how they were stacked, because they go back in the same order later. Leave the lock washer on the bolt, as it is permanently fitted.
4 Detach one end link from the bar
To keep the bar from fighting you while you thread the first bolt, unscrew the end link on your starting side from the center bar so you can handle it on its own. This lets you build up the bolt stack and start it into the anchor without maneuvering the full assembly at the same time.
5 Assemble the bolt stack and mount the first end link
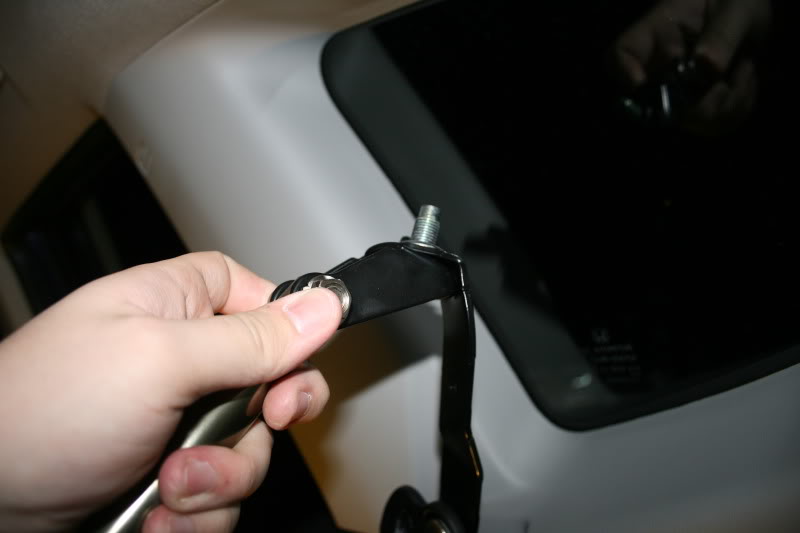
Slide the anchor bolt through the end link eye and then through the seat belt anchor, keeping the lock washer on the outside. Return the flat washer to its original position and set the plastic disc above it so the washer cannot slip off. Guide the anchor back onto its locating tab (a slot beside the threaded hole engages a metal tab), hold it up in place, and hand-start the bolt using only the socket and extension. Run it in about halfway so it cannot fall out, taking care not to cross-thread, then snug it with the ratchet to hand-tight only. Do not fully tighten yet: the end link must still be free to swivel so you can reach the opposite side.
6 Free the opposite anchor and set the bar length
Remove the bolt and hardware from the second seat belt anchor the same way you did the first, saving its washer and plastic disc. Thread the center bar fully back onto the end link you already mounted. Then use the threaded sections at both ends to lengthen or shorten the bar so the second end link can reach its anchor hole; aim to keep the adjustment roughly centered between the two ends.
7 Mount the second end link
Build the same bolt stack on this side, lock washer outboard, flat washer and plastic disc restored in their original order. Line the end link up with the anchor, seat the anchor on its tab, and hand-start the bolt with the socket and extension. Bring it to hand-tight with the ratchet, again being careful not to cross-thread.
8 Lock the end link pivots with two wrenches
Each end link pivot has a 14mm nut on one face and a 14mm bolt head on the other. Hold the nut still with the 14mm open-end wrench while you drive the bolt head with the ratchet, tightening until the joint barely moves. Firm it up well but stop short of snapping the head. Do this at both end links.
9 Snug the 24mm adjuster nuts
A large nut rides on the threaded portion at each end of the bar. Run each nut inward toward the center until it seats against the end link and can no longer be turned by hand, then bring it up firm with the 24mm open-end wrench. These jam nuts lock the length adjustment so the bar cannot loosen or rattle.
10 Final inspection
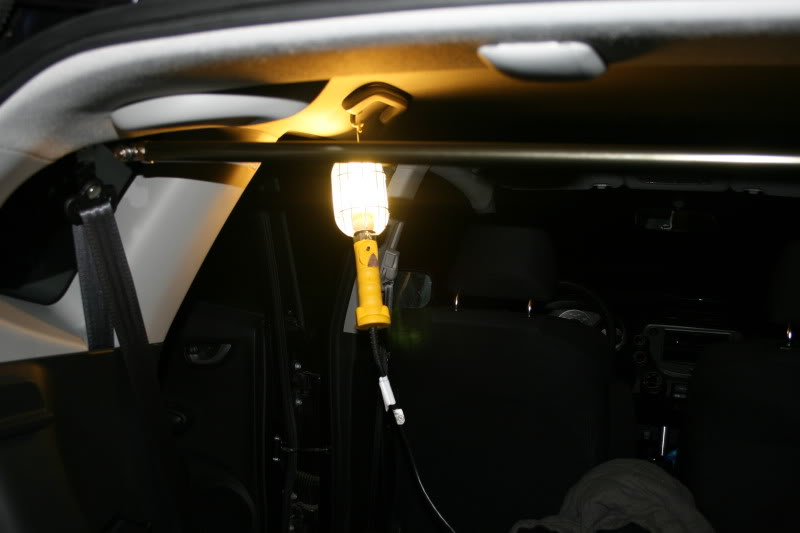
Go back over every fastener: the two anchor bolts, both end link pivots, and both 24mm jam nuts should all be secure. Confirm the bar does not shake or rattle when pushed. A small amount of flex when you pull on it is normal because the bar is aluminum. Because the two anchor bolts also retain the seat belt anchors, make sure each is fully seated and tight before returning the car to use.
Pro Tips
- 💡 Use the threads at both ends to fine-tune overall length so both end links line up with the anchor holes without forcing anything.
- 💡 The aluminum bar flexes noticeably; for a firmer setup you can thread a suitable-diameter stainless steel pipe to match the end link thread pitch and substitute it for the bar.
- 💡 Handling benefit is debated: with only a single upper bar and no diagonal member, the braced area can still deform, so do not expect meaningful rigidity gains. Some owners report improvement only when a full cross-brace setup is used.
- 💡 Expect a slight reduction in rearward visibility and in the vertical clearance available for tall cargo.
Was this guide helpful?

