Honda Fit (GD) Rear Drum-to-Disc Brake Conversion
Introduction
This guide converts the rear drum brakes on a first-generation Honda Fit (GD) to a discreet, OEM-style disc setup using rear brake components from a 1997 Acura Integra (non-Type R). The aim is a factory-appearing result that retains the standard rotor diameter and preserves the car's front-to-rear brake proportioning, rather than an oversized big-brake kit, and it costs far less than the pre-packaged kits sold for the platform (roughly $540 in parts). A Scarebird adapter bracket locates the Integra caliper and rotor on the Fit's rear axle; the disc and caliper installation is straightforward, while adapting the parking brake is the time-consuming part and requires 1987 Acura Legend cables plus some fitting. ABS remains fully functional after the swap and no master-cylinder change is needed. Note that for hard track use some owners report the stock proportioning valve can let the lighter rear discs lock, so evaluate braking balance before pushing the car. Adapted from a community writeup by apexanimal on FitFreak (https://www.fitfreak.net/forums/fit-suspension-brake-modifications/87423-diy-gd-rear-disc-brake-conversion.html), including corrections from the follow-up discussion.
Reference
Tools Required
- Metric sockets and ratchets
- 32 mm socket (for the rear hub nut)
- 10 mm flare (line) wrench
- 17 mm box wrench (if using FastBrakes conversion lines)
- Phillips and flat-blade screwdrivers
- Dremel or rotary tool with a grinding wheel
- Four jack stands and a floor jack
- Brake bleeding equipment
Parts Required
-
Scarebird GD rear disc conversion brackets
-
Rear rotors from a 1997 Acura Integra, non-Type R (Centric Premium 12040017)
-
Rear brake pads from a 1997 Acura Integra, non-Type R (Centric Premium Ceramic 10503740)
-
Rear calipers from a 1997 Acura Integra, non-Type R (Centric reman 14140532 left, 14140531 right; supplied with clips, bleeders, banjo and crush washers)
-
Integra parking-brake arms with mounting bolts: 43267-SH3-931 left arm, 43247-SH3-931 right arm, and 45240-SC2-003 bolts (four required)
-
Parking brake cables from a 1987 Acura Legend coupe: BC94043 left, BC94044 right (Raybestos-branded equivalents also fit)
-
Holding pin 43471-SD2-930 and cotter pin 90705-SD2-931
-
Conversion brake lines (FastBrakes Honda Fit rear conversion hoses, or custom hoses approximately 36 in long with a female 10x1mm end and a 30-45 degree banjo 10x1mm end)
-
DOT brake fluid
Safety Warnings
- ⚠ Support the car on four jack stands rated for the load; never rely on a jack alone while working underneath.
- ⚠ Brake fluid strips paint and harms skin and eyes; catch drips and rinse any spills immediately.
- ⚠ Bleed all four corners and confirm a firm pedal and no leaks before driving.
- ⚠ For spirited or track driving, the stock proportioning valve may allow the lighter rear discs to lock because discs need less line pressure than the original drums; assess brake balance before hard use and fit a proportioning valve if needed. This contradicts the original writeup's expectation that proportioning is unchanged.
- ⚠ Check parking-brake cable and brake-line clearance to the wheel and suspension through full steering lock and suspension travel after installation.
Step-by-Step Instructions
1 Preassemble the rear calipers on the bench
Before touching the car, build up each rear caliper away from the vehicle. Fit the pads and anti-rattle clips, apply the slide grease, and thread on the flexible conversion hose. Preparing the calipers in advance turns the on-car work into a quick bolt-up and shortens the time an open hydraulic line sits exposed to air and contamination.
2 Raise the car and remove the rear drums
Break the rear lug nuts loose, then lift the back of the car and support it on four jack stands before removing both rear wheels. Draw each drum off the hub. If a drum is seized on, thread a bolt into its service hole to jack it free from the hub.
3 Remove the hub nut and bearing/hub assembly
Pry off the cap that covers the hub nut. Relieve the staked (dimpled) collar so the nut can turn, then remove it with a 32 mm socket. Slide the bearing and hub assembly off the spindle and set it aside clean for reinstallation.
4 Swap the rear brake hydraulics
Release the two clips holding the hard-line-to-hose junction and free the line from its remaining retainers. With the new caliper and hose positioned close at hand, unthread the factory hard line from the old soft junction and immediately connect it to the new hose to keep fluid loss to a minimum. Save one junction clip per side; it is reused later to secure the parking-brake cable at the caliper.
5 Remove the drum backing plate and parking-brake assembly
Undo the four bolts that fasten the drum backing plate and its integral parking-brake assembly to the rear axle, and move the assembly aside. It may remain loosely tethered by the parking-brake cable, which is freed later from inside the car. Keep these four bolts, as they reattach the conversion bracket.
6 Install the Scarebird brackets and reinstall the hub

Bolt a Scarebird conversion bracket to each rear axle using the four retained bolts, with the mounting tabs oriented inboard and toward the rear of the car. Refit the bearing/hub assembly, install the hub nut, and re-stake (re-dimple) its collar to lock it.
7 Mount the rotor and caliper
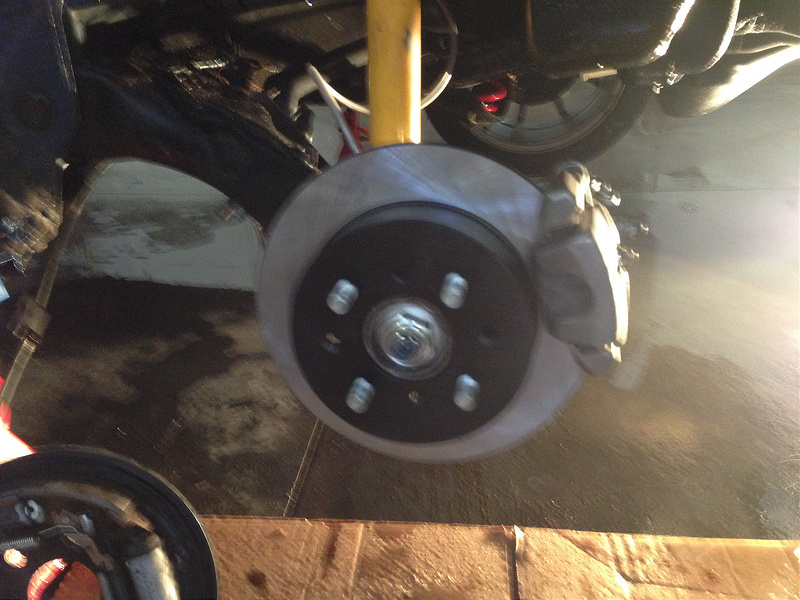
Slide the rotor onto the hub, then bolt the preassembled caliper to the bracket. Confirm the rotor seats fully flat against the hub face before final assembly. One builder found the hub would not sit flush inside the rotor's center register and had to machine the rotor's lip on a lathe to clear it, so test-fit each rotor rather than assuming it drops on.
8 Bleed the system and secure the lines
Bleed all four corners in the correct sequence until the pedal is firm. Route the new flexible lines and clamp them at several points; one reused factory clip anchors each new junction, and short lengths of rubber sleeve protect the line where it is secured. Confirm there are no leaks before moving on.
9 Disconnect the parking brake at the equalizer
Move into the cabin and lift the rear of the center console. From the back seat, back off the parking-brake adjuster nut and unhook both cable ends from the equalizer. Unbolt the cable-holding bracket and set it aside; it will be modified before reuse.
10 Remove the underbody panels and braces
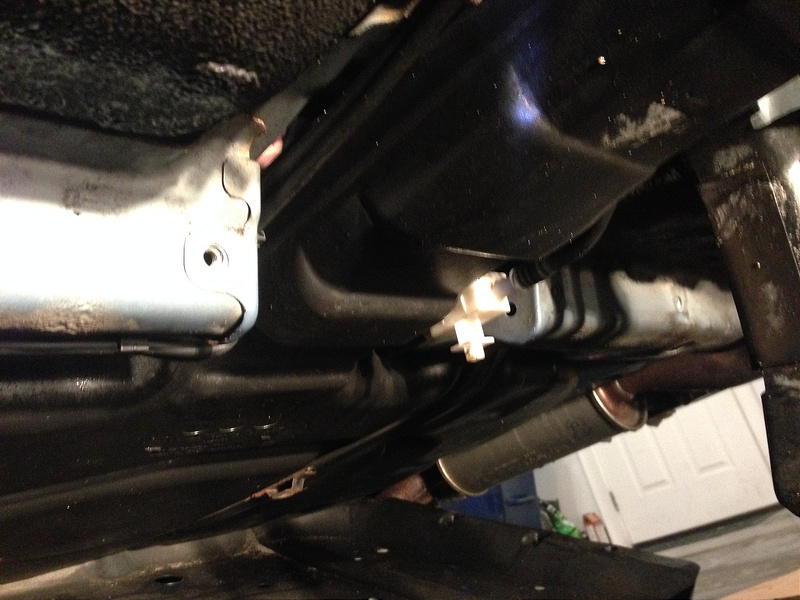
Working beneath the car, remove the bracket that shields the fuel-filler neck at its entry to the tank, the plastic undertray, the mid-frame brace, and the parking-brake bracket nuts. This opens up the cable path between the cabin and the rear axle. A helper stationed inside while you work underneath greatly speeds this stage.
11 Withdraw the old cables and prepare the new ones
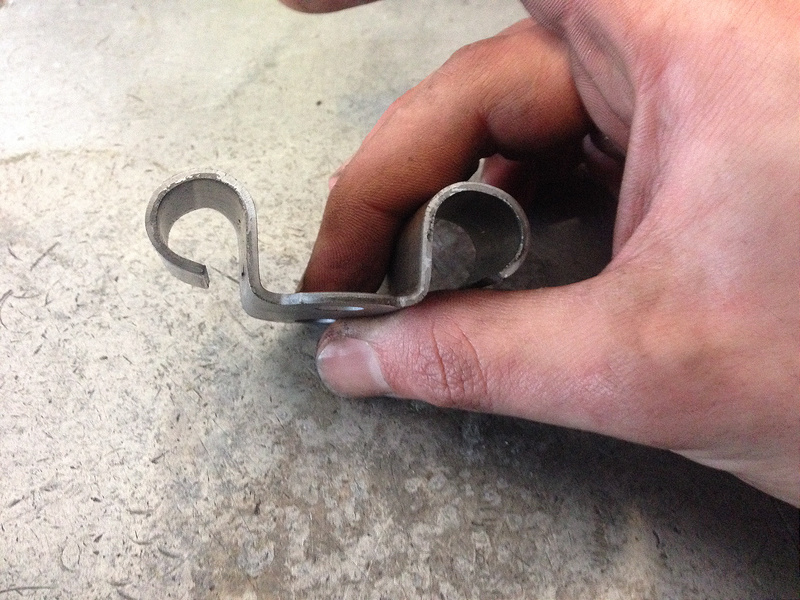
Push the cable grommets up through the floor and pull the original cables out from below, taking the driver's side first and then the passenger side. Transfer the factory grommets onto the new 1987 Legend cables, using silicone or penetrating lube to ease them into place. Rebend the cable-holding bracket so it accepts the larger end fittings of the new cables.
12 Widen the floor slots and fit the new cables
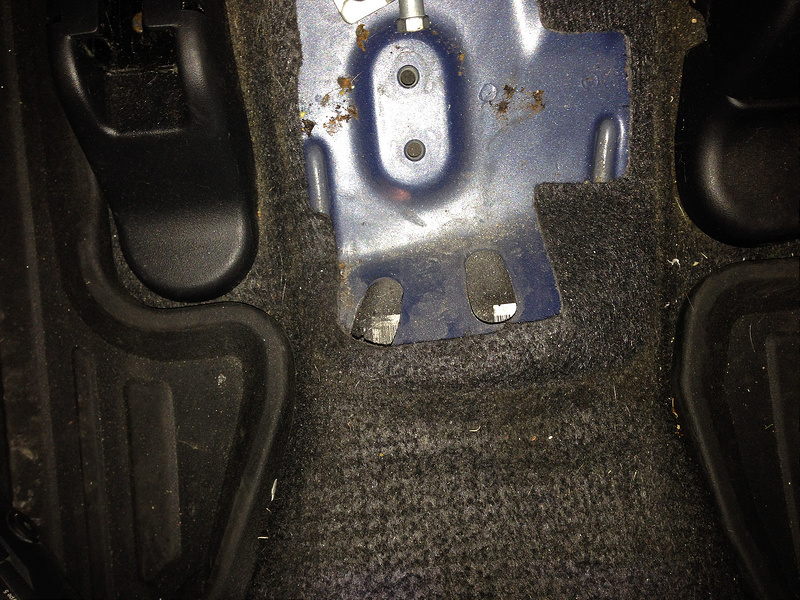
The new cables are wider than the slots in the floor, so grind roughly 1/8 inch of additional width into each slot with a dremel, test-fitting the cable repeatedly as you go. Feed the new cables up from below, passenger side first and then driver's side, reinstall the holding bracket, and reconnect both cable ends to the equalizer.
13 Connect the cables at the calipers, route, and adjust
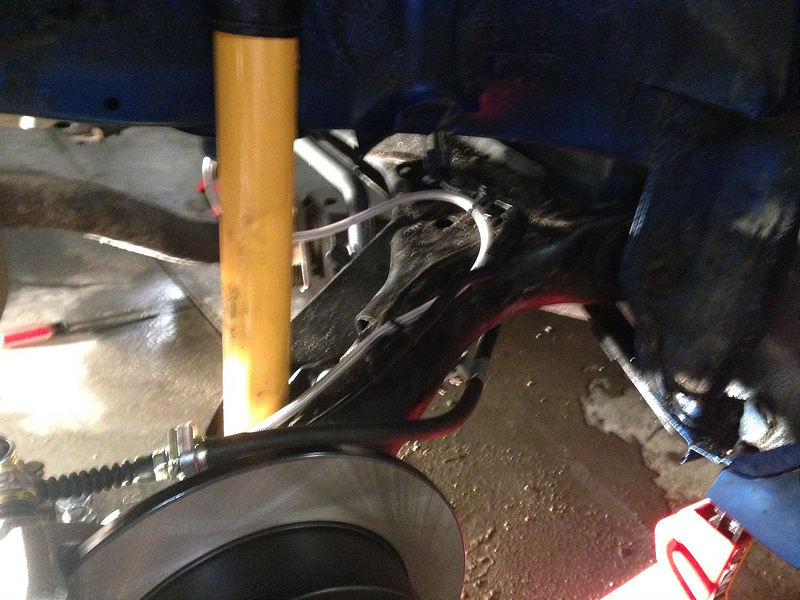
At each caliper, hook the new cable to the parking-brake arm and secure it with a saved junction clip, then attach the cable end to the caliper's spring arm using the holding pin and cotter pin. Route the remaining cable so it stays tight against the axle where it exits the caliper, then verify wheel clearance. Finally, set the parking-brake adjuster nut inside the car and confirm the brake holds before lowering the vehicle.
Pro Tips
- 💡 FastBrakes now offers parking-brake cable adapters that let you keep the factory Fit cables, avoiding the Legend cables and the floor-slot grinding entirely.
- 💡 The 1987 Legend cables are sold under Raybestos part numbers BC94043 and BC94044 and can often be found cheaper than at the originally listed supplier.
- 💡 Reman calipers (such as the Centric units) tend to develop surface rust quickly; wire-brush and paint them before installation if appearance matters.
- 💡 For daily driving, choose a street compound such as Centric Premium Ceramic. Aggressive pads (e.g. Stoptech Street Performance) wore rapidly on the lightly loaded rear axle in street use.
- 💡 EP3 Civic Si rear discs are an alternative of the same size (matching the DC2R 10.2 in rotor), but require parking-brake cable and caliper styles matched to each other.
- 💡 The Legend cables leave some slack length; a cable about 2 inches shorter should still work.
- 💡 Recruit a second person for the cable routing; it is far easier with someone inside the car and someone underneath.
Was this guide helpful?