Building a Custom Fiberglass Front Lip and Splitter Base (7th-Gen Civic)
Introduction
This guide covers fabricating a one-off front lip with an integrated flat splitter-mounting surface for a 7th-generation Honda Civic (EM2), where off-the-shelf lip options are scarce. Rather than buy a generic eBay piece, the build creates a custom lip inspired by the Js Racing FD2 profile, adapting its aggressive lines to the rounded 7th-gen bumper and eliminating the gap between lip and splitter. The method uses a shaped expanding-foam plug over a protective glass shell, refined with body filler and finished as a prototype from which a reusable mold can later be pulled. It suits fabricators comfortable with fiberglass, foam plug work, and long finishing cycles; expect a significant investment in materials and patience. Adapted from a community writeup by BlackNDecker on K20A.org (https://www.k20a.org/threads/diy-lip-and-splitter-build.111209/), including corrections from the follow-up discussion.
Reference
Tools Required
- Plywood and fasteners to build a support frame/jig
- 1.5" bumper spacers
- Air compressor with gravity-feed spray gun
- Fiberglass laminating tools (rollers, mixing cups, brushes)
- Hacksaw blade for coarse foam removal
- Orbital sander
- Sanding sponge and hand sandpaper (including 60 grit)
- Band saw / miter saw (optional, for stock trimming)
- Spray primer setup
- Respirator, gloves, and eye protection
Parts Required
-
Fiberglass chopped-strand mat
-
Polyester laminating resin and hardener
-
PVA release film
-
Two-part expanding foam
-
Body filler (Rage Xtreme used here)
-
60-grit and finer sandpaper
-
Primer
-
Optional: subframe-mounted splitter support brackets
Safety Warnings
- ⚠ Expanding foam, polyester resin, and body filler release strong fumes and dust. Work with ventilation and wear a respirator, gloves, and eye protection.
- ⚠ Do not attempt foam or filler work below their cure temperatures; foam will not rise correctly under about 60F and filler will not set well in cold conditions.
- ⚠ The bare prototype is brittle. Do not force it onto the car during test fits or it can crack; pull a mold and use molded copies for durable fitment.
Step-by-Step Instructions
1 Establish the shape and build a reference frame

Decide on the target profile before cutting anything. Here the goal was a Js Racing FD2-style lip with a flat bottom to seat a splitter gap-free. Because the 8th-gen crease that inspires that lip does not exist on the rounded 7th-gen bumper, translate the design's flowing lines into the fins rather than copying it literally. Build a plywood frame that holds everything square, level, and aligned to the ground, and space the bumper off the body with 1.5" spacers to leave working room. Confirm the front curve is symmetric by measuring across both sides; photo lighting can make a symmetric shape look uneven, so trust the tape, not the eye.
2 Apply release film and lay a protective glass shell
Spray PVA release film over the bumper surface so nothing bonds to it. Lay three layers of fiberglass mat over the bumper and let it cure for 24 hours, then pop the cured shell free. This shell protects the original bumper and becomes the working base on which the new lip is built.
3 Add symmetry guides and the reverse curve
Fabricate guides that keep the left and right halves mirror-matched as the lip takes shape. Work in a subtle reverse curve to echo the fin detail of the Js Racing lip. Once the guides are positioned correctly, glass them permanently into place so they hold the reference profile through the messy shaping stages.
4 Pour the expanding-foam plug
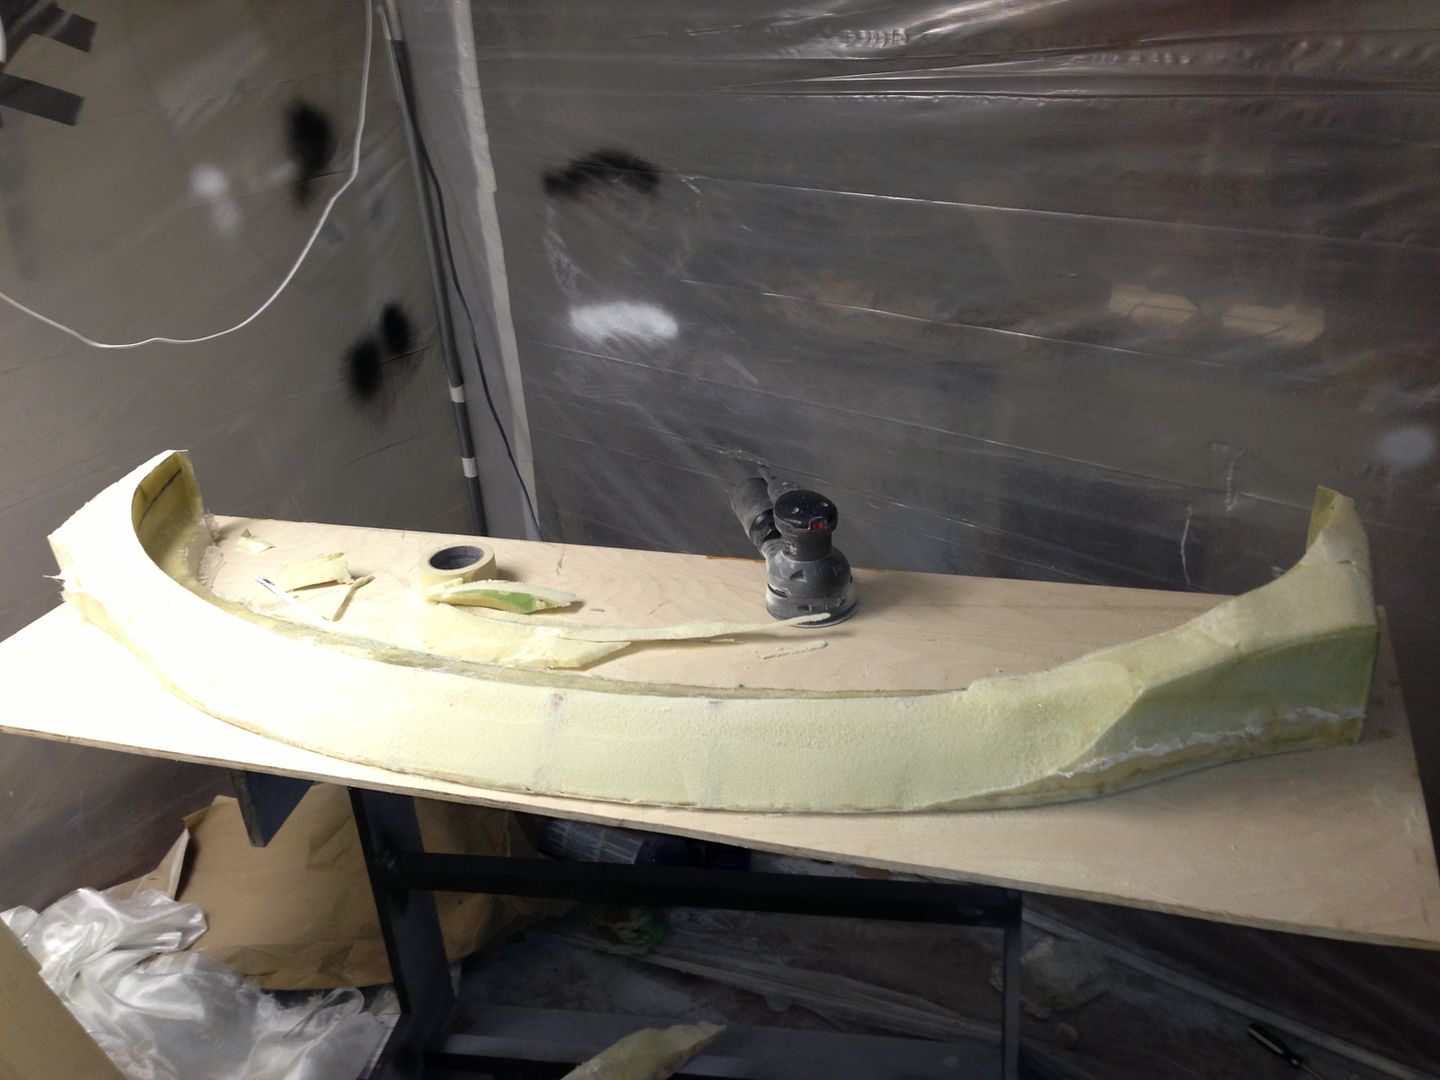
Remount the bumper on the car with the plywood frame underneath so ride height stays correct and the assembly stays level. Mix the two-part expanding foam indoors, then pour it into the frame and build the plug up in successive layers, letting each pour set for roughly a couple of hours before adding the next. Temperature is critical: the foam needs around 60F to rise and cure properly, so a cold garage will stall this step until it warms up.
5 Demold and rough-shape the plug
After the plug fills the frame, demold it and lift it off the bumper. Rough-trim toward the lip outline. The shaping itself goes quickly: remove large chunks with a hacksaw blade, knock down broad areas with an orbital sander, then refine with sandpaper wrapped around a sponge. Trim the top edge slightly where the lip needs to clear the brake ducts. A microplane wood rasp is another effective coarse-shaping option for foam and filler.
6 Skim with body filler and shape while soft
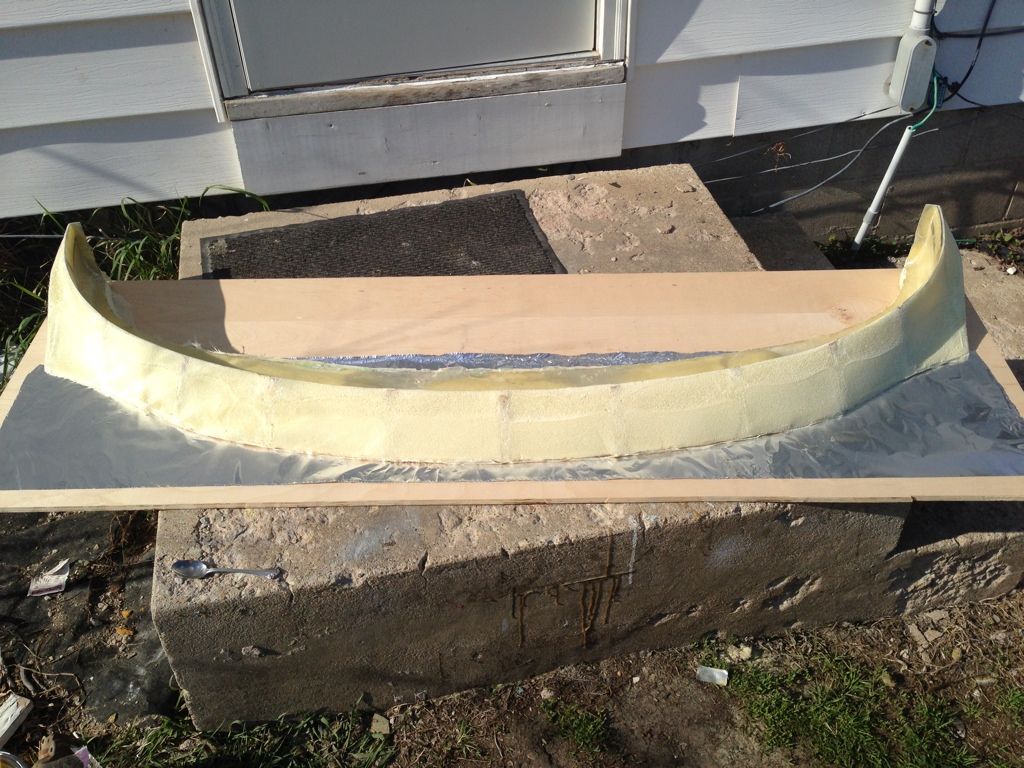
Spread a thin coat of body filler (Rage Xtreme here) over the entire plug to build the final surface. To save effort, sand the filler with 60 grit while it is still slightly soft, before it fully cures. For structural areas, favor resin with chopped-strand mat or fabric over short-fiber "kitty hair" filler, which produces a stronger part.
7 Smooth, fill pinholes, and prime
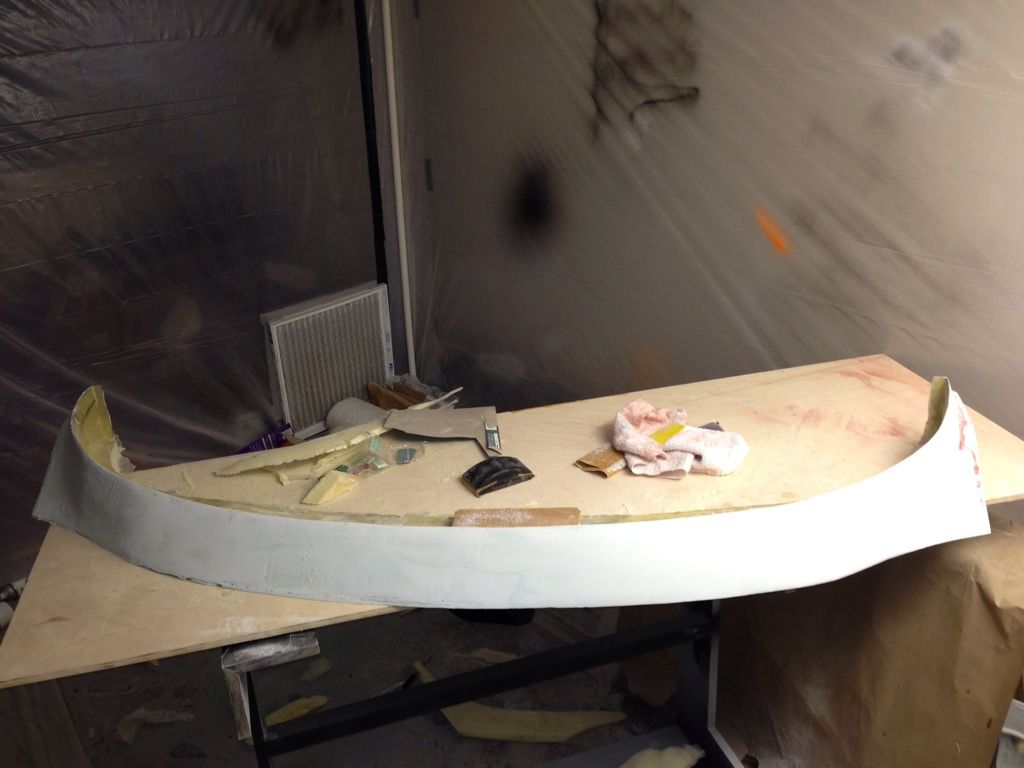
Work the surface through repeated cycles of sanding, skimming, and re-sanding. Expect burn-through spots that need another pass of filler, and chase down pinholes until the surface reads glass-smooth. This finishing stage is the most monotonous and time-consuming part of the build. Verify the outer edge geometry stays true; the outer edge here was held at exactly 90 degrees. Once smooth, lay down primer.
8 Test fit, then mold the prototype
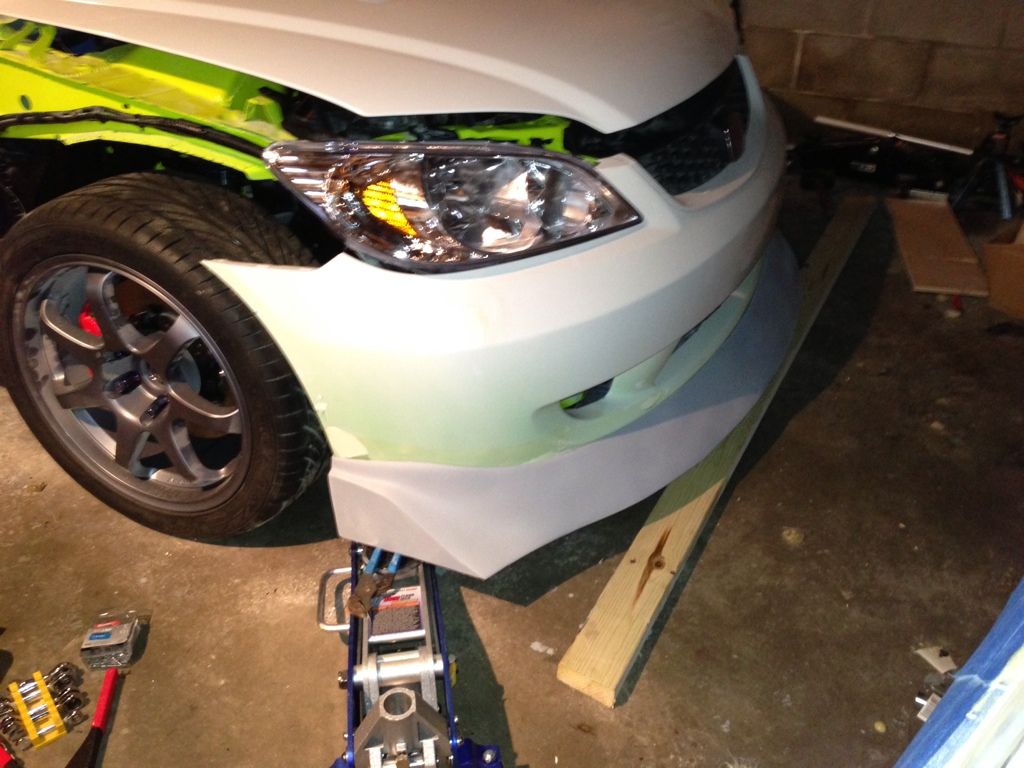
Clip the finished lip onto the bumper to check fit and stance; this lip hangs roughly 2 to 2.5 inches below the front bumper. Handle the prototype carefully, as forcing an unclipped side into place can crack it. Clean any leftover PVA film off the bumper. Because the raw prototype is fragile, pull a mold from it so future copies can be produced without stressing the original. For mounting, subframe brackets that clamp under the front subframe bolt, sandwiched against the subframe, give adjustable splitter support and were noted to need at least the lip's drop of vertical travel.
Pro Tips
- 💡 Measure symmetry across the front with a tape rather than judging by eye; lighting in photos and in the shop distorts a curve's apparent balance.
- 💡 Sand filler while it is still slightly soft (before full cure) to shape it far faster and with less clogging.
- 💡 A microplane wood rasp rough-shapes foam and filler well before you move to sanding.
- 💡 Budget realistically: materials alone ran over $400, and pulling a reusable mold from the prototype was estimated at another $600-700 in materials.
- 💡 For a subframe-supported splitter, mounting brackets clamp under the front subframe bolt behind the subframe; confirm they offer enough vertical adjustment for how far your lip hangs.
Was this guide helpful?


