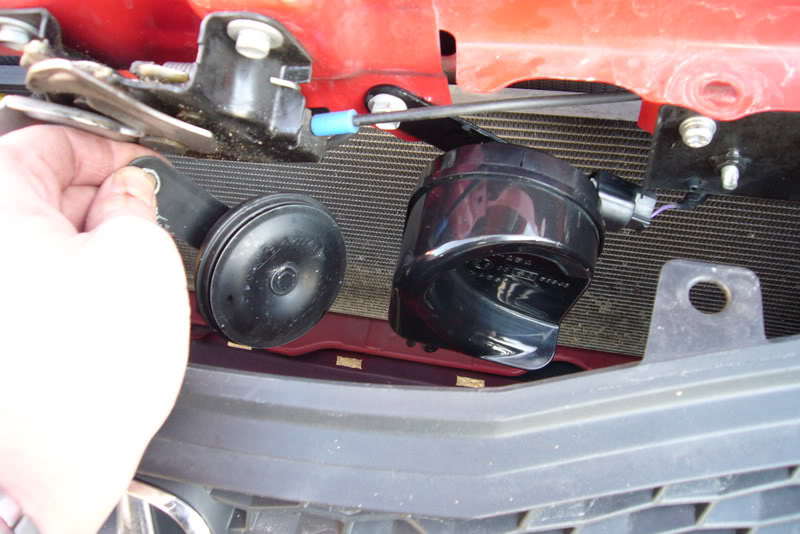
Accord horn (PN: 38100-STK-A02)
Electrical
Horn
Verified
Modification Required
Compatibility Overview
Source Vehicle
Accord
Target Vehicle
Fit
Generation: 2nd generation (GE)
Years: 2009-2013
Installation Difficulty
Easy
Basic tools
Moderate
Some experience
Difficult
Skilled work
Expert
Professional
Reference
Important Caveats
- • This is a tone change, not a loudness upgrade: multiple owners measured the Accord horn as lower in decibels and lower in frequency than the stock Fit horn, with the rating stamped on the bracket.
- • Verify the part number: at least one buyer received a horn identical in size and decibel rating to the stock Fit horn, so confirm 38100-STK-A02 against the original before installing.
- • The horn must be mounted upright to keep water and debris out.
- • The horn is grounded through its mounting bolt and will not function while loose.
Photo Gallery
View Full Size
DIY Installation Guide
No Installation Guide Yet
Have you completed this swap? Help the community by sharing your step-by-step installation guide!
Community Verification
By
soxfan0434 via FitFreak
Added 1 day ago
Find Parts
Looking for parts for this swap? Check out our recommended retailers:
Loading recommended retailers...
Some links are affiliate/sponsored links — we may earn a commission at no extra cost to you. Disclosure.
Sources & References
Comments (0)
No comments yet. Be the first to share your experience!