Retrofit Acura TSX Homelink Into a Honda CR-Z EX Overhead Console
Introduction
This guide covers adding factory Homelink garage-door control to a 2011+ Honda CR-Z EX by substituting the overhead interior-light switch with the Homelink-equipped assembly from a 2003-2005 Acura TSX. The TSX unit shares the CR-Z's overhead footprint and brings three features in one part: programmable Homelink buttons, blue ambient console lighting, and a HandsFree Link (HFL) microphone. It drops into the EX's existing 10-pin harness with no cutting or permanent changes, provided you reorder the connector pins and add one wire for constant battery power. The trade-off is the loss of the switch's middle 'ON' dome-light position; only 'OFF' and 'DOOR' remain, and this cannot be restored by repinning because the switching logic lives on the module's circuit board. The procedure applies to the EX trim, which already has the 10-pin connector and switched power in the headliner; base cars use a different 4-pin connector and lack switched power at that location, so they need extra wiring. Adapted from a community writeup by ITEM9 on CRZ Forum (https://www.crzforum.com/threads/diy-tsx-homelink-on-cr-z-ex.10452/), including corrections from the follow-up discussion.
Reference
Tools Required
- .050" hex key wrench (ball-end preferred) or Astro 78445 Asian Terminal Kit for depinning
- 8 mm socket and ratchet
- Small flat-blade / precision screwdriver
- Basic wiring tools (strippers, crimp or solder, heat shrink)
- Spare green connector for depin practice (optional)
Parts Required
-
Acura TSX Homelink module, P/N 39180-SEC-A51ZB (or Accord w/ Navi 39180-SDA-A52ZA, amber LED)
-
One extra terminal pin for a green connector (e.g. from a base 6MT steering-wheel MID sub-harness, 6-pin green connector)
-
Short length of wire (approx. 5-6 inches) for the constant +12V feed
-
Honda Fit (GE8) map light case, P/N 34404-SNA-A21ZD (optional, for color match)
-
Foam or tape to prevent housing rattle
Safety Warnings
- ⚠ Disconnect the battery (or pull fuse #1) before depinning; the switch wiring is hot at all times.
- ⚠ Map light grounding runs through the mounting screws, so loose screws will leave the map and reading lights dead even when Homelink still works.
- ⚠ A battery disconnect can trigger a radio security-code lockout; have your unlock code ready before you start.
Step-by-Step Instructions
1 Source and verify the Homelink module
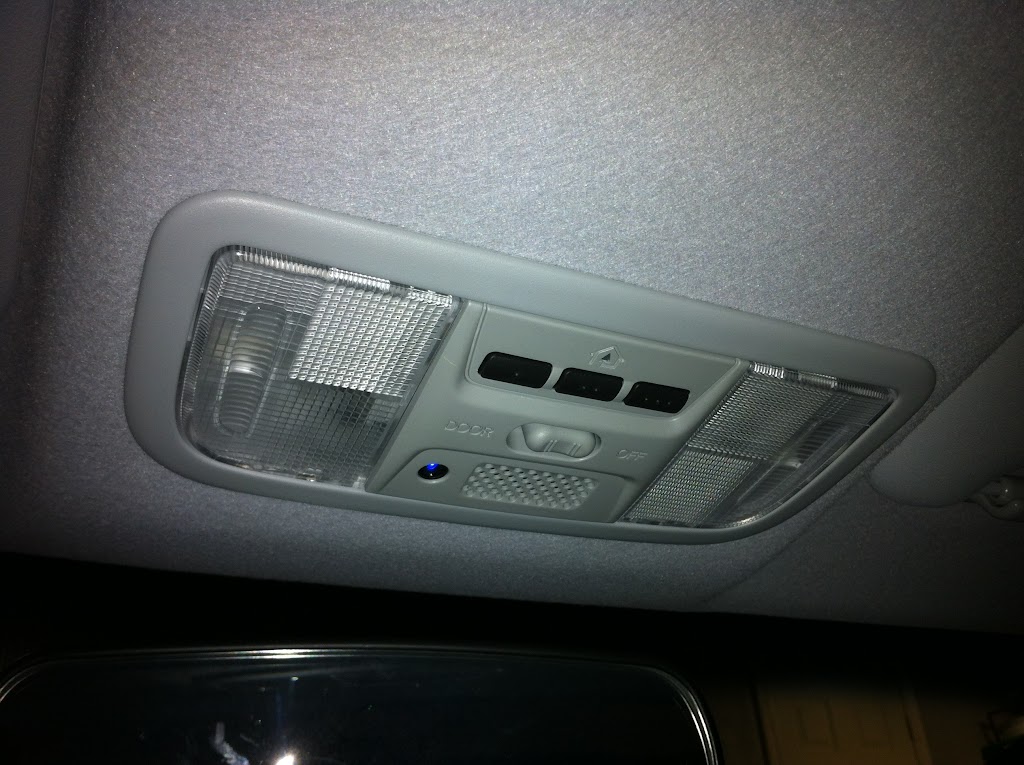
Obtain an Acura TSX Homelink assembly, part 39180-SEC-A51ZB. New units run around $240, but used ones typically sell for roughly $45-$70. Inspect any used module carefully: some carry the microphone grille yet have no microphone soldered to the board, and non-NAVI and NAVI cars can look identical from the outside, so confirm the mic is actually present if HandsFree Link matters to you. The Accord-with-Navi module (39180-SDA-A52ZA) is an interchangeable alternative but uses an amber LED; if you prefer the blue glow, transplant the removable blue LED from a TSX unit into it. Note that the CR-Z's own switch LED is soldered down and cannot be reused in another module.
2 Prepare a depinning tool
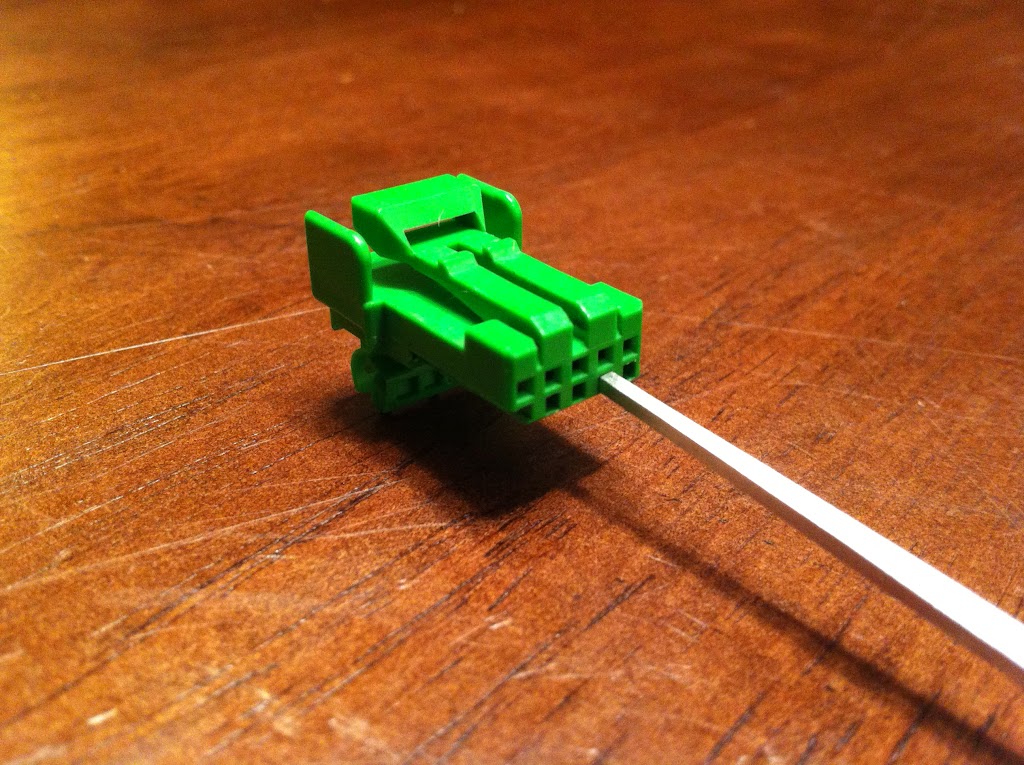
Depinning is the crux of this job, so ready the right tool first. A .050" hex key works well, and the ball-end style is easiest to seat; the Astro 78445 5-Piece Asian Terminal Kit also includes a suitable extractor. If you make your own, grind a thin strip of aluminum to 1.36 mm x 1.27 mm so it slides freely into the square release holes above each pin and reaches roughly 13 mm deep. The tool must sit just under the opening size so you can feel the internal tabs spread apart; forcing an oversize tool only damages the connector body. Practice on a spare green connector before working on the car.
3 Cut power before touching the harness
Disconnect the negative battery terminal before opening the connector. The wires at this switch are live at all times, so removing power protects both you and the module. If a battery disconnect would cost you a radio security code, pulling fuse #1 removes power to the map light circuit and HFL instead; be aware that the radio may still demand its code afterward on some cars once the fuse is reinstalled.
4 Remove the overhead map light assembly
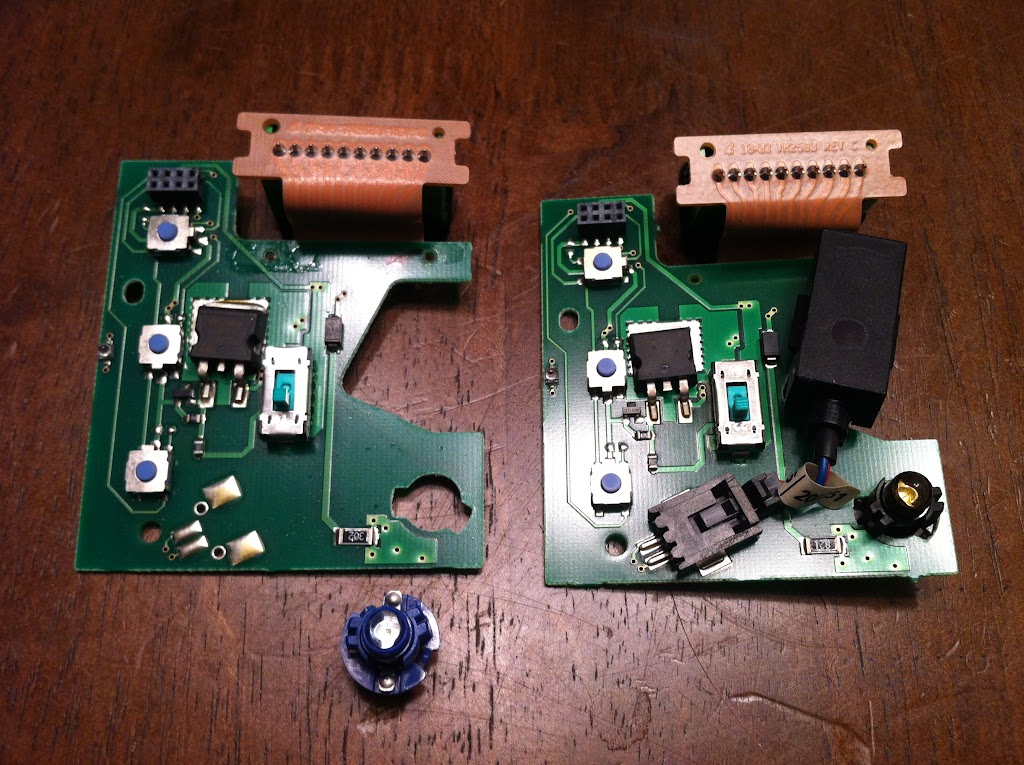
Pry off the map light lenses to reveal the two 8 mm screws beneath them, then back both out with an 8 mm socket. The overhead assembly will drop free of the headliner. Unplug the 10-pin and the 3-pin connectors to release it fully. The 10-pin green connector is the one you will reconfigure.
5 Fit the module into a light housing
Transfer the Homelink module into a housing. You can reuse the CR-Z's original casing by popping the factory switch out and snapping the Homelink unit into its place, or seat it in a GE8 Honda Fit case (34404-SNA-A21ZD) for a closer color match. Set the assembled unit aside while you work on the wiring.
6 Unlock and depin the 10-pin connector

Release the plastic locking strip on top of the 10-pin green connector by gently prying it away from the body with a small flat-blade screwdriver. With the connector unlocked, insert your depinning tool into a release hole to spread the pin's tabs past the internal catch and free it. There is little harness slack, so work from the outer positions inward and free several pins at once rather than one at a time.
7 Reorder the pins for the TSX module

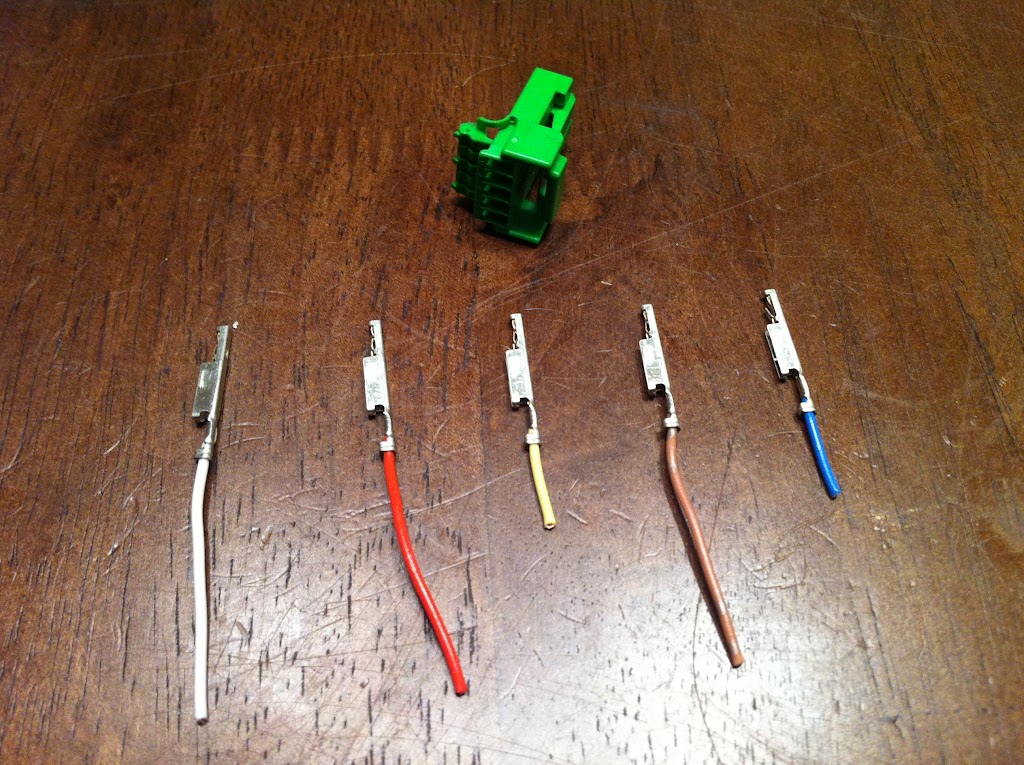
Rearrange the freed pins into the TSX module's layout using the repin diagram and pinout table. The red wire is the only conductor that keeps its original position; every other wire shifts. Reseat pins working from the center outward and confirm each one clicks home. Cross-check against both the stock TSX and stock CR-Z pinouts so you understand what each wire now feeds.
8 Add the constant +12V power pin

Add the extra pin that supplies constant, unswitched +12V to the Homelink. This power is available only inches away at the map light's own +12V feed. Seat this pin in the center socket of the connector before the pins around it go back in, because the middle position is hard to reach once its neighbors are seated. If the wire on your salvaged pin is short, extend it to about 5-6 inches: strip roughly 1/2 inch of insulation, twist the strands, and splice on a length of wire. Sourcing the pin can be the hardest part; salvage one from a cut vehicle pigtail, or buy the base 6MT steering-wheel MID sub-harness (6-pin green connector, under $20) for the terminal. As a cleaner alternative, some builders solder constant power directly onto the map light connector's power wire instead of adding a pin.
9 Reassemble and remount the assembly
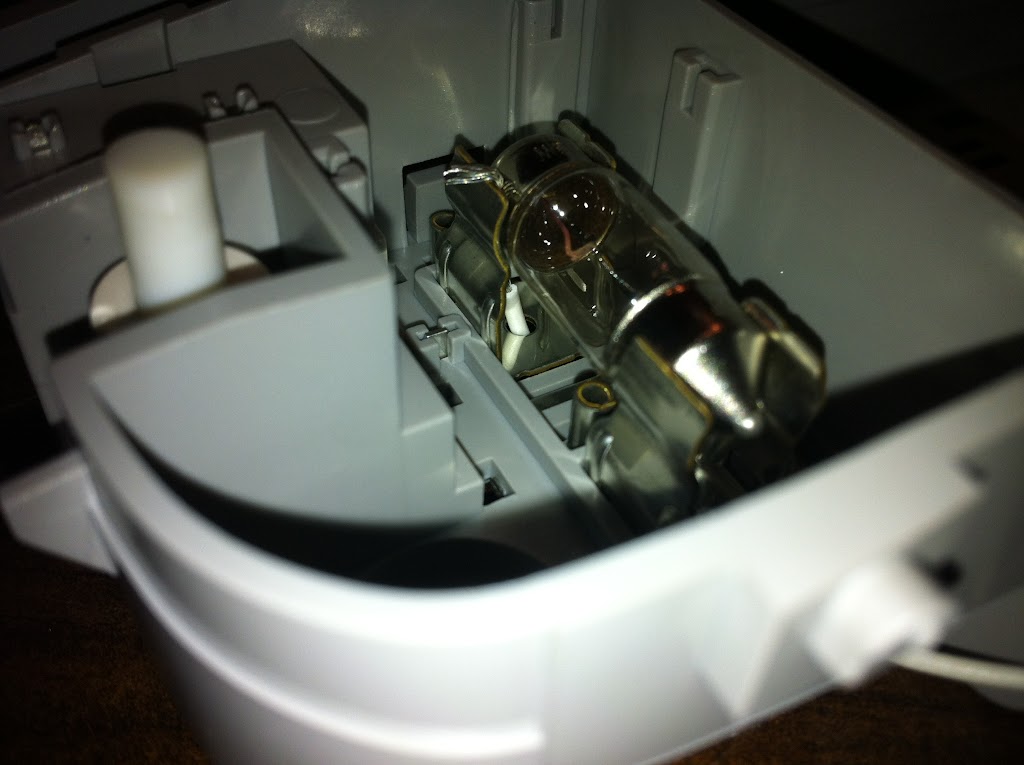
Reconnect the 10-pin and 3-pin connectors, then lift the assembly back to the headliner. Drive both 8 mm screws in snug: these screws also carry the ground for the map and reading lights, so if those lamps fail to work after installation, a loose screw is almost always the cause. Add a strip of foam or tape at the base of the housing to keep the module from rattling.
10 Restore power, test, and finish

Reconnect the battery (or refit fuse #1) and test the installation. Verify the map and reading lights, the blue ambient console light, and HandsFree Link if your module has the mic, then program a Homelink button to a garage door or gate to confirm operation. Expect only 'OFF' and 'DOOR' dome positions; the 'ON' detent is gone and cannot be recovered by repinning. To reduce the 'Light Gray' versus 'Clear Gray' color difference, swap in the GE8 Fit map light case, or hunt for a closer factory gray such as the 09+ Ridgeline (Warm Gray) or 09-10 Odyssey (Atlas Gray).
Pro Tips
- 💡 A .050" ball-end hex wrench depins the connector well; the Astro 78445 Asian Terminal Kit also contains a usable extractor.
- 💡 When buying used, confirm the module actually has a microphone; some units keep the mic grille but were built without the mic, and the Accord Navi module can donate one.
- 💡 Harness wires can look discolored and appear to be the wrong color; the true color is often visible on the strands under the insulation sleeve.
- 💡 You lose the 'ON' dome-light position (only 'OFF' and 'DOOR' remain); this is a circuit-board function and cannot be restored by moving pins around.
- 💡 For color matching, keep a spreadsheet of part numbers and interior color codes; candidates include the GE8 Fit trim, 09+ Ridgeline (Warm Gray) and 09-10 Odyssey (Atlas Gray).
Was this guide helpful?
