Honda Fit (GE) DIY Mesh Guard for the A/C Condenser Grille Opening
Introduction
The exposed lower opening on the second-generation Honda Fit (GE) leaves the air-conditioning condenser directly in the path of stones and road debris, and a punctured condenser is an expensive repair. This budget project fits a blacked-out protective mesh across that opening using inexpensive barbecue grill panels and zip ties, with no drilling and no bumper removal. It applies to the 2011 Fit Base and other GE-chassis Fits that share the same open grille area. Because the mesh mounts entirely with cable ties behind the factory upper grille, the modification is fully reversible and leaves the car unmarked. Adapted from a community writeup by Red Rockit on FitFreak (https://www.fitfreak.net/forums/2nd-generation-ge8-specific-diy-repair-maintenance-sub-forum/64406-2011-fit-base-diy-c-condensor-mesh-grill.html), including corrections from the follow-up discussion.
Reference
Tools Required
- Small flat-head screwdriver
- Small Phillips-head screwdriver
- Primer spray paint (gray)
- Flat black spray paint
Parts Required
-
BBQ replacement mesh panels (Home Depot, packaged 2 for $9.99) or gutter guard as an alternative mesh
-
12-inch zip ties (roughly 4 needed)
-
6-inch zip ties (for joining the mesh panels)
Safety Warnings
- ⚠ The point of the guard is to shield the A/C condenser from stone strikes; a holed condenser can lead to a costly compressor or condenser replacement.
- ⚠ Route the long zip ties only through the existing holes in the bumper support so you do not chafe or block anything behind the grille.
Step-by-Step Instructions
1 Source the mesh material
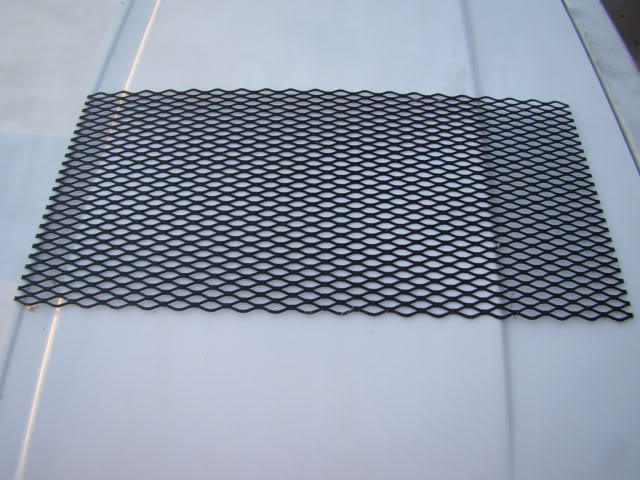
Pick up a pack of replacement barbecue grill mesh, sold at Home Depot in packs of two for $9.99. Gutter guard works equally well if you prefer a different weave. A single panel is not wide enough to span the whole opening, so plan on using both panels from the pack.
2 Prime and paint the mesh
Lay the mesh out and lay down a coat of gray primer, then follow with two coats of flat black. Coat both faces of each panel: the rear surface remains partly visible through the grille from certain viewing angles, so an unpainted back will show. Let each coat dry before handling.
3 Remove the upper grille
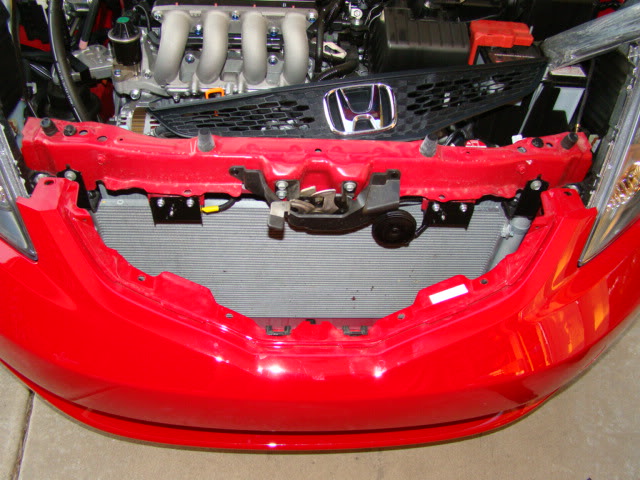
Open the bonnet and take off the factory upper grille to expose the opening in front of the condenser. The bumper stays on the car; there is enough working room to complete the install without pulling it. Use the small flat-head and Phillips screwdrivers to release the grille's fasteners and clips.
4 Join the two mesh panels
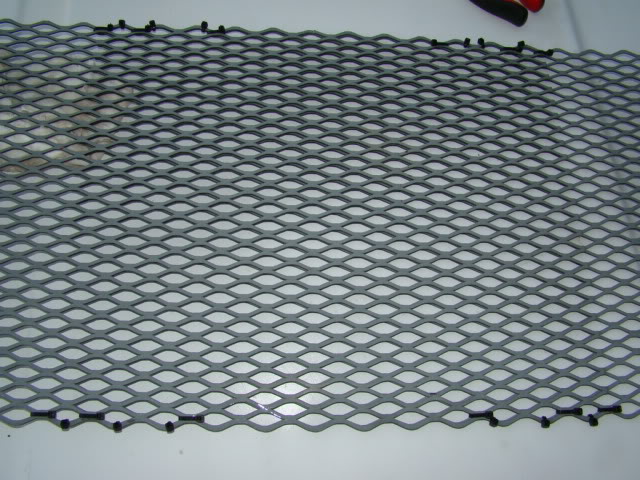
Overlap the edges of the two painted panels so their combined width covers the full opening. Align the weave and lash the overlap together with 6-inch black zip ties to make one continuous sheet. Trim the tie tails flush.
5 Anchor the top edge to the bumper support
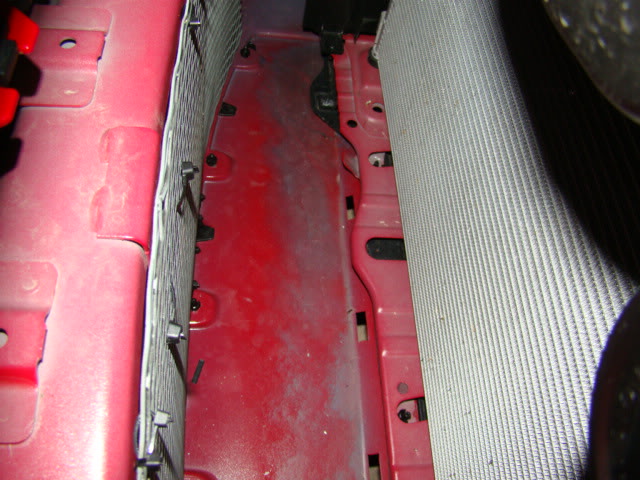
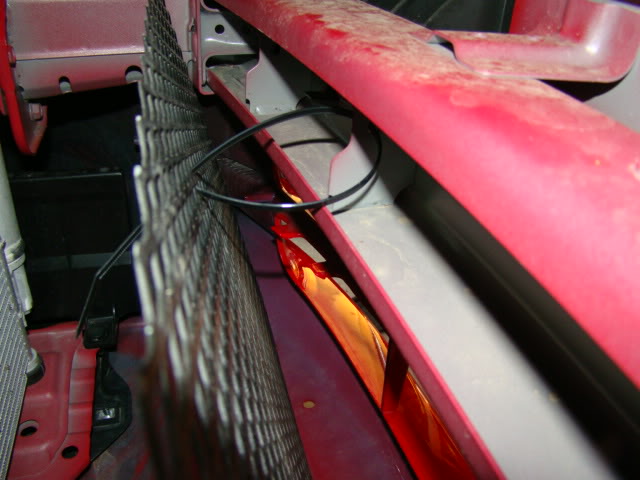
Hold the mesh sheet up to the opening and secure the upper edge using the 12-inch zip ties. There are three usable anchor spots along the inside of the upper bumper support: a central point with two holes, plus one toward each side. Route the ties horizontally so they run flat across the car, and pull them snug. Around four long ties hold the top securely.
6 Trap the bottom edge and refit the grille
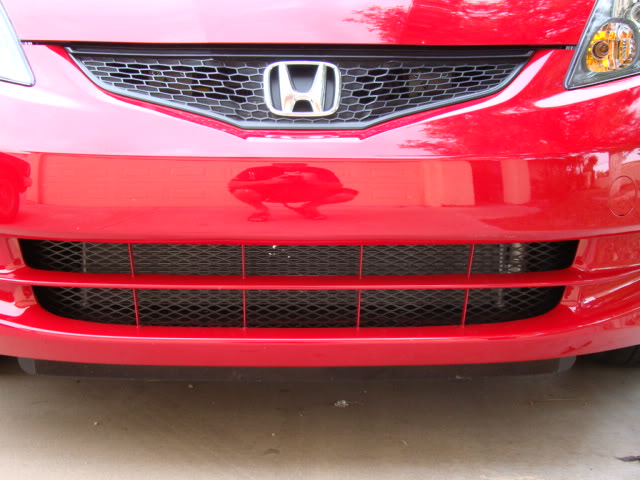
Slide the sheet's bottom edge so it seats ahead of the upright fasteners holding the lower bumper. Those posts back the mesh and hold its bottom in place without any additional ties or drilling. Confirm the sheet is taut and flat, then reinstall the factory upper grille over it.
Pro Tips
- 💡 Paint the back of the mesh as well as the front; the rear shows through the grille at some angles.
- 💡 Gutter guard is a good substitute if you cannot find barbecue replacement mesh.
- 💡 The whole job relies on zip ties, so no drilling into the car is required.
- 💡 This is a well-worn modification on the Fit forums; searching turns up several variations if you want more mounting ideas.
Was this guide helpful?


