Honda Fit Front Strut Tower Bar Installation (A Spec / Tanabe)
Introduction
A front strut tower brace links the tops of the two front strut towers to cut down on chassis flex during hard cornering. This guide covers fitting a bolt-on aluminum bar, such as the budget A Spec or Tanabe units (both made from 6061 T-6 alloy), to the first-generation Honda Fit (GD). It also folds in the hard lessons from the original build: the fasteners packaged with these kits are poor quality and rust within weeks, so the procedure replaces them with stainless hardware and isolates the steel mounting brackets from the painted towers to head off corrosion and paint abrasion. Note that the brackets clamp to the thin tower sheet metal rather than to the strut studs themselves, so temper your expectations: the practical result is a slight increase in front-end road noise and little felt change in handling, unlike a rear anti-sway bar. Adapted from a community writeup by manxman on FitFreak (https://www.fitfreak.net/forums/fit-suspension-brake-modifications/12295-spec-front-strut-bar-review-diy-install-w-photos.html), including corrections from the follow-up discussion.
Reference
Tools Required
- Allen/hex key set sized to the bar eye bolts
- Ratcheting 7/16" (11 mm) box-end wrench
- Open-end or box wrench for the eye-bolt lock nuts
- Trim/pry tool for releasing the plastic clips and anchor plugs
- Phillips screwdriver (if using Phillips-drive screws)
- Masking tape
- Aerosol rubberized undercoating
Parts Required
-
6061 T-6 aluminum front strut tower bar (A Spec, Tanabe, or equivalent)
-
Stainless steel flat-head machine screws, 1/4-20 or 1/4-28: four at 1" long and two at 1/2" long
-
Four stainless fender washers, 1" outside diameter, for 1/4" bolts
-
Six 1/4" Nylock or aircraft-style locking nuts (thread pitch matched to the screws)
-
Rubber washers (garden-hose fitting type) to isolate the brackets from the towers
-
Black zip ties
Safety Warnings
- ⚠ If you raise the vehicle to relieve load on the strut towers, support it on jack stands and never rely on a jack alone.
- ⚠ The brackets clamp to thin strut-tower sheet metal, not to the strut studs; use the large fender washers to spread the clamping load and avoid deforming the metal.
- ⚠ The factory-supplied fasteners corrode rapidly and can rust within a month; replacing them with stainless hardware is essential, not optional.
Step-by-Step Instructions
1 Upgrade the mounting hardware before you start
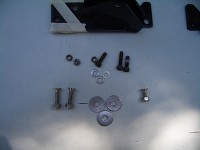
Set aside the fasteners that ship with the bar. On the A Spec kit they carry only a thin black-oxide coat over zinc plating and rust almost immediately once exposed to rain and car washes. Source replacements from a hardware or industrial fastener supplier: stainless steel flat-head machine screws in 1/4-20 or, preferably, 1/4-28, in the quantities four at 1" long and two at 1/2" long; four stainless fender washers of 1" outside diameter sized for 1/4" bolts; and six 1/4" Nylock or aircraft-style locking nuts in a matching thread pitch. The kit's 6 mm bolts interchange with 1/4" SAE. Phillips or hex-drive heads both work, though hex resists stripping better and is harder to find.
2 Free up the bolt locations on the strut towers
Pry out the plastic anchor plugs that hold the black cowl trim against the upper firewall near the inboard edge of each strut tower. Release the plastic clip retaining the washer hose at the passenger-side tower, and the wiring-loom clip at the driver-side tower. Leave those clips attached to the hose and to the harness; you only need the vacated holes, which will now carry the bracket bolts.
3 Corrosion-proof the bracket-to-tower contact points
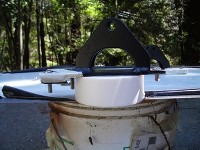
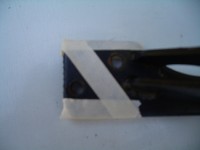
The bare steel brackets seat directly on the painted tower metal and will scuff the paint and seed rust if the towers move at all. Mask the bolt holes in each bracket and lay down aerosol rubberized undercoating over those areas. Then, over each hole on the tower, drop a rubber washer of the kind found in garden-hose connections, so the bracket ends up clamping onto rubber instead of onto bare paint.
4 Position and bolt the mounting brackets to the towers
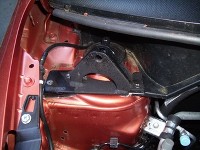
Each side uses inboard holes in a small finger of sheet metal at the top of the tower plus two outboard holes that pass through the tower and come out under the fender. On the passenger side, rest the bracket's inboard end onto the plastic cowl-trim lip and run the bolt through both the bracket and that lip; the plastic insulates the joint, so skip the rubber washer there. The driver's side trim has a different shape: either trim it for clearance or tuck the bracket end underneath it with a rubber washer, then bolt through trim, bracket, and sheet metal together.
5 Fit the fender-side washers and locking nuts
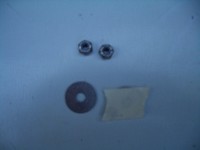
Clearance inside the tower beside the spring is severe, and one of the outboard nuts is reached entirely by feel. To keep the fender washer from dropping while you work, tape it to a strip of masking tape, then push the taped washer over the protruding bolt so it holds itself against the underside of the fender while you start the locking nut. Snug the nuts with a ratcheting 7/16" (11 mm) box-end wrench. Do not tighten by turning the screw heads, which only mangles the drive.
6 Set the bar length and thread the end bolts
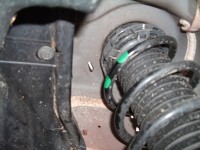
Turn the eye bolts in or out of the bar ends by hand to set the overall length so their holes align with the bracket holes. The machined hex shoulder on the inboard face of each eye bolt seats against the flat side of the bracket, so alignment has to land within half a turn or the fit is off. Once the holes match up visually, start each mounting bolt gently with the correct Allen key. The first side seats easily; the second is stubborn, so ease it in rather than forcing the aluminum bolt and stripping its threads. Add the supplied aluminum lock nuts and tighten with a box or open-end wrench while holding the Allen key.
7 Reattach the washer hose and wiring loom
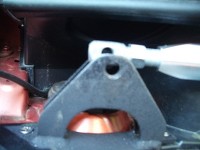
Secure the windshield washer hose and the wiring loom back to the bar's end brackets using black zip ties. Route each tie through the original plastic clip instead of cinching it directly around the hose; clamping the hose itself would pinch off flow to the washer nozzles.
Pro Tips
- 💡 These bars offer no genuine preload adjustment once mounted; the right-hand-thread eye bolts only set length for fitment. Any benefit comes purely from holding the towers where gravity leaves them.
- 💡 Tanabe advises lifting the front wheels off the ground during installation to unload the strut towers before final tightening.
- 💡 Follow-up posters found the Tanabe kit's fasteners and eye-bolt hardware noticeably better than the A Spec equivalents, which may justify its small price premium.
- 💡 Expect only a faint increase in front-end road noise and little change in handling; a rear anti-sway bar delivers a far more noticeable improvement on the Fit.
Was this guide helpful?

