Acura RDX (3G) Apple CarPlay USB Port Relocation
Introduction
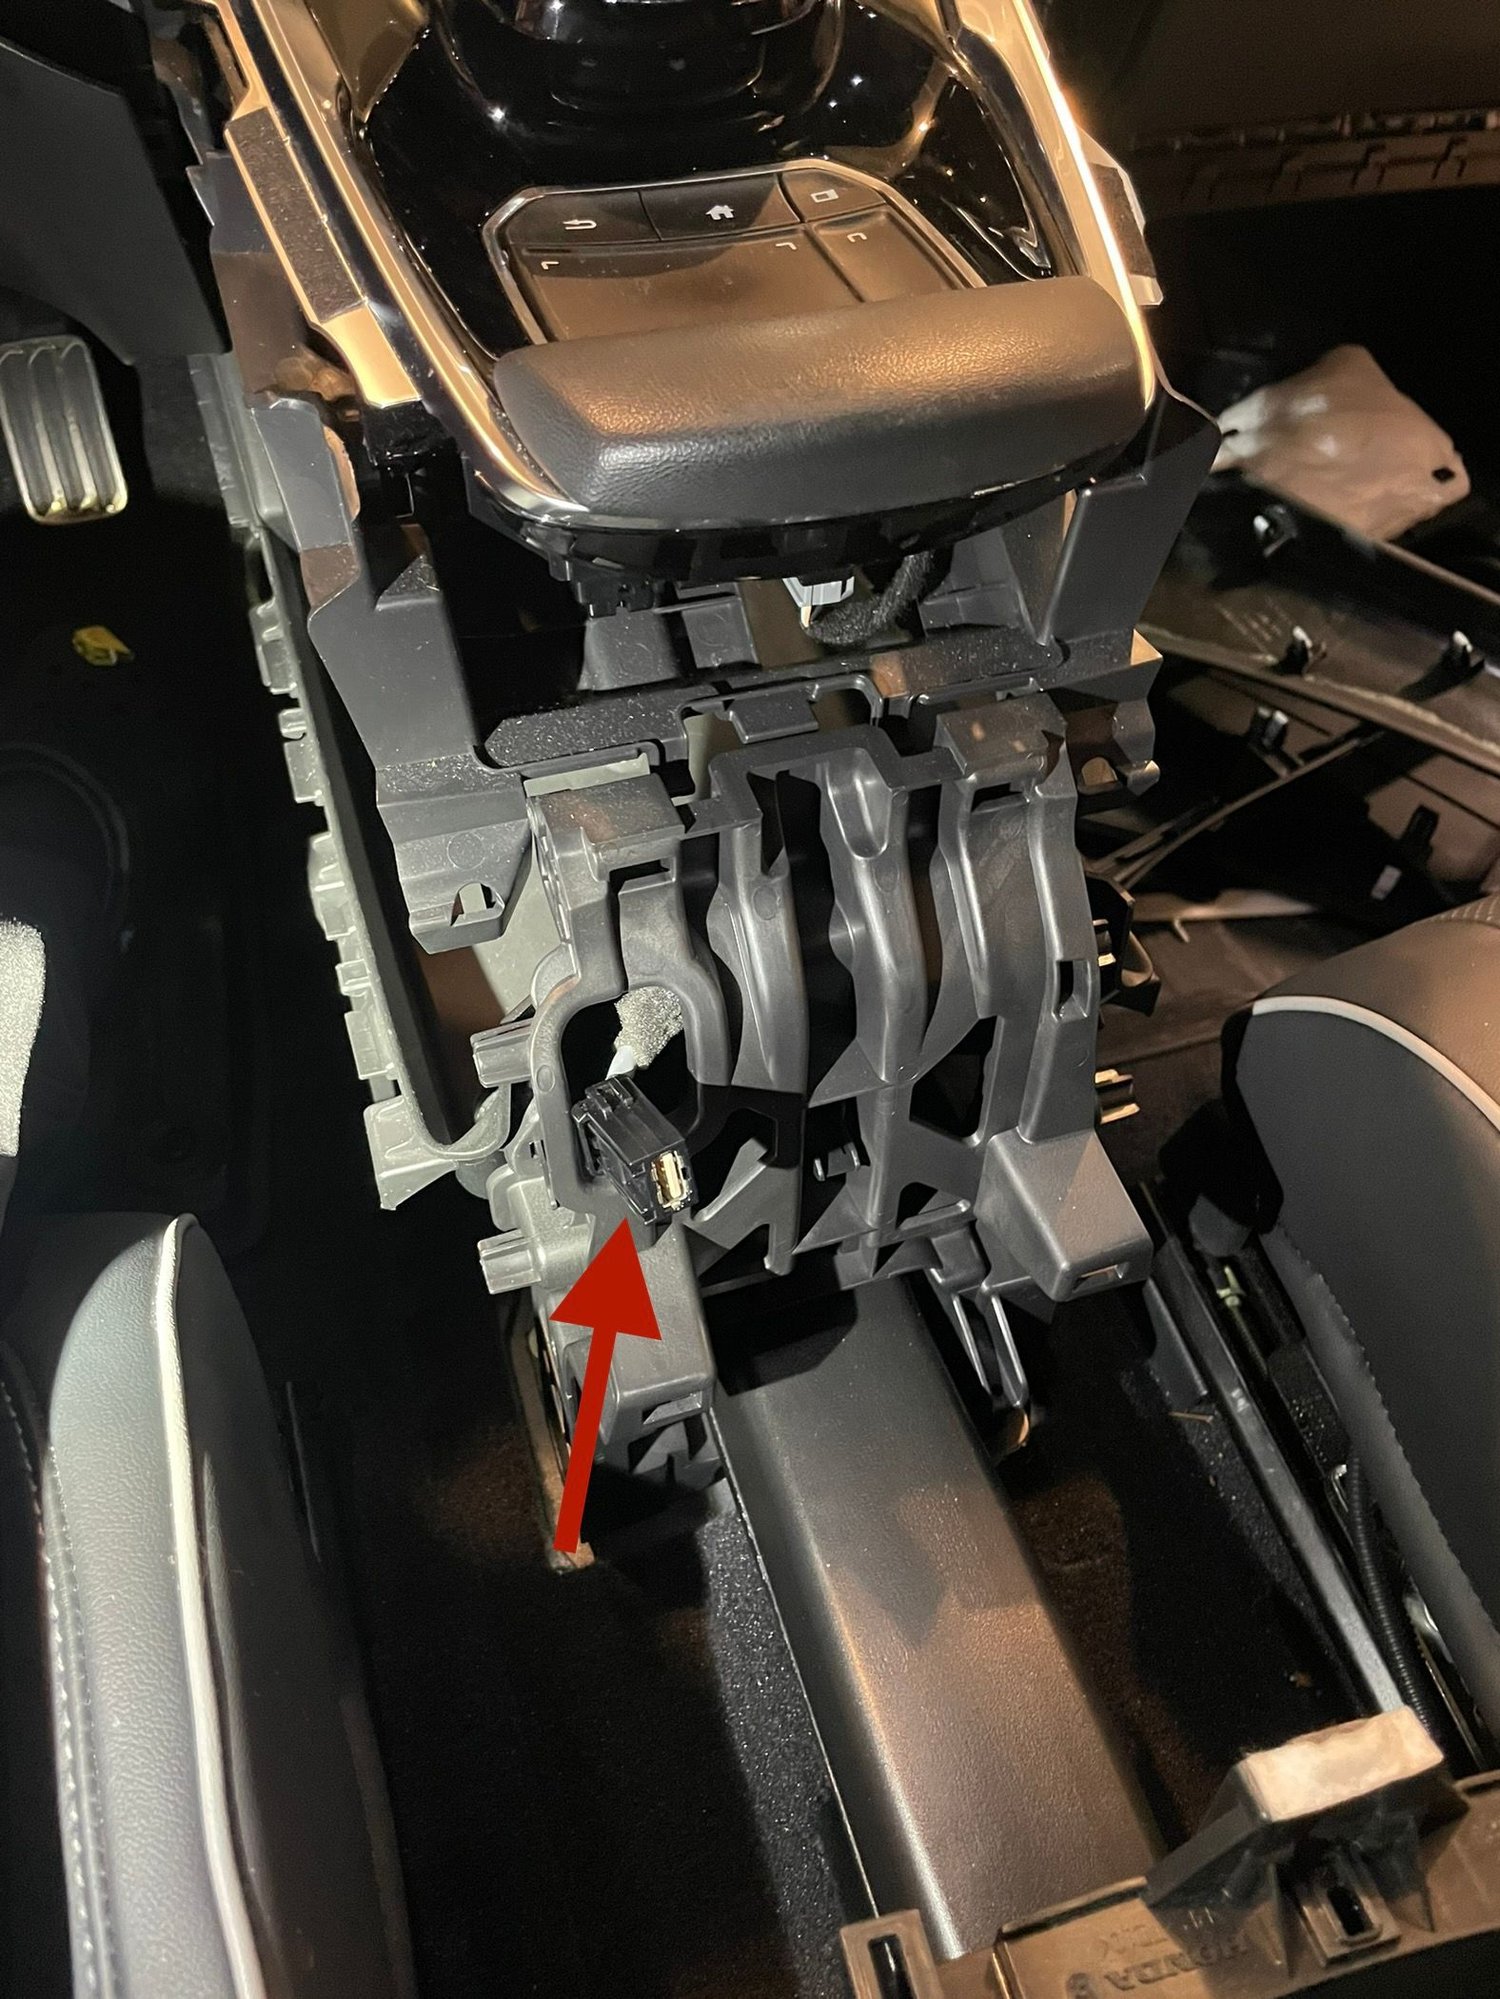
On the third-generation Acura RDX the only Apple CarPlay USB socket is buried inside the storage bin at the base of the center console, which is awkward for a permanently connected phone cable. This guide walks through relocating that port cable to a more accessible spot beneath the tunnel. There is no shortcut: reaching the back of the socket requires stripping most of the center console and its surrounding dash trim, because each panel traps the next. No wiring needs to be cut for the relocation itself, though you may choose to drill a discreet cable exit at the end. Set aside a large block of time, keep every fastener sorted by where it came from, and treat the clips patiently, since several of the panels are thin and crack easily. This procedure suits the 2019-onward RDX with factory CarPlay. Adapted from a community writeup by SarcasticaLy on AcuraZine (https://acurazine.com/forums/3g-rdx-diy-faq-460/diy-carplay-usb-port-relocation-1001847/), including corrections from the follow-up discussion.
Reference
Tools Required
- Plastic trim removal / pry tools
- 10 mm socket with ratchet
- Phillips screwdriver
- Small flat-head screwdriver (for retainer clips)
- Masking or painter's tape (to protect gloss-black trim)
- Small containers or a labelled tray to sort fasteners
- Rotary tool or drill (optional, only if you choose to cut a permanent cable path)
Parts Required
-
Existing factory USB cable and port (reused, not replaced)
-
Cloth-backed adhesive tape to secure the wire loom (e.g. Gorilla tape)
-
Replacement zip ties (optional, to re-secure loom after cutting the originals)
Safety Warnings
- ⚠ The armrest-bin liner and the upper trim near the vents are thin and crack under force; pry slowly and support them as they release.
- ⚠ Never drive a clip or panel home with hard hits. If it resists, find the obstruction first, or you will break tabs that are difficult to replace.
- ⚠ Reconnect the rear-vent air tube and reseat every locating nub during reassembly so panels sit flush and the rear vents keep working.
Step-by-Step Instructions
1 Plan the teardown and organize hardware
Expect to remove roughly ten screws in a mix of lengths, four 10 mm bolts, and a large number of hidden clips before the socket is reachable. Lay out a tray with labelled sections and drop each screw into the slot matching where it came from, because the lengths are not interchangeable. Throughout the job, seat and release clips with steady but controlled pressure; if a panel will not move, stop and check for a missed fastener or a snagged edge rather than pulling harder. Snapping a clip or cracking a panel almost always comes from forcing a piece that was still held somewhere.
2 Drop the trim panel under the glove compartment
Grip the leading edge of the panel beneath the glove box and pull it straight down toward the floor to release its four clips. Disconnect the ambient-light connector behind it and set the panel aside. Note the pair of locating nubs that seat into their holders, so you can align the panel correctly on reassembly.
3 Release the passenger-side lower trim
Open the glove box first. Begin releasing this trim at its rearmost edge and work forward toward the glove box, freeing the clips with firm tugs. The final two tabs at the front point sideways toward the driver, so finish by sliding the piece to the right, toward the open glove box, to disengage them.
4 Free the driver-side leather trim and start button
Work the driver-side leather-wrapped trim loose from the rear forward, heading toward the push-button start. Unplug the start-button connector before lifting the panel fully clear. The narrow trim directly under the start button only needs to be popped loose in that immediate area, not removed entirely; leaving it slightly loose gives clearance for a later panel.
5 Lift the vent trim and release the climate panel
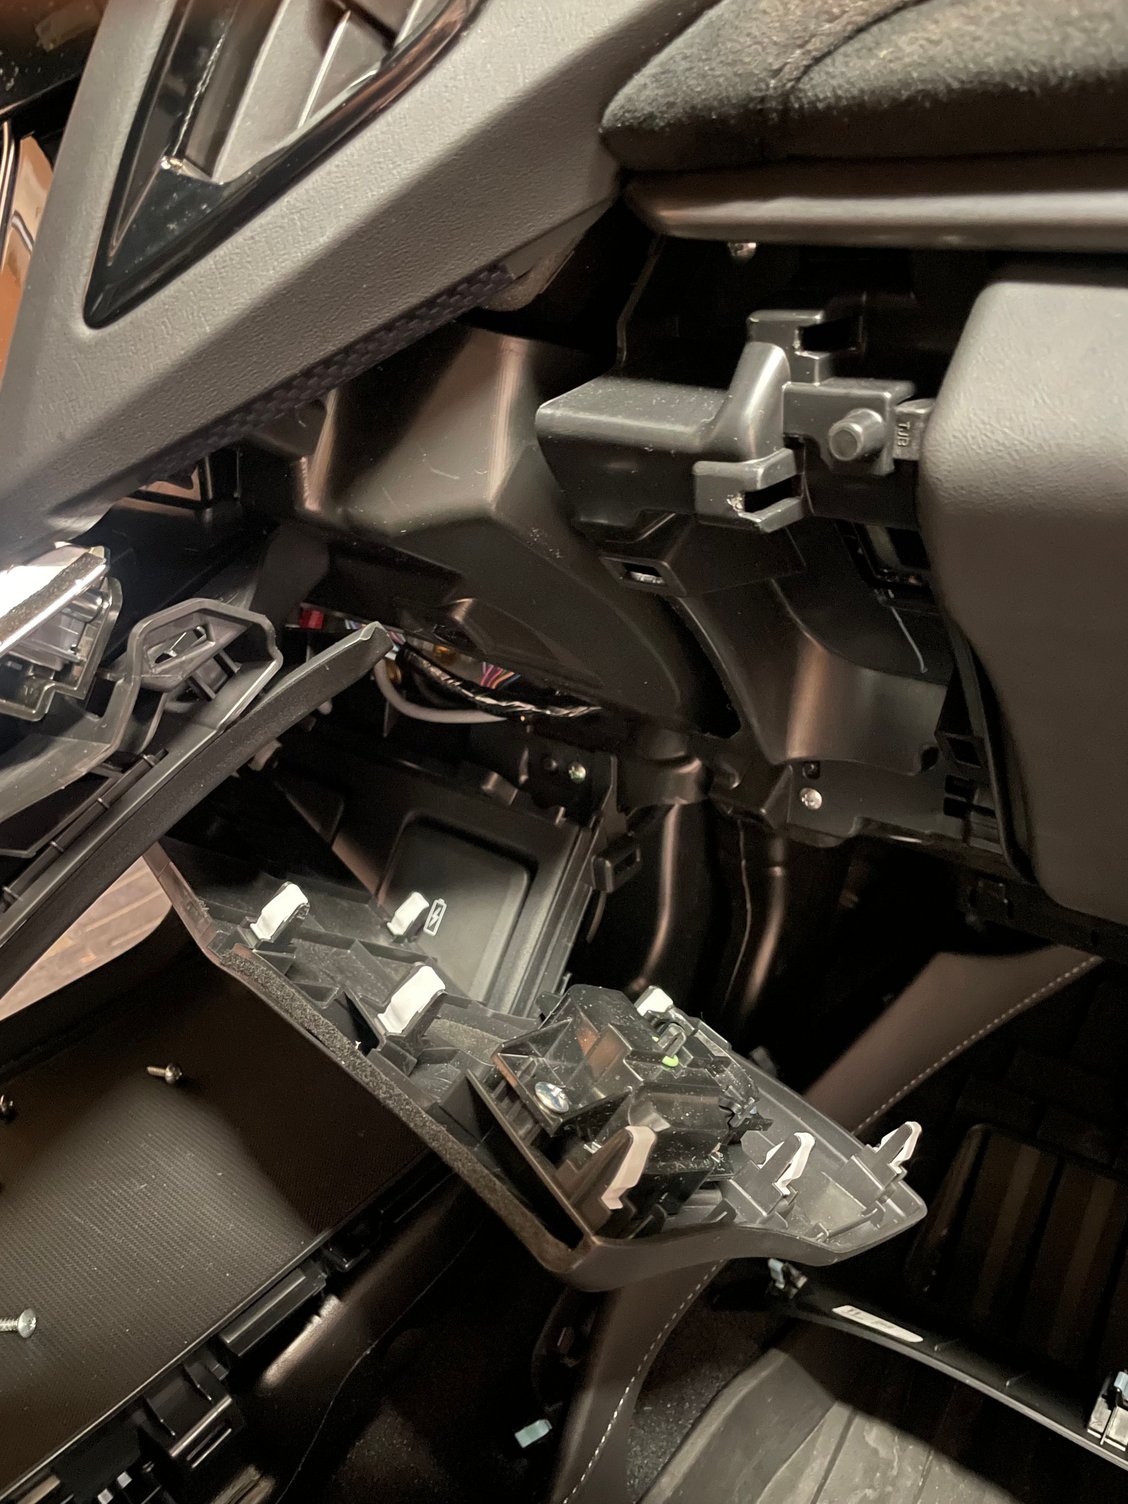
Pop up the trim carrying the driver-side vent next to the center dash, lifting only as far as the front edge of the center screen. Then reach behind the climate unit on its left edge and release the assembly; a tab sits at each of its corners. The fit is tight here, so trim tools help. Mask the gloss-black surfaces with tape to avoid scratches. Once the left side is out, work across the top and ease the upper right corner forward, letting the lower edge follow. Finally, lift the palm-rest / trackpad section to open up more working room.
6 Remove the glove-box-button piece and drop the tunnel ceiling

From the passenger side, remove the piece just ahead of the tunnel that holds the glove-box release button; the button is not fastened and simply presses a switch behind it, so set it aside. Next lower the overhead panel of the tunnel, which is held by six tabs, and disconnect its ambient-light connector before setting it down.
7 Remove the armrest-bin liner and its hidden screws

Raise the armrest to the upright position and remove the thin liner inside; this is the most delicate panel in the job, so pry gently and work around its edge, and lift the front section under the palm rest straight up to clear its three tabs. Removing this liner exposes about eight short screws facing upward. Take them all out, and be sure to include the two that the source specifically flags near the front.
8 Remove the rear console panel and its bolts
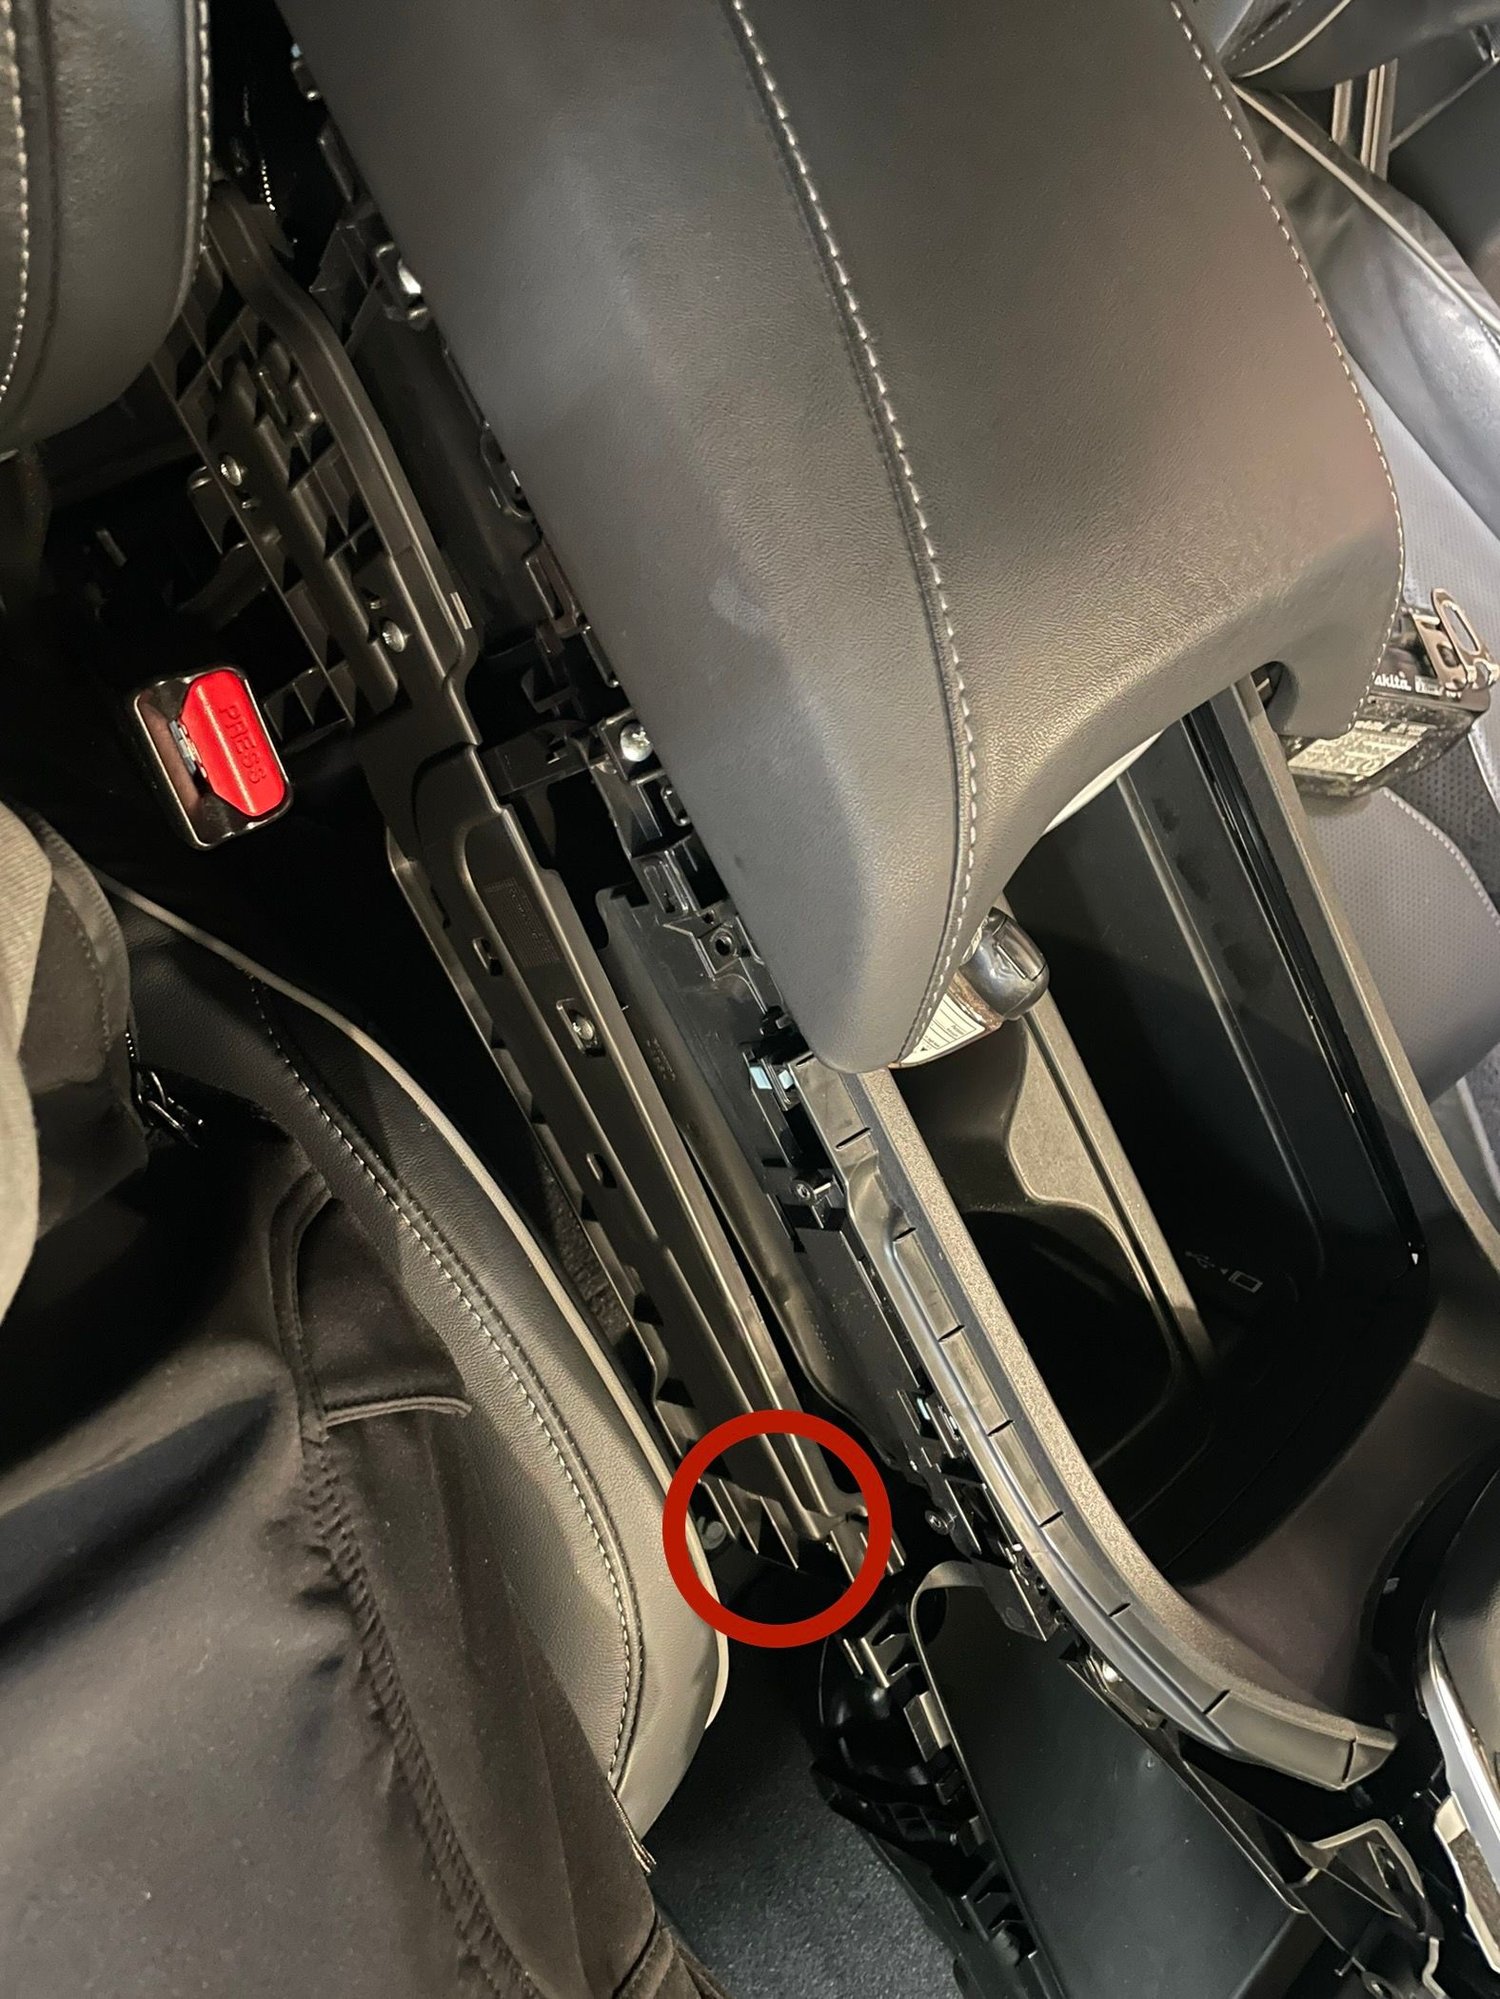
Close the armrest and slide it fully forward. The rear panel of the center console is held entirely by tabs, so pry along its edges and work all the way around. Unplug the green connector and release its wire retaining clip for slack. Look down at the base of the console to find two 10 mm bolts and remove them. With the rear panel off, lift the small trim piece straight up; it and the rear panel together lock the two long side panels, so this removal order matters.
9 Remove the long side panels

Each long side panel is retained by screws near the front of the armrest area. Remove those screws before pulling on any part of the panel. The remainder are clips, running along the top edge, the bottom edge, and the middle. Start at either end and release the clips progressively, alternating between the upper and lower rows so the panel comes free evenly along its length rather than binding at one corner.
10 Free and withdraw the rear console section
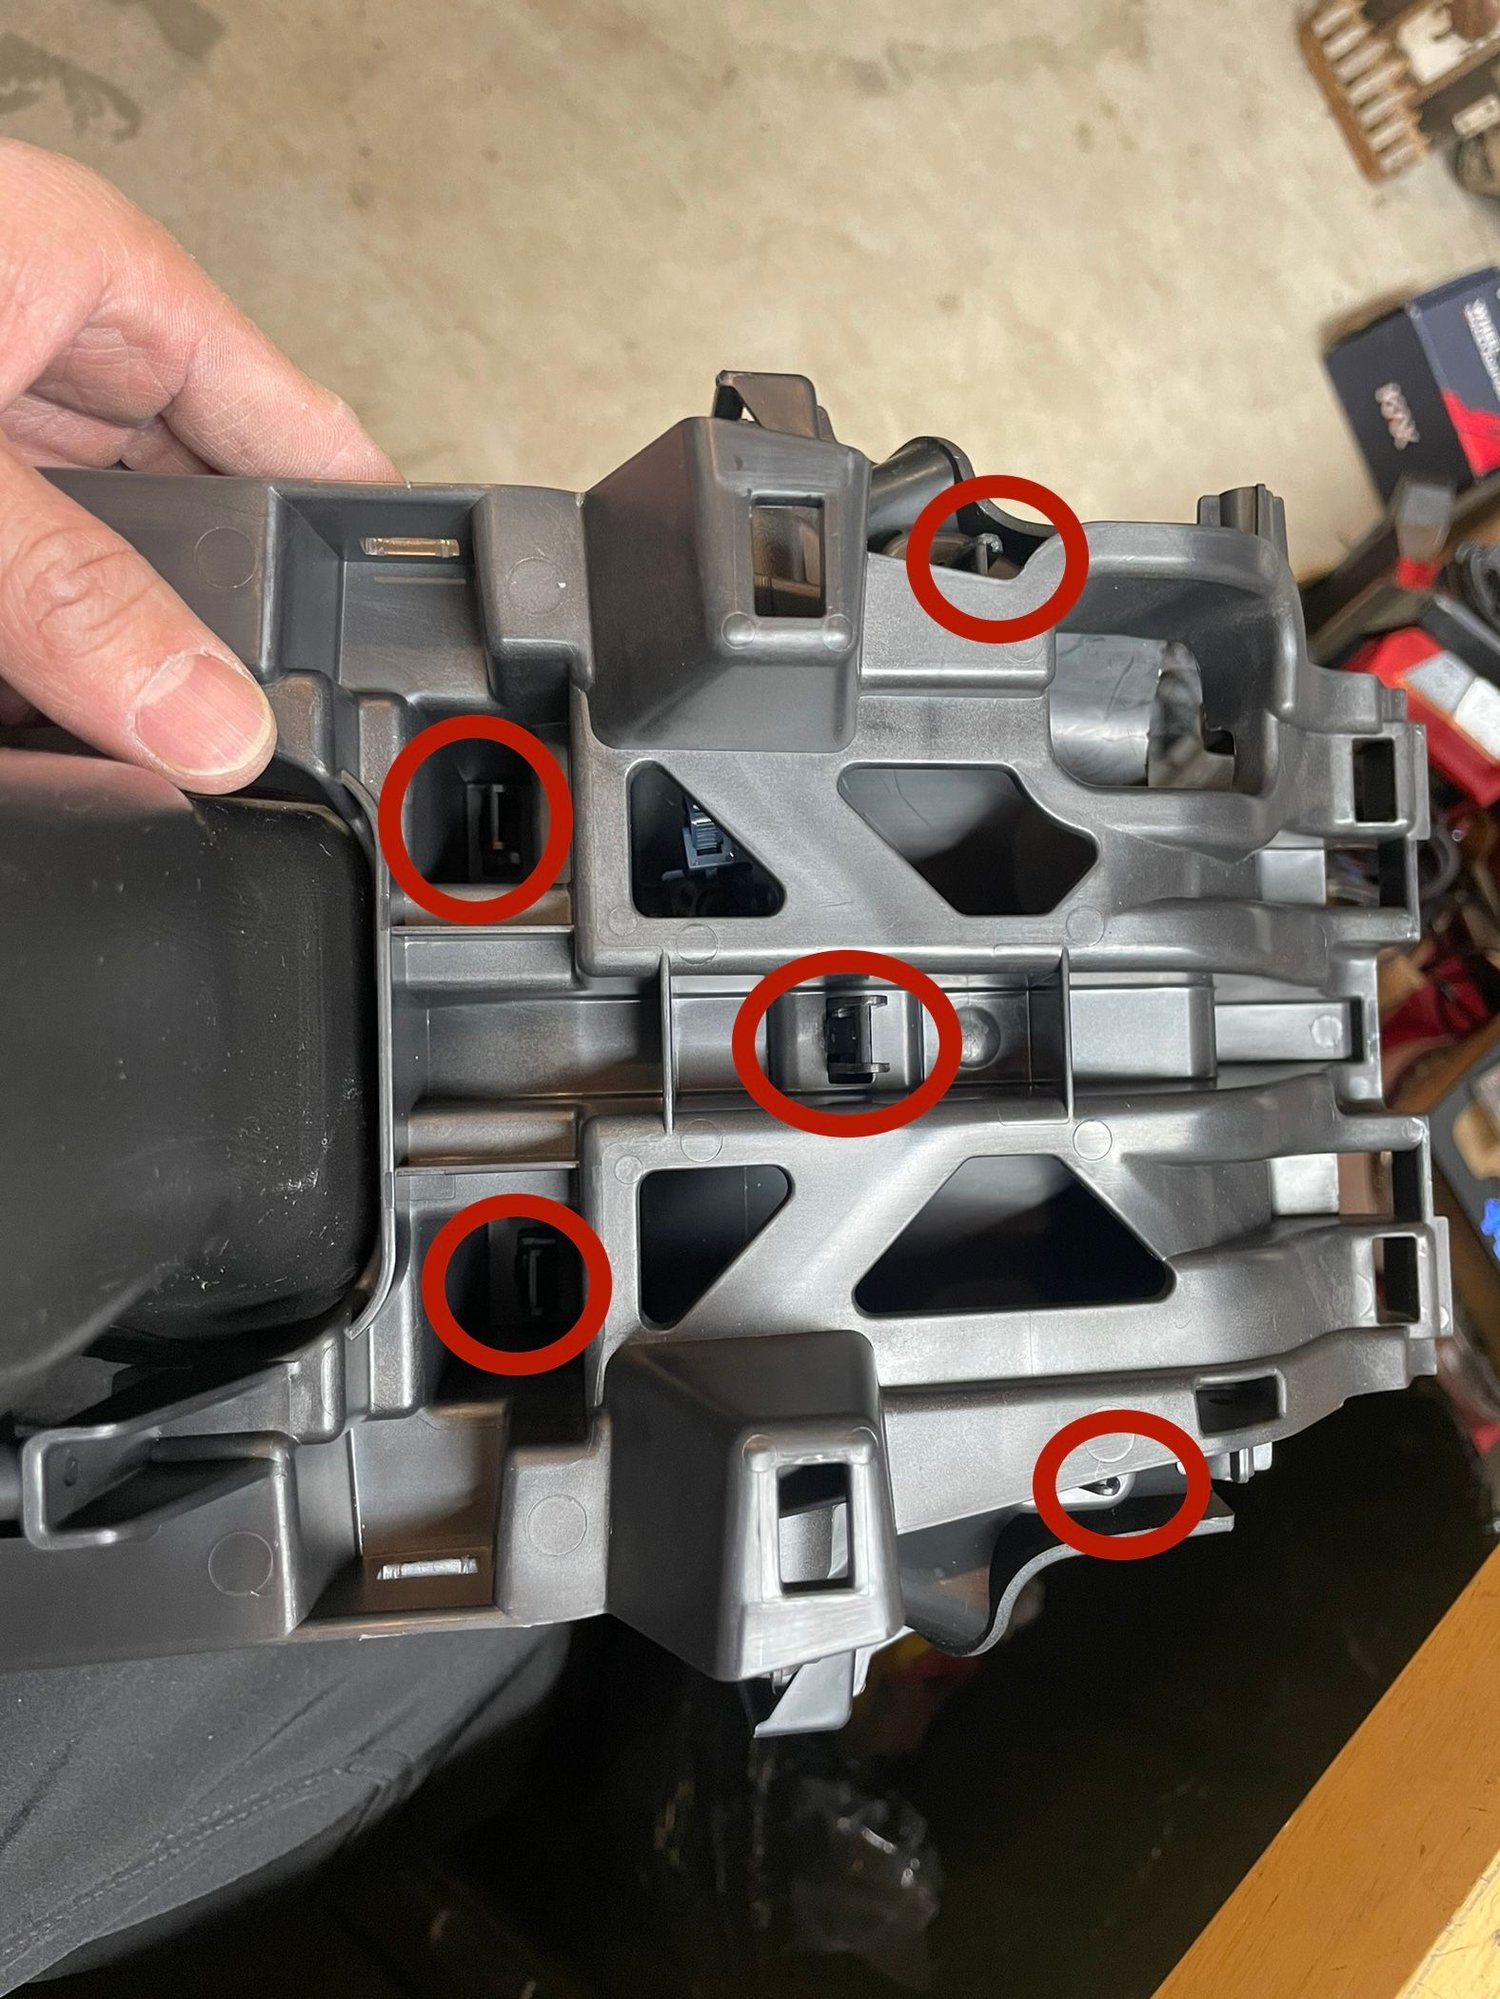
With the side panels off, note the long bracket on each side; only the front screw needs to come out. Behind that screw, on both sides, a right-angle bracket ties the console section to the front section that carries the palm rest and dash. Keep both of these brackets swung outward as you pull, wedging something non-abrasive to hold them out if needed, so they do not catch and trap the console. Check for anything else holding it down, mind the locating nubs between the front and rear sections, and take care with the air tube that feeds the rear-passenger vents. Ease the section rearward a few inches until the back of the CarPlay socket is visible, then squeeze the small tabs on its sides to release it from the console.
11 Remove the tunnel assembly and split its trim halves

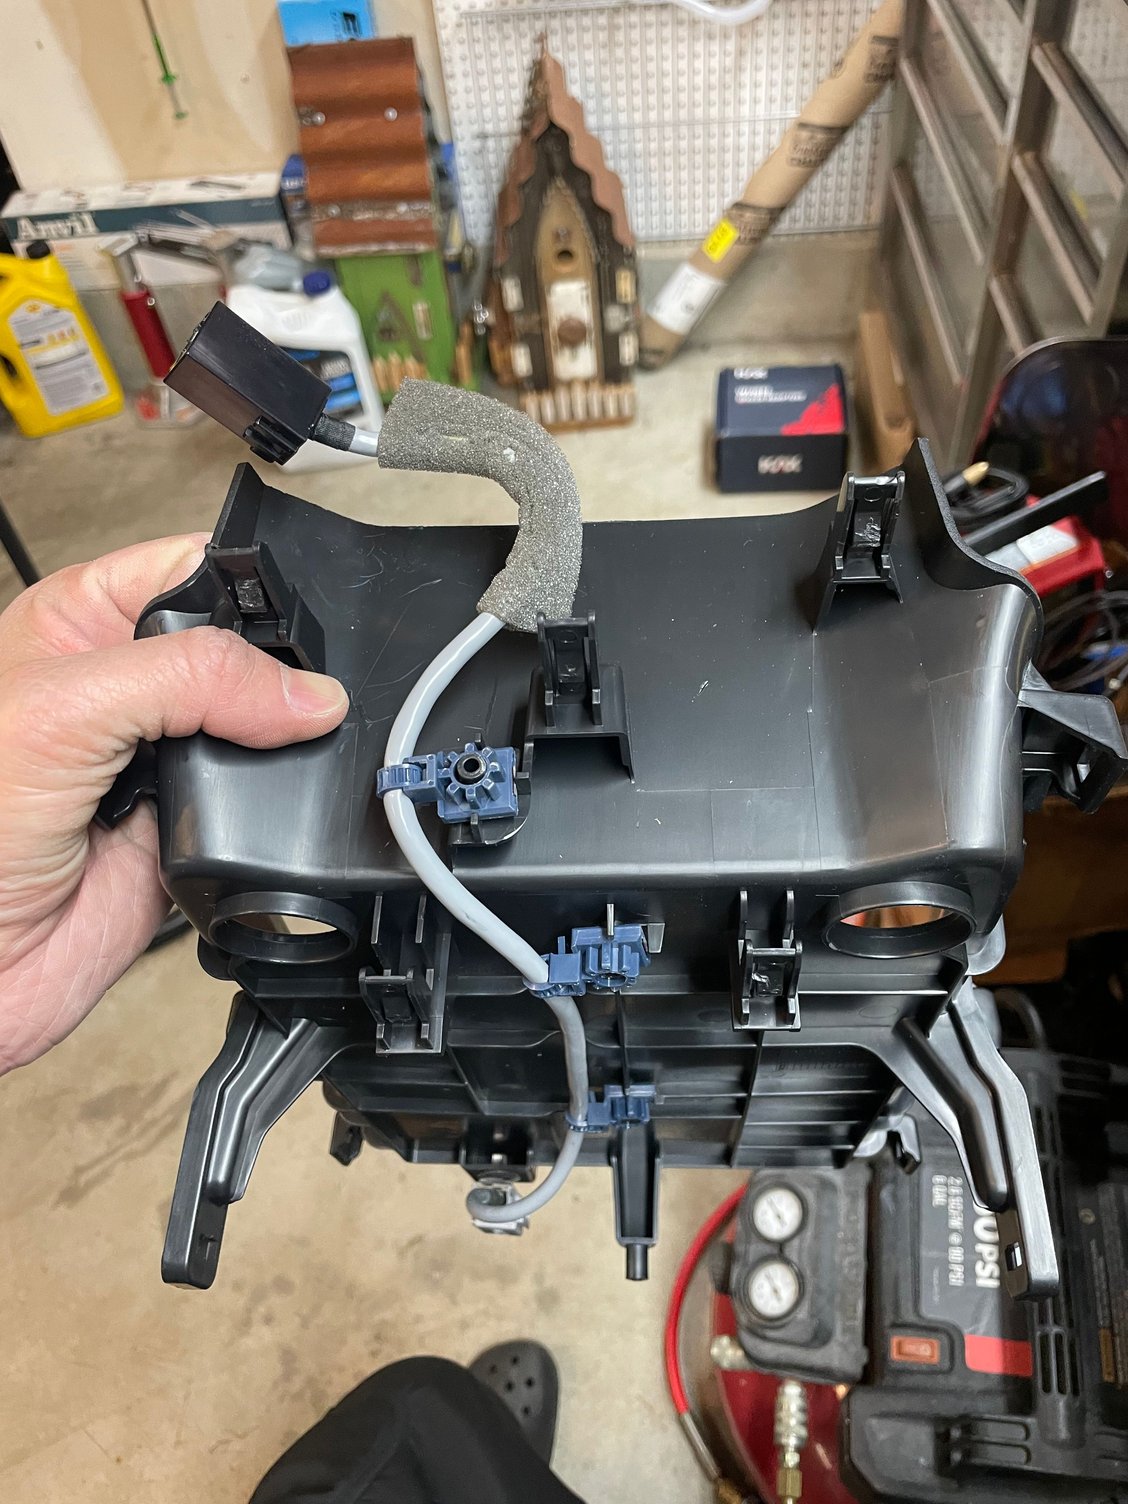
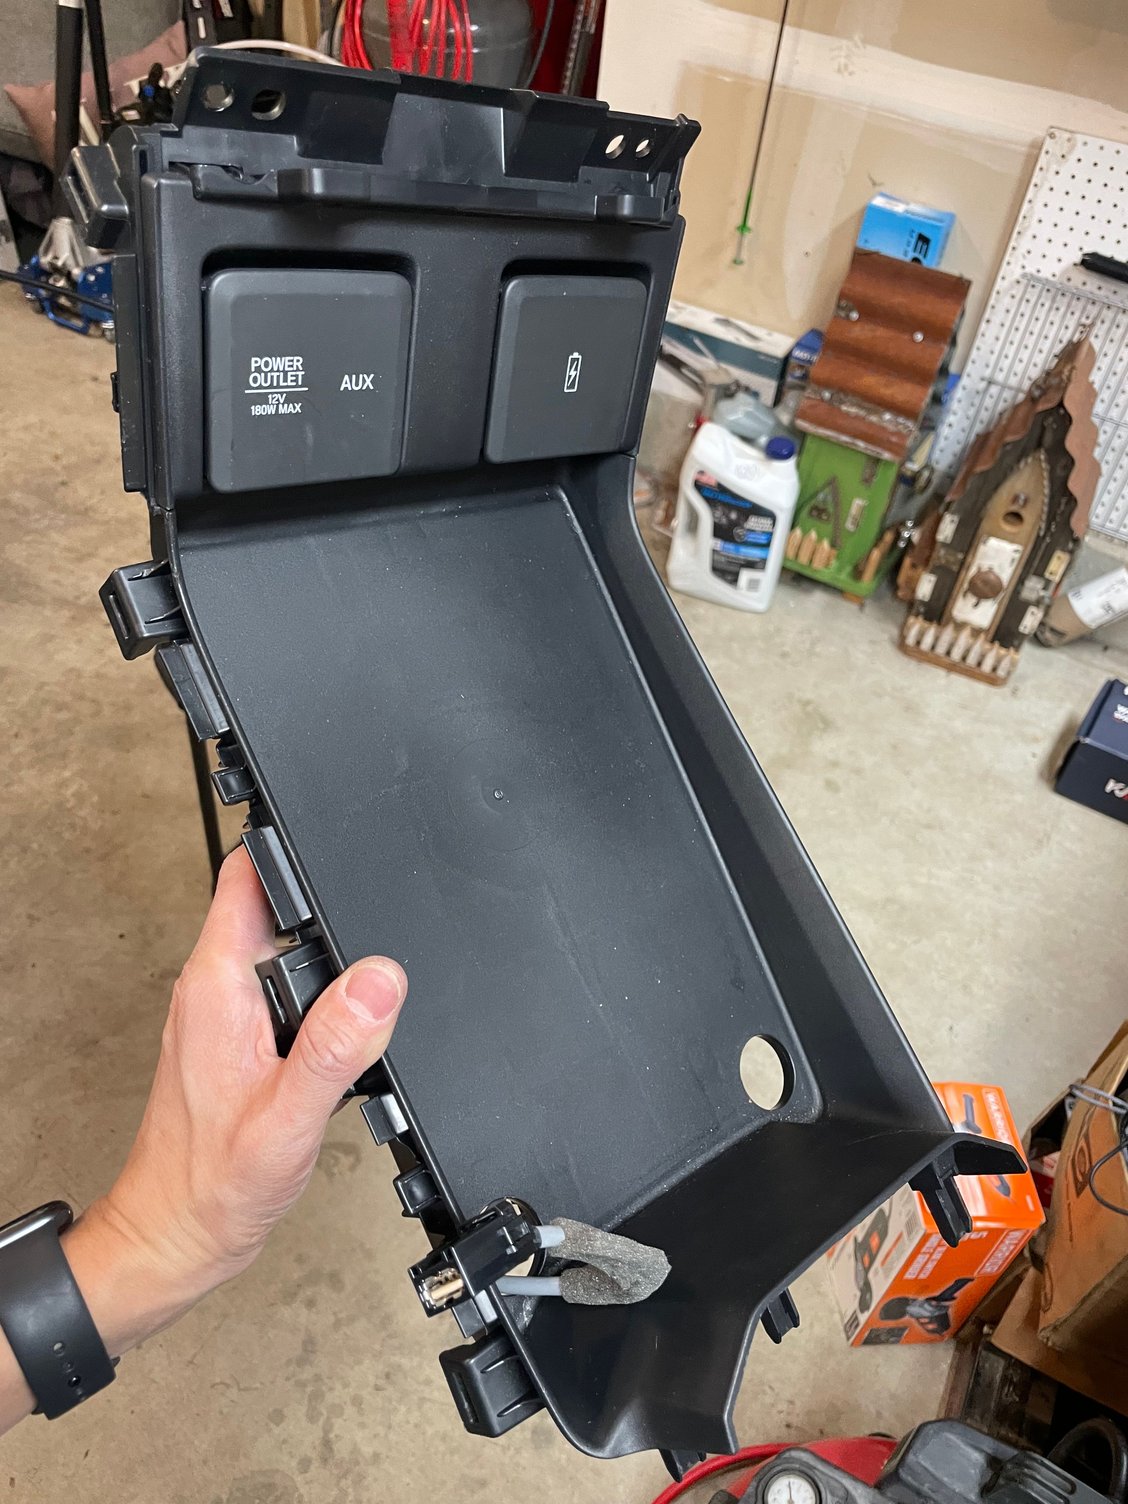
Lift out the rubber mat in the tunnel floor ahead of the USB / USB-C / 12 V ports. Two pass-through holes sit at its rear edge; directly below them on the floor are two 10 mm bolts, which you can reach with a socket and ratchet straight down, no extension required. Disconnect every connector at the back of the ports, then lift the tunnel assembly out. To separate its two trim halves, release the five retainer clips with a small screwdriver, working side to side a little at a time. The air tube can stay attached, since it is held by a single screw.
12 Route the cable and reassemble

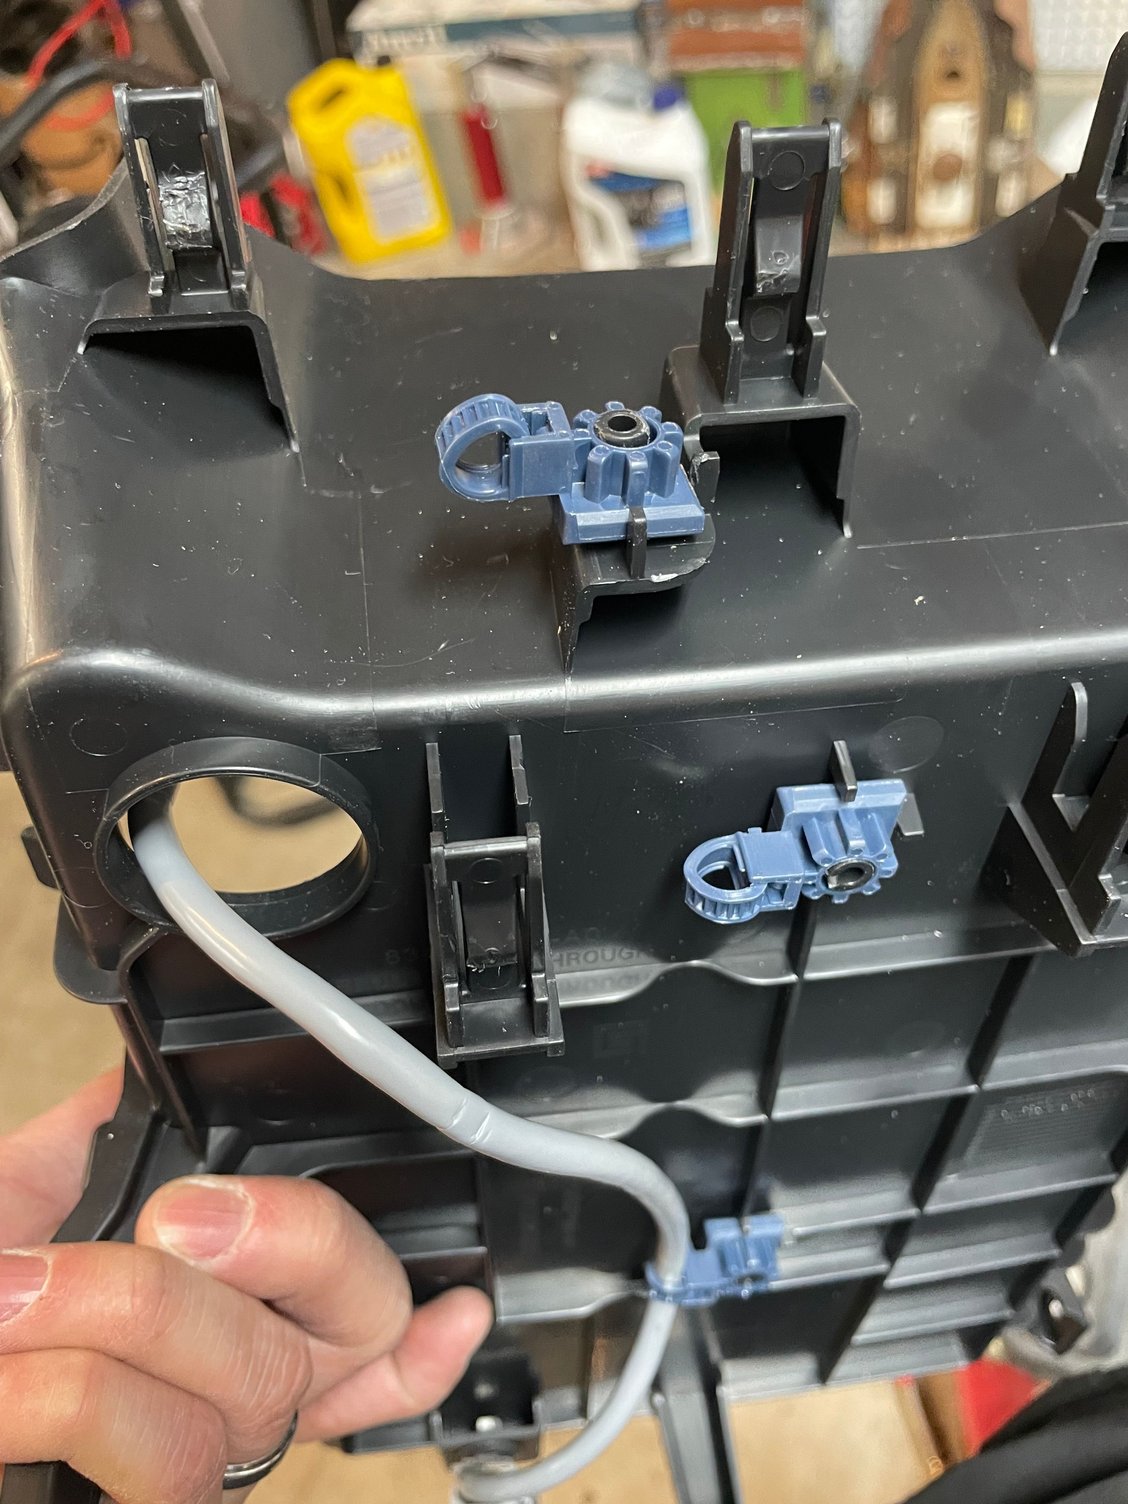
Feed the USB cable up through one of the pass-through holes. To clear its path, pry out the two blue plastic retainers and release the factory zip ties, then return the retainers to their positions afterward. Anchor the loom with a strip of cloth-backed tape. Reassemble everything in the reverse order of removal, guiding each panel into alignment and seating it with a firm press rather than repeated blows. Tuck the phone cable out of sight behind the start-button trim. The rubber tunnel mat lies back down over the routed cable without any trimming, and in practice enough slack remains that no drilling is needed, though you may cut a discreet exit if you prefer.
Pro Tips
- 💡 Photograph each panel and connector before removing it; the reassembly is long and the fastener lengths are easy to mix up.
- 💡 Wrap the tip of any metal screwdriver in cloth or tape before prying near painted or gloss-black trim to avoid gouging it.
- 💡 Try the relocation before committing to any cutting; the factory slack was enough to route the cable cleanly without drilling.
- 💡 Work the tightest panels (climate unit, armrest liner) with proper plastic trim tools rather than fingers alone, especially if your hands do not fit the gap.
Was this guide helpful?