Acura 1G CL Clutch Slave Cylinder Replacement and Bleed
Introduction
A failing clutch slave cylinder on the first-generation Acura CL commonly shows up as a hydraulic leak and a pedal that sinks or hangs near the floor after the clutch is held disengaged for a short time. Because the slave sits at the transmission and is fed by a rigid hydraulic pipe from the master cylinder, replacing it is a self-contained job that restores firm pedal feel and clean shifting without opening the transmission. This guide covers removing the leaking unit, fitting a new one, and gravity-bleeding the clutch line so no air remains, along with the torque figures and a workaround for the notoriously easy-to-strip line fitting. It applies to the manual-transmission 1G CL and shares its hydraulic layout with related Honda/Acura clutch systems of the era. Adapted from a community writeup by Tehvine on AcuraZine (https://acurazine.com/forums/1g-cl-diy-faq-74/diy-clutch-slave-cylinder-97-a-689465/), including corrections from the follow-up discussion.
Reference
Tools Required
- 12 mm socket with ratchet
- 10 mm open-end wrench
- 9 mm open-end wrench
- Short length of hose sized to slip over the bleeder nipple
- Catch container for used fluid
- Torque wrench (in-lb/ft-lb)
- Drip pan
- Penetrating oil (for a stubborn line fitting)
Parts Required
-
New clutch slave cylinder, complete with pushrod, seals and hardware
-
DOT 3 or DOT 4 brake fluid
Safety Warnings
- ⚠ Brake fluid strips paint; catch every drip and wipe up spills immediately.
- ⚠ Never bend or kink the rigid clutch pipe, as a damaged line must be replaced.
- ⚠ Keep the reservoir topped throughout the bleed to prevent air being pulled back into the system.
- ⚠ Support the vehicle on rated stands, never on a jack alone, while working underneath.
Step-by-Step Instructions
1 Break the mounting bolts loose
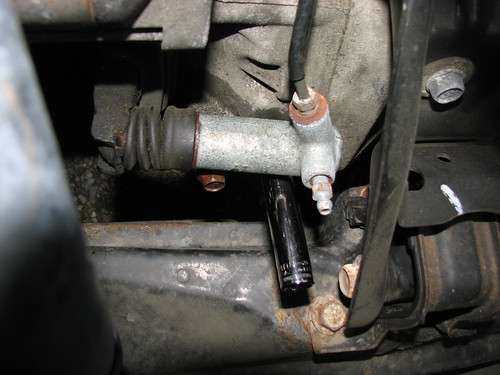
With the vehicle safely supported and the slave cylinder accessible at the transmission, crack both 12 mm mounting bolts free while the unit is still firmly held in place, but leave them threaded in. Loosening them now, before the housing can shift or spring back, is far easier than fighting them once the hydraulic line is off.
2 Disconnect the hard clutch line
Using the 10 mm open-end wrench, back off the fitting where the rigid metal pipe threads into the cylinder. Turn only the nut and keep the pipe itself dead straight, since a kinked line must be replaced. Rather than fully unthreading it under tension, loosen the fitting just until it turns freely on the pipe. Slide a drip pan underneath first, as fluid will run out. If the nut begins to round off, hold it steady with the wrench, soak the joint in penetrating oil, and rotate the cylinder body instead of the nut to break it loose.
3 Remove the old slave cylinder
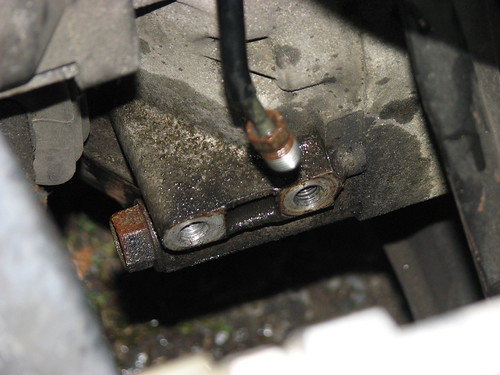
Take out the driver-side 12 mm bolt first, then the passenger-side one. As the driver-side fastener frees up, the cylinder relaxes rearward and swings down and clear of the hard pipe on that side. Lift the worn unit out.
4 Fit and start the new cylinder
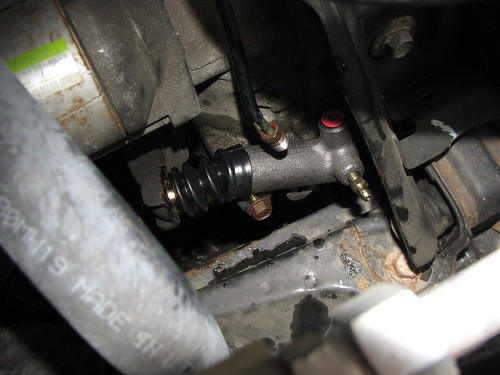
Compress the new cylinder's piston by hand until its pushrod can seat into the clutch release lever. Hold that compression, align the pushrod with the lever, and slide the body into position. Start the passenger-side 12 mm bolt by hand so the unit is loosely captured.
5 Align the driver side and reconnect the pipe
The driver-side bolt hole needs more force to line up; press the housing into place and start that bolt by hand. Pull the shipping dust plug from the fluid port, then offer up the hard pipe fitting. Leave both mounting bolts about one turn short of snug so the housing can still float slightly while you start the pipe nut by hand, which avoids cross-threading. Once the fitting catches cleanly, torque the mounting bolts to 16 lb-ft and the clutch pipe fitting to 11 lb-ft.
6 Set up the bleed

Push a short hose over the bleeder nipple and route the open end into your catch container. Crack the bleeder screw open one or two turns with the 9 mm wrench. Move to the firewall and find the clutch fluid reservoir, which is the smaller of the two and sits closer to the fender. Wipe the cap clean before removing it so no debris falls into the fluid.
7 Gravity-bleed the clutch line
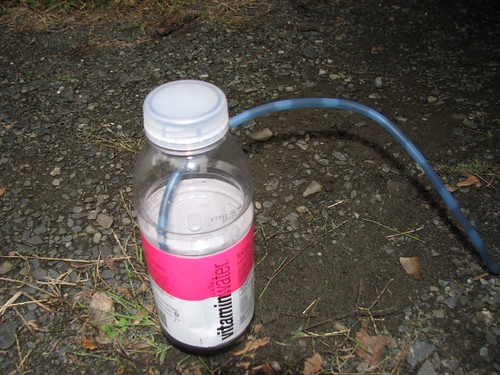
Fill the reservoir with fresh DOT 3 or DOT 4 fluid. Press the clutch pedal down slowly once or twice to start the flow, after which the system will bleed under gravity on its own. Keep the reservoir topped up the whole time and watch the hose until the air bubbles stop coming through with the fluid. Do not let the reservoir run empty, or you will draw air back in.
8 Close up and test
Once the fluid runs free of bubbles, close the bleeder screw and torque it to 7.2 lb-ft. Confirm the reservoir is filled to its side level mark, and avoid over-tightening either the bleeder or the pipe fitting. Test clutch engagement stationary in the driveway and inspect every joint for weeping, then verify clean shifting on a short road test before putting the car back into normal use.
Pro Tips
- 💡 The full job is realistically an hour or less of hands-on work.
- 💡 The hard-line fitting strips easily; a shot of penetrating oil plus holding the nut and turning the cylinder body is a reliable way to free a stubborn one.
- 💡 Only minimal pedal pumping is needed to start the gravity bleed once the bleeder is cracked open.
Was this guide helpful?
