
Honda S2000 Front Lower Control Arm and Compliance Bushing Replacement
- Torch work on rubber produces smoke and can start a fire. Work outside or in a ventilated space with an extinguisher and a helper.
- Never stand under a car on a jack alone; use jack stands.
- Always fit new cotter pins on castle nuts.
- The car's alignment will be out after this job; do not drive at speed until it has been aligned.
Introduction
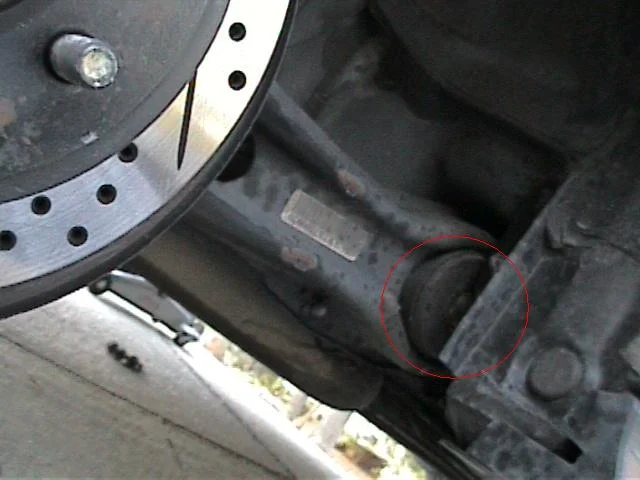
The big front compliance bushing on the S2000 lower control arm is the bushing most likely to fail. When it cracks, the arm can shift so the car loses caster in corners, the wheels feel as if they move over at full lock, and the caster adjustment runs out. Honda does not sell the bushing on its own, so owners either buy complete lower arms or press new bushings into the old arms. The main headache is that the eccentric cam bolt through the bushing is usually seized to the inner sleeve and has to be cut out. This guide covers both the rubber Mugen-bushing route and the Energy Suspension polyurethane route. Adapted from a community writeup by learnerspermit on S2KI (https://www.s2ki.com/s2000/topic/935502-diy-compliance-bushings/).
Procedure
12 steps-
Step 1: Order cam bolts first
Buy new Honda cam bolts and eccentric nuts for the lower arm before you start. The old ones are often seized into the bushing sleeve and get destroyed during removal.
-
Step 2: Mark the adjusters
With the car still on its wheels, mark the position of each cam adjuster against the arm with paint or nail polish. You will set the new cam bolts back to the same positions so the car is drivable to the alignment shop.
-
Step 3: Lift and support
Lift the front of the car with both sides off the ground and the car level, support it on jack stands and remove the wheels.
-
Step 4: Disconnect the arm
Unhook the sway bar end link from the lower arm and remove the lower damper/coilover bolt. Separate the lower ball joint from the knuckle (or remove the two bolts that hold the ball joint to the hub, depending on how your arm is built). Unclip the ABS sensor wiring and brake hose brackets (10mm) if they limit movement.
-
Step 5: Remove the cam bolts
Try to remove the two eccentric cam bolts that hold the arm to the subframe. If a bolt is seized to the bushing sleeve, do not keep turning the eccentric nut; you can strip the cam. Instead cut through the bolt above and below the bushing with a reciprocating saw to free the arm. Do not disturb the top cam bolt's eccentric nut.
-
Step 6: Press out the old rubber (Mugen route)
On the press, push the rubber centre out first, then press out the outer metal ring. Keep the old ring: it makes a good pressing tool for the new bushing.
-
Step 7: Orient and press the new bushing
The bushing rubber is not uniform; thinner sections give compliance in one direction. Line up the two triangle marks moulded into the rubber with the direction the original pointed (fore-aft vs. up-down) before pressing. Press only on the outer shell, keep the press plates parallel so the bushing cannot tilt, and stop when the sleeve sticks out evenly on both sides.
-
Step 8: Energy Suspension route: burn out the centre
For the Energy Suspension 16.3120 set, leave the outer metal shells of all three lower-arm positions in the arm. Play a hot torch flame around each shell, never holding it in one spot, until the rubber lets go of the metal. The sign is a sizzle and a little smoke; if the rubber catches fire, you are using too much heat. Push the rubber and inner sleeve out, then let the arm cool before you clean it.
-
Step 9: Clean and grease the shells
File off burrs and smooth all edges inside the shells, then grease the bores straight away so they do not rust. Grease every face of the polyurethane bushing that touches metal and fit the supplied sleeves.
-
Step 10: Refit the arm
Bolt the arm back to the subframe using the new Honda cam bolts, setting each eccentric to the mark you made earlier (not 180 degrees out). Reconnect the lower ball joint with a new cotter pin, the damper bolt and the end link, all snug only.
-
Step 11: Load and torque
Jack the lower arm up to ride height before final torque. Energy Suspension's S2000 sheet (https://sdda.semadata.org/Standard/Energy%20Suspension/17581.pdf) lists: lower arm cam adjusting nuts and bolts 58 lb-ft, lower damper flange bolt 47 lb-ft, lower ball joint castle nut 43-51 lb-ft (tighten to the low figure, then only far enough to line up the cotter pin hole), end link 28 lb-ft at the bar and 22 lb-ft at the arm, wheel sensor and brake hose bracket bolts 7.2 lb-ft. Refit the wheels and torque the lug nuts to the factory figure.
-
Step 12: Align
Removing the cam bolts always changes the alignment. Book a professional alignment straight away and drive gently until it is done.
- Do both sides at once so the front stays balanced.
- Some owners pull the arms and take them to a machine shop for the pressing only, which saves buying a press.
- When pressing, uneven or tilted fixtures are the usual reason a bushing goes in crooked.
Related procedures
All guides →
Tap right for next · left for back · Keys: ← → step · Space / PgUp / PgDn scroll · Esc exit