Honda Fit (GE8) Spark Plug Access and Replacement
Introduction
Replacing the spark plugs on the second-generation Honda Fit Sport (GE8, 1.5L L15A) is mechanically simple, but Honda buried the coils and plugs beneath the windshield cowl, so most of the effort goes into gaining access. This guide covers the full teardown needed to reach all four ignition coils: removing the wiper arms, the plastic cowl grille, the wiper harness, and the black metal shelf that sits against the firewall. It also covers correct plug preparation and the reassembly sequence that keeps the cowl seated without gaps. Expect a first-time job to take a couple of hours even though the plug swap itself is quick. Owners across a wide mileage range have reported plugs that backed out or arrived loose from the factory, so this is also a worthwhile inspection. Note that the 1.2L L12B2 engine used in some European Fit/Jazz cars takes a different plug and is not covered by the part numbers here. Adapted from a community writeup by CasualFitOwner on FitFreak (https://www.fitfreak.net/forums/2nd-generation-ge8-specific-diy-repair-maintenance-sub-forum/73214-diy-get-access-spark-plug-2009-sport.html), including corrections from the follow-up discussion.
Reference
Tools Required
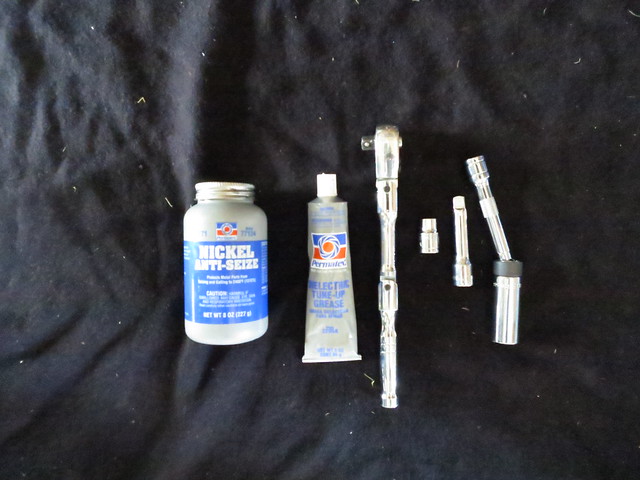
- 10 mm socket and ratchet
- 5/8 in. magnetic spark plug socket with swivel (e.g. GearWrench 5/8 in. x 6 in.)
- Socket extension and wobble/universal joint
- Trim panel removal tool
- Spark plug gap gauge
- Torque wrench (optional)
Parts Required
-
Spark plugs, four: NGK IZFR6K13 or DENSO SKJ20DR-M13
-
High-temperature anti-seize compound (nickel or copper based)
-
Dielectric grease
-
Spare main cowl clips: Honda 90602-TA0-003 (nine used)
-
Spare windshield-edge cowl clips: Honda 90602-TK6-A00 (two used)
Safety Warnings
- ⚠ Factory plugs are frequently extremely tight, and several owners found plugs that were loose or showing blow-by. Check the seating of all four.
- ⚠ The 1.2L L12B2 engine used in some European Fit/Jazz cars needs its own plug; NGK DIFR6D13 caused surging on that engine, so verify the correct plug for your market and engine.
- ⚠ Let the engine cool completely before removing plugs to avoid damaging the aluminum cylinder head threads.
Step-by-Step Instructions
1 Remove the wiper arms

Begin at the base of the windshield. Lift the covers over the wiper pivot nuts, remove the nuts, and pull each wiper arm off its splined post. Mark the resting position of the blades first so the arms can be refitted at the correct angle. Disconnect the washer fluid tube and peel off the rubber hood seal so the cowl trim can lift freely.
2 Detach the plastic cowl grille
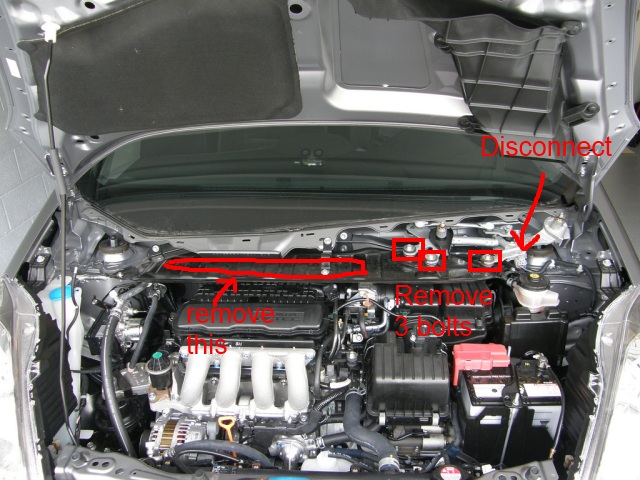
The vented plastic grille below the glass is retained by push clips (Honda 90602-TA0-003, nine used on North American cars) plus two white end clips at the window corners (90602-TK6-A00). Release the clips and lift the grille away. On right-hand-drive and some non-US cars this trim is a single molded piece rather than the split design used on USDM vehicles, so adjust your approach accordingly.
3 Free the wiper harness and lift out the metal shelf
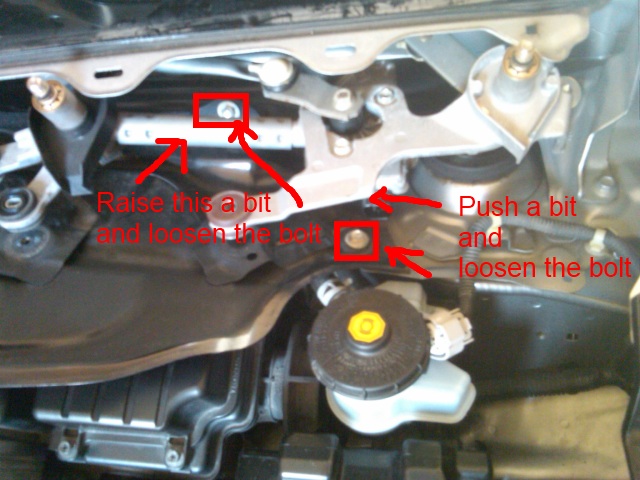
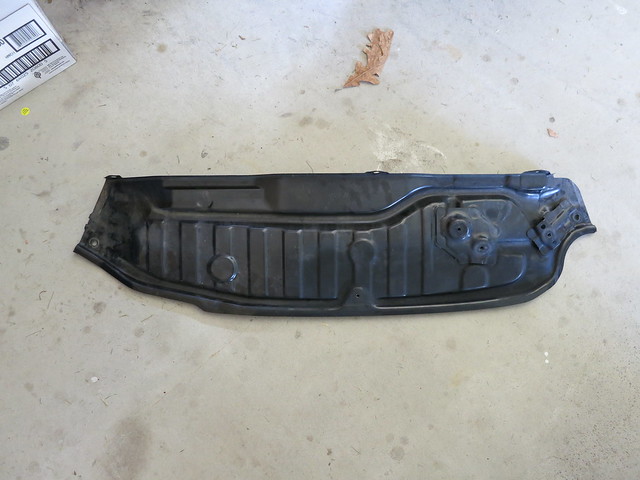
Undo the three 10 mm bolts holding the wiper wiring harness and unplug its power connector so it can be set aside. Then remove the remaining 10 mm bolts around the black metal shelf that spans the firewall. Two of those bolts hide behind the harness; nudge the harness out of the way to reach them. The shelf is also bonded with foam double-sided tape, so lift firmly and evenly to break it loose. As an alternative reported by one owner, you can leave the wiper linkage bolted to the shelf and remove both together, freeing a single bolt at the far end with a wobble extension.
4 Identify the coils and plan access
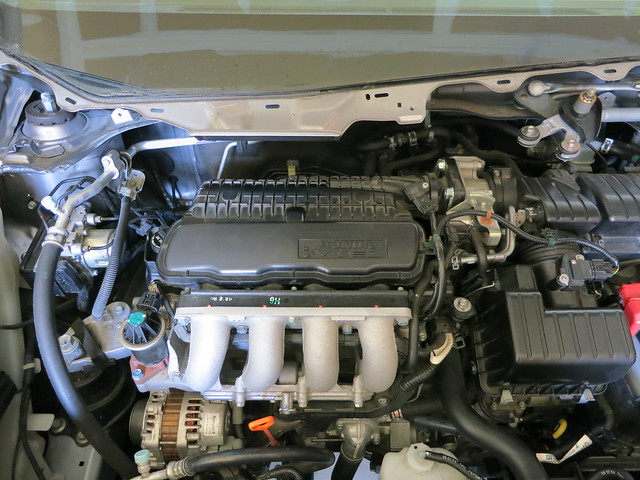
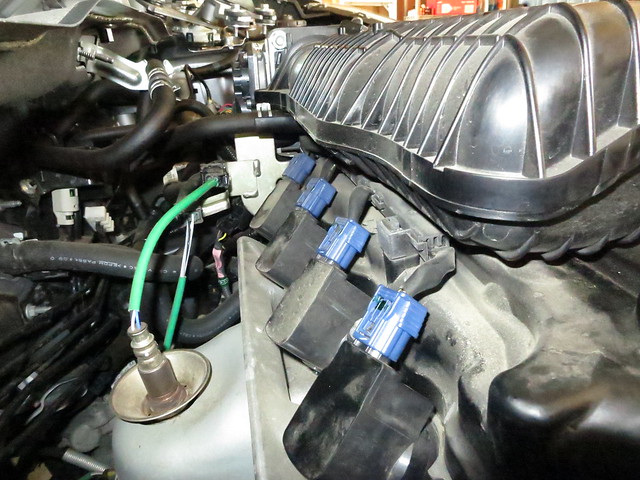
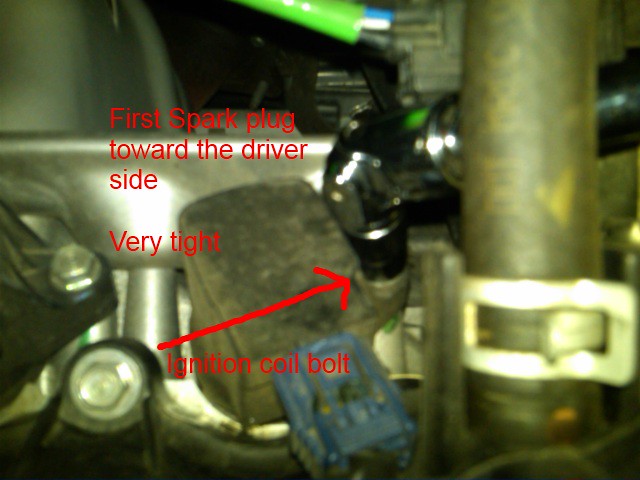
With the shelf removed, all four ignition coils are exposed along the rear of the cylinder head near the firewall. The three toward the passenger side have the most working room and should be done first. The coil nearest the driver side sits in a tight pocket and needs the extra steps below. Work from the passenger fender for the best reach.
5 Remove the accessible coils and plugs
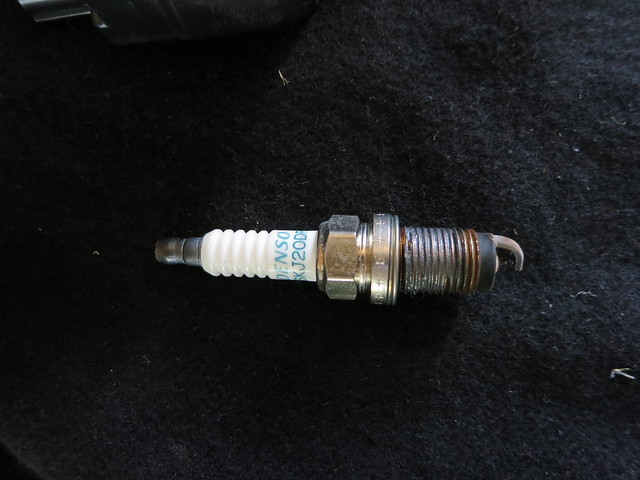
For each of the first three positions, release the coil connector by pressing the tab on top of the blue plug and pulling it off. Undo the single 10 mm bolt retaining the coil, then draw the coil straight up. Fit the magnetic 5/8 in. spark plug socket, break the plug loose, and unthread it by hand. Expect the original plugs to be very tight and the threads to look brown or discolored.
6 Reach the tight driver-side plug
The coil next to the driver side has almost no clearance. Temporarily unplug the oxygen sensor connector to open up room. Because the coil connector cannot be reached first here, remove the coil hold-down bolt and rotate the coil slightly to expose the blue connector, then unplug it and lift the coil out. Remove and inspect this plug as with the others.
7 Inspect and prepare the new plugs
Use NGK IZFR6K13 or DENSO SKJ20DR-M13, the plugs Honda lists for the 1.5L Fit. Confirm the electrode gap is correct before fitting; these plugs are supplied pre-gapped. Apply a thin film of high-temperature anti-seize (nickel or copper based) to the threads and a small amount of dielectric grease inside each coil boot. Compare each old plug as you go, since loose or discolored plugs point to blow-by and are worth noting.
8 Install the plugs and refit the coils
Thread each plug in by hand to avoid cross-threading, then seat it with the ratchet: snug it until you feel resistance, then rotate an extra 1/16 to 1/8 turn. Push each coil back down, reconnect its blue connector, and start the coil bolt by feel before tightening. Reconnect the oxygen sensor connector you unplugged earlier.
9 Reassemble the shelf and cowl
Refit the metal shelf and wiper harness, reversing the removal and reconnecting the power connector. When replacing the plastic cowl, slide it toward the glass first, then press its row of clips down into place from above; seating the clips before positioning the trim leaves a visible gap. Fit the two small end pieces last, with the hood closed, so they align. Finally reinstall the wiper arms at their marked positions and reconnect the washer tube.
Pro Tips
- 💡 A magnetic spark plug socket holds the plug securely where a worn O-ring socket drops it once the O-ring picks up any grease.
- 💡 Buy spare cowl clips before you start. The plastic tabs and clips break easily, especially if a windshield shop has previously disturbed the cowl.
- 💡 Working from the passenger side gives the most room; the first three plugs come out easily from there.
- 💡 Some owners skip the full teardown and reach the plugs by hand around the back of the cylinder head in about half an hour, though it is cramped and easy to miss torque.
- 💡 Non-USDM and right-hand-drive cars may use a single-piece cowl instead of the split trim shown here.
Was this guide helpful?