Honda Fit (GE8) Custom Cold-Air Intake with Velocity Stack
Introduction
This guide covers building a low-cost custom cold-air intake for the second-generation Honda Fit (GE8), centered on a velocity stack that sharpens throttle response and a relocated inlet that pulls cooler air from the pocket behind the headlight. The factory filter and its long run of tubing are removed and replaced with a cone filter, a machined aluminum velocity stack, and a stack of size adapters that let mismatched pipe diameters mate cleanly and hold a true round shape under clamp pressure. A fabricated heatshield finishes the job, walling the filter off from radiant engine heat so the incoming charge stays cooler. The aim is crisper part-throttle and low-to-mid-range response plus a modest efficiency gain rather than large peak-power numbers. It suits owners who are comfortable sourcing generic couplers and cutting a simple sheet-metal panel. Adapted from a community writeup by kurisux92 on FitFreak (https://www.fitfreak.net/forums/2nd-gen-ge8-specific-fit-engine-modifications-motor-swaps-ecu-tuning-sub-forum/72430-so-i-got-bored-my-diy-intake-pics-inside.html), including corrections from the follow-up discussion.
Reference
Tools Required
- Socket or wrench set for battery removal
- Screwdriver or nut driver for hose clamps
- Band saw or metal shears (for heatshield fabrication)
- Tape measure and marker
- Utility knife or scissors (for heat tape and edge trim)
Parts Required
-
Cone air filter (Spectre or equivalent)
-
Aluminum velocity stack sized for 2-inch couplers (eBay/generic)
-
Reducing boot, 3-inch to 2-inch
-
Spectre stepped size adapter (included with filter kit)
-
Support collar to keep the boot round
-
Assorted hose clamps
-
20-gauge steel sheet for the heatshield
-
DEI Heatshield tape with edge trim
-
Optional: pre-made APC heatshield (close-out alternative)
Safety Warnings
- ⚠ Disconnect the battery before working in the engine bay to prevent accidental shorts.
- ⚠ A low inlet behind the headlight is exposed to road spray; make sure it cannot ingest standing water, which risks hydrolock.
- ⚠ Wear gloves and eye protection when cutting sheet steel; the edges are sharp until trimmed.
Step-by-Step Instructions
1 Remove the battery and strip the old intake
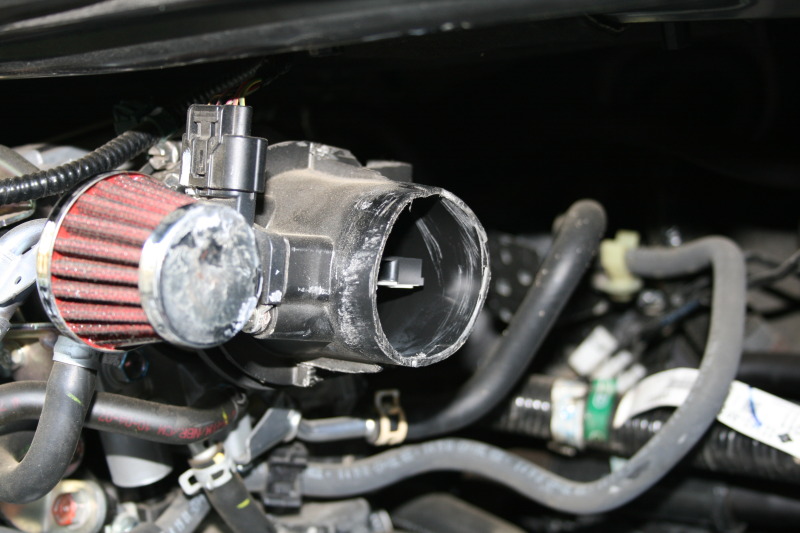
Disconnect and lift out the battery to open up that corner of the engine bay. With it clear, work the factory filter free and pull the length of intake tubing that runs under the headlight and down alongside the radiator. This frees the space needed to reroute the inlet and gives room to test-fit the new parts.
2 Assemble the velocity stack and reducing boot
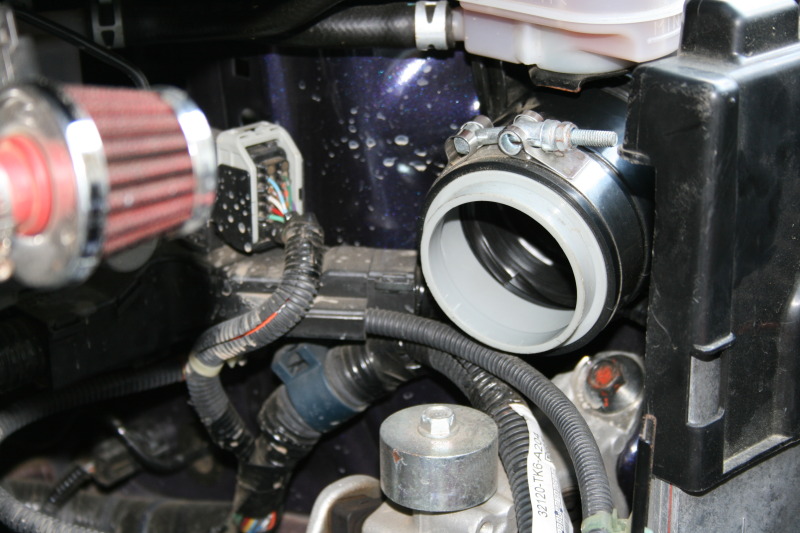
Fit an aluminum velocity stack sized for 2-inch couplers; the flared trumpet smooths airflow into the pipe and is what restores the missing low- and mid-range crispness. Seat the stack inside a reducing boot that steps from 3-inch down to 2-inch so the small stack can bridge up to the larger filter opening.
3 Bridge the diameters and support the boot
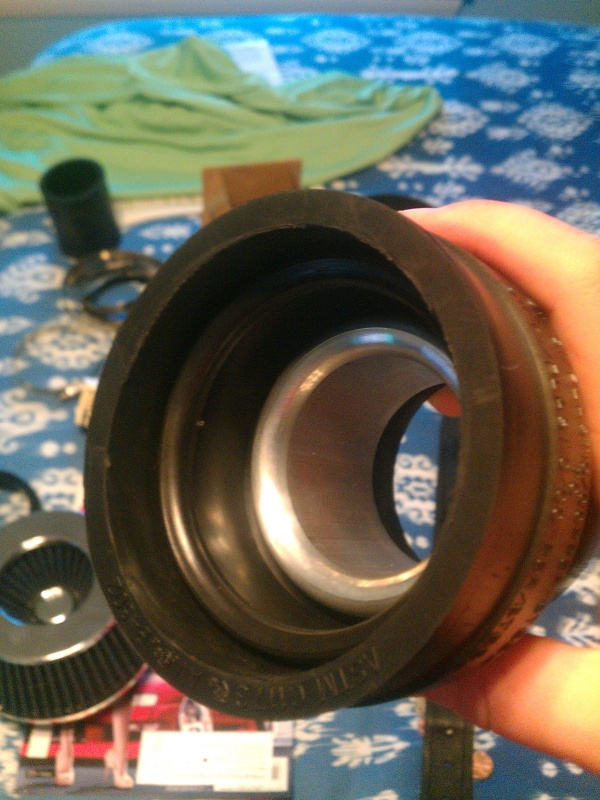
Use the stepped adapter that ships with Spectre filter kits to close the remaining size mismatch. Drop a support collar inside the boot so the rubber holds a round profile and does not pinch oval when clamped, then push the boot into the mouth of the cone filter.
4 Connect the assembly to the MAF tubing
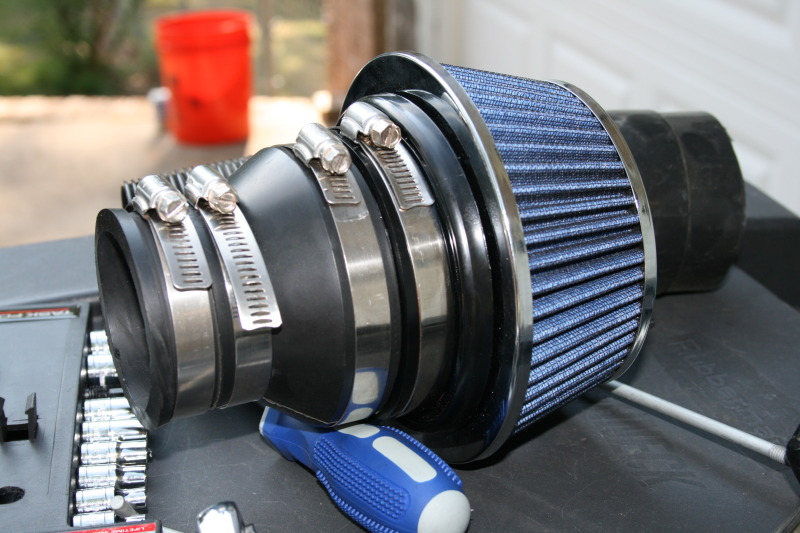
Slide the completed filter-and-stack assembly onto the mass-airflow sensor tubing; it should seat with light pressure. Lock the joint with a hose clamp. Expect to use several clamps across the various couplers, and snug each just enough to seal without crushing the rubber.
5 Relocate the inlet behind the headlight
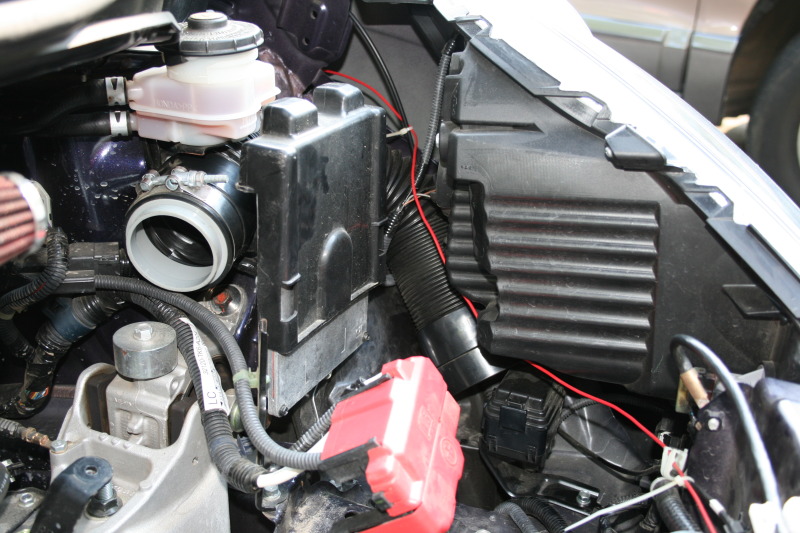
Route the intake so its open end draws from the pocket behind the headlight, the coolest part of this engine bay. Set the filter's inlet into the funnel opening there so it feeds on ambient air rather than heat radiating off the block.
6 Reinstall the battery and check clearances
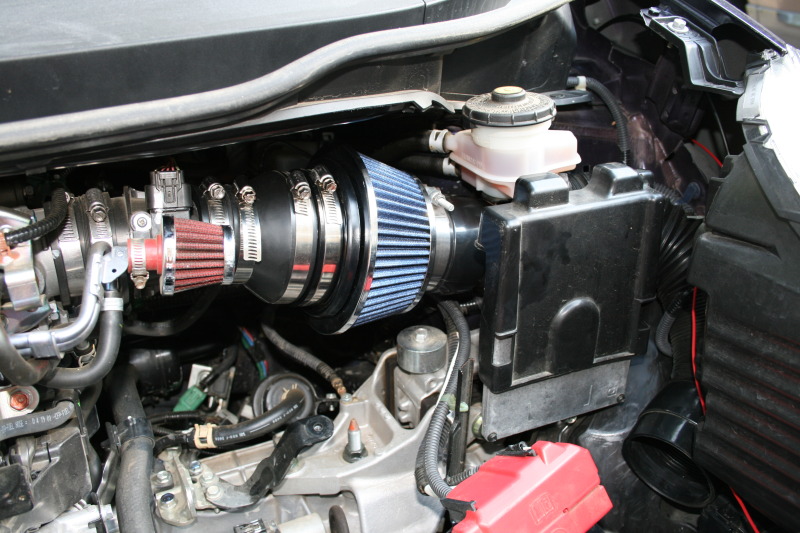
Return the battery to its tray and reconnect it. Confirm the new routing clears the battery, the hood line, and any hot or moving components, and recheck that every clamp along the intake is tight before the first start.
7 Fabricate and fit the heatshield

Replace any thin, poorly sealing shield with a rigid panel cut from 20-gauge steel that mates against the top of the bay to isolate the filter from engine heat. Line the face and edges with DEI Heatshield tape and edge trim. Cut the panel with a band saw or metal shears; avoid a hacksaw on sheet metal, which tends to catch and distort the cut. A close-out APC pre-made shield is a drop-in alternative if you would rather not fabricate one.
Pro Tips
- 💡 The builder credits the velocity stack with the biggest gain in throttle response, especially in the low range.
- 💡 Keep the inlet in the pocket behind the headlight; the builder confirmed it as the coolest spot in the GE8 bay.
- 💡 Leftover DEI heat tape can be used to wrap the intake-manifold runners for additional heat isolation.
Was this guide helpful?
