Acura RDX (2G): Hidden USB Phone Charger and Mount Install via Radio Trim Removal
Introduction
This guide covers a clean, mostly reversible way to add a fast USB phone charger and a subtle phone mount to the second-generation Acura RDX, which lacks factory Android Auto. Rather than leaving a cable and adapter hanging from the 12V socket in the storage pocket, the charging cable is routed up through a dashboard vent to a magnetic mount, while the charger and its power feed are hidden inside the radio console and wired directly to the fuse panel. The work involves removing the lower storage trim and the radio bezel, then making a switched or fused 12V connection, so basic trim-removal and wire-crimping skills are needed. It applies to the 2013-2018 RDX and to owners who want a tidy phone-charging setup without permanent dashboard damage. Adapted from a community writeup by rubinox on AcuraZine (https://acurazine.com/forums/2g-rdx-diy-faq-406/radio-trim-removal-cell-mount-charger-installation-989903/), including corrections from the follow-up discussion.
Reference
Tools Required
- Plastic pry / trim removal tool
- Phillips screwdriver (or 8mm nut driver)
- Socket or wrench for the 10mm ground bolt
- Wire crimping tool
- Heat gun or lighter for heat-shrink
- Zip ties
Parts Required
-
12V USB fast charger (Qualcomm Quick Charge 3.0, 18 watts or more)
-
Female cigarette-lighter (12V) socket
-
USB-C charging cable, preferably with a right-angle connector
-
Magnetic phone mount with adhesive base and phone-side metal plate
-
Add-a-circuit fuse holder
-
Insulated U-type fork/spade crimp terminal with heat-shrink
-
Butt connectors with heat-shrink
-
Electrical tape (Scotch Super 88)
Safety Warnings
- ⚠ Disconnect the negative battery terminal before removing trim or making any wiring connection, both to silence the chime and to prevent shorts.
- ⚠ Keep the two small radio-bezel bolts captured while removing them; a dropped fastener can fall deep into the console and be hard to recover.
- ⚠ Make sure the add-a-circuit taps an appropriately rated circuit and that the accessory's current draw stays within the fuse rating.
Step-by-Step Instructions
1 Disconnect the battery and make room
Pulling trim wakes the vehicle's chime system, which will sound continuously while panels are open, and live wiring risks a short during the connections you are about to make. Disconnect the negative (ground) battery cable before starting. Then slide the gear selector fully rearward to free up clearance around the center console.
2 Remove the lower storage panel
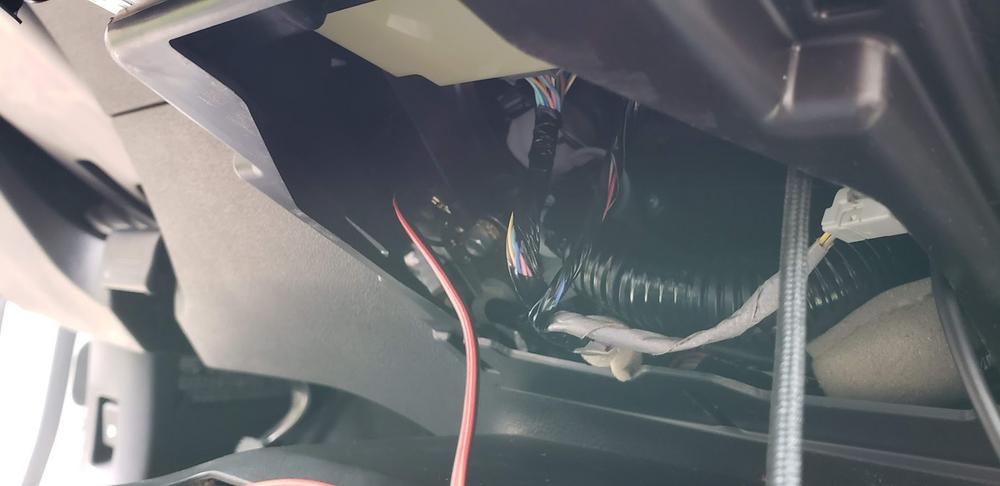
A small plastic panel caps the storage pocket at the base of the radio console. Work a plastic pry tool around its outer edge, releasing each clip as you feel it let go, and move slowly by feel to avoid marring the trim. Once loose, unplug the single connector on its back. This feeds the small bulb that lights the top of the storage cubby; the thread's follow-up clarified it is a lamp, not a retaining clip.
3 Remove the two hidden bolts
Reach up into the cavity now exposed behind the removed panel. Feeling upward, you will find two 8mm bolts with Phillips heads holding the radio bezel from underneath. Back both out. Keep firm control of them as they come free, because they drop easily into the console interior and are difficult to fish back out.
4 Release the radio bezel
With those two fasteners out, the bezel is retained only by concealed spring clips. Begin at the top edge, where the bezel meets the flat surface beneath the upper display screen. Insert a trim tool to start the seam, then switch to your fingertips and draw the panel toward you. The clips release one after another and the bezel comes away.
5 Route the charging cable through a vent
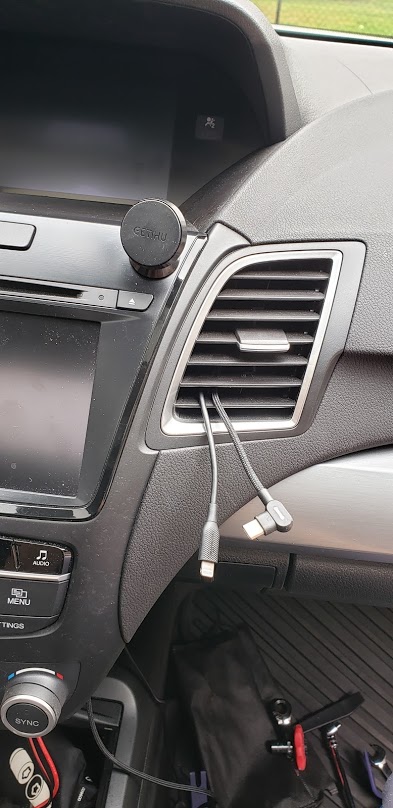
The dashboard air vents sit just behind and below where the phone will mount. Feed the USB-C charging cable up from inside the opened console and out through a vent louver, leaving enough slack at the top to reach the mounted phone. A right-angle USB-C plug keeps the exposed end low-profile, and a connector with a small locator LED makes plugging in at night easier.
6 Test-fit the bezel with the cable in place
Before committing to the wiring, reseat the bezel with the cable routed to confirm nothing binds. The trim snaps back together without interference and grips the cable lightly, which stops it sliding back down into the console, a useful bonus. Leave the panel loosely in place while you finish the power connections.
7 Mount and secure the charger
Inside the lower cavity, plug a 12V USB fast charger into a female cigarette-lighter socket, then wrap the joint with electrical tape (Scotch Super 88) so vibration cannot separate the two. Select a charger that supports Qualcomm Quick Charge 3.0 rated at 18 watts or more; a 36-watt unit can fast-charge two phones simultaneously. Zip-tie the assembly to the existing wiring bundle to hold it in place.
8 Connect the ground
Find the factory ground stud in the cavity, secured by a 10mm bolt. Crimp an insulated U-type fork/spade terminal with heat-shrink onto the socket's negative lead, slide it under the bolt, and tighten. Grounding points are plentiful in this area of the RDX if you need an alternative location.
9 Run the positive lead to the fuse panel
Extend the socket's positive wire with a heat-shrink butt connector, then route it across to the fuse box on the driver's side, securing the run with zip ties. Terminate it at an add-a-circuit fuse holder tapped into a suitable circuit, using a second butt connector for the final joint. Reconnect the battery ground, confirm the charger powers up, then fully seat all trim.
Pro Tips
- 💡 Clean the mounting surface with rubbing alcohol before applying the magnetic mount's adhesive, and stick the metal plate to the inside of the phone case so it can later be removed with gentle heat.
- 💡 The adhesive magnetic mount holds best on smooth hard plastic; avoid soft leather-look surfaces where the pad may not bond well or could cause damage.
- 💡 A cradle clipped into the driver's-side dashboard vent, just left of the wheel, is a solid non-adhesive alternative that reportedly holds firm with no vibration or sag.
- 💡 If you prefer Qi wireless charging, an adhesive metal ring with an open center lets a magnetic mount and wireless charging coexist, though the rings can run warm.
Was this guide helpful?
