Molded Fiberglass Stealth Subwoofer Enclosure for the Honda Fit
Introduction
This guide covers building a molded fiberglass subwoofer box that follows the contour of a rear quarter cavity in a Honda Fit (Jazz), giving a near-OEM, low-profile install that can preserve most of the cargo area and, depending on the location chosen, the spare tire. Rather than a simple rectangular MDF box, the enclosure is laminated directly against the car's interior so it hugs the trunk sidewall and disappears behind matching carpet. The technique combines an MDF structural baffle with fiberglass skins, so it applies to first- and second-generation Fit models and, in principle, any vehicle with a suitable rear cavity. You would do this to reclaim usable space, achieve a factory-stealth look, and tune internal volume precisely to a chosen driver. Expect fabrication skill, patience with sanding, and multiple cure cycles. Adapted from a community writeup by joe d on FitFreak (https://www.fitfreak.net/forums/fit-interior-modifications/8229-diy-stealth-fiberglass-sub-box.html), including corrections from the follow-up discussion.
Reference
Tools Required
- Disposable brushes and mixing containers for resin
- Organic-vapor respirator (not a dust mask)
- Angle grinder with cutting and sanding-flap wheels
- Jigsaw or handsaw for cutting MDF
- Staple gun
- Hot glue gun
- Drill
- Improvised compass or a fixed-pivot marker for scribing the speaker circle
- 3M spray adhesive
- Nitrile gloves and eye protection
Parts Required
-
Polyester laminating resin with hardener (roughly 1 gallon for a 12-inch build)
-
Fiberglass chopped-strand mat
-
Fiberglass woven mat
-
MDF (for the baffle and structural panels)
-
Stretch fleece fabric
-
Two-part body filler (Bondo-style)
-
Automotive underbody/undercoating spray
-
Masking tape and aluminum foil (mold release)
-
Paste wax or cooking spray as a release agent
-
Dowels or scrap wood for locating the speaker ring
-
Speaker terminal cup or a length of wire sealed with silicone
-
Carpet, suede, or vinyl for the outer skin
-
The subwoofer driver being enclosed
Safety Warnings
- ⚠ Cured resin permanently ruins carpet and trim. Mask thoroughly and cover the surrounding area before mixing anything.
- ⚠ Use an organic-vapor respirator, not a dust mask, and work in a ventilated space; resin fumes can leave you lightheaded.
- ⚠ Under-built shells crack under heavy subwoofers. Laminate enough thickness, especially for high-excursion drivers.
- ⚠ Secure the enclosure solidly to structure. An unrestrained subwoofer becomes a dangerous projectile in a crash, and the factory plastic pocket is too flimsy to hold it on its own.
- ⚠ An exposed cone is vulnerable to shifting cargo; add a grille if the driver sits proud.
Step-by-Step Instructions
1 Plan the location and size the enclosure to the driver
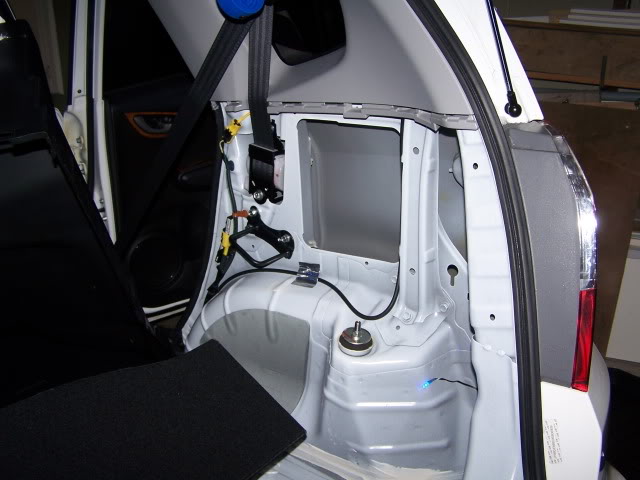
Pick a rear quarter cavity to mold into. A common choice is the passenger-side corner behind the rear seat, with an amplifier rack mirrored on the driver side. Confirm the cavity clears fixed components; on the driver side of the Fit the fuel-fill hose and box occupy much of the space. Match the finished internal air volume to your subwoofer's specification: one builder's 12-inch Rockford Punch called for about 1.25 ft3 sealed, while another targeted roughly 0.75 to 1.15 ft3 (ideally near 1 ft3) for a Type R driver. Wipe the panel and carpet down with a damp cloth before starting.
2 Mask the car so resin never touches trim
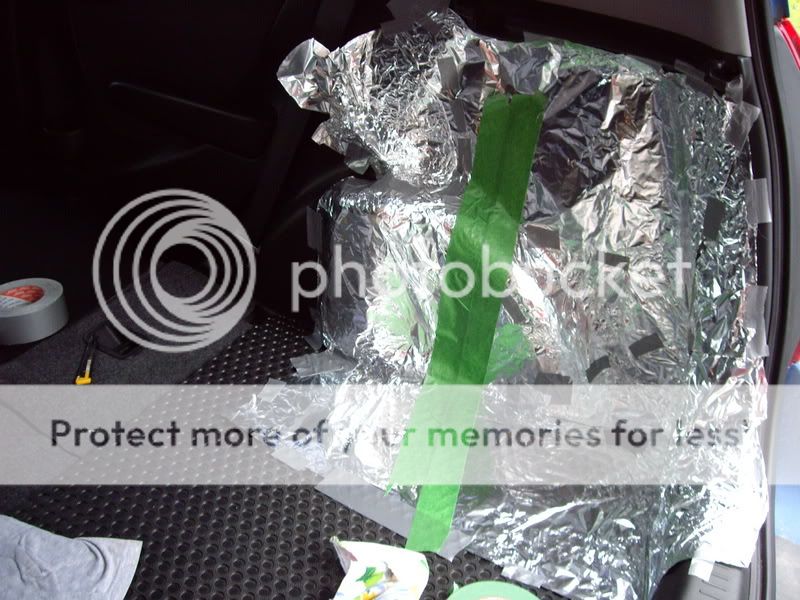
Because you laminate directly against the interior, the masking is the single most critical step; cured resin permanently destroys carpet and trim. Lay down tape, then cover it with aluminum foil. Keeping the foil as the outermost layer makes it far easier to release from the hardened shell later. Vinyl protectant on nearby surfaces can stop tape from adhering, so clean those areas first. Coat the tape with paste wax or cooking spray so the shell pops off cleanly. Drape a blanket over everything else in the work zone, since drips travel and stick to anything.
3 Lay the first fiberglass mold layer
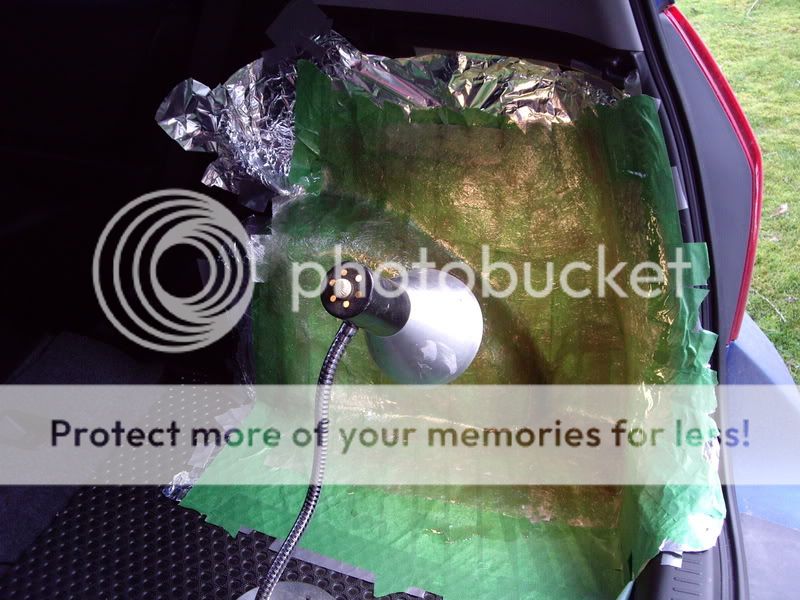
Cut chopped-strand mat into small strips, roughly 3 by 8 inches, so the material drapes into curves without fighting you. Mix resin and hardener to the product's ratio, brush resin onto the masked surface, press the strips into place, and stipple more resin through until saturated. Spread the material well past the final footprint of the box; trimming excess later is easy, adding coverage after the fact is not. In cold conditions a work lamp helps the resin kick. Let it cure overnight. With a single layer the shell will be thin, translucent, and brittle, so handle it gently.
4 Release the shell, test-fit, and build thickness
Once cured, lift the shell out of the car and peel away the masking. Set it back into the cavity to check fit; leftover tape residue can be sanded off at the end. Now build strength: add roughly two layers of woven mat and two of chopped mat, then cure overnight again. Aim for five or six layers overall, with a couple of extra layers everywhere as insurance. Thin shells are the usual failure point; heavy drivers such as JL Audio W7s have been known to crack under-built enclosures within months.
5 Build the MDF structural frame

Trace the shell's contour onto MDF, then cut a bottom panel and side panel to suit. Dry-fit the pieces against the shell, adjust, then glue and fasten them together; scrap blocks work fine as internal bracing if you lack dowels. Some builders make the box bottom out of fiberglass instead of wood for a stiffer, better-sounding result. MDF supplies the rigidity a pure fiberglass shell lacks, and later encapsulating it in glass seals the wood against condensation and moisture damage.
6 Bridge the MDF frame to the shell with fleece

Cut strips of stretch fleece and staple them from the MDF edges across to the fiberglass shell. The fleece acts as a conduit that carries resin between the wood and the existing glass. Mix a batch of resin, saturate the fleece, and lay chopped mat along the seams, realigning the frame as gravity pulls it. Once the seams go tacky, add further layers matching the shell's thickness, laminating both faces so the frame and shell fuse into one continuous piece.
7 Cut and locate the speaker mounting ring
Measure the driver's mounting radius and scribe a circle; an improvised fixed-pivot marker does the job. Cut the inner opening, drop the speaker in to verify fit, then trace the outer diameter for the ring. Suspend the ring at the depth and angle you want using dowels and dabs of hot glue. For a cleaner face, some builders stack two trim rings so the driver sits flush.
8 Stretch fleece to define the final shape
Drape inexpensive fleece over the ring and frame to form the outer contour. Staple it to the MDF and bond it to the glass with 3M spray adhesive. This layer dictates the finished silhouette, so pull it taut and be meticulous. Test-fit the assembly in the car; grind down any high spots at the rear so the box seats flush against the body.
9 Saturate and harden the stretched fleece
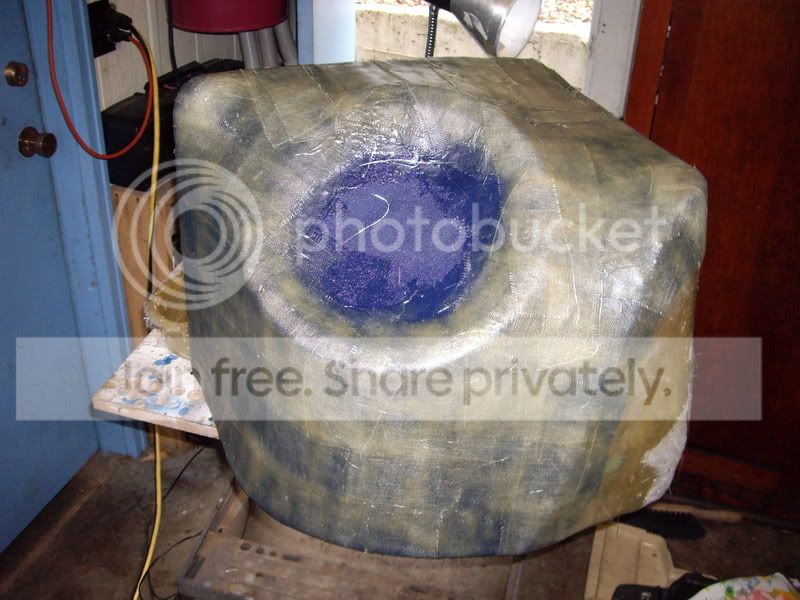
Brush resin onto the fleece and work it in until it soaks completely through. Let it cure into a rigid shell, then reinforce with several more glass layers, alternating between the inside and outside faces to fill gaps and even out the wall thickness. Weave mat lays up with fewer trapped air bubbles than chopped mat and is easier to conform over compound curves.
10 Coat the interior for better sound (optional)
Spray automotive underbody coating over the inside of the enclosure, and apply a second interior coat after the box is finished. This damps the fiberglass walls and noticeably improves the sound quality of a molded shell.
11 Skim with body filler and sand smooth
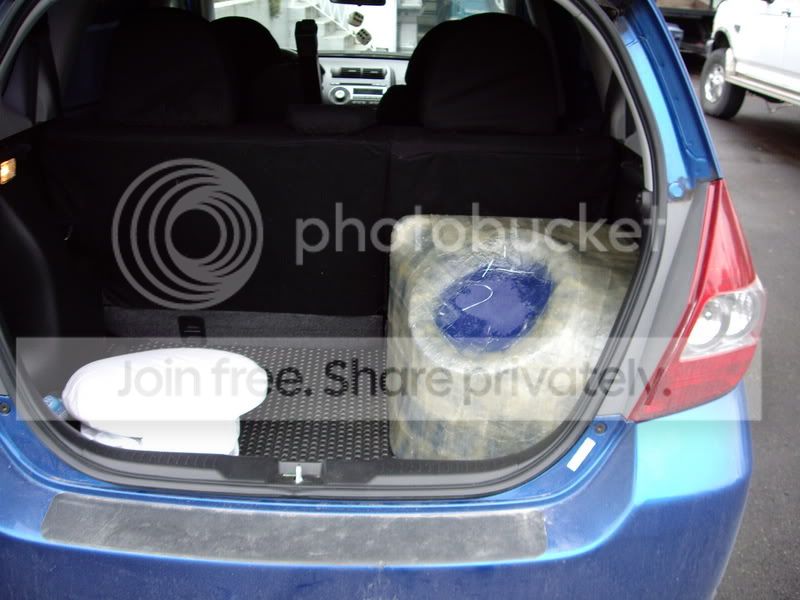
Thin two-part body filler with resin at roughly 6 parts filler to 1 part resin so it brushes on like a heavy paint; adjust for your brand and the ambient temperature, and add the correct amount of each hardener. Skim the outside, sand, test-fit, and repeat until the surface is fair. To cut the sanding workload, prefer a brushable resin-and-filler slurry over piling on extra chopped mat and thick bondo to build up the exterior.
12 Upholster and wire the finished box
Wrap the completed enclosure in carpet, suede, or a stealth cloth so it blends with the interior. For the electrical pass-through, fit an inexpensive terminal cup (well under five dollars) or simply drill a small hole and seal a wire through it with silicone; a smaller hole seals better. Mount the driver and secure the enclosure firmly in the cavity before final installation.
Pro Tips
- 💡 Wax the masking tape, or spray it with cooking spray, so the cured shell releases without tearing at your interior.
- 💡 Match internal air volume to the sub's spec; if you end up slightly oversize, add polyfill or cotton stuffing to compensate.
- 💡 Fiberglass is intensely itchy on skin and the resin fumes are strong; ordinary particulate masks do nothing for vapor, so wear a proper respirator and ventilate.
- 💡 Woven mat produces fewer air bubbles and drapes more easily than chopped mat over curved shapes.
- 💡 Stack two trim rings to flush-mount the driver for a cleaner face.
- 💡 Budget realistically: one builder spent around 300 dollars in materials, versus roughly 599 to 650 dollars for a commercial JL Audio Stealthbox.
- 💡 An alternative to a full molded build is a stiff MDF box mechanically fastened into the cavity with metal brackets, rubber washers, and thread-locked nuts.
Was this guide helpful?
.JPG)

