Honda S2000 EVAP System Delete with Fuel-Tank Vent Valve
Introduction
The evaporative emissions (EVAP) system captures fuel vapor from the tank and routes it back into the intake to be burned rather than vented. On an S2000 that has moved to a standalone ECU, the ECU no longer commands the EVAP solenoids, so the system sits dead. Left in place and inoperative, the charcoal canister and its hoses gradually saturate with fuel, producing a persistent fuel smell, occasional leaks, and enough back-pressure at the filler neck to trip the pump nozzle while refueling. This guide covers a full, clean removal of the canister, solenoids, brackets, and hoses, plus the one detail that makes the delete work correctly: the tank must still be able to breathe. Capping every line outright creates alternating vacuum and pressure that strains the fuel pump, so the delete fits a two-way pressure-relief check valve (the Newton TPV8) on the tank vent. The valve holds a slight positive tank pressure and vents only the excess, so the tank breathes without filling a closed garage with fuel vapor. It applies to the Honda S2000 (AP1 and AP2); the rear layout differs slightly between early and late cars. A reversible bypass version is included for owners who must return to stock for emissions testing. Adapted from a community writeup by Kyle on S2KI (https://www.s2ki.com/forums/s2000-forced-induction-142/diy-evap-system-removal-proper-way-1207469/), including corrections from the follow-up discussion.
Reference
Tools Required
- Socket set and ratchet
- Flat and Phillips screwdrivers
- Pliers for factory spring and squeeze-lock hose clamps
- Pick or hose-removal tool for push-lock fittings
- Connector de-pinning pick
- Heat gun or lighter for shrink tubing
- Rotary tool such as a Dremel (only if a breather filter needs trimming to fit)
- Jack and jack stands
Parts Required
-
Newton TPV8 in-line pressure-relief vent valve (also sold rebadged as Mocal TPV8)
-
K&N 62-2470 breather filter for the valve outlet
-
K&N 62-1370 breather filter, 1 inch flange ID, for the corrugated vent hose
-
Stainless steel cushion clamps: 1.25 inch ID for the valve, 9/16 inch ID for the corrugated hose
-
Stainless bolts to suit the cushion clamps (factory canister bolts and washers are too wide)
-
Dorman 02251 coolant bypass cap for the subframe drain nipple
-
Caplugs BPFE-39MM blanking grommet for the 1.5 inch body hole
-
Assorted vacuum caps (3/8 inch and 5/16 inch for the intake ports; 1/4 inch and 1/2 inch if using the reversible bypass)
-
Adhesive-lined heat-shrink tubing, zip ties, and electrical tape
Safety Warnings
- ⚠ Expect the tank to be pressurized. Loosen the fuel cap to bleed pressure before disconnecting the last tank line, or you may get a sudden release of pressurized fuel vapor.
- ⚠ Fuel vapor is flammable. Work in a ventilated area with no open flames, sparks, or other ignition sources nearby.
- ⚠ Never cap the tank vent lines fully. A sealed tank swings between vacuum and pressure, straining the fuel pump and risking delivery problems or pump failure.
- ⚠ Support the car on jack stands, never a jack alone, while working underneath at the rear.
- ⚠ Removing EVAP equipment is illegal for street-driven vehicles in emissions-regulated areas. This procedure is intended for off-road, track, or standalone-ECU builds; use the reversible bypass if you must pass inspection.
Step-by-Step Instructions
1 Source the correct check valve
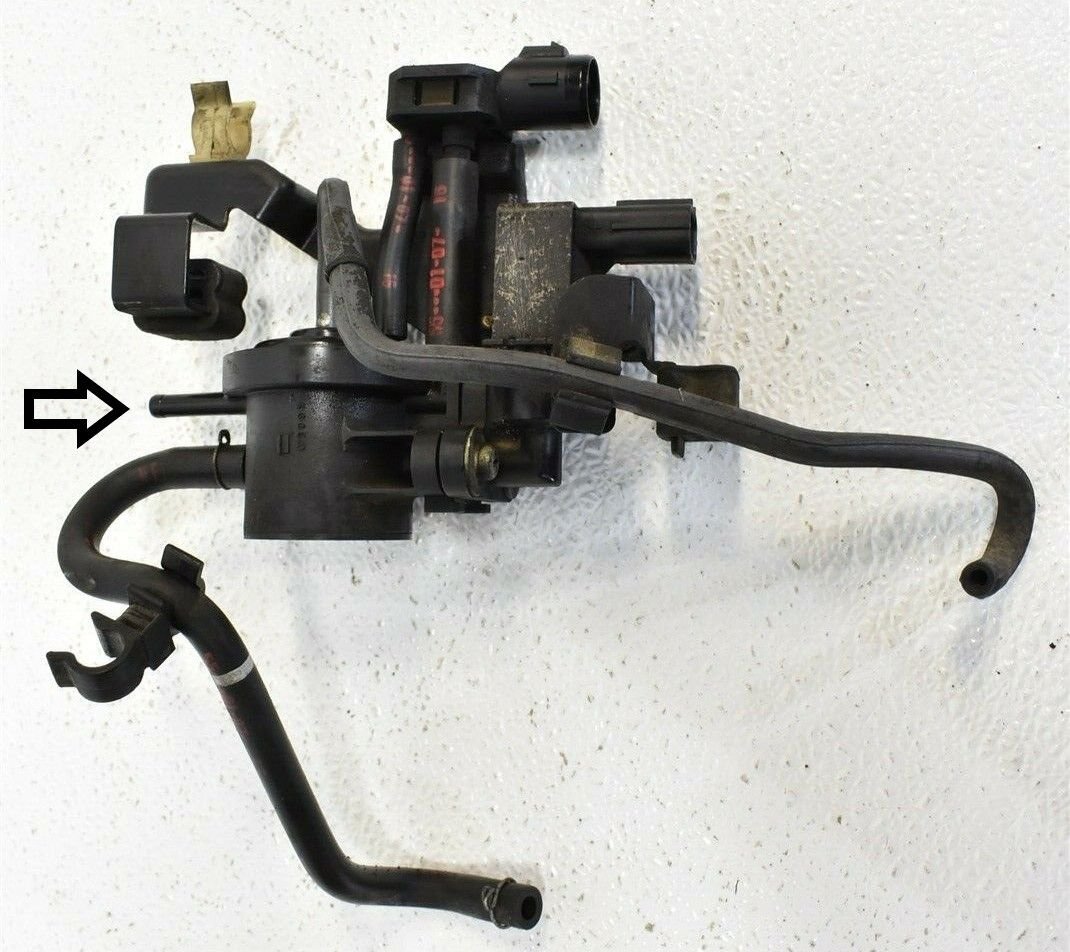
The delete depends on a single specific part: the Newton TPV8 in-line pressure-relief vent valve. It is sold under several retailer brands, most commonly Mocal, but every version is stamped Newton and functions identically; only the printed markings have changed over the years. Expect to pay roughly $70 to $90 shipped from UK suppliers. Avoid US resellers that mark the identical valve up to nearly triple that price. The valve has an 8mm (5/16 inch) nipple on its atmosphere side that will accept a breather filter.
2 Relieve tank pressure before disconnecting anything

A modified tank can hold significant pressure. Before pulling the final line off the tank, loosen the fuel filler cap to bleed off any built-up pressure; owners who skipped this reported a loud hiss of pressurized vapor when the last line came free. Work in a well-ventilated space away from any ignition source, since fuel vapor will be released during the job.
3 Remove the engine-bay purge solenoid and cap the intake ports
In the engine bay, locate the purge solenoid bolted to the driver-side frame rail. It connects by hose to a T fitting on the intake manifold and to a hard line that runs along the underside of the car to the rear. Unbolt and remove the solenoid and its hoses. Cap both now-open ports on the intake manifold using 3/8 inch or 5/16 inch ID vacuum caps. The hard line will be open at both ends once the rear components are gone and does not strictly need capping, though a cap on the front end keeps debris out.
4 Remove the charcoal canister and rear components

Raise and support the rear of the car on jack stands. Remove the charcoal canister along with all of its hoses, solenoids, and brackets. Also remove the black metal heat shield beneath the canister, which bolts to the canister bracket and the rear subframe cross member. Keep the removed parts if you may want to reinstall the system later; the full assembly weighs roughly 10 to 15 pounds with a dry canister.
5 Identify the two lines that remain at the tank
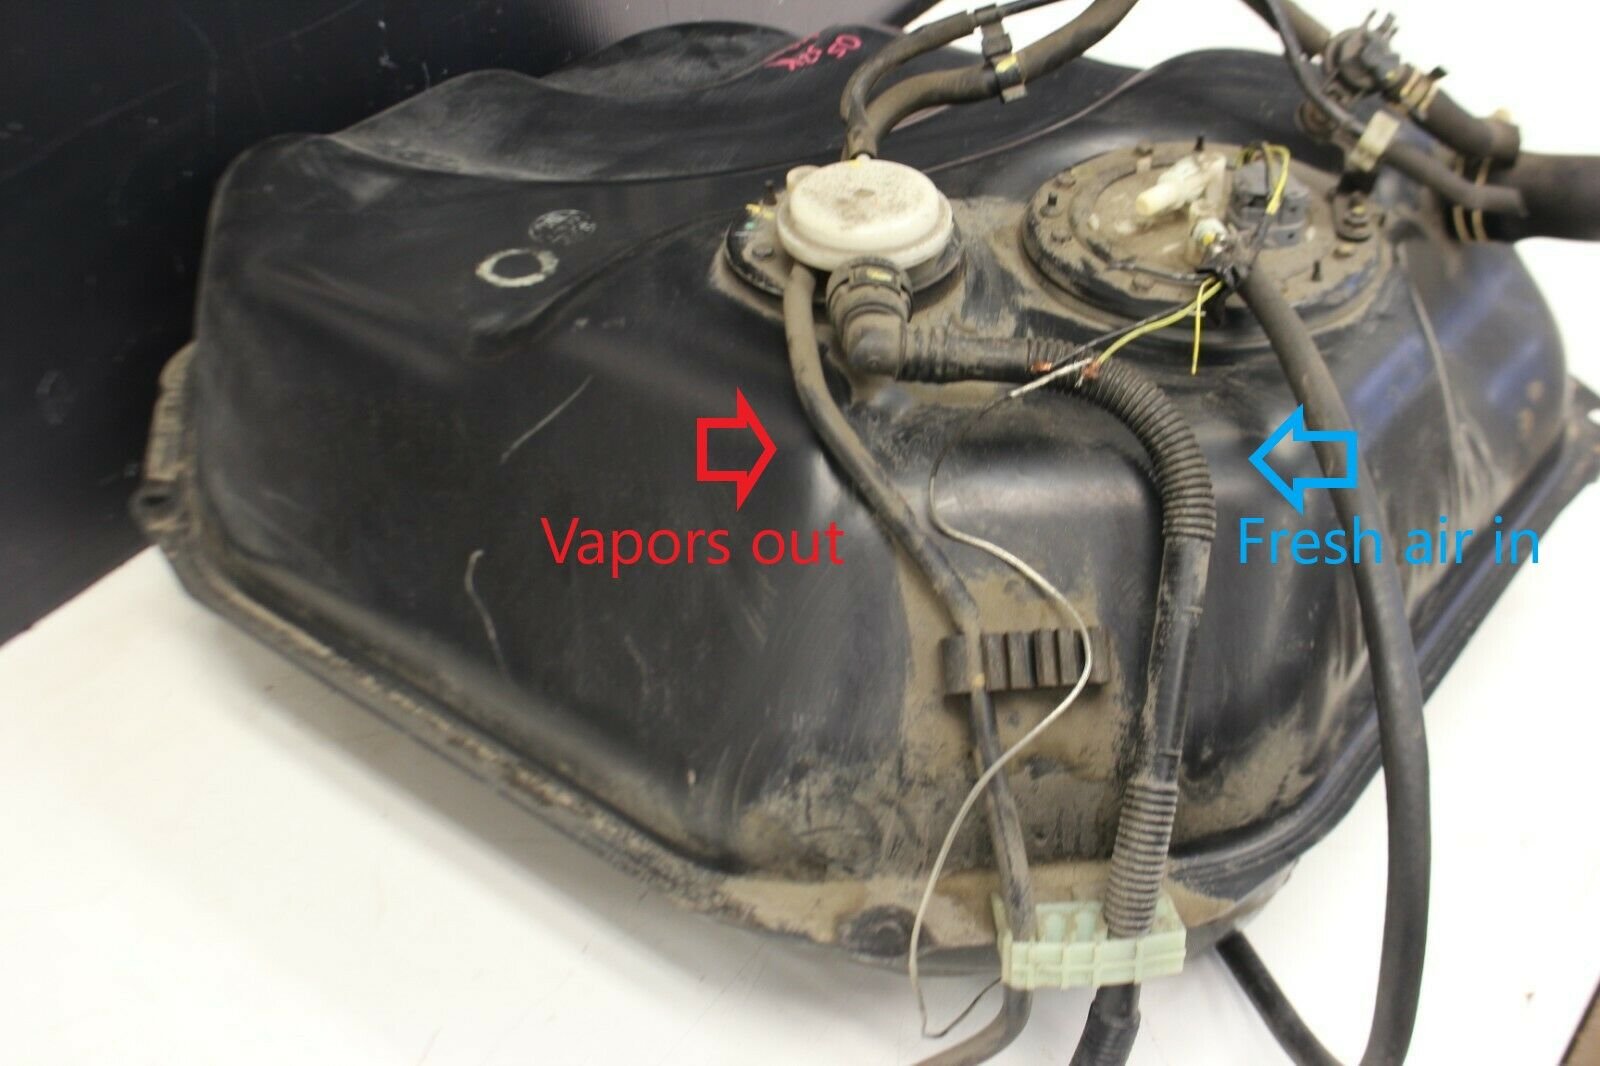
With the canister gone, two lines remain coming off the fuel tank. The wider plastic hose, the one using push-lock fittings, serves as the vacuum feed: it only admits fresh air into the tank to replace consumed fuel. The narrower rubber hose is the tank vent line, which expels excess vapor and pressure. Note which is which, because the check valve goes on the vent line only. The rubber vent hose is the one retained by a factory spring clamp rather than the thin push-lock clips.
6 Fit the TPV8 check valve to the vent line in the correct orientation
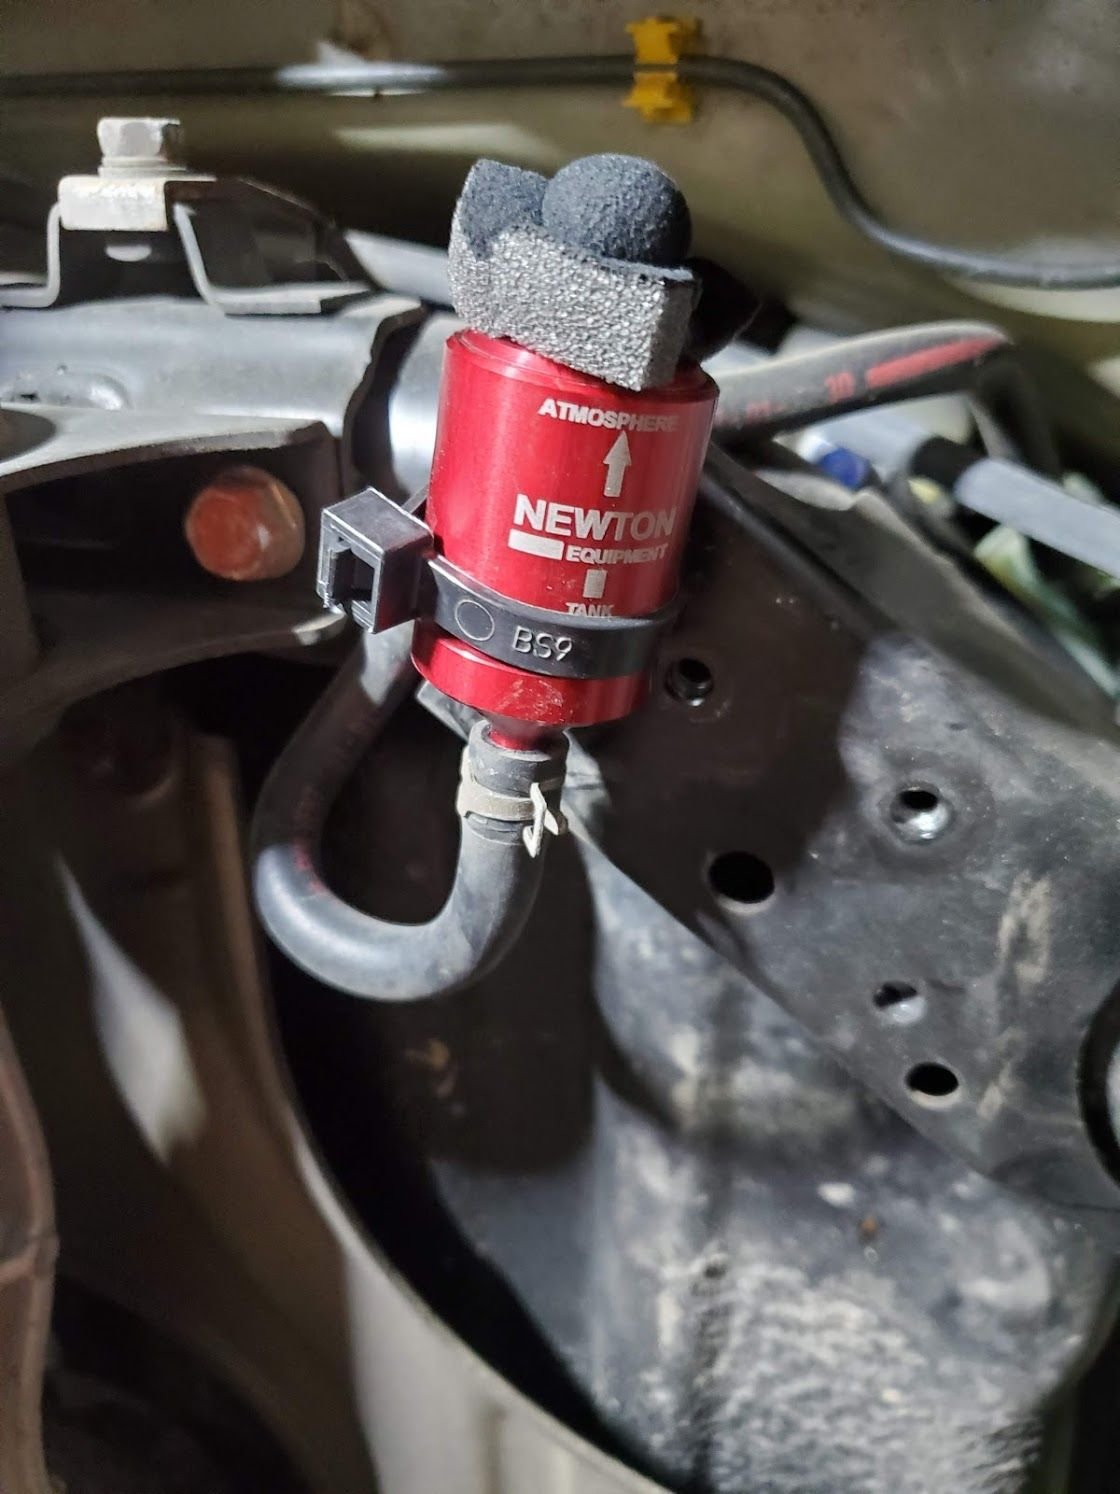
Connect the TPV8 to the end of the rubber vent hose where it previously joined the EVAP system, reusing the factory spring clamp. Orientation is critical: the end whose groove sits closer to it goes toward the vent line, and the opposite end faces atmosphere. Installed backward, the valve will not regulate tank pressure. Fit a K&N 62-2470 breather filter onto the valve's 5/16 inch atmosphere nipple so the outlet stays clean while still venting freely.
7 Protect the air-inlet vacuum hose
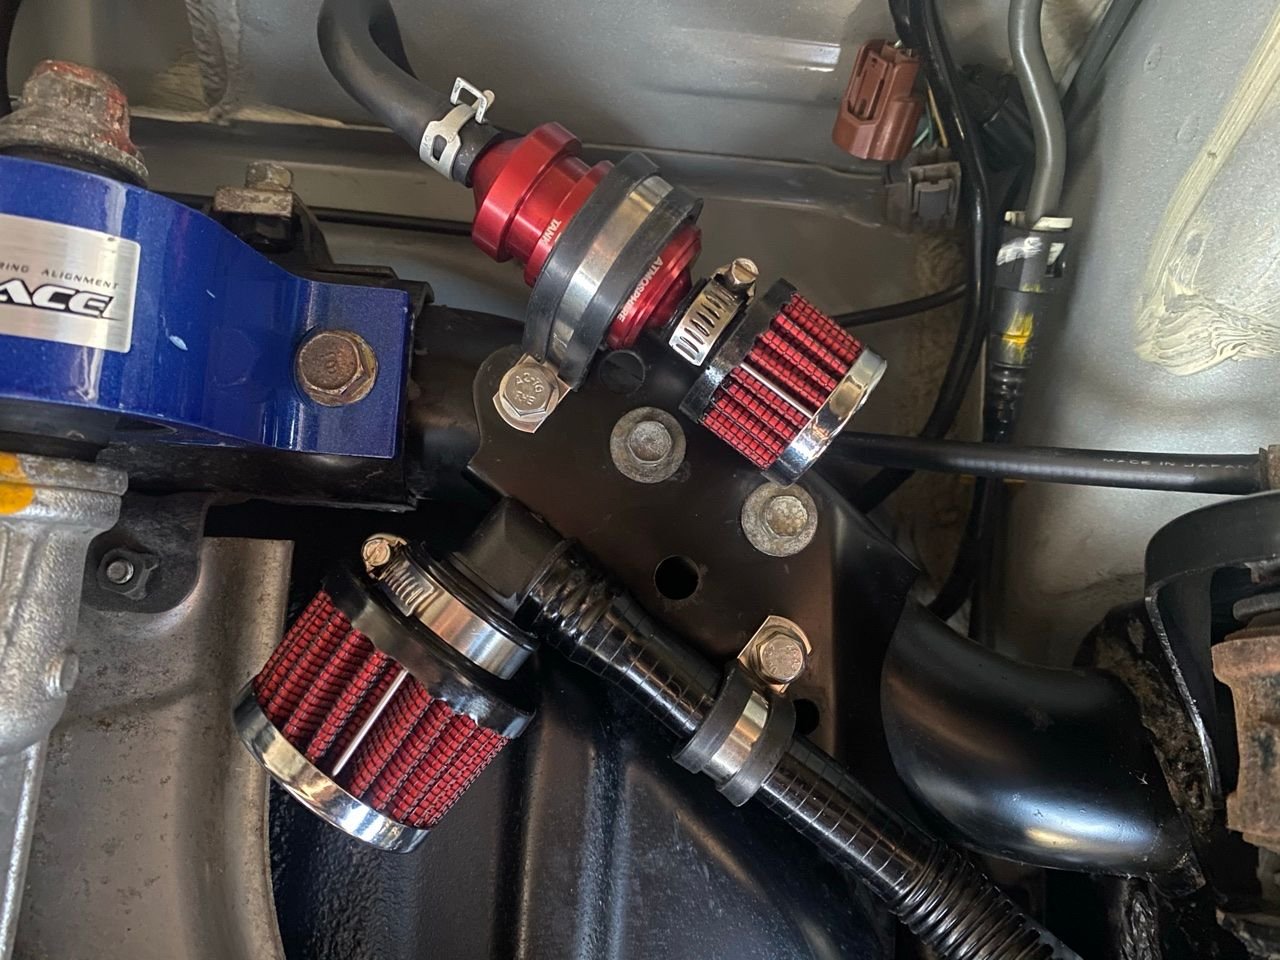
The corrugated plastic vacuum hose that admits air into the tank should be left open to atmosphere but shielded so nothing can be drawn inside. Fit a K&N 62-1370 breather filter, which has a 1 inch flange ID, over the plastic shell at the end of the hose. As a low-cost alternative, wrap foam around the opening and secure it with a zip tie. Do not seal this hose closed; the tank relies on it to draw in replacement air.
8 Mount the valve and hose using the old canister holes
Anchor the assembly using two of the four now-vacant bolt holes that the charcoal canister once occupied. Secure the valve with a 1.25 inch ID stainless cushion clamp and the corrugated vacuum hose with a 9/16 inch ID cushion clamp. Supply your own stainless bolts, because the factory canister bolts and washers are too wide to seat on the cushion clamps. Route the hoses so the filters point downward or sideways, away from road spray.
9 Cap the subframe drain nipple
A separate plastic nipple on the subframe once carried vented pressure away from the canister by hose. Its outside diameter is approximately .700 inch. Cap it with a Dorman 02251 coolant bypass cap, which is advertised as 3/4 inch but measures about .690 inch ID and seats snugly over the nipple. This step is cosmetic finishing rather than functional, since the nipple only ever released pressure, never liquid.
10 Clean up the leftover EVAP wiring
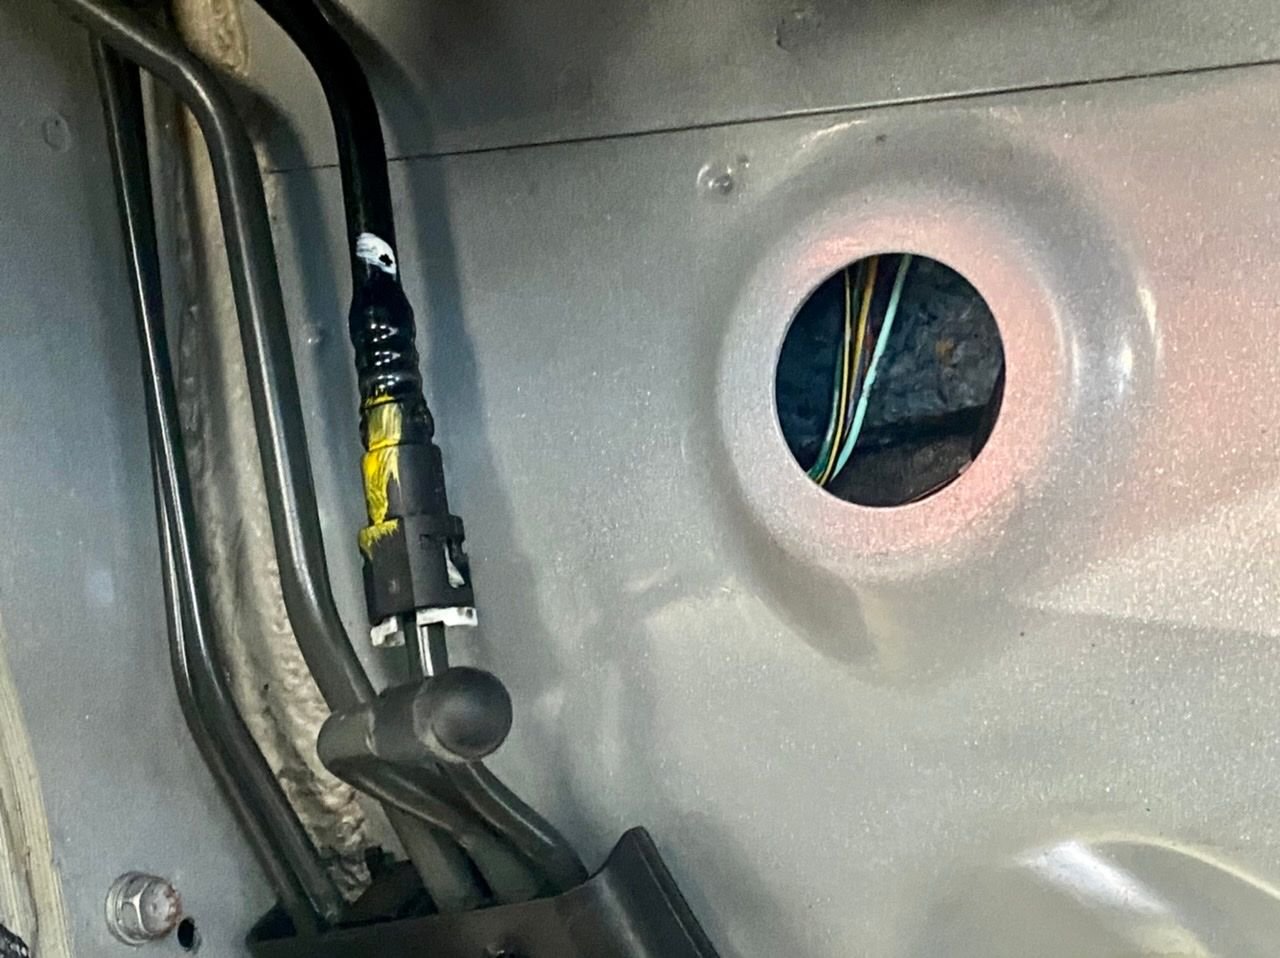
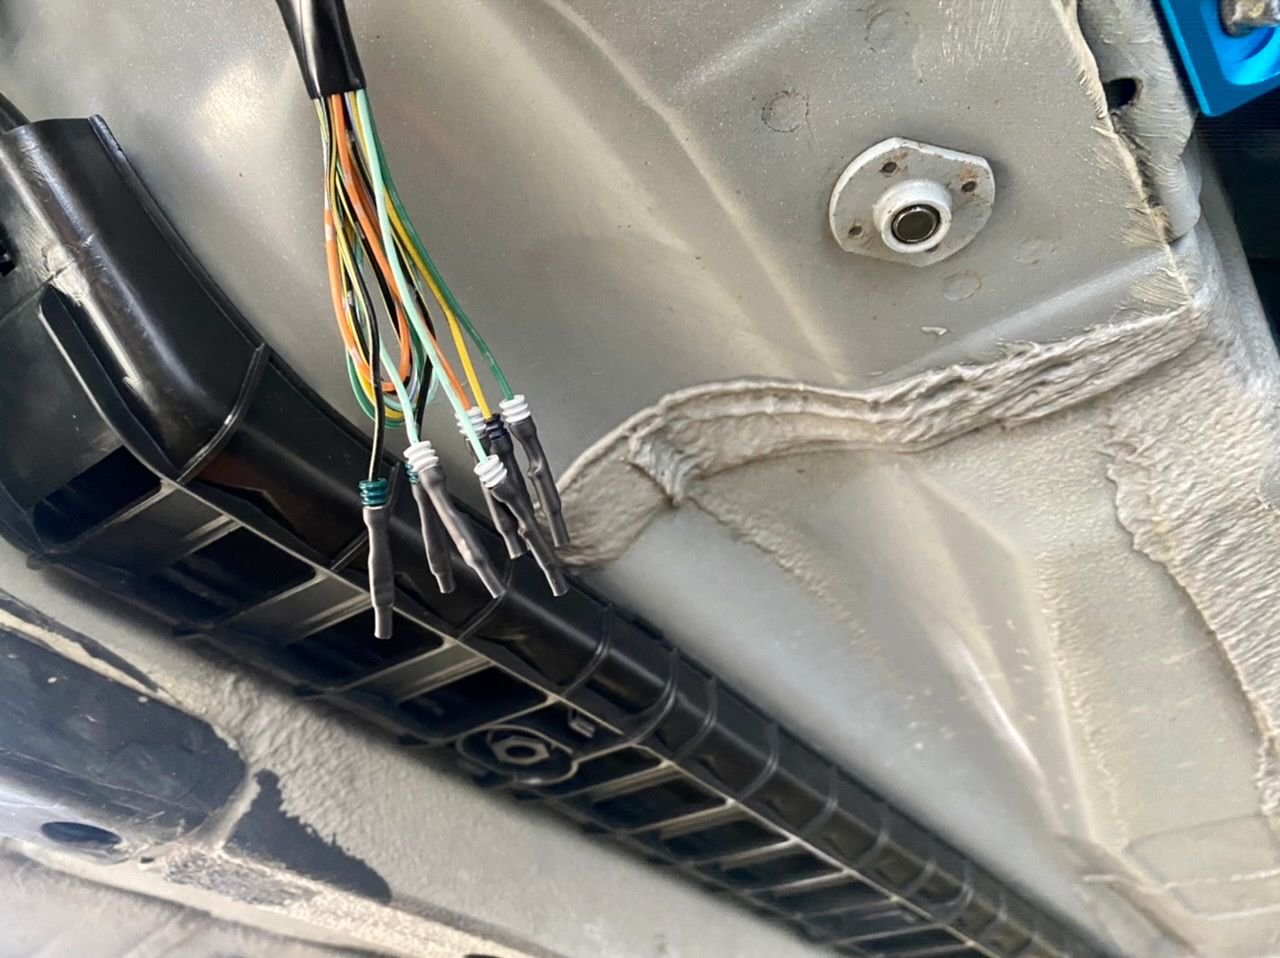
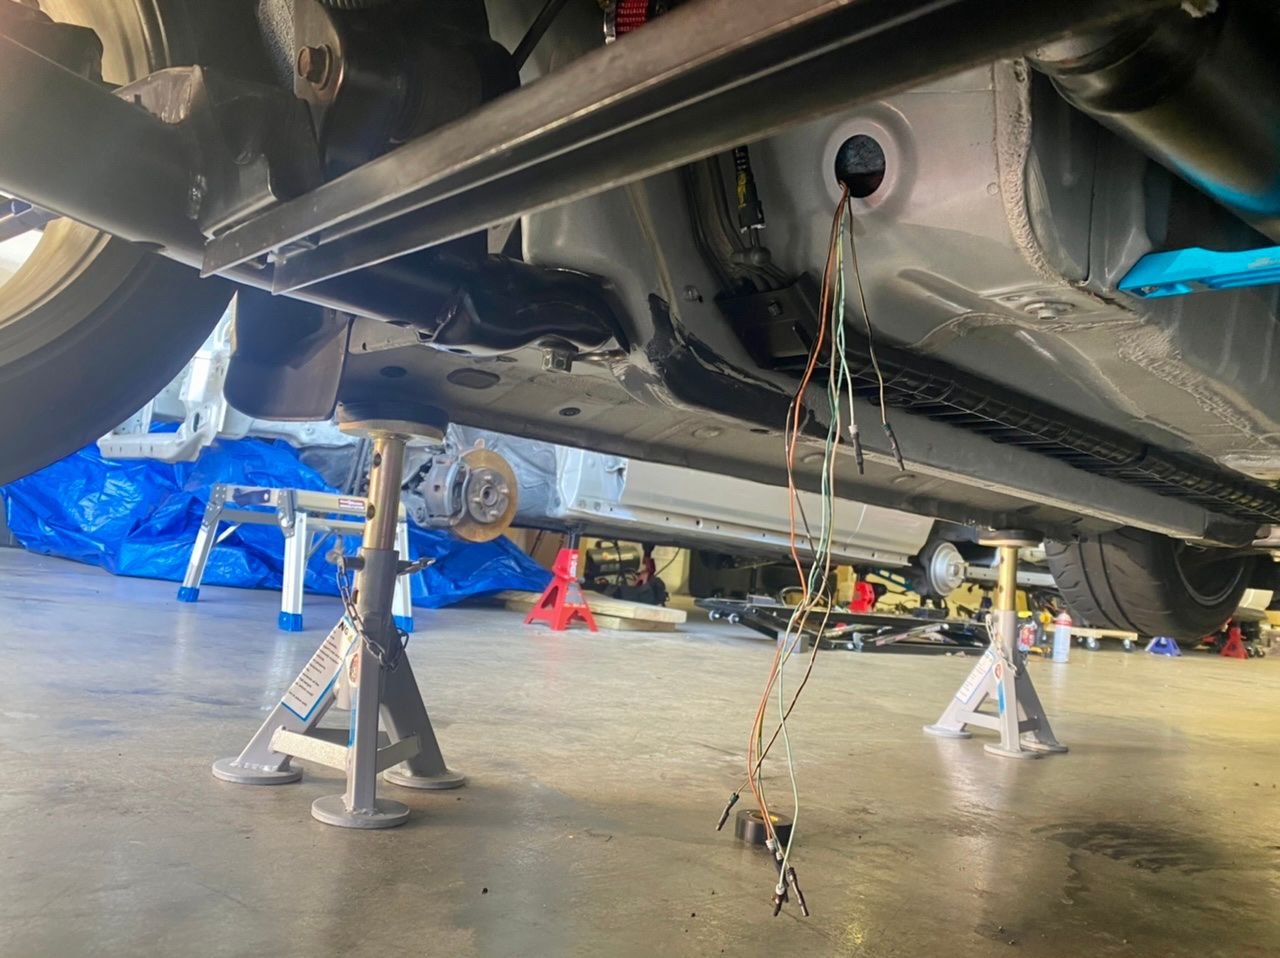
Three connectors are freed by removing the solenoids. For a tidy result, unwrap the factory loom tape, de-pin the connectors so the wires pull out of the factory grommet without cutting it, cover the exposed pins with heat-shrink tubing, bundle the wires, and push them back into the body cavity. Blank the empty 1.5 inch ID grommet hole with a Caplugs BPFE-39MM plug to seal the body and keep the wiring out of the weather. A quicker option is simply to bundle and zip-tie the harness to a hard fuel line.
11 Verify correct valve operation
Start the engine and let it run. As fuel is drawn from the tank, air enters through the vacuum hose and pressure slowly builds until the TPV8 opens to relieve it, then reseats; this shows up as a faint intermittent hum lasting several seconds at a time and a light vapor haze at the filter. Any fuel smell at the outlet should be minimal and dissipate at once. After shutting off, loosen the filler cap: a small pressure release confirms the valve is holding the intended slight positive pressure, and a brief vacuum sound from the underside confirms the tank drawing air back in through the vacuum hose.
Pro Tips
- 💡 Reversible bypass for emissions testing: instead of removing everything, pull the rubber vent hose off the two-way vent solenoid (the hose held by a spring clamp) and fit the TPV8 there, and disconnect the corrugated push-lock hose from the canister. Plug the solenoid nipple using a 1/4 inch vacuum cap, and seal the canister nipple (about .600 inch OD) with a 1/2 inch cap for a snug fit. This is roughly a five-minute job and leaves the system in place to reinstall later.
- 💡 The valve orientation matters more than any other detail. Double-check that the grooved end faces the tank vent line before final clamping.
- 💡 The TPV8 is the only valve of its kind; shop the rebadged versions on price. UK suppliers were the cheapest at the time of writing, while at least one US seller listed the identical part for close to triple the cost.
- 💡 On late (AP2) cars such as a 2007, the rear layout differs and the K&N 62-1370 filter may not slide over the hose end; light trimming with a rotary tool lets it seat.
- 💡 Removed EVAP hardware weighs roughly 10 to 15 pounds with a dry canister, a modest weight saving on top of clearing up the fuel-smell problem.
Was this guide helpful?
