Honda Fit (GE8) DIY Short-Ram / Cold-Air Intake Using the Factory MAF Tube
Introduction
This guide builds a custom short-ram (or cold-air) intake for the 2nd-generation Honda Fit (GE8, MAF-equipped models) for roughly the cost of a filter and a few couplers, instead of buying a $250-$300 bolt-on kit. The trick is to salvage the mass-airflow (MAF) tube out of the factory airbox lid and rebuild the intake tract around it, so the MAF sensor keeps measuring air in its original housing and diameter. That preserves correct fuel metering and avoids a persistent lean code, which is exactly where the cheap universal intakes fail. The result is a deeper intake note under load, a slight response gain, and a fully reversible setup if you keep a spare factory lid. It applies to GE8 Fits that use a MAF sensor; the non-MAF Sport variants can run a universal intake without any cutting. Adapted from a community writeup by Lyon[Nightroad] on FitFreak (https://www.fitfreak.net/forums/2nd-gen-ge8-specific-fit-engine-modifications-motor-swaps-ecu-tuning-sub-forum/55146-diy-50-less-intake-ge-cai-sri.html), including corrections from the follow-up discussion.
Reference
Tools Required
- Rotary cutting tool (Dremel) or fine hacksaw
- Metal file
- Wire brush
- Compressed air / air compressor
- 10mm socket or wrench
- Phillips screwdriver
- Nut driver or flat screwdriver for hose clamps
- Utility knife
Parts Required
-
Conical air filter with a 3-inch or 2.5-inch inlet
-
Reducing coupler that steps down to 2 inch (3-to-2 inch for a 3-inch filter, or 2.5-to-2 inch for a 2.5-inch filter)
-
Short length of straight pipe matching the filter inlet (3-inch or 2.5-inch)
-
Screw-type hose clamps (several)
-
Small breather / PCV filter
-
Spare factory airbox lid, Honda part 17210-RB0-000 (optional, about $18.85, for reversibility)
-
Reused factory parts: throttle-body rubber elbow, MAF tube, MAF sensor
Safety Warnings
- ⚠ The MAF-tube cut is irreversible and the car will not run until reassembly is complete -- do not attempt it if you cannot finish, and keep a spare lid on hand.
- ⚠ An incorrect diameter at the MAF sensor (anything other than the factory 2 inch) can cause a lean condition and a P0171 code; never shim an oversized coupler with tape, as it can be sucked into the bore and obstruct airflow.
- ⚠ Do not overtighten the hose clamp on the plastic MAF tube -- excess force cracks it.
- ⚠ Do not aim the filter into oncoming airflow at the front of the car; water reaching the filter risks engine damage.
- ⚠ Always reconnect the MAF sensor before starting the engine.
Step-by-Step Instructions
1 Source the correct-diameter components
Pick a conical filter with a 3-inch or 2.5-inch inlet; the engine bay is cramped, so a smaller filter fits more easily. The single dimension that matters most: the salvaged MAF tube measures 2 inch at its cut end, so the coupler that joins the connector pipe to that tube must step down to 2 inch. For a 3-inch filter use a 3-to-2 inch reducer; for a 2.5-inch filter use a 2.5-to-2 inch reducer. Both are uncommon silicone sizes -- search for silicone turbo couplers online, or check hardware-store plumbing sections (one builder found a rubber 3-to-2 inch reducer in the Home Depot plumbing aisle). Also gather a short piece of straight pipe matching the filter inlet, several screw-type hose clamps, and a small breather filter for the crankcase line. Do not substitute a 2.5-to-3 inch coupler on the MAF tube (see the assembly step); the original builder tried that and it caused a problem. If you want the mod to be reversible, buy a spare factory airbox lid, Honda part 17210-RB0-000, which includes its own MAF tube.
2 Remove the factory airbox
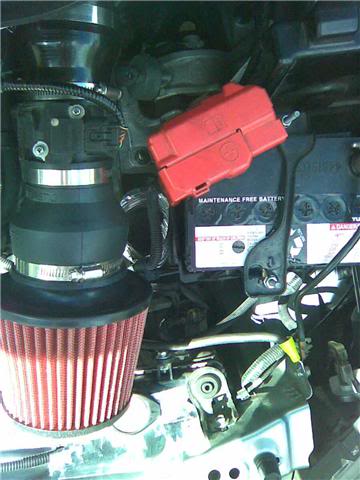
Unplug the MAF sensor connector and free its wiring retainer clip. Remove the two 10mm bolts securing the airbox (one is low on the left, the other is nearer the battery on the right). Using a Phillips screwdriver, loosen the clamp ring on the large rubber elbow where the box meets the throttle body, then rock the box off the throttle body. Pull the crankcase breather tube off its port with a firm tug. Twist and work the airbox up and out of the bay; if it will not clear, pull the battery to gain room.
3 Recover the reusable factory parts
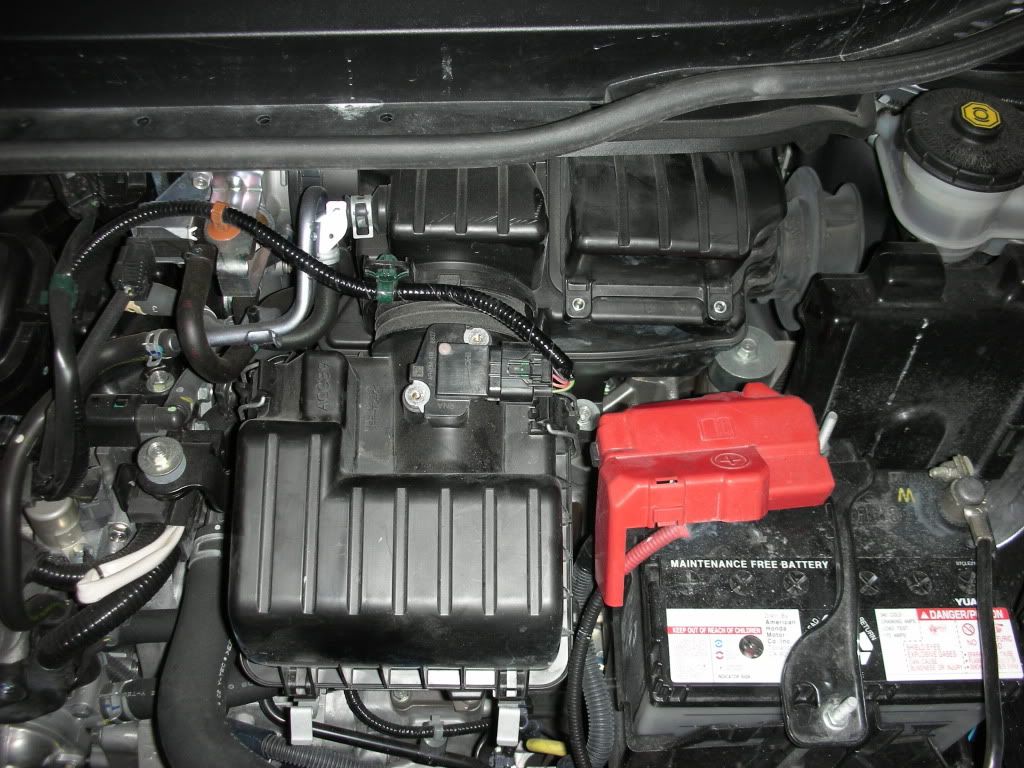
Separate the upper lid of the airbox, which carries the MAF sensor and the MAF tube. Remove the MAF sensor from the lid (leave the small coupling beside it alone). Also pull the short straight rubber elbow from inside the box and set it aside -- you will reuse it between the MAF tube and the throttle body, unless you bought a separate 2.5-to-2.5 inch coupler to replace it.
4 Cut the MAF tube free from the airbox lid
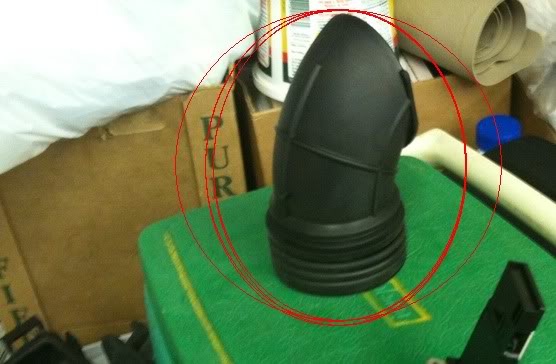
This is the irreversible step: once you begin, the car will not run until the new intake is assembled, so work when you have time. Cut the plastic box away from the MAF tube a little at a time, staying clear of the tube's bore -- never let the blade bite into the tube itself, especially if you have no spare lid. When the tube is freed, dress the rough edges with a metal file and wire brush, then blow all plastic shavings out with compressed air so nothing gets ingested. You may paint the exposed plastic to tidy the scuffs; little of it shows once installed.
5 Cut the connector pipe to length
Trim the straight pipe to roughly 2 to 2.5 inch long -- just enough to seat inside both the reducing coupler and the filter with no wasted gap between them. Keeping the assembly as short as possible is what lets it fit the tight space later, so err on the short side unless you are running a very small filter.
6 Assemble the intake tract
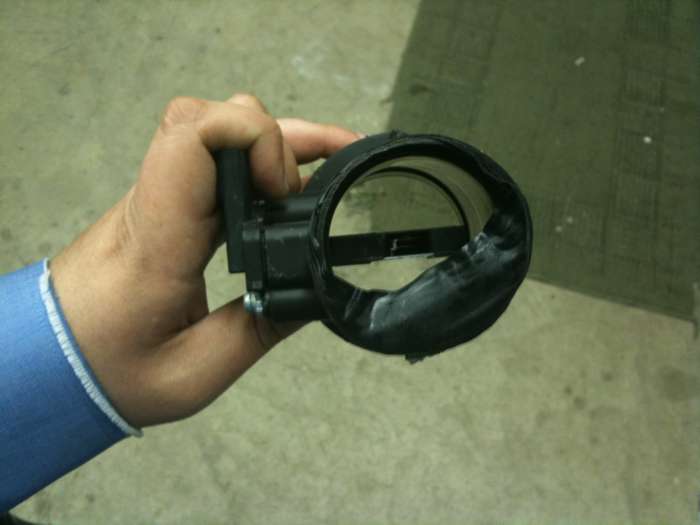
Build the tract in this order from the engine outward: factory rubber elbow, MAF tube, reducing coupler, connector pipe, filter. On the rubber elbow, the end with the small lip and four cut dashes (slightly wider inside) goes onto the MAF tube; the half-lip end (slightly narrower) faces the throttle body. Orient the MAF tube with its ridged/circular end toward the engine and the heavily cut end toward the filter. Slip the 2-inch side of the reducing coupler over the cut end of the MAF tube. Critical correction from the discussion: use a coupler that actually steps to 2 inch on the MAF tube. Do NOT fit an oversized 2.5-inch coupler and pack the gap with vinyl tape -- a builder did this and a strip of tape was drawn into the bore, obstructing airflow. Also do not overtighten the clamp on the plastic MAF tube; it can crack. Secure each joint with a hose clamp, tight enough to seal without crushing the plastic.
7 Install the intake and reconnect the sensors
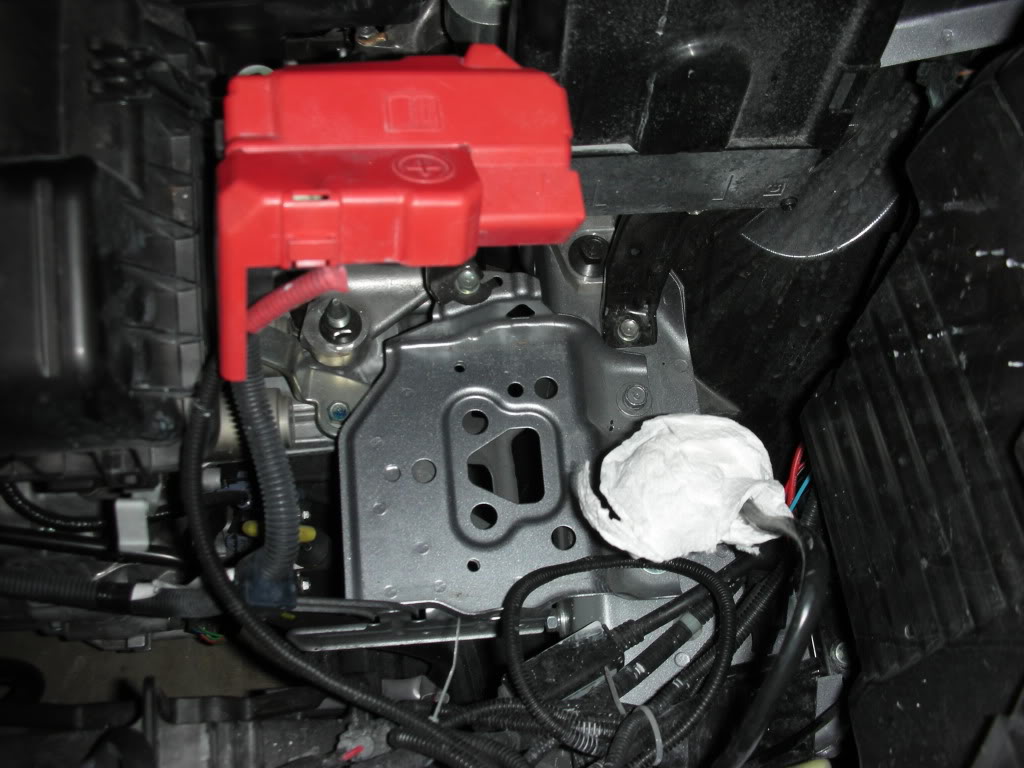
It is a very tight fit. Tuck the filter into the pocket under the brake-fluid reservoir, pushing it as far to the right as it will go. Loosen the hose clamps so the joints can flex, work the rubber elbow onto the throttle body, and clamp it down. Then retighten every clamp. Reinstall the MAF sensor into its tube and reconnect its electrical plug, and fit the small breather filter onto the crankcase line. Position the filter so it does not face directly into the airflow at the front of the car, which reduces the chance of drawing water in wet conditions.
8 Reset the ECU and let it relearn
Because the intake changed, reset the ECU so it re-learns fuel trims. Clear its memory either by unhooking the battery lead for a minute or two, or by reaching the ECU (the black box behind the battery) and unplugging the top wiring harness -- there are three, and the top one carries the power wire -- then reconnect it; this clears codes while keeping radio presets. Let the engine idle a few minutes to relearn idle, then drive normally so it can relearn the MAF, MAP, O2, and IAT values. If a check-engine light appears, first confirm the MAF connector is plugged in and that the tube diameter at the sensor is the factory 2 inch, since a wrong diameter can trigger a P0171 lean code. A code thrown by a momentarily unplugged MAF clears itself within a couple of drive cycles.
Pro Tips
- 💡 Buy a spare factory airbox lid (Honda 17210-RB0-000, about $18.85) so you can bolt the stock intake back on at any time; this keeps the whole mod reversible.
- 💡 If you would rather not cut anything, some builders reuse only the factory MAF/filter-cover section and the rubber elbow to mount the sensor and filter with no cutting, or fit a ready-made adapter such as the Spectre 9405 that keeps the correct MAF diameter.
- 💡 For a 2-inch cone filter you can skip the reducing coupler entirely and clamp the filter straight onto the cut MAF housing.
- 💡 Add a simple heat shield on the engine side of the filter to reduce heat soak, since no cold-air duct feeds this location directly.
- 💡 Most builders report a slight mixed-driving fuel-economy gain and a noticeably deeper note when i-VTEC engages around 5,300 rpm.
Was this guide helpful?
