Honda Fit (GE8) Stock Airbox Intake Restriction Mod
Introduction
The second-generation Honda Fit (GE8) draws intake air through a factory airbox whose inlet necks down to a square throat just under two inches on each side, tucked beneath the resonator chamber. That restriction trims the top of the flow curve while the resonator muffles induction sound. This guide covers reworking the stock box to breathe more freely without buying an aftermarket intake: enlarging the inlet, clearing an internal divider, and sealing the plastic against underhood heat. Owners report a modest bump in the midrange around 3,000-4,000 rpm and a noticeably stronger induction note, all while retaining the factory mounting points and the option to reinstall the resonator lid so the change stays invisible to a dealer. A popular variant skips the box surgery and instead couples the factory MAF/MAP tube straight to the throttle body; it is covered here as an alternate path. This applies to the GE-chassis Fit; the earlier GD3 airbox is shaped differently and does not translate directly. Adapted from a community writeup by FITProject on FitFreak (https://www.fitfreak.net/forums/2nd-gen-ge8-specific-fit-engine-modifications-motor-swaps-ecu-tuning-sub-forum/56264-not-so-pointless-airbox-mod-diy.html), including corrections from the follow-up discussion.
Reference
Tools Required
- Socket set and screwdriver for airbox removal
- Drill with hole saw attachment
- Fine-tooth saw blade or hacksaw blade
- Hobby (craft) knife
- Assorted sandpaper (medium to fine)
- Clamps or hose clamps (for the alternate coupler method)
Parts Required
-
Krylon Fusion black spray paint (plastic-bonding)
-
Aviation-grade heat-reflective aluminum tape
-
2.5-inch silicone coupler (alternate direct-to-throttle-body method only)
-
90-degree silicone elbow (alternate method only)
Safety Warnings
- ⚠ Work only on a cold engine, and keep plastic shavings out of the throttle body and intake tract, since debris drawn into the engine can cause damage.
- ⚠ If you build a direct intake, reuse the factory MAF/MAP tube. Aftermarket tubes with a slightly different inside diameter disturb the sensor reading and will trigger a check-engine light.
- ⚠ An opened or exposed intake can let water reach the filter; position the inlet away from direct splash and standing water.
Step-by-Step Instructions
1 Inspect the airbox and locate the restriction
With the engine off and cool, remove the resonator cover and trace where fresh air feeds the primary filter chamber. On the GE8 the inlet passes below the resonance chamber and chokes down to a square throat measuring a little under 2 inches per side, which is the bottleneck this mod targets. Note where the molded internal divider sits, since it partially blocks a clean path to the wall you will open up.
2 Remove the airbox from the car
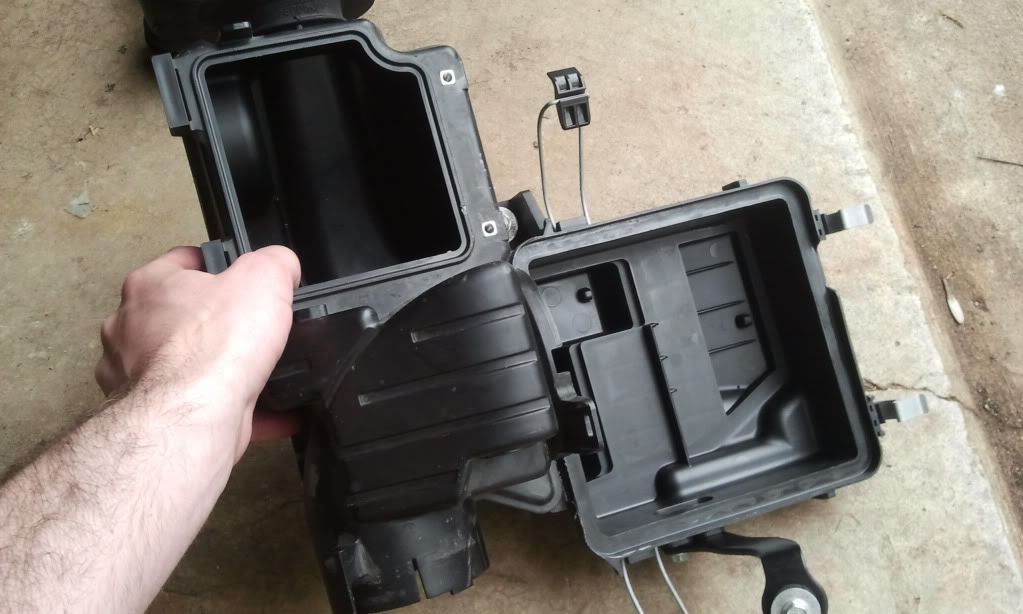
Unclip the lid, release the intake ducting, and unbolt the box from its brackets, keeping every mount and fastener for reassembly. The box lifts out with the factory bracketing intact, so you are only modifying the box itself, not replacing any mounting hardware. Move it to a bench where the cutting stays clean and plastic shavings never reach the engine bay.
3 Cut the enlarged inlet opening
On the bench, identify the flat wall just past the internal divider, where enlarging the passage gives the straightest shot into the primary filter box. Fit a hole saw to a drill and cut a fresh opening at that spot. Work slowly so the bit does not grab and crack the plastic, and start the cut from the smooth outer face where you can.
4 Trim the divider and dress the edges
The molded divider inside the tube still obstructs the new route, so cut it back with a fine-tooth saw blade to open the airflow path. Deburr and smooth the cut edges with a hobby knife followed by progressively finer sandpaper. The leading edge of the divider is awkward to reach; clean it up as much as practical and accept a slightly rough finish there rather than thinning the wall.
5 Clean and seal the interior
Wash every shaving and all sanding dust out of the box so nothing can be pulled into the filter. Once it is dry, coat the reworked interior with Krylon Fusion, a paint formulated to bond to bare plastic, to hide the sanding marks and seal the cut surfaces. Let it cure fully before going any further.
6 Apply heat-reflective tape to the underside
Cover the underside of the box, the face closest to hot engine components, with two layers of aviation-grade heat-reflective aluminum tape to keep radiant heat out of the intake charge. Use genuine heat-reflective foil tape rather than kitchen aluminum foil, and press it down so it conforms tightly with no lifting edges.
7 Reinstall and align the factory scoop
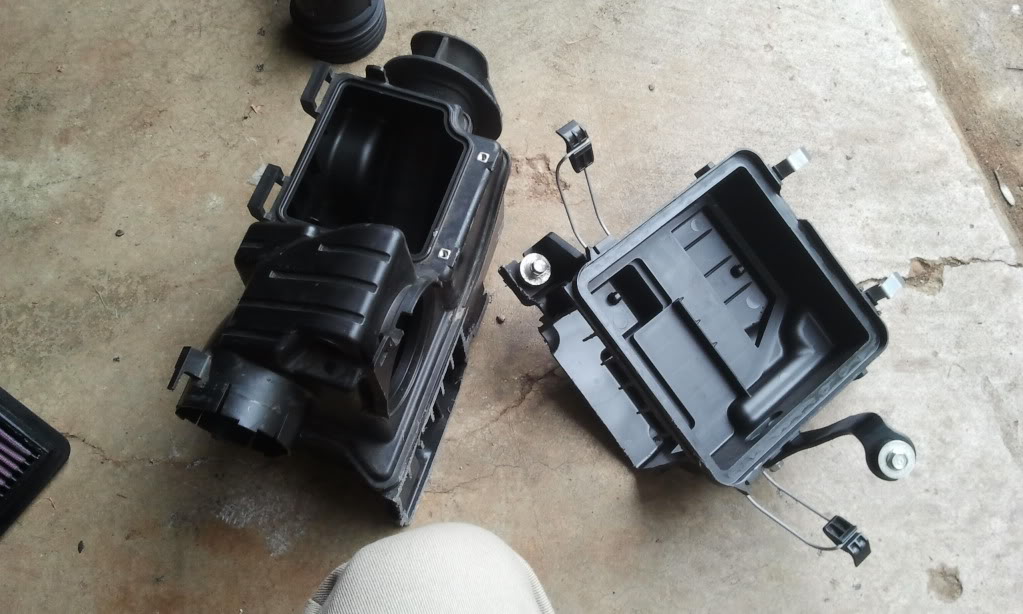
Bolt the box back to its mounts, reconnect the ducting, and clip the lid into place. With the enlarged inlet, the factory underhood scoop that draws air from behind the front bumper now feeds directly into the new opening instead of the general area around the box. To keep the mod hidden, refit the resonator chamber lid and the engine bay looks stock.
8 Alternate: couple the MAF tube directly to the throttle body
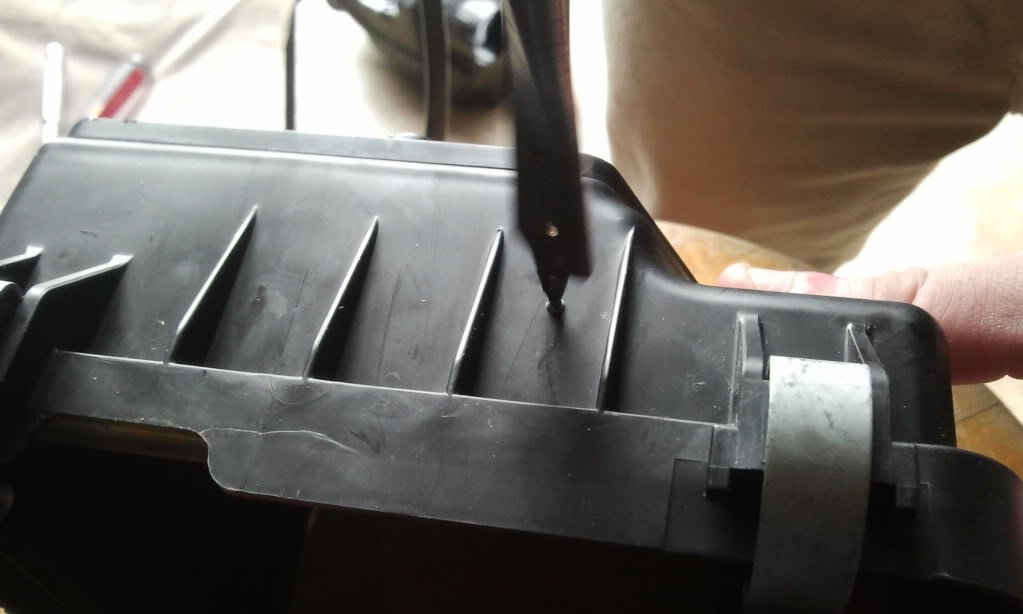
Rather than enlarging the box, several owners cut the MAF/MAP tube out of the stock airbox lid and joined it straight to the throttle body with a 2.5-inch silicone coupler, since the outlets measure 2.5 inches; some add a 90-degree elbow and a second coupler in place of the built-in bend. Reusing the factory tube is deliberate, because it preserves the exact inside diameter the sensor expects. Keep the original mounts bolted in, and once the lid clips on and the coupler is clamped the assembly sits solid.
Pro Tips
- 💡 Owners consistently describe a louder induction note that builds from roughly 3,500 rpm and eases off past 6,000 rpm; measured gains are modest, on the order of 1.5 hp by seat-of-the-pants, and mostly in the midrange.
- 💡 Keeping the factory box, unlike a short-ram intake, retains low-end response while still freeing up airflow.
- 💡 Refitting the resonator lid restores a fully stock appearance, which is handy for dealer service or resale.
- 💡 There is little spare room inside the box for an oversized filter, so plan the build around the stock filter.
- 💡 On the coupler method, the mounts alone let the box move, but once the lid is clipped on and clamped to the coupler the whole assembly is stable.
Was this guide helpful?
