Acura RDX (Gen1 Tech/Navi): USA Spec ACUxl iPod/iPhone Interface Install
Introduction
This guide covers installing a USA Spec PA15-ACUxl interface into a first-generation Acura RDX equipped with the Technology (navigation) package, giving you a factory-integrated iPod/iPhone connection through the existing audio system. The adapter wires inline at the satellite radio module behind the glove box, so no head unit removal is required and factory satellite radio stays functional. Because it is a plug-in interface with a supplied harness, the job is quick and beginner-friendly. Note that a non-navigation RDX uses a different module (PA15-HON3) and a similar but not identical routine. If you are not confident working inside the dashboard, have the unit installed professionally. Adapted from a community writeup by H22A_CD5 on AcuraZine (https://acurazine.com/forums/1g-rdx-diy-faq-161/diy-installing-usa-spec-acuxl-07-rdx-tech-834830/), including corrections from the follow-up discussion.
Reference
Tools Required
- Zip ties
- Plastic trim/panel removal tool (optional)
Parts Required
-
USA Spec PA15-ACUxl interface unit (includes 3-connector harness and instruction manual)
-
iPod, iPhone, or compatible device with its cable
Safety Warnings
- ⚠ Free the carpeted panel from its lip before forcing any clips, or you risk cracking the trim.
- ⚠ If you are not comfortable disassembling interior trim, have the unit installed by a professional.
Step-by-Step Instructions
1 Configure the DIP switches
Before touching the vehicle, read the manual packed with the interface and set the DIP switches to match it. Unlike the Honda-oriented HON2 modules, which offer several selectable operating modes, the ACUxl has a single correct configuration, so simply mirror the settings shown in the included documentation.
2 Release the lower carpeted dash panel
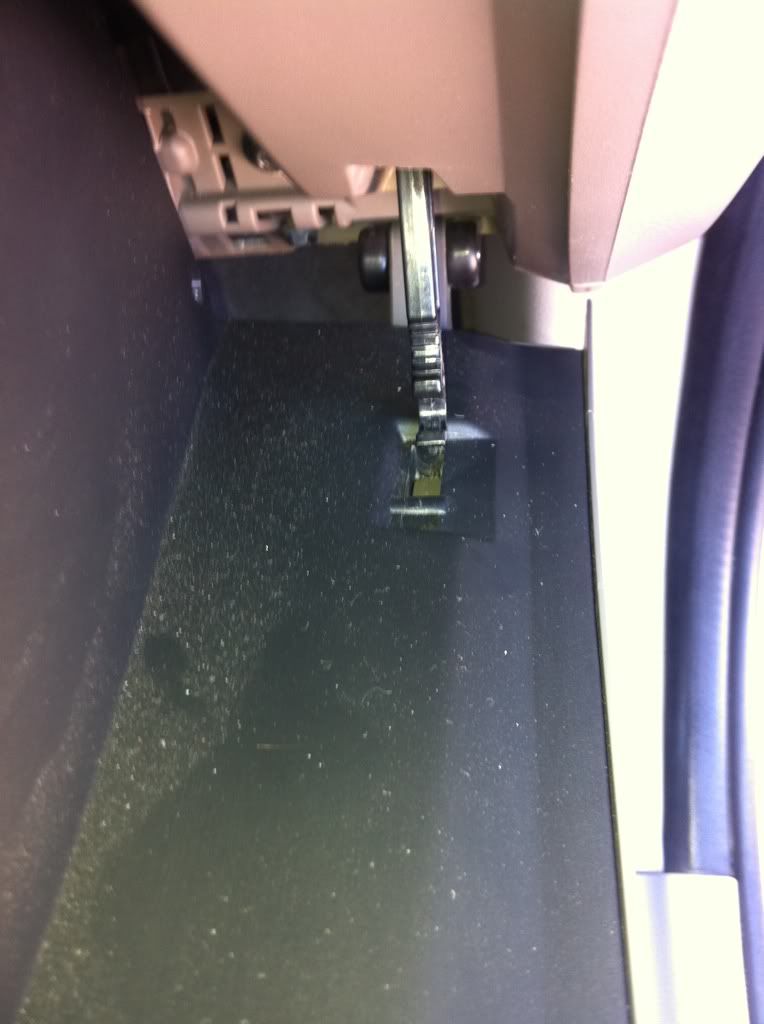
Reach into the left side of the passenger footwell down near the floor and pull the carpeted panel outward. This is the full fascia in front of the navigation drive, not just the drive's cover. It seats behind a lip, so it must be freed first before the clips higher up will release.
3 Remove the panel beneath the glove box
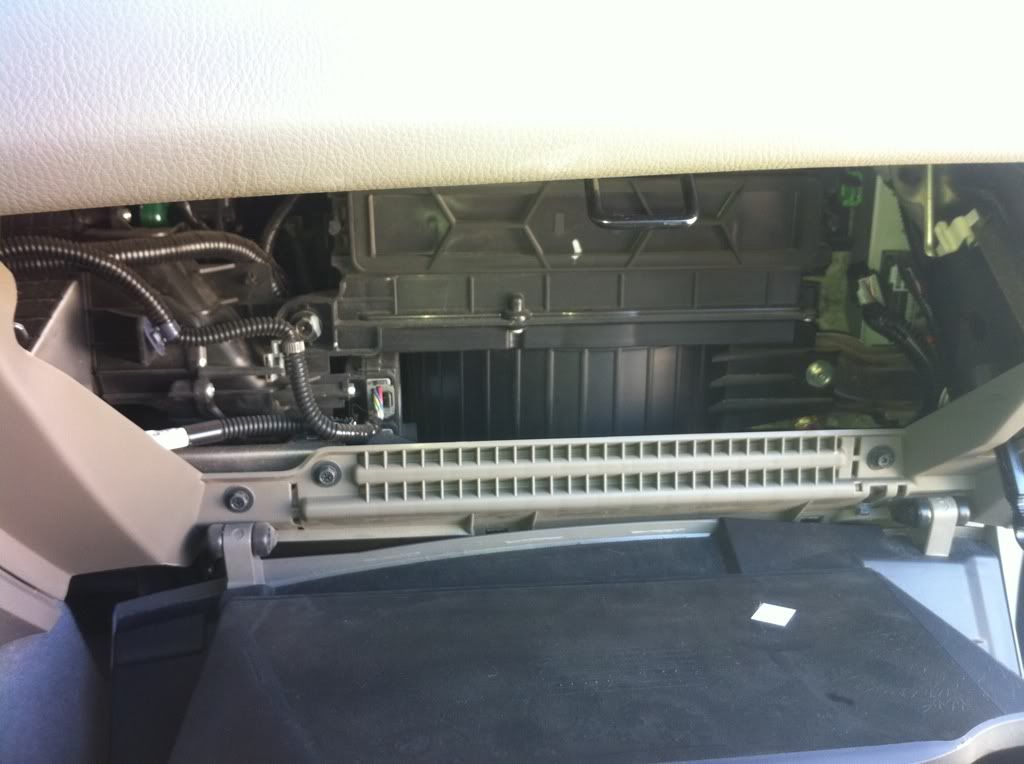
With the carpeted panel out of the way, release the two clips located directly under the glove box and draw the panel toward you to take it off completely.
4 Drop the glove box down
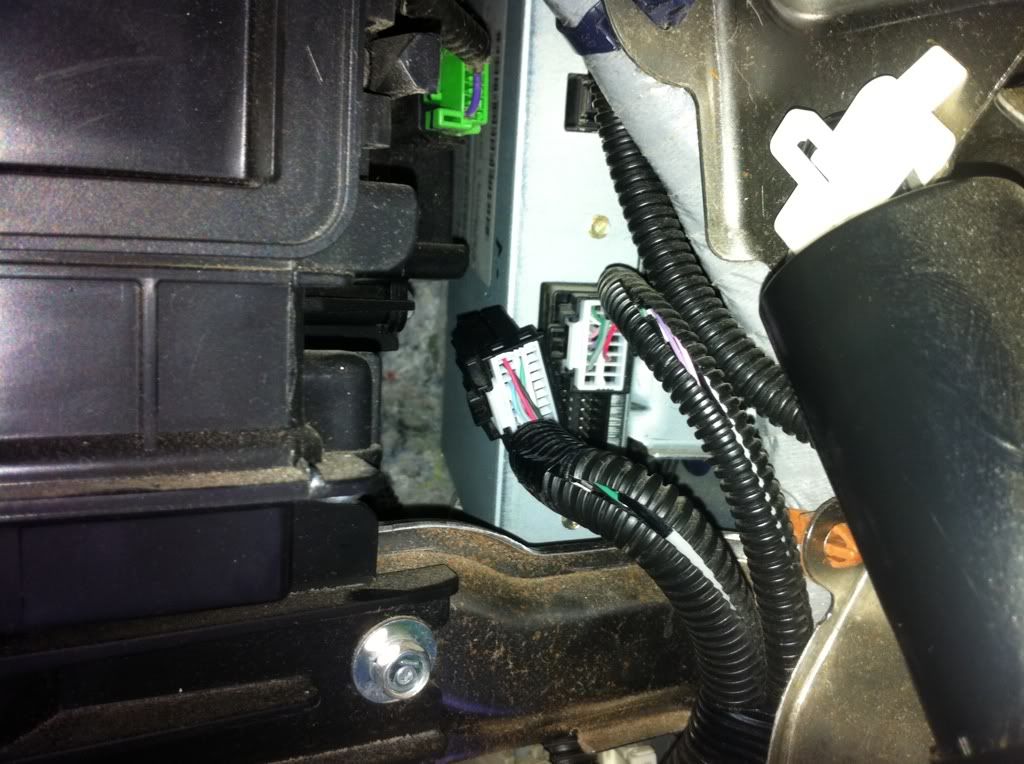
Empty the glove box first. Lift it slightly and push the damper arm, the part that controls its slow opening motion, forward toward the vehicle's nose until it pops free of its clip. Now squeeze both upper corners of the box inward so it swings fully open and hangs down, exposing the cavity behind it.
5 Locate and unplug the satellite radio module
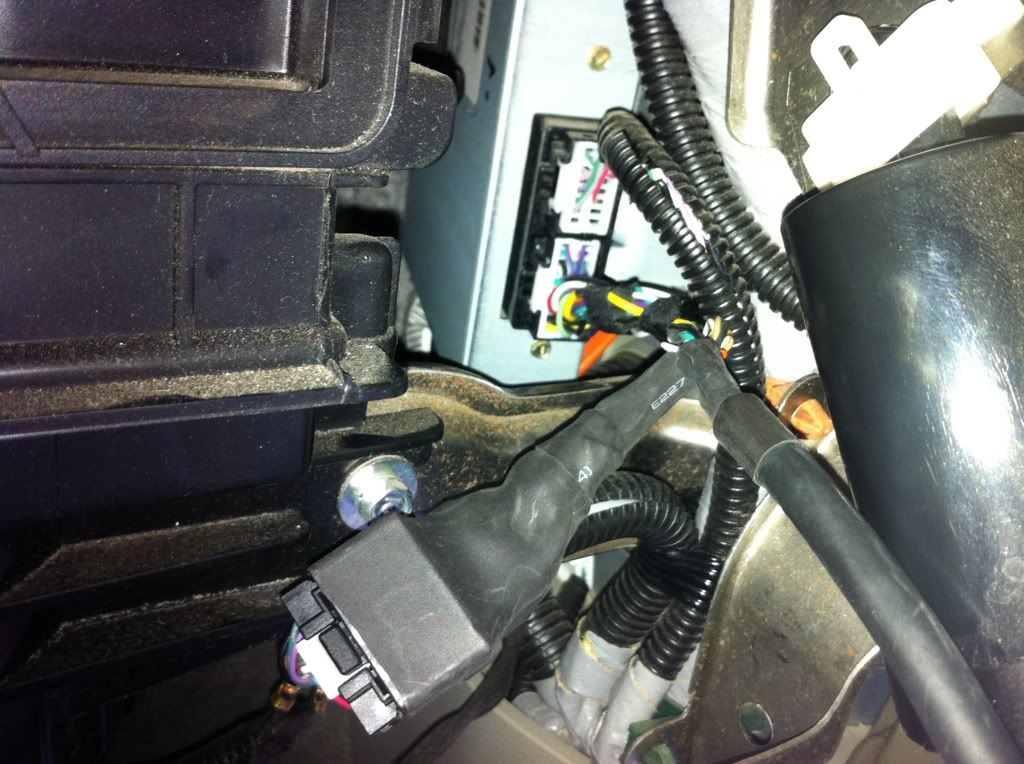
Look into the opened cavity and find the XM/satellite radio module on the right-hand side. Disconnect the factory connector from it.
6 Wire the ACUxl harness inline
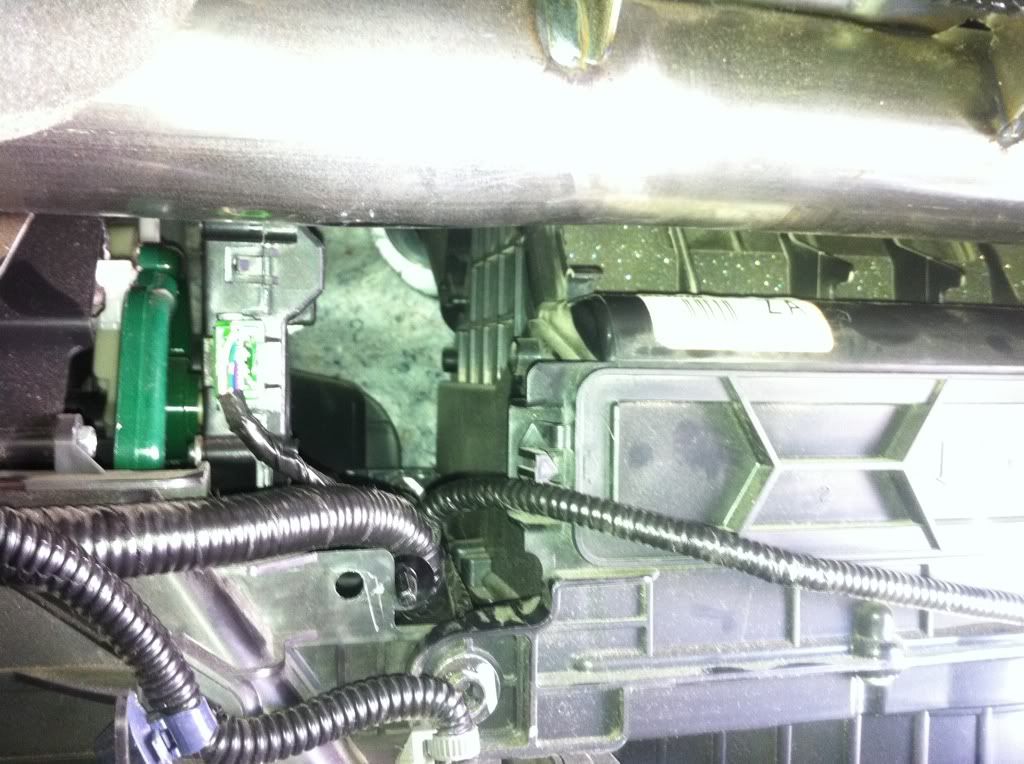
The supplied cable has three ends: one that feeds the interface unit itself, one male connector, and one female connector. Plug the male end into the module port you just freed, then reconnect the original factory plug into the female pass-through. This inserts the interface into the circuit while keeping the satellite radio working.
7 Stow the excess cable
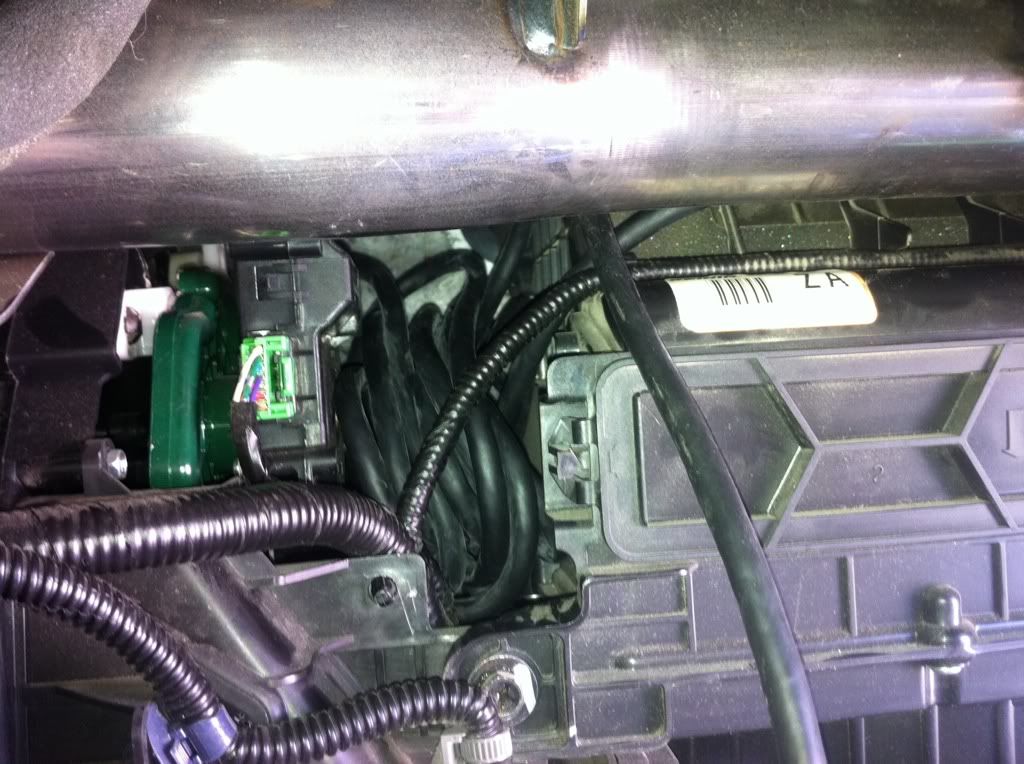
Behind the A/C blower and vent housing there is an open pocket where surplus wire can be coiled and hidden. Unclip and shift any wiring in the way, then work the coiled slack in until it sits securely. If you would rather bring the device cable up somewhere else, such as the center console, route it there instead of coiling it all here.
8 Mount the unit and route the device cable
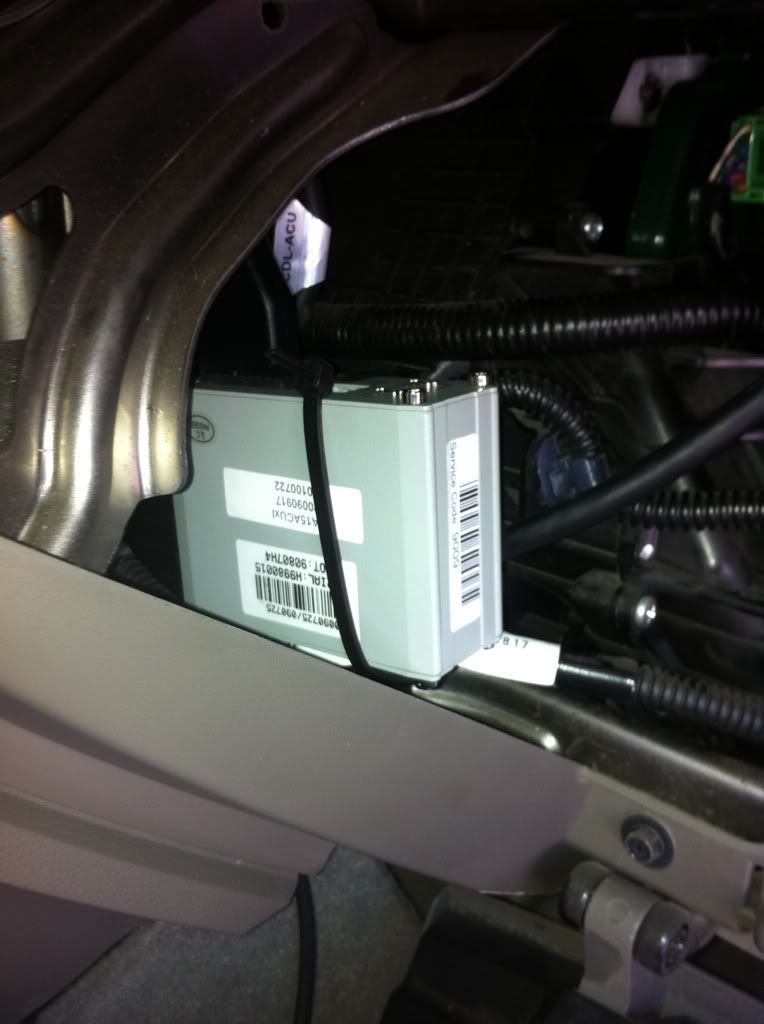
Position the ACUxl behind the radio on the left side of the glove box opening with its connectors facing downward, which yields the most usable device-cable length. Guide the iPod/iPhone cable down and out into the passenger footwell (or your chosen location). This leaves enough slack to hold a phone to your ear or pass it to a rear-seat passenger. Zip tie the unit and cable to existing wiring so nothing rubs or rattles.
9 Reassemble and test
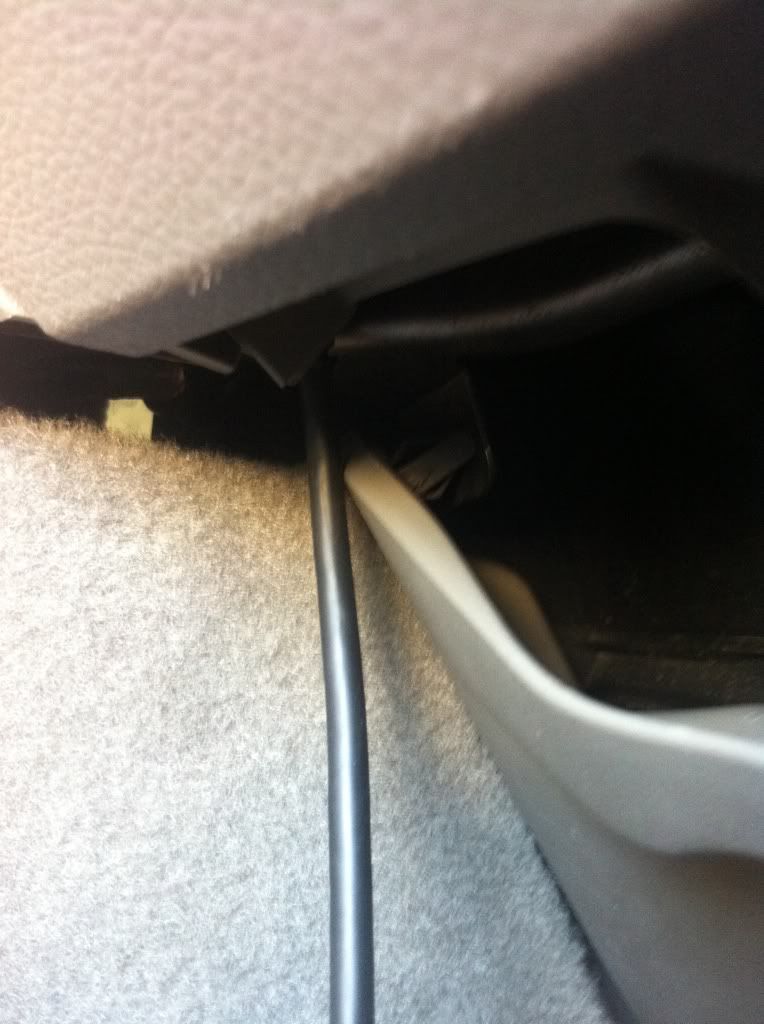
Reinstall every panel in the reverse order of removal, and reclip any wiring you moved out of the way earlier. Connect your device and confirm the interface operates before considering the job finished.
Pro Tips
- 💡 The whole install, including stopping to take photos, runs about 20 minutes.
- 💡 One reported source was the seller "Audio Connections" on Amazon at $132 with fast delivery.
- 💡 Mounting the unit with its connectors pointing down and dropping the cable into the footwell gives generous slack for phone calls and back-seat use.
- 💡 For a non-navigation RDX, use the PA15-HON3 module instead; it plugs into the satellite radio box, or into the same rear/bottom plug on the radio if no satellite box is present.
Was this guide helpful?
.JPG)

