Acura RDX (3G) Custom Phone-Mount Bracket
Introduction
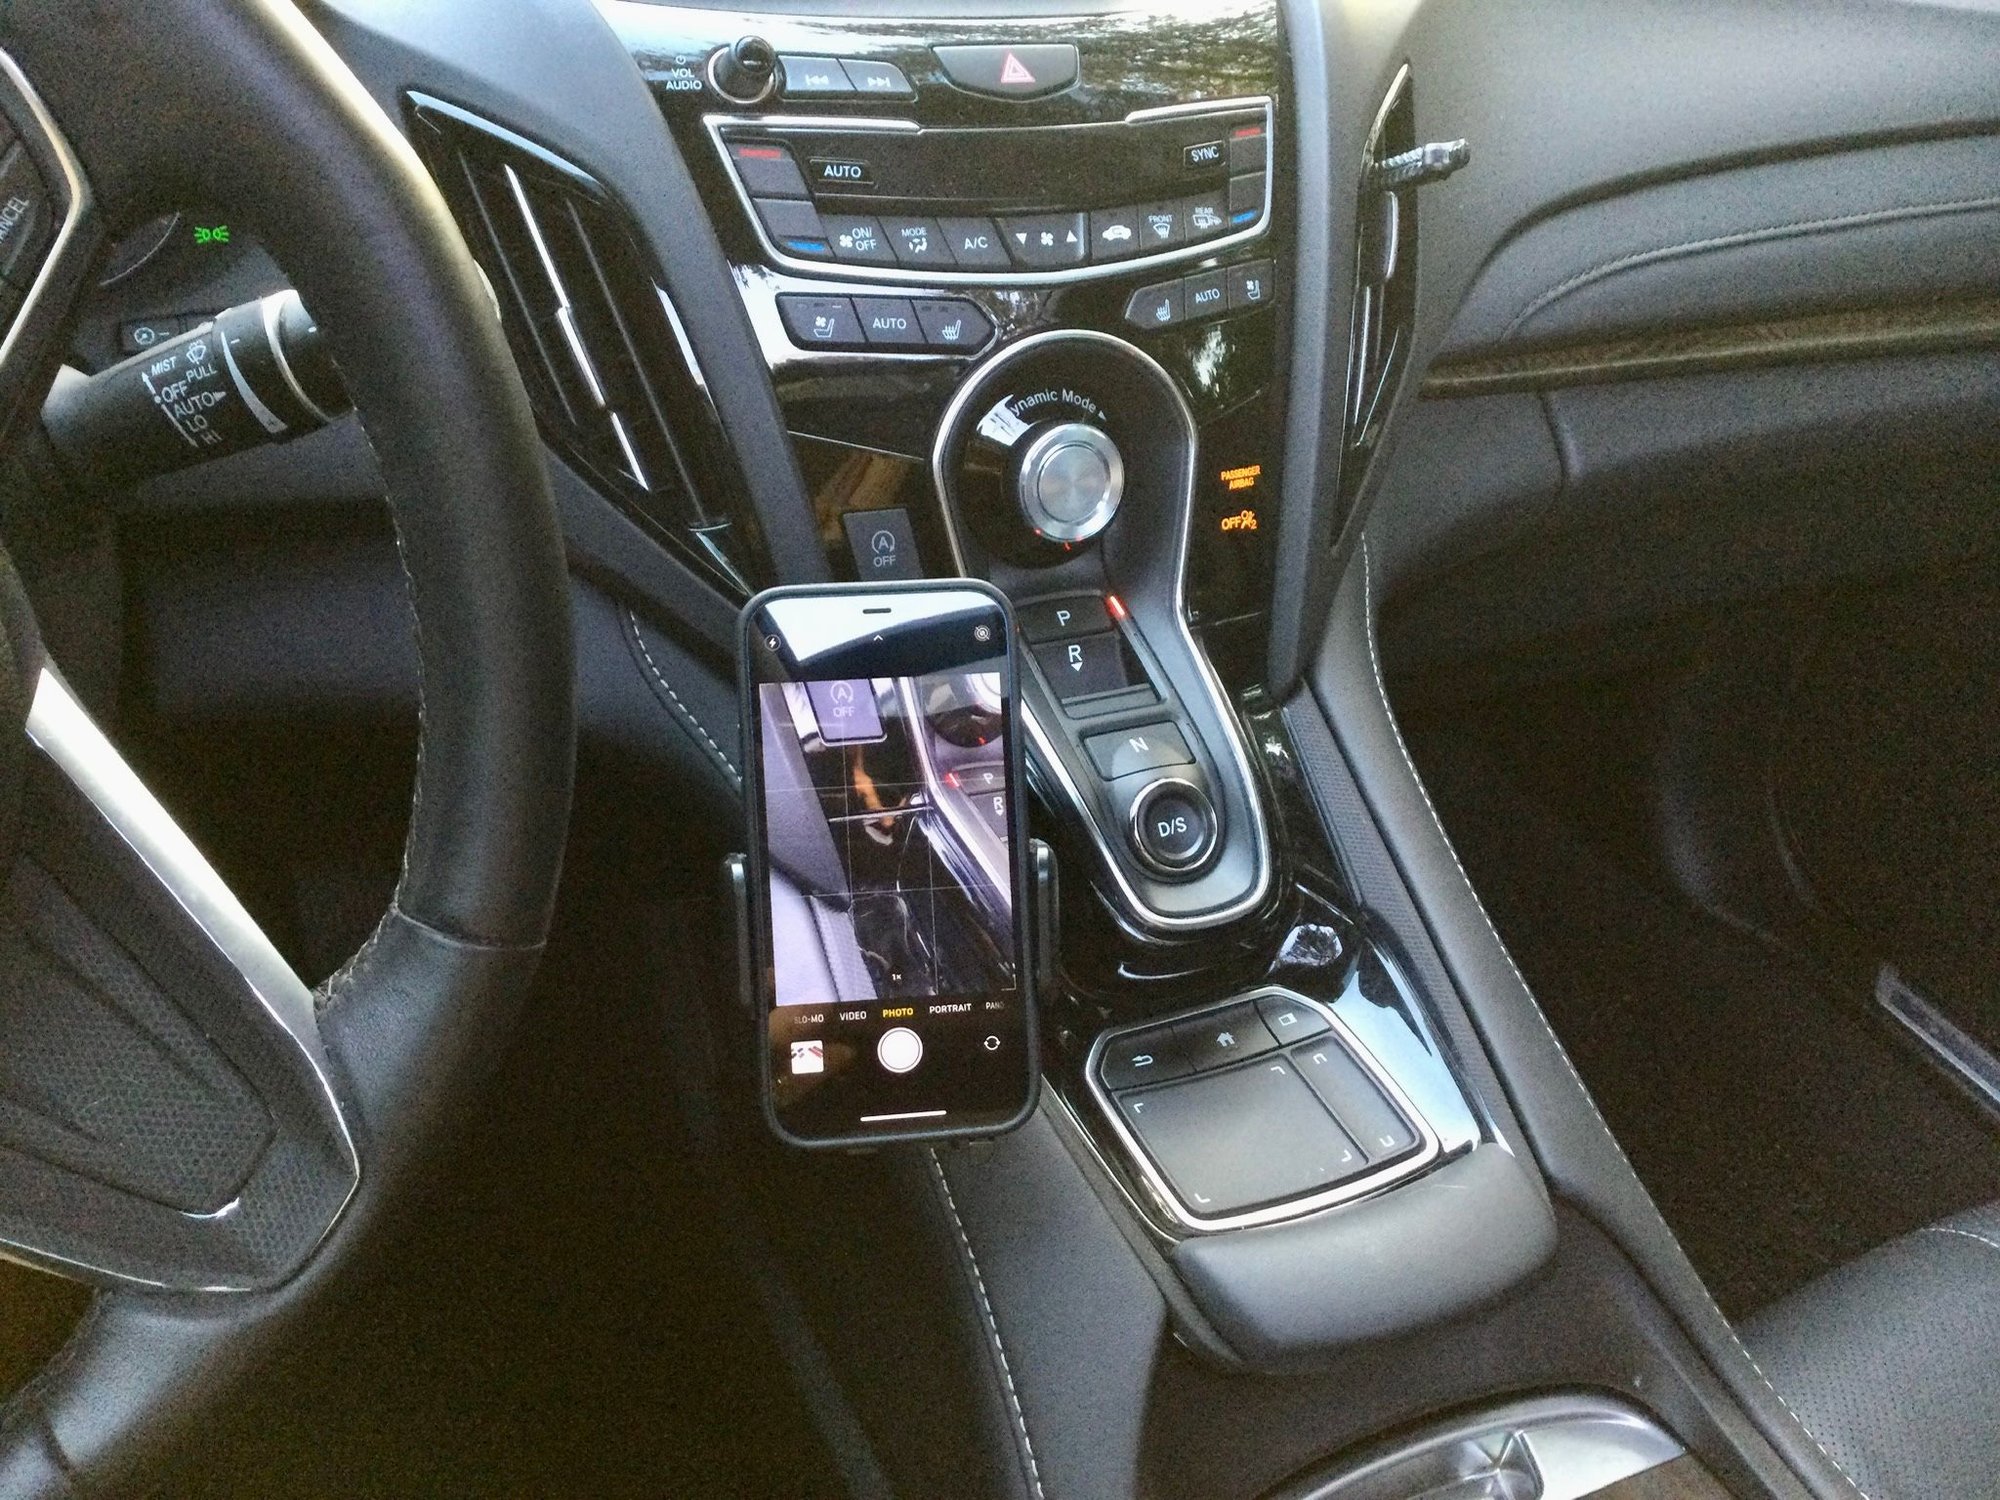
This guide covers fabricating a custom phone-mount bracket for the third-generation Acura RDX. The factory console offers few good options: vent-clip holders choke the air flow, and most surfaces either block a vent or a control, including the Start/Stop idle-inhibitor button. The solution is a small bracket that anchors to the lower console and presents a flat pad onto which any aftermarket cradle can be bolted, positioned so it keeps the vents clear and leaves the idle-inhibitor button within reach. The bracket is bent from inexpensive flat metal, padded with rubber matting where a knee might rest, and wrapped in vinyl film so it blends with the surrounding trim. This is an interior accessory build that needs only basic fabrication tools and an hour or two of work. Adapted from a community writeup by SH4RKT00TH on AcuraZine (https://acurazine.com/forums/3g-rdx-diy-faq-460/phone-mounting-bracket-diy-997598/), including corrections from the follow-up discussion.
Reference
Tools Required
- Rotary tool (Dremel) with cutting wheel
- Drill and bits
- Phillips screwdriver
- Pliers or a bench vise for bending metal
- Utility knife or scissors
- Marker
Parts Required
-
Flat metal strap stock (about $6 worth)
-
Mounting and holder screws
-
3M 2080 vinyl wrap film
-
Dense rubber floor matting (trimmed to about 3/16 inch)
-
Phone holder or cradle of your choice
Safety Warnings
- ⚠ Before drilling or driving screws, verify nothing sits behind the panel; avoid the console courtesy lighting and any wiring underneath.
- ⚠ Cover exposed screw heads with vinyl so they cannot chafe or scar the leather and trim.
Step-by-Step Instructions
1 Plan the mounting position
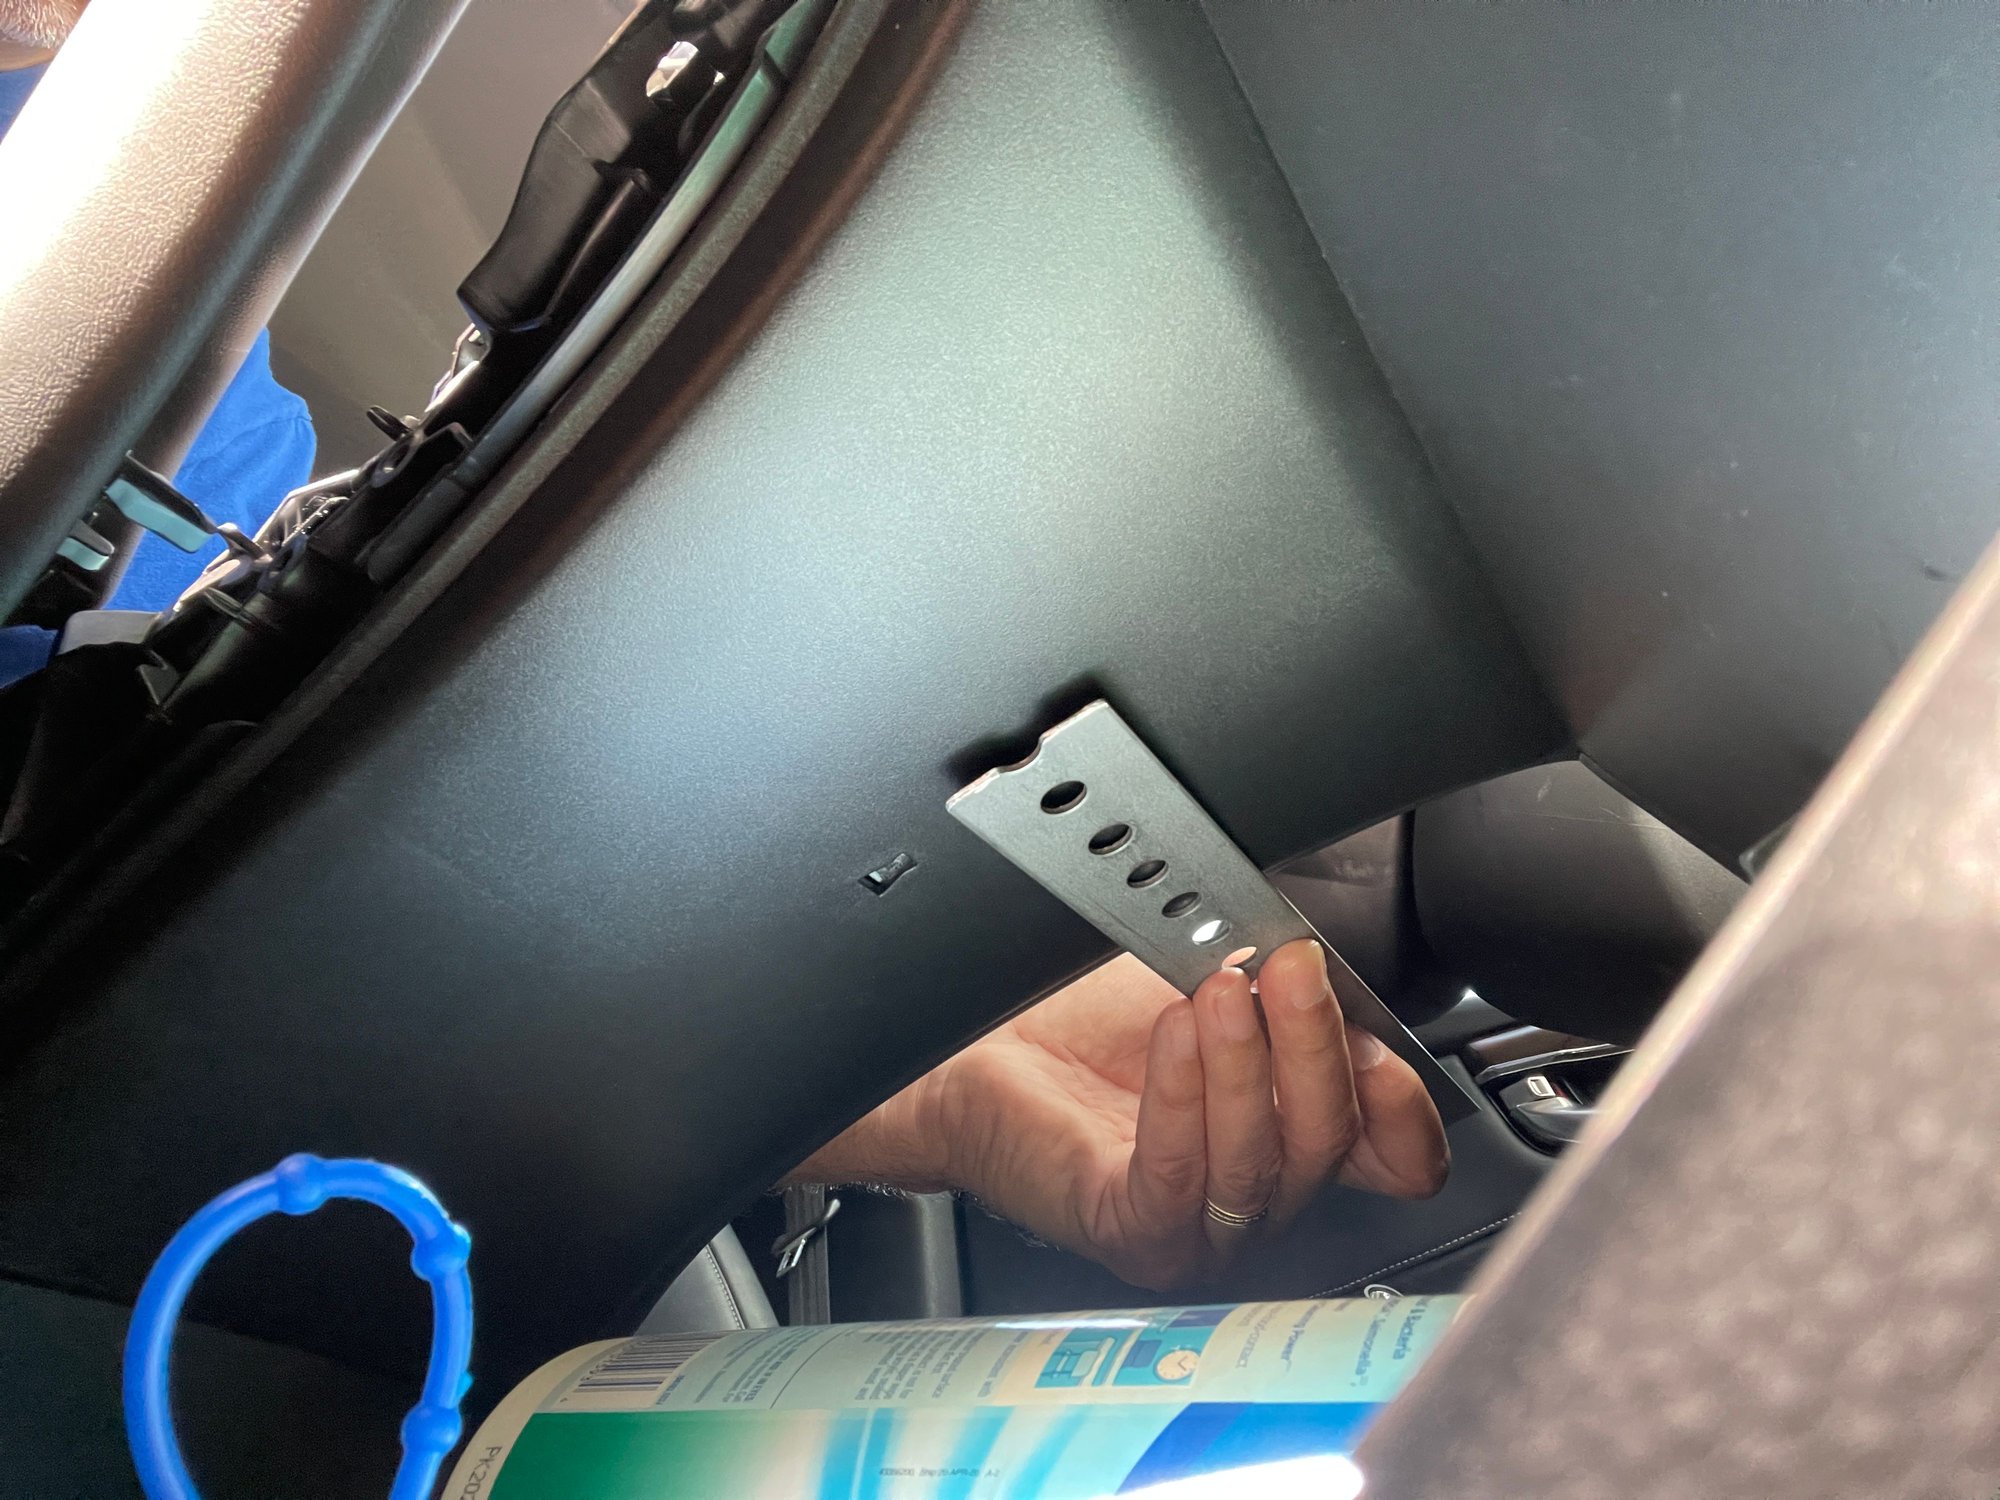
Sit in the driver's seat and pick a spot on the lower center console where a phone can rest without covering the air vents or the idle-stop inhibitor button. Before committing, reach under the console trim and confirm the chosen area is clear of the console's courtesy lighting and any wiring, because the bracket will be fastened through the panel at this point.
2 Cut the metal blank
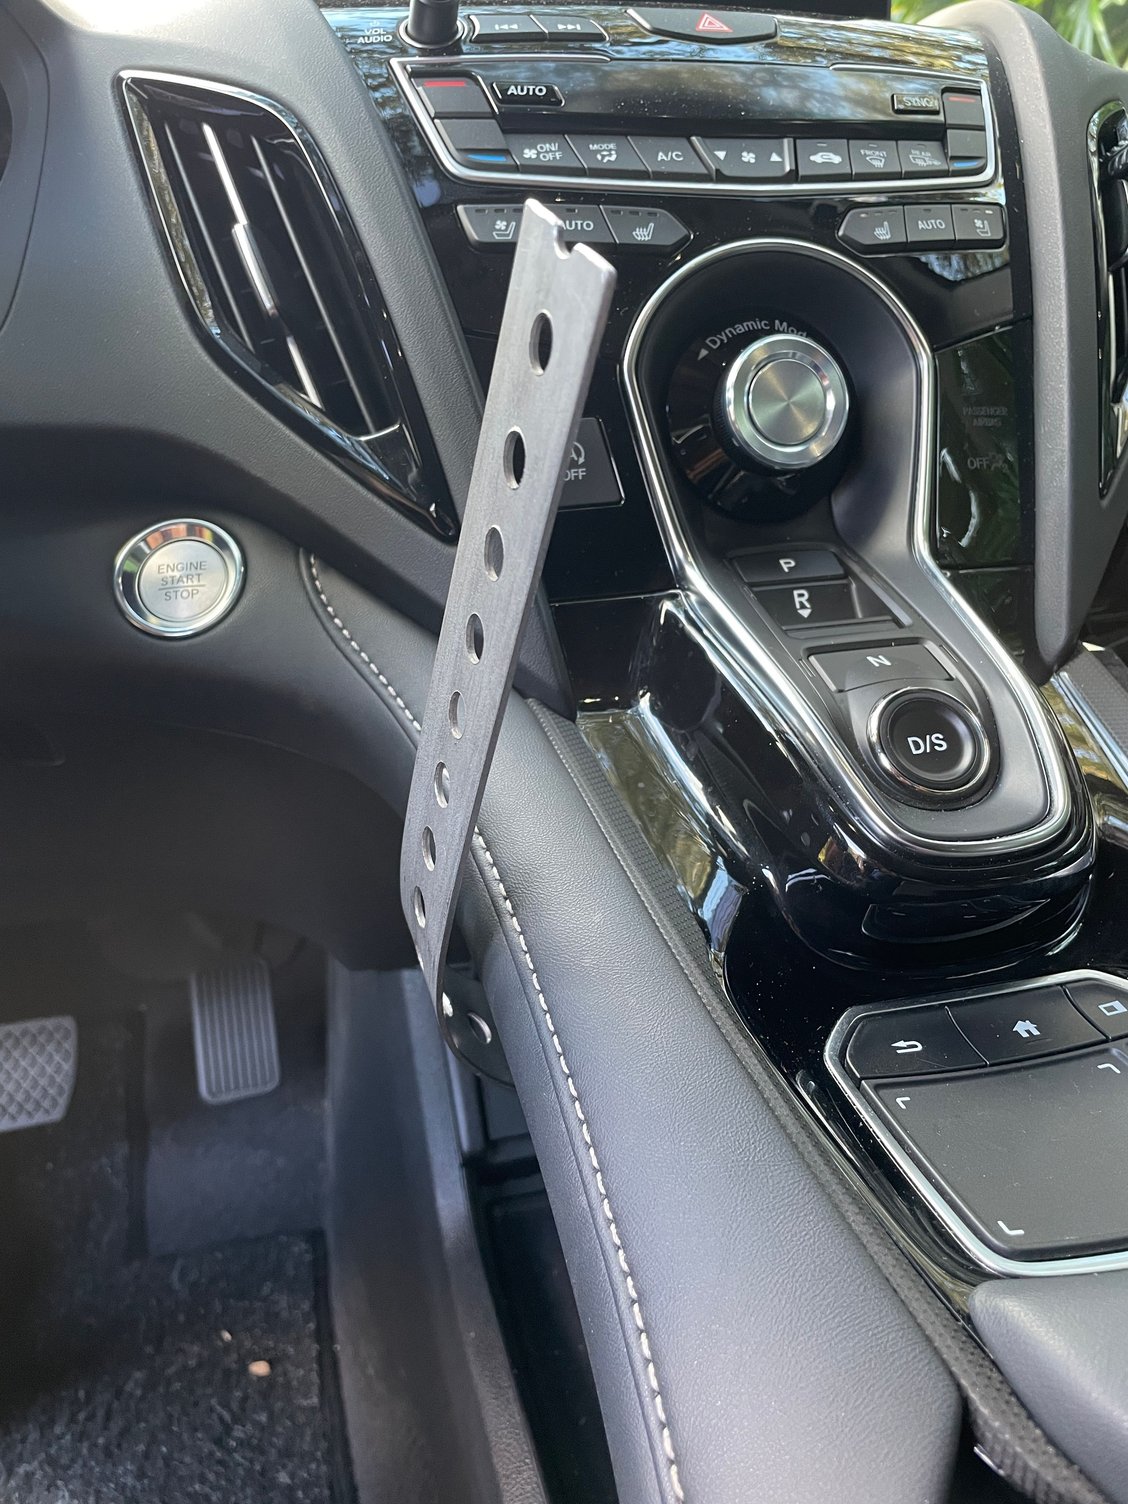
Start from a flat metal strap; roughly $6 of stock is plenty. Using the rotary tool, cut a blank that is noticeably longer than the finished bracket needs to be. The surplus material acts as a handle that makes the later bends easier to control, and it can be trimmed off once the shape is set.
3 Drill the holes and anchor the blank
Mark and drill the fastener holes that will secure the bracket to the console. Screw the blank down at the chosen location so it is held firmly in place, then start working the metal against the console contour. Forming it while it is anchored helps the bracket follow the existing curves.
4 Form the mounting pad and retaining lip
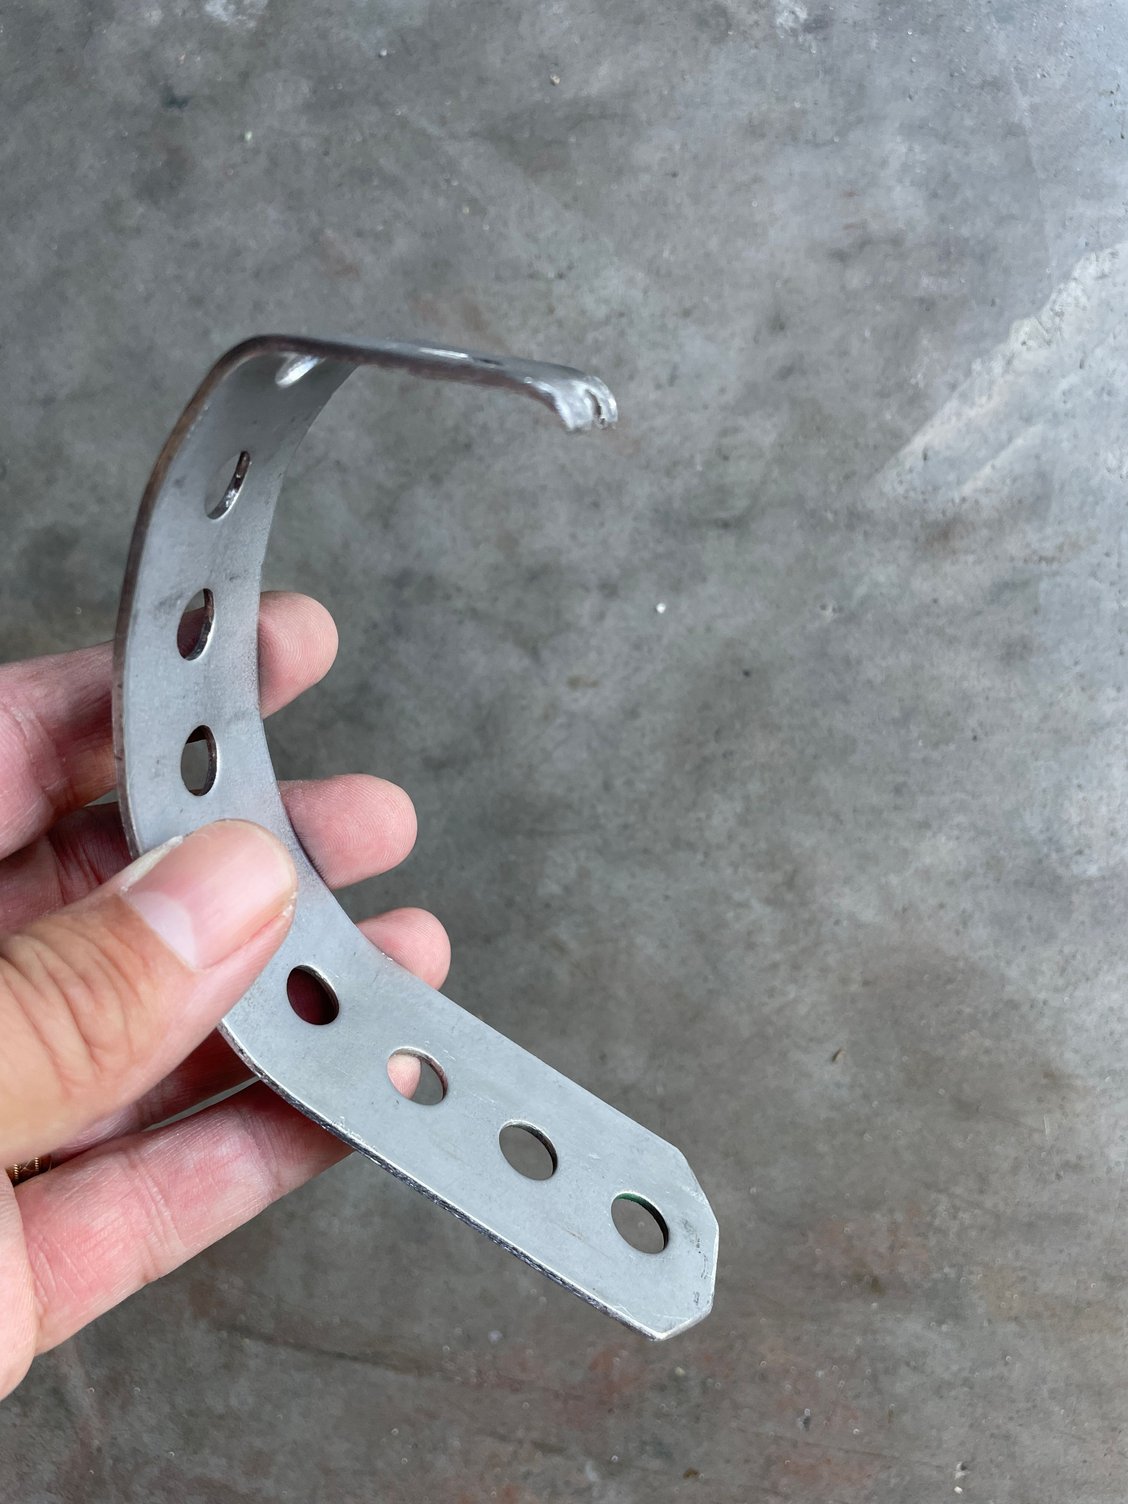
Bend the upper end into a flat, horizontal pad; this is the face the phone holder will bolt to. Add a short lip at the very tip so it can hook over the leather edge along the side of the console, bracing the bracket against the trim and damping wobble over bumps. Try to finish the lip on solid metal rather than over a drilled hole for a cleaner appearance.
5 Cut the rubber padding
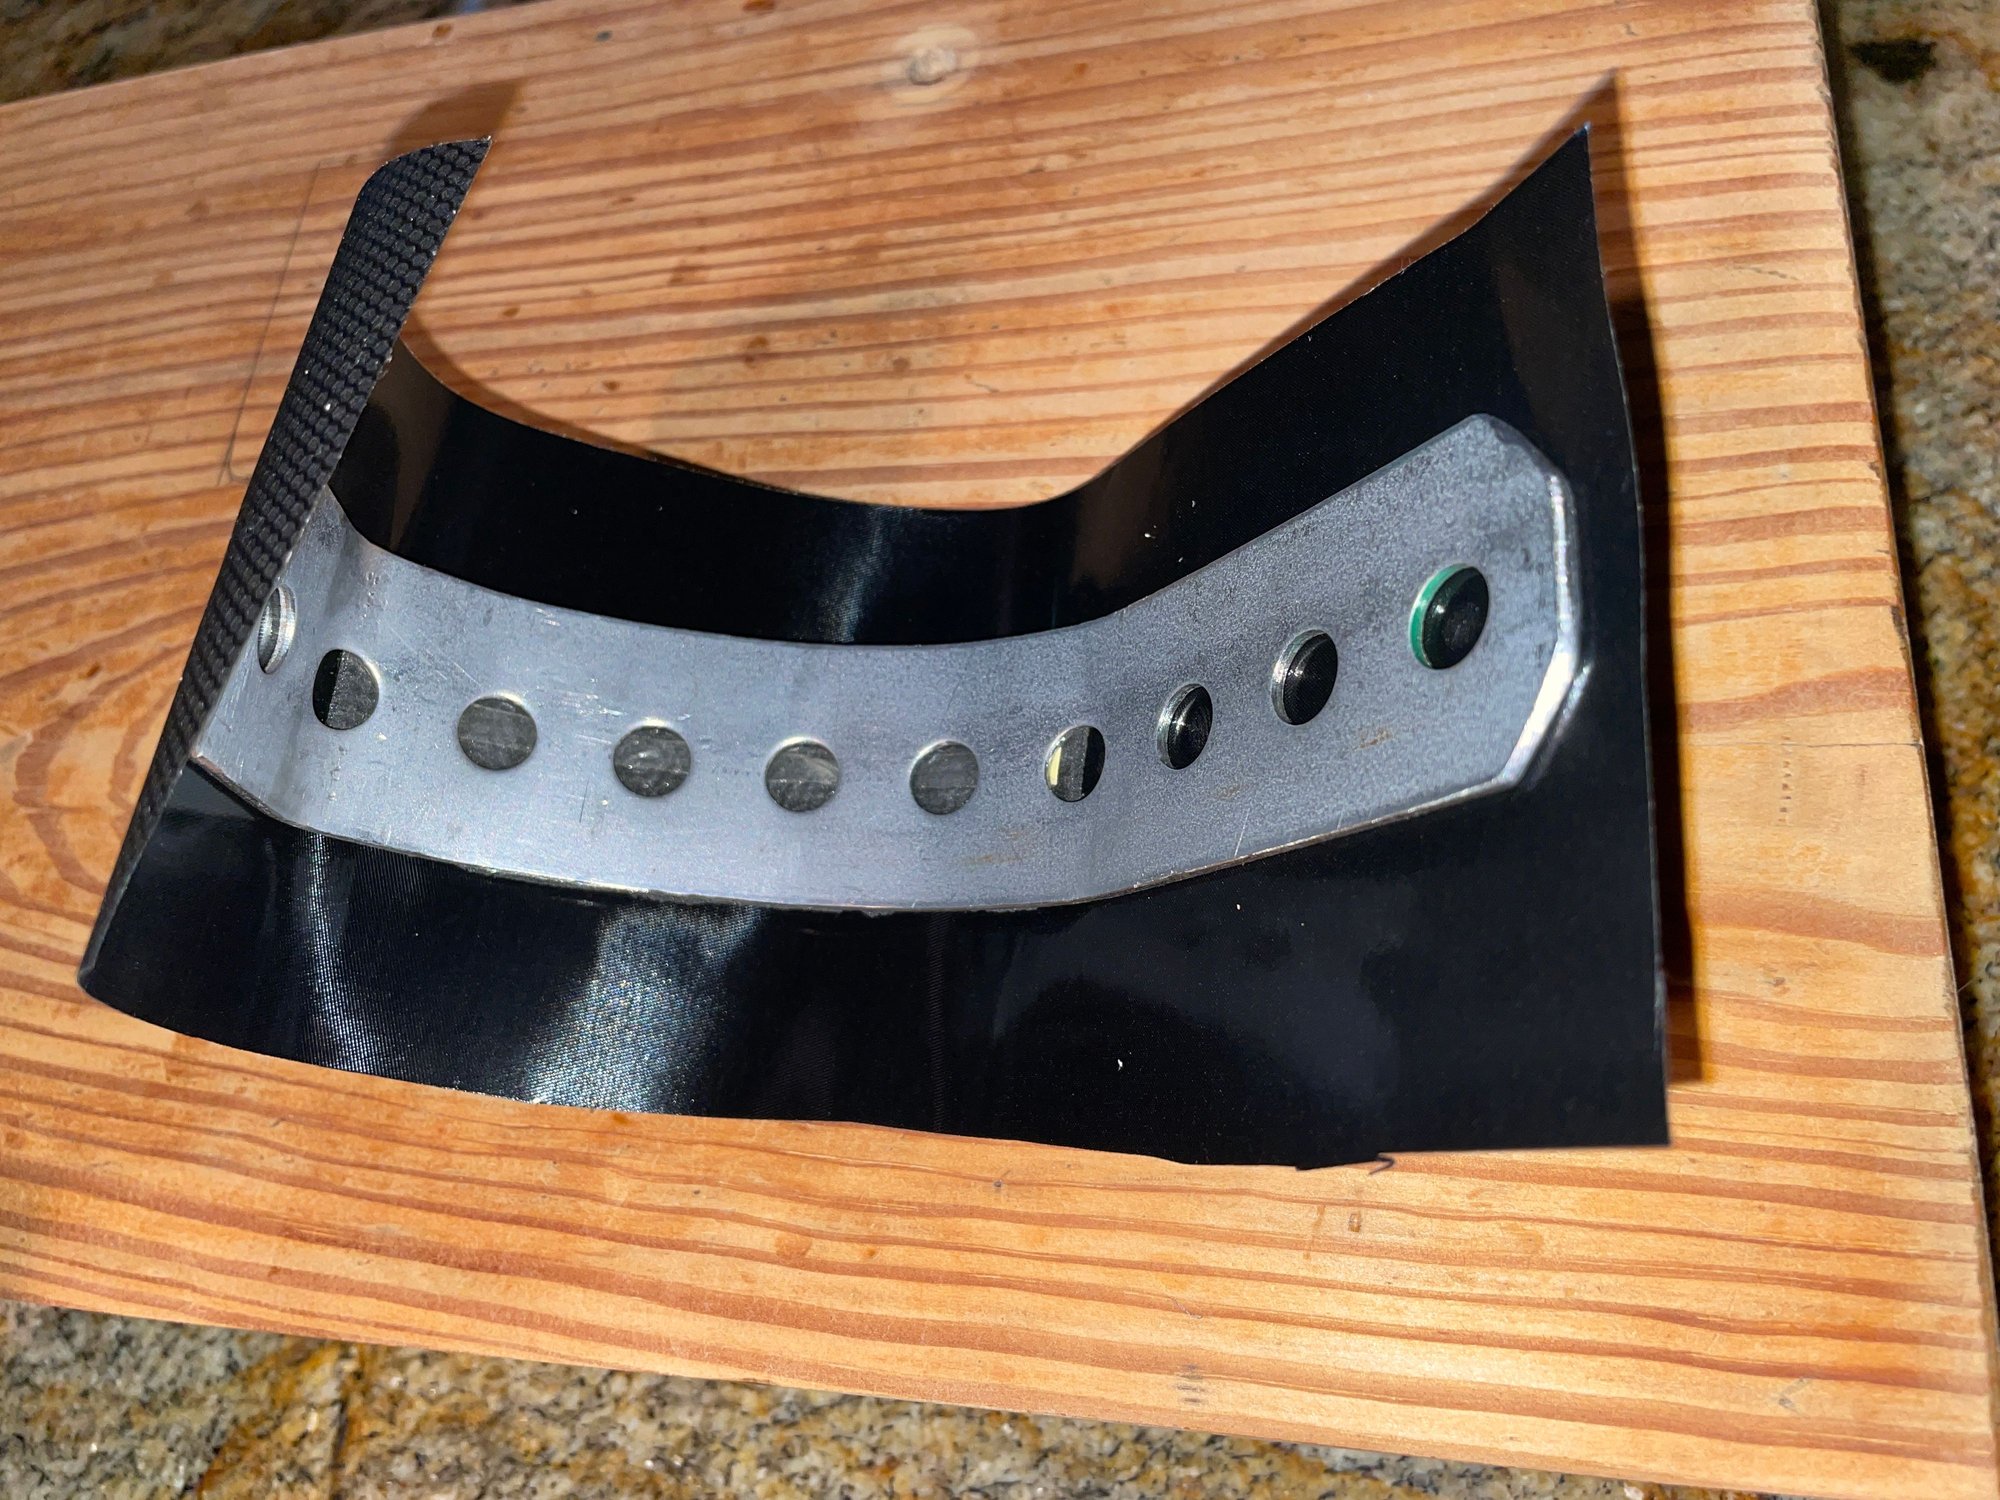
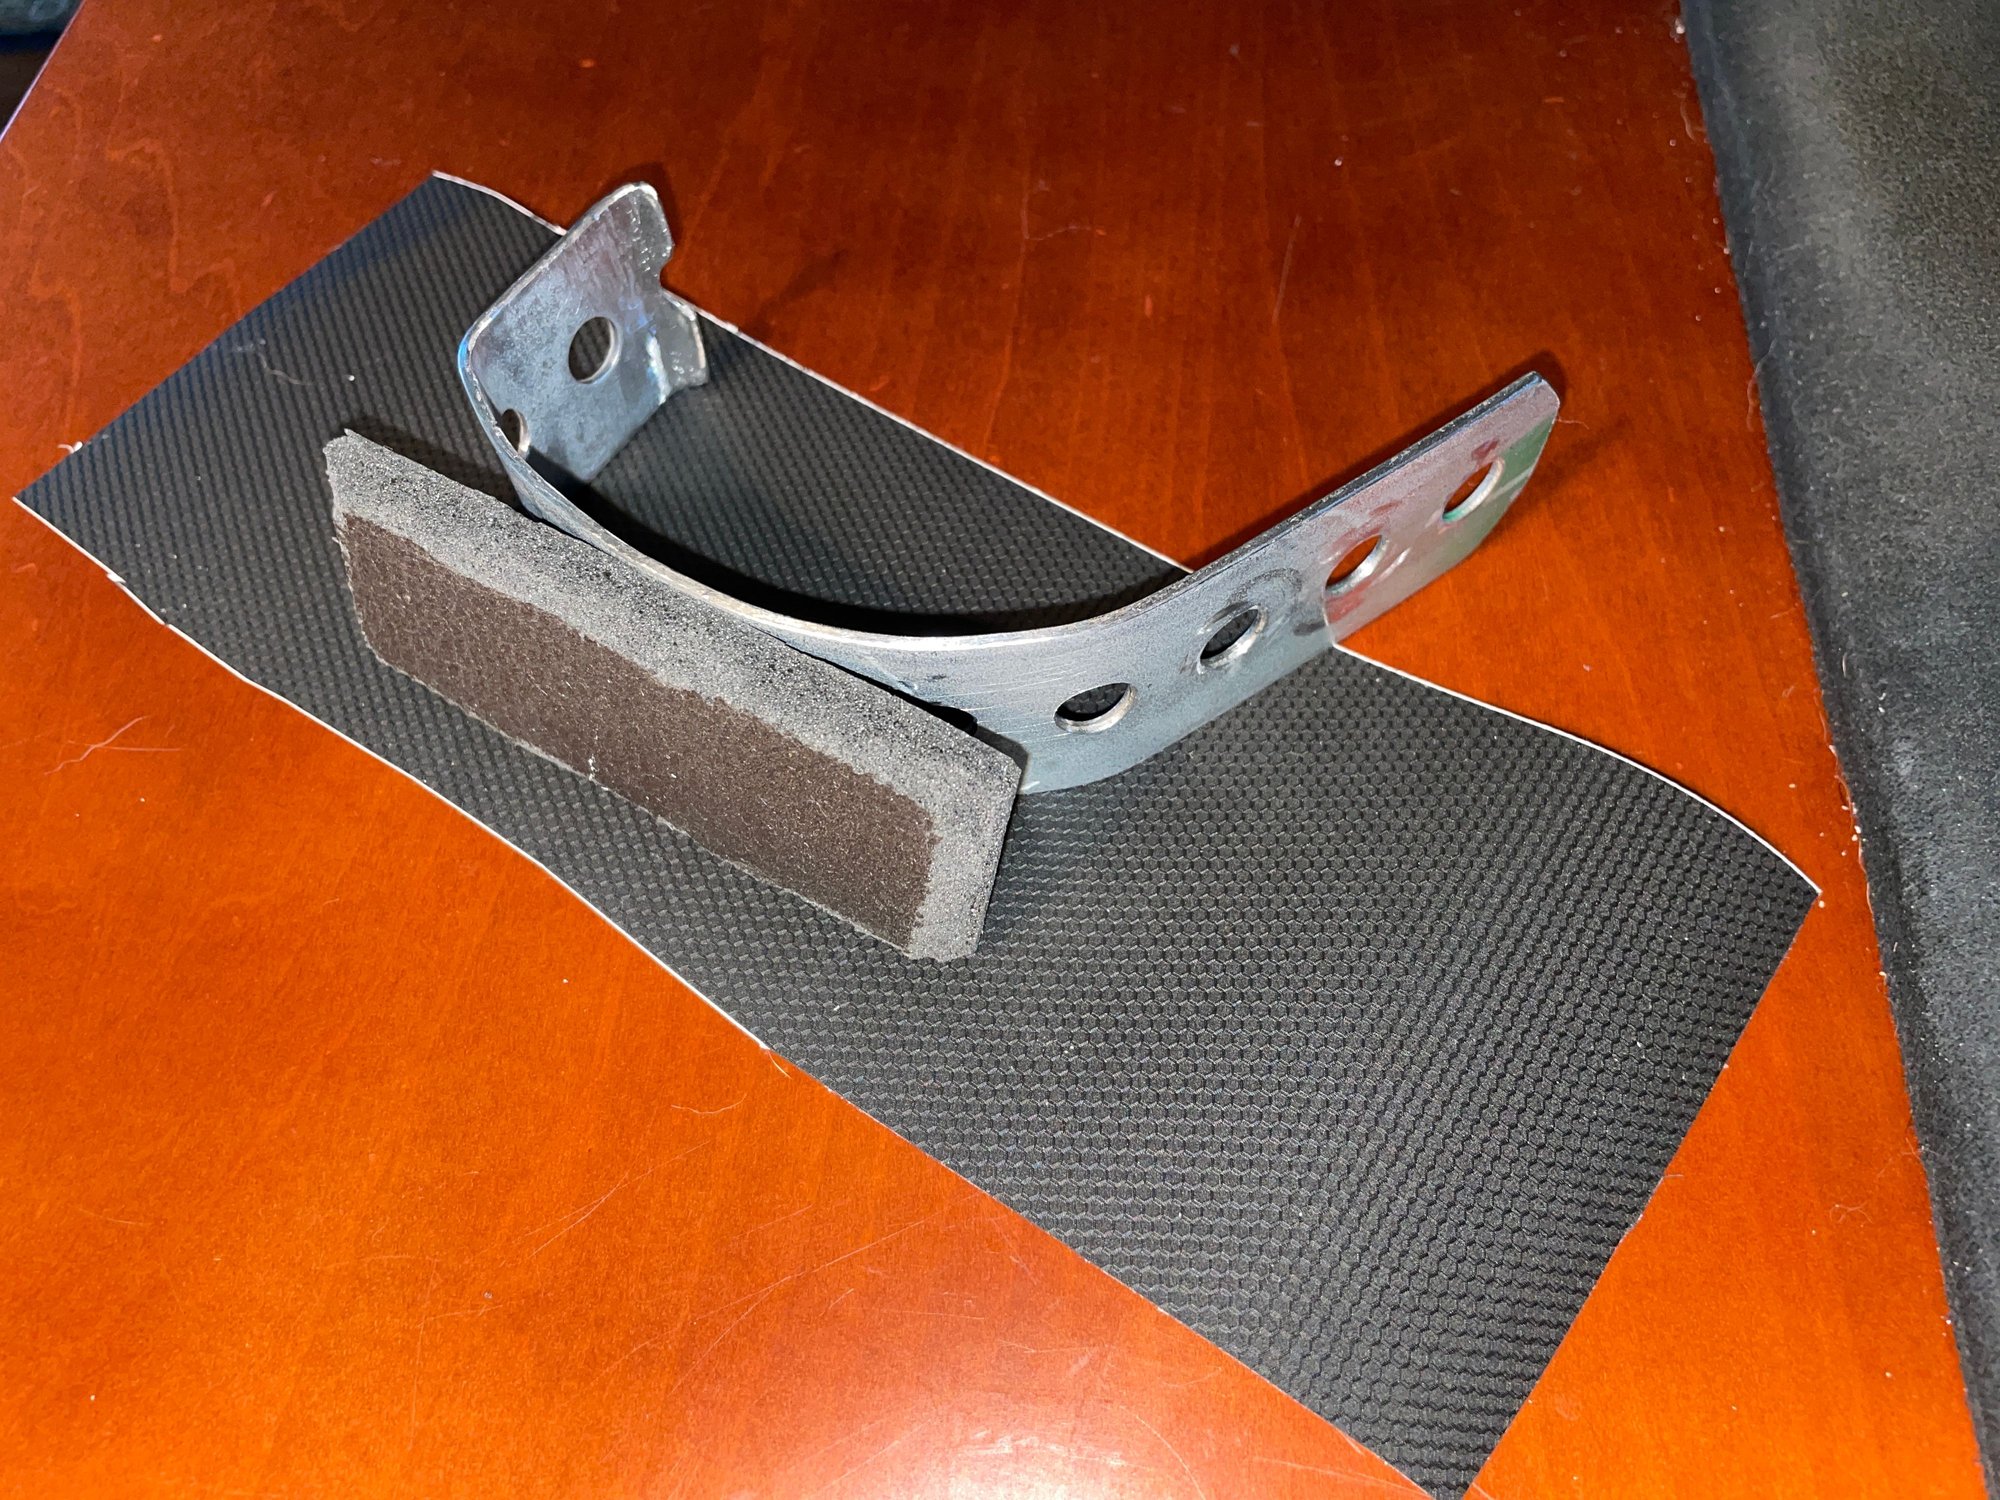
Cut a piece of dense rubber floor matting to pad the section of the bracket a knee may contact. As sold, the matting is a little too thick, so slice it down to about 3/16 inch. Trim it to cover only the areas that need cushioning.
6 Wrap the bracket in vinyl
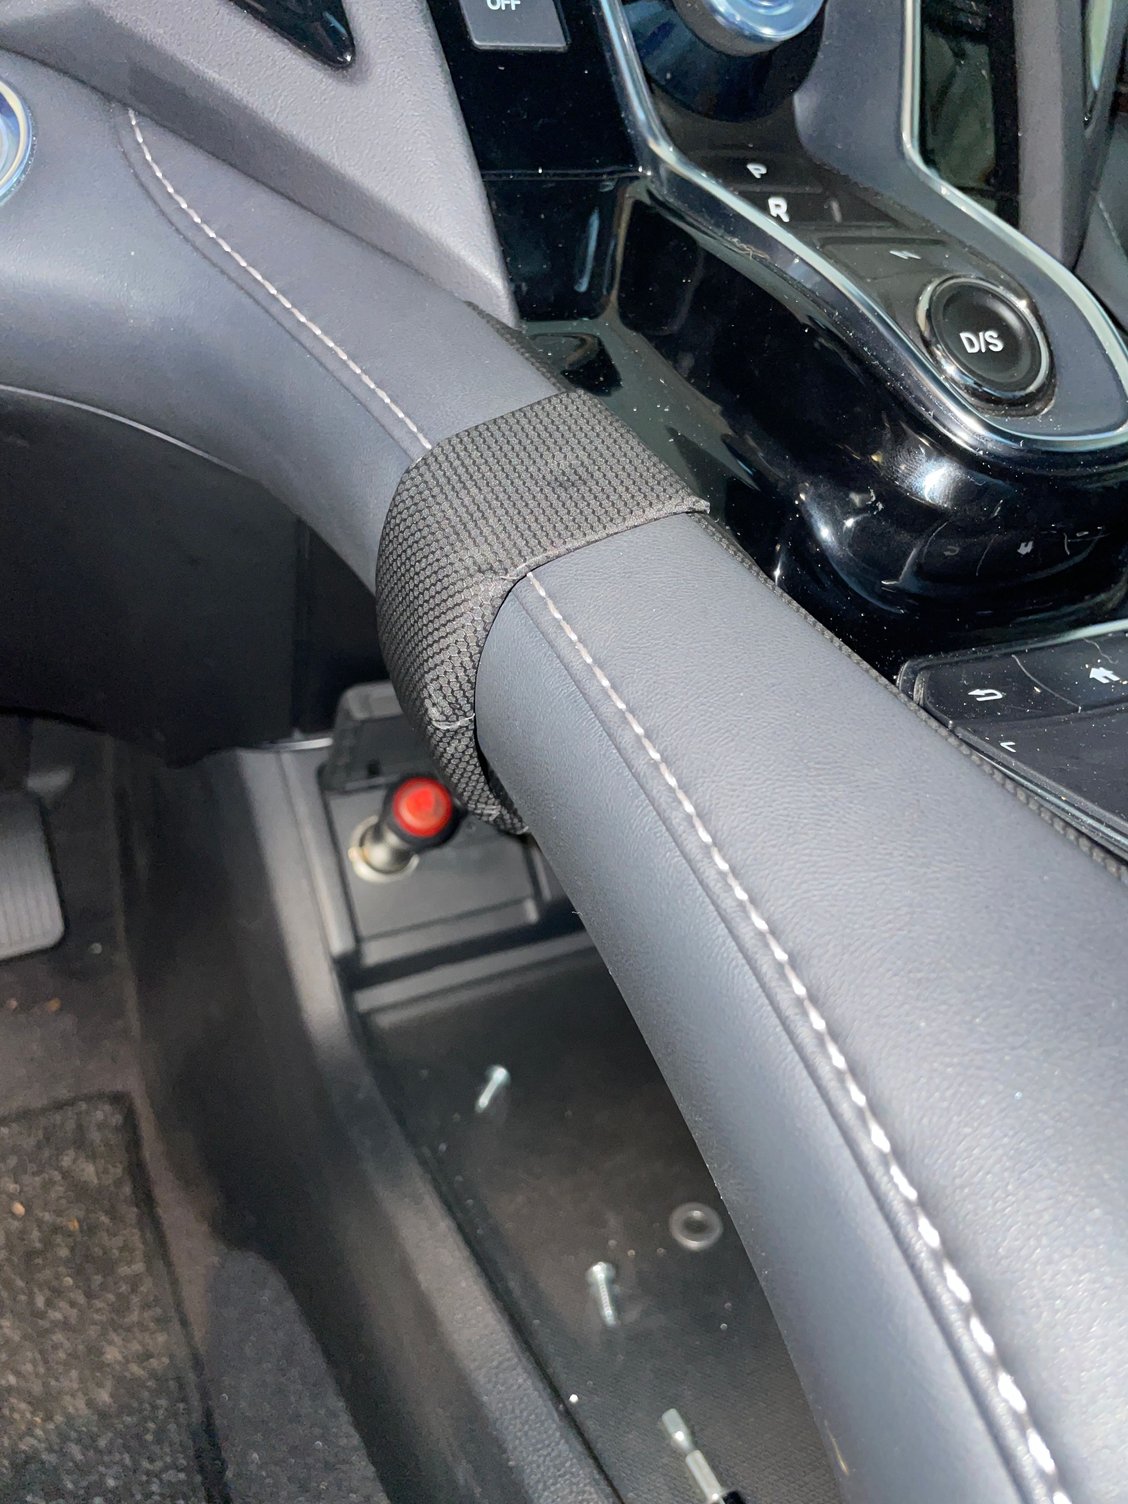
Wrap the bracket in 3M 2080 vinyl film, placing the rubber padding between the metal and the film so the padding stays hidden on the back side. Choosing a film that matches vinyl already applied elsewhere on the console, such as anti-glare film on the chrome trim, keeps the finished piece looking factory.
7 Dry fit and locate the holder hole
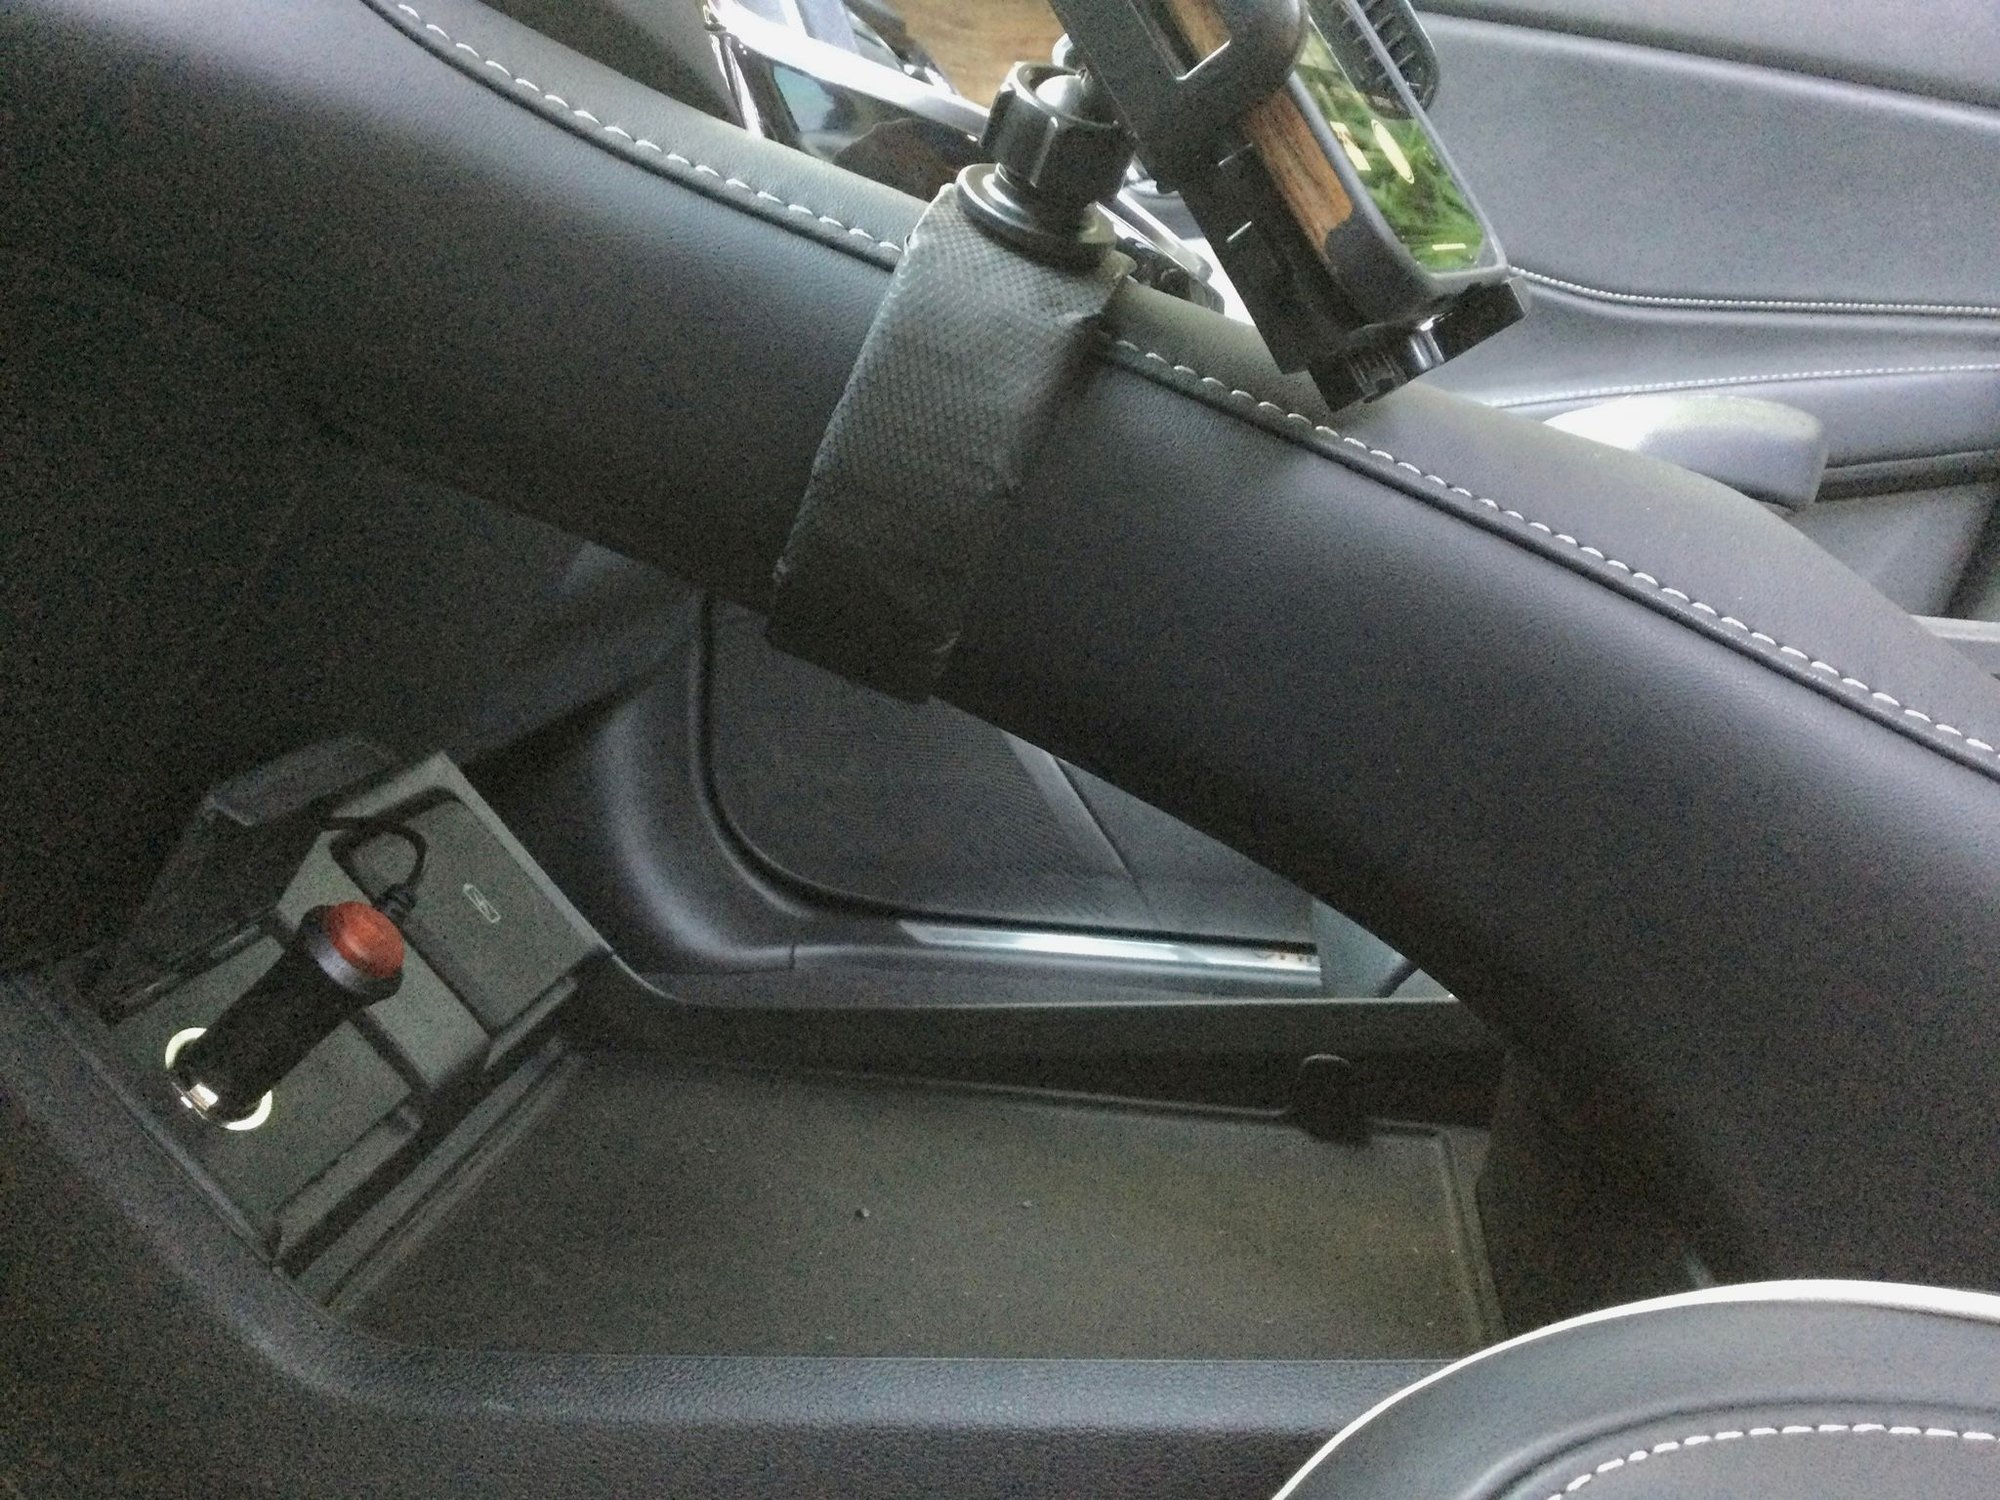
Set the wrapped bracket back in position for a test fit. Locate the hole planned into the mounting pad; it lets you attach the phone holder from underneath. Confirm the pad sits level and the lip still catches the console edge before final assembly.
8 Install the bracket and attach the holder
Fasten the bracket to the console through the holes drilled earlier. Set the phone holder on the pad, aligned with the hole, and drive a screw up through the bracket from below into the holder. Cover the exposed screw head with a small patch of the vinyl film so it cannot rub or mark the leather.
9 Verify final placement and clearance
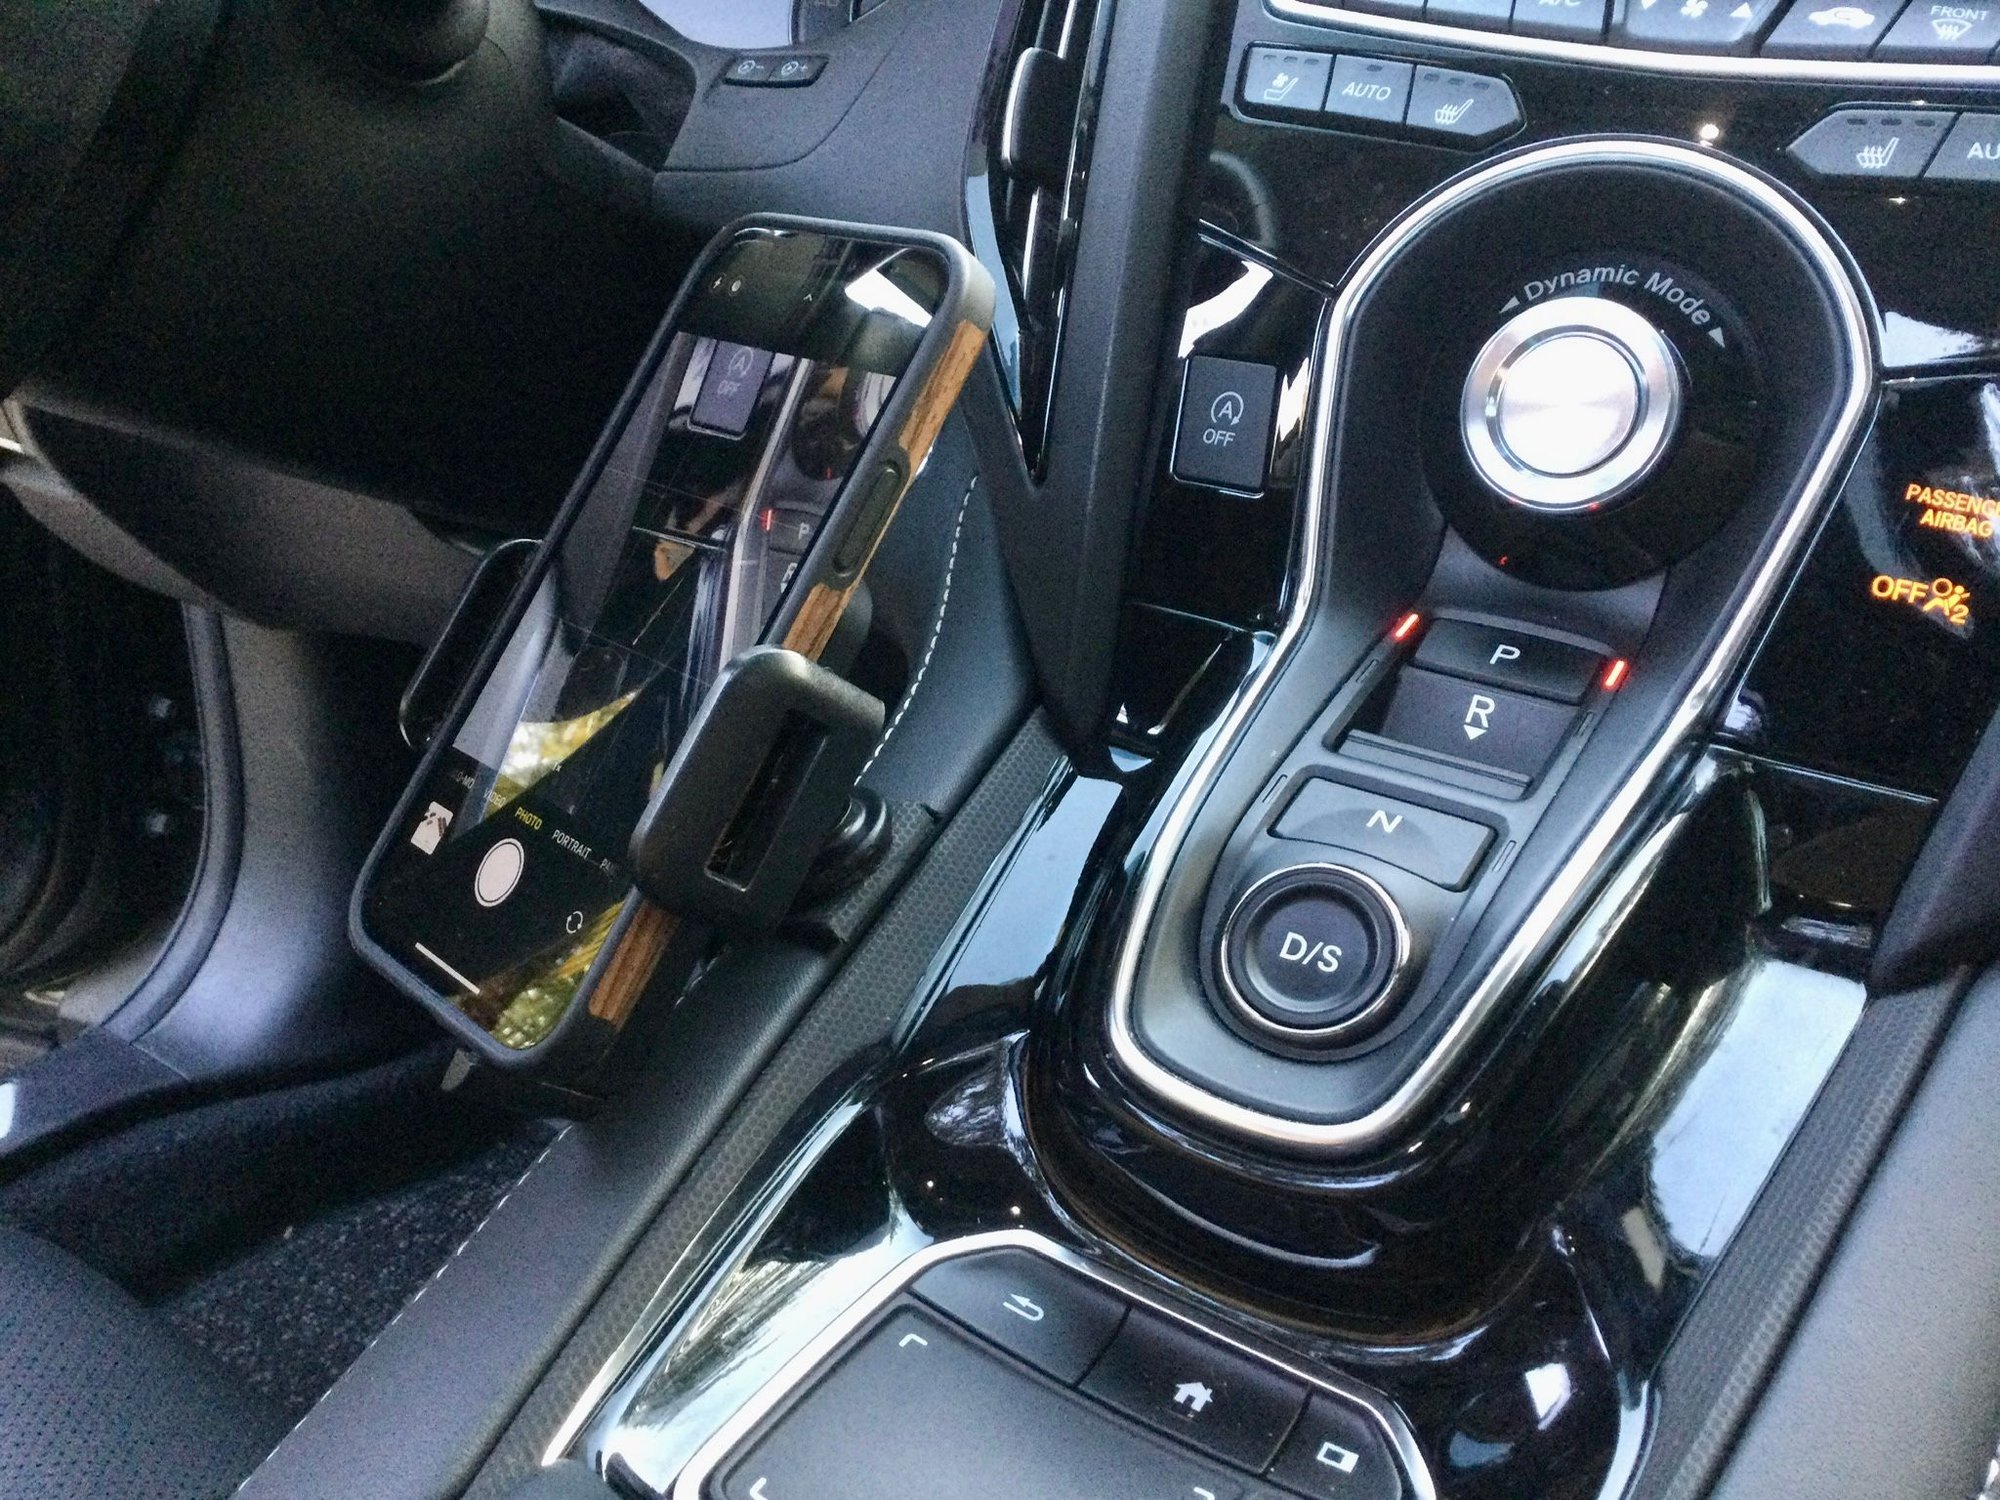
Sit in the car and confirm the mounted phone clears the vents and still lets you reach the idle-stop inhibitor button. The finished mount presents a small pad, roughly 1" x 1", for the cradle of your choice, and the padded face gives your knee a soft resting point.
Pro Tips
- 💡 Cut the metal blank longer than needed; the extra length gives you leverage while bending and is trimmed off at the end.
- 💡 Match the vinyl film to any wrap already used on the console (for example anti-glare film over the chrome) so the bracket disappears into the trim.
- 💡 If you would rather not fabricate, a commercial ProClip mount can be repurposed by flipping the clip over and mounting it on the passenger side instead.
Was this guide helpful?